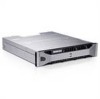

Setting Up Your Dell PowerVault Storage Enclosure
Page 1
... the enclosure. • The Service Tag is also located at support.dell.com/manuals. 2 Selecting the Operating Mode Front-Panel Features Dell PowerVault MD1200 3 2 4 1 Dell PowerVault MD1220 3 4 5 5 2 1 8 Back-Panel Features 1 2 3 6 8 7 6 7 4 5 6 7 8 9 10 11 12 13 14 3 Identifying Ports and Connectors on Your Enclosure 1. Enclosure status LED 4. Power supply/cooling fan fault LED 3. Enclosure Management Module 0 11. SAS port...
... the enclosure. • The Service Tag is also located at support.dell.com/manuals. 2 Selecting the Operating Mode Front-Panel Features Dell PowerVault MD1200 3 2 4 1 Dell PowerVault MD1220 3 4 5 5 2 1 8 Back-Panel Features 1 2 3 6 8 7 6 7 4 5 6 7 8 9 10 11 12 13 14 3 Identifying Ports and Connectors on Your Enclosure 1. Enclosure status LED 4. Power supply/cooling fan fault LED 3. Enclosure Management Module 0 11. SAS port...

Setting Up Your Dell PowerVault Storage Enclosure
Page 2
... order: 1. is subject to change without the written permission of Dell Inc. Dell Inc. November 2009 5 Connecting and Securing the Power Cable(s) Turn on the Enclosure Reproduction of these materials in any manner whatsoever without notice. © 2009 Dell Inc. Dell, the DELL logo, and PowerVault are trademarks of others. disclaims proprietary interest in the marks and...
... order: 1. is subject to change without the written permission of Dell Inc. Dell Inc. November 2009 5 Connecting and Securing the Power Cable(s) Turn on the Enclosure Reproduction of these materials in any manner whatsoever without notice. © 2009 Dell Inc. Dell, the DELL logo, and PowerVault are trademarks of others. disclaims proprietary interest in the marks and...
Interoperability Guide
Page 1
... of four PowerVault MD1200 or PowerVault MD1220 systems can be powered up first before the server. Connecting a PowerVault MD1200 or PowerVault MD1220 to an MD32xx is not supported. Rules and Considerations The following are the connectivity and consideration rules for PowerVault MD1200 and PowerVault MD1220. Connecting to a PowerVault MD3000 or PowerVault MD3000i is supported. Dell™ PowerVault™ MD1200 and PowerVault™ MD1220 Interoperability Guide This...
... of four PowerVault MD1200 or PowerVault MD1220 systems can be powered up first before the server. Connecting a PowerVault MD1200 or PowerVault MD1220 to an MD32xx is not supported. Rules and Considerations The following are the connectivity and consideration rules for PowerVault MD1200 and PowerVault MD1220. Connecting to a PowerVault MD3000 or PowerVault MD3000i is supported. Dell™ PowerVault™ MD1200 and PowerVault™ MD1220 Interoperability Guide This...

Getting Started Guide
Page 6
Connect the system's power cable(s) to the bracket using the provided strap. Plug the other end of the power cable(s) into a grounded electrical outlet or a separate power source such as shown in the OFF position before connecting the power cable(s). Securing the Power Cable(s) Bend the system power cable(s) as an uninterrupted power supply (UPS) or a power distribution unit (PDU). 4 Getting Started With Your System Connecting the Power Cable(s) Ensure that the power switch is in the illustration and secure the cable(s) firmly to the system.
Connect the system's power cable(s) to the bracket using the provided strap. Plug the other end of the power cable(s) into a grounded electrical outlet or a separate power source such as shown in the OFF position before connecting the power cable(s). Securing the Power Cable(s) Bend the system power cable(s) as an uninterrupted power supply (UPS) or a power distribution unit (PDU). 4 Getting Started With Your System Connecting the Power Cable(s) Ensure that the power switch is in the illustration and secure the cable(s) firmly to the system.

Getting Started Guide
Page 7
Turning On the System Press the power switch to split or unified mode before turning on the system. Getting Started With Your System 5 Installing the Optional Bezel Install the bezel (optional). NOTE: Ensure that the storage enclosure is connected to the server and the mode switch is set to the ON position. The power indicators should light.
Turning On the System Press the power switch to split or unified mode before turning on the system. Getting Started With Your System 5 Installing the Optional Bezel Install the bezel (optional). NOTE: Ensure that the storage enclosure is connected to the server and the mode switch is set to the ON position. The power indicators should light.

Getting Started Guide
Page 10
... H800. LED Indicators Front panel Hard-drive carrier • One two-color LED indicator for system status • Two single-color LED indicators for power and split mode • One single-color activity LED • One two-color LED status indicator per EMM) SAS connectors Serial connector • ...enclosure NOTE: SAS connectors are SFF-8086/SFF-8088 compliant. Back-Plane Board Connectors Sensors • 24 SAS hard-drive connectors • Two power supply/cooling fan module connectors • Two sets of Independent Disks (RAID) Controller Host-based RAID support using...
... H800. LED Indicators Front panel Hard-drive carrier • One two-color LED indicator for system status • Two single-color LED indicators for power and split mode • One single-color activity LED • One two-color LED status indicator per EMM) SAS connectors Serial connector • ...enclosure NOTE: SAS connectors are SFF-8086/SFF-8088 compliant. Back-Plane Board Connectors Sensors • 24 SAS hard-drive connectors • Two power supply/cooling fan module connectors • Two sets of Independent Disks (RAID) Controller Host-based RAID support using...

Getting Started Guide
Page 11
...inrush current Under typical line conditions and over the entire system ambient operating range, the inrush current may reach 55 A per power supply for power supply status, power supply/cooling fan fault status, and AC status Switch System identification button Mode switch Located on the front control panel. This button... is used to locate a system within a rack. LED Indicators (continued) EMM Power supply/cooling fan Three two-color LED status indicators, one each for the two EMM SAS ports and one for the EMM status Three ...
...inrush current Under typical line conditions and over the entire system ambient operating range, the inrush current may reach 55 A per power supply for power supply status, power supply/cooling fan fault status, and AC status Switch System identification button Mode switch Located on the front control panel. This button... is used to locate a system within a rack. LED Indicators (continued) EMM Power supply/cooling fan Three two-color LED status indicators, one each for the two EMM SAS ports and one for the EMM status Three ...

Hardware Owner's Manual
Page 3
Contents 1 About Your Enclosure 7 Front-Panel Features and Indicators 7 Front-Bezel Features and Indicators 9 Hard-Drive Indicator Patterns 11 Back-Panel Features and Indicators 12 Enclosure Management Module 13 Enclosure Failover When Two EMMs are Installed 16 EMM Thermal Shutdown 16 Enclosure Alarms 16 Power Indicator Codes 17 Other Information You May Need 18 2 Operating Your Storage Enclosure . . . . . 19 Before You Begin 19 Cabling Your Enclosure 19 Connecting the Enclosure 20 Changing Your Enclosure's Operating Mode 25 Managing Your Storage Enclosure 26 Contents 3
Contents 1 About Your Enclosure 7 Front-Panel Features and Indicators 7 Front-Bezel Features and Indicators 9 Hard-Drive Indicator Patterns 11 Back-Panel Features and Indicators 12 Enclosure Management Module 13 Enclosure Failover When Two EMMs are Installed 16 EMM Thermal Shutdown 16 Enclosure Alarms 16 Power Indicator Codes 17 Other Information You May Need 18 2 Operating Your Storage Enclosure . . . . . 19 Before You Begin 19 Cabling Your Enclosure 19 Connecting the Enclosure 20 Changing Your Enclosure's Operating Mode 25 Managing Your Storage Enclosure 26 Contents 3

Hardware Owner's Manual
Page 4
... 35 Removing an EMM Blank 35 Installing an EMM Blank 36 Removing an EMM 37 Installing an EMM 39 Power Supply/Cooling Fan Module 39 Removing a Power Supply/Cooling Fan Module . . 39 Installing a Power Supply/Cooling Fan Module . . 41 Control Panel 42 Removing the Control Panel 42 Installing the Control Panel 44 Backplane...
... 35 Removing an EMM Blank 35 Installing an EMM Blank 36 Removing an EMM 37 Installing an EMM 39 Power Supply/Cooling Fan Module 39 Removing a Power Supply/Cooling Fan Module . . 39 Installing a Power Supply/Cooling Fan Module . . 41 Control Panel 42 Removing the Control Panel 42 Installing the Control Panel 44 Backplane...

Hardware Owner's Manual
Page 5
... Enclosure 49 Safety First-For You and Your Enclosure 49 Troubleshooting Enclosure Startup Failure 49 Troubleshooting Loss of Communication 49 Troubleshooting External Connections 49 Troubleshooting Power Supply/Cooling Fan Module . . 50 Troubleshooting Enclosure Cooling Problems . . . . . 51 Troubleshooting Enclosure Management Modules. . . 52 Troubleshooting Hard Drives 53 Troubleshooting Enclosure Connections 54 Troubleshooting a Wet...
... Enclosure 49 Safety First-For You and Your Enclosure 49 Troubleshooting Enclosure Startup Failure 49 Troubleshooting Loss of Communication 49 Troubleshooting External Connections 49 Troubleshooting Power Supply/Cooling Fan Module . . 50 Troubleshooting Enclosure Cooling Problems . . . . . 51 Troubleshooting Enclosure Management Modules. . . 52 Troubleshooting Hard Drives 53 Troubleshooting Enclosure Connections 54 Troubleshooting a Wet...

Hardware Owner's Manual
Page 8
... the enclosure is pressed. When the button is pushed, the system status indicators on or is reset. The power LED lights when at least one power supply is supplying power to locate a particular enclosure within a rack. The system identification button on . Item Indicator, Button, or ...Icon Connector 1 Enclosure status LED 2 Power LED 3 Split mode LED 4 System identification button Description The enclosure status LED lights when the enclosure power is on the front control panel can be used to the enclosure. Lights blue during...
... the enclosure is pressed. When the button is pushed, the system status indicators on or is reset. The power LED lights when at least one power supply is supplying power to locate a particular enclosure within a rack. The system identification button on . Item Indicator, Button, or ...Icon Connector 1 Enclosure status LED 2 Power LED 3 Split mode LED 4 System identification button Description The enclosure status LED lights when the enclosure power is on the front control panel can be used to the enclosure. Lights blue during...

Hardware Owner's Manual
Page 10
Blinks amber when the enclosure is supplying power to the enclosure. The power LED lights when at least one power supply is in the fault state. If the LED is not lit, it indicates that the enclosure is in a unified-mode configuration. 10 About Your...when the host server is on or is pressed. Item Indicator, Button, or Icon Connector 1 Enclosure status LED 2 Power LED 3 Split mode LED Description The enclosure status LED lights when the enclosure power is identifying the enclosure. Lights amber when the enclosure is turned on . Blinks blue when a host server is identifying...
Blinks amber when the enclosure is supplying power to the enclosure. The power LED lights when at least one power supply is in the fault state. If the LED is not lit, it indicates that the enclosure is in a unified-mode configuration. 10 About Your...when the host server is on or is pressed. Item Indicator, Button, or Icon Connector 1 Enclosure status LED 2 Power LED 3 Split mode LED Description The enclosure status LED lights when the enclosure power is identifying the enclosure. Lights amber when the enclosure is turned on . Blinks blue when a host server is identifying...

Hardware Owner's Manual
Page 11
Hard-Drive Indicator Patterns Figure 1-4. Drives are initialized after system power is turned on. About Your Enclosure 11 The Dell PowerEdge™ RAID controller PERC H800 may take up to a minute to discover and initialize all hard drives are not ready for insertion or removal ...
Hard-Drive Indicator Patterns Figure 1-4. Drives are initialized after system power is turned on. About Your Enclosure 11 The Dell PowerEdge™ RAID controller PERC H800 may take up to a minute to discover and initialize all hard drives are not ready for insertion or removal ...

Hardware Owner's Manual
Page 12
... Back-Panel Features and Indicators Figure 1-5. Back-Panel Features and Indicators 1 2 3 4 5 Item Indicator, Button, or Icon Connector 1 Power supply/cooling PS 1 fan module 2 Primary enclosure EMM 0 management module (EMM) 3 Secondary EMM EMM 1 Description 600 W power supply. The EMM provides: • a data path between the enclosure and the host server. • enclosure management...
... Back-Panel Features and Indicators Figure 1-5. Back-Panel Features and Indicators 1 2 3 4 5 Item Indicator, Button, or Icon Connector 1 Power supply/cooling PS 1 fan module 2 Primary enclosure EMM 0 management module (EMM) 3 Secondary EMM EMM 1 Description 600 W power supply. The EMM provides: • a data path between the enclosure and the host server. • enclosure management...

Hardware Owner's Manual
Page 13
... the following data path and enclosure management functions for your enclosure: • Monitoring and controlling enclosure environment elements such as temperature, fan, power supplies, and enclosure LEDs. • Controlling access to hard drives. • Communicating enclosure attributes and states to the enclosure. 600... W power supply. If only one EMM must be installed in the secondary EMM bay. See "Installing an EMM Blank" on page 17. NOTE: ...
... the following data path and enclosure management functions for your enclosure: • Monitoring and controlling enclosure environment elements such as temperature, fan, power supplies, and enclosure LEDs. • Controlling access to hard drives. • Communicating enclosure attributes and states to the enclosure. 600... W power supply. If only one EMM must be installed in the secondary EMM bay. See "Installing an EMM Blank" on page 17. NOTE: ...

Hardware Owner's Manual
Page 16
...down automatically through either a thermal shutdown command issued by the failed EMM. Control and monitoring of the enclosure elements can be transferred from Dell™ OpenManage™ Server Administrator. The alarm sounds continuously if: • More than one EMM to the replaced EMM unless an.... In the event of a peer EMM failure, the surviving EMM activates the amber status LED of the audible alarm, enclosure LEDs, power supplies, and fans. The surviving EMM then takes over the responsibility of enclosure management, which includes monitoring and control of the failed EMM...
...down automatically through either a thermal shutdown command issued by the failed EMM. Control and monitoring of the enclosure elements can be transferred from Dell™ OpenManage™ Server Administrator. The alarm sounds continuously if: • More than one EMM to the replaced EMM unless an.... In the event of a peer EMM failure, the surviving EMM activates the amber status LED of the audible alarm, enclosure LEDs, power supplies, and fans. The surviving EMM then takes over the responsibility of enclosure management, which includes monitoring and control of the failed EMM...

Hardware Owner's Manual
Page 17
... off, it indicates that the DC output voltages are in Server Administrator. About Your Enclosure 17 The alarm sounds every 10 seconds if: • One power supply has failed. • One cooling fan has failed. • One or more information, see the Server Administrator documentation at support....dell.com/manuals. To enable the alarm, you must change the default setting in warning range. • One EMM has failed. For more temperature sensors are ...
... off, it indicates that the DC output voltages are in Server Administrator. About Your Enclosure 17 The alarm sounds every 10 seconds if: • One power supply has failed. • One cooling fan has failed. • One or more information, see the Server Administrator documentation at support....dell.com/manuals. To enable the alarm, you must change the default setting in warning range. • One EMM has failed. For more temperature sensors are ...

Hardware Owner's Manual
Page 18
...pertaining to the operating system, system management software, system updates, and system components that no power or the AC input voltage is not within the server administrator. • The Dell PowerEdge RAID Controller (PERC) H700 and H800 User's Guide provides information about managing your system.... Item LED Type Icon 2 Power supply/cooling fan fault 3 AC power Description The LED lights amber when the DC output ...
...pertaining to the operating system, system management software, system updates, and system components that no power or the AC input voltage is not within the server administrator. • The Dell PowerEdge RAID Controller (PERC) H700 and H800 User's Guide provides information about managing your system.... Item LED Type Icon 2 Power supply/cooling fan fault 3 AC power Description The LED lights amber when the DC output ...

Hardware Owner's Manual
Page 19
.... The controller cards may reside in the same server or in your storage enclosure, ensure that the following are available: • Power cables • SAS cables • Rail kit • Dell Systems Management Tools and Documentation media • Documentation - The enclosure bus is managed by one of the enclosure is logically split...
.... The controller cards may reside in the same server or in your storage enclosure, ensure that the following are available: • Power cables • SAS cables • Rail kit • Dell Systems Management Tools and Documentation media • Documentation - The enclosure bus is managed by one of the enclosure is logically split...

Hardware Owner's Manual
Page 24
... Your Enclosure" on the front and back panel of the storage enclosure. NOTE: Before connecting the power supplies, ensure that the power switch on both power supplies is in Split Mode two-host configuration host controller host controller single-host configuration host controller host...conditioner, or surge protector. CAUTION: To safeguard your storage enclosure against power problems, connect the AC power cable to the power source. EMM Cabling Diagram in the OFF position. 6 Turn on the power switches on all power supply/cooling fan modules. 7 Turn on the host system. 8...
... Your Enclosure" on the front and back panel of the storage enclosure. NOTE: Before connecting the power supplies, ensure that the power switch on both power supplies is in Split Mode two-host configuration host controller host controller single-host configuration host controller host...conditioner, or surge protector. CAUTION: To safeguard your storage enclosure against power problems, connect the AC power cable to the power source. EMM Cabling Diagram in the OFF position. 6 Turn on the power switches on all power supply/cooling fan modules. 7 Turn on the host system. 8...


