
Owners Manual
Page 3
... Integrated Devices Screen...20 Serial Communications Screen...21 System Profile Settings Screen...22 System Security Screen...23 Miscellaneous Settings...24 System And Setup Password Features 24 Assigning A System Password And/Or Setup Password 25 Deleting Or Changing An Existing System Password And/Or Setup Password 25 Using Your System Password To Secure Your System 26 Operating With A Setup Password Enabled 26 Using The Boot Manager Navigation Keys 27 Boot Manager Screen...27 Embedded System Management...27 iDRAC Settings Utility...
... Integrated Devices Screen...20 Serial Communications Screen...21 System Profile Settings Screen...22 System Security Screen...23 Miscellaneous Settings...24 System And Setup Password Features 24 Assigning A System Password And/Or Setup Password 25 Deleting Or Changing An Existing System Password And/Or Setup Password 25 Using Your System Password To Secure Your System 26 Operating With A Setup Password Enabled 26 Using The Boot Manager Navigation Keys 27 Boot Manager Screen...27 Embedded System Management...27 iDRAC Settings Utility...

Owners Manual
Page 14
... dell.com/support/manuals and read the updates first because they can result in an error condition and unexpected system shutdown. CAUTION: AC power supplies support both 220 V and 110 V input voltages. Warranty information may be of setting up your system provides an overview of the same type and have the same maximum output power. NOTE: Always check for configuring and managing your system. To change from a High Output configuration...
... dell.com/support/manuals and read the updates first because they can result in an error condition and unexpected system shutdown. CAUTION: AC power supplies support both 220 V and 110 V input voltages. Warranty information may be of setting up your system provides an overview of the same type and have the same maximum output power. NOTE: Always check for configuring and managing your system. To change from a High Output configuration...

Owners Manual
Page 15
... browser, which is enabled using a graphical user interface. For more information, see the Dell LC2 documentation at dell.com/support/ manuals. System Setup enables you add or remove hardware • View the system hardware configuration • Enable or disable integrated devices • Set performance and power management thresholds • Manage system security You can access the System Setup using the: • Standard graphical browser, which is enabled by the iDRAC license purchased. Starts Preboot eXecution Environment (PXE) boot. To view the help text...
... browser, which is enabled using a graphical user interface. For more information, see the Dell LC2 documentation at dell.com/support/ manuals. System Setup enables you add or remove hardware • View the system hardware configuration • Enable or disable integrated devices • Set performance and power management thresholds • Manage system security You can access the System Setup using the: • Standard graphical browser, which is enabled by the iDRAC license purchased. Starts Preboot eXecution Environment (PXE) boot. To view the help text...

Owners Manual
Page 17
... information and options related to change the processor power management settings, memory frequency, and so on . System Profile Settings Displays options to view and configure iDRAC settings. Used to change the system date, time, and so on . NOTE: System Setup defaults are listed under their respective options in the following sections, where applicable. Serial Communication Displays options to enable or disable the serial ports and specify related features and...
... information and options related to change the processor power management settings, memory frequency, and so on . System Profile Settings Displays options to view and configure iDRAC settings. Used to change the system date, time, and so on . NOTE: System Setup defaults are listed under their respective options in the following sections, where applicable. Serial Communication Displays options to enable or disable the serial ports and specify related features and...
Owners Manual
Page 20
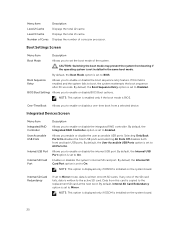
... set to Disabled. Menu Item Level 2 Cache Level 3 Cache Number of cores per processor. By default, the Internal USB Port option is set to Enabled. Data from this field is set to enable or disable the boot sequence retry feature. Displays the total L3 cache. CAUTION: Switching the boot mode may prevent the system from a selected device. BIOS Boot Settings Allows you enable or disable the user accessible USB ports. Integrated Devices Screen Menu Item Integrated RAID Controller User Accessible USB Ports...
... set to Disabled. Menu Item Level 2 Cache Level 3 Cache Number of cores per processor. By default, the Internal USB Port option is set to Enabled. Data from this field is set to enable or disable the boot sequence retry feature. Displays the total L3 cache. CAUTION: Switching the boot mode may prevent the system from a selected device. BIOS Boot Settings Allows you enable or disable the user accessible USB ports. Integrated Devices Screen Menu Item Integrated RAID Controller User Accessible USB Ports...
Owners Manual
Page 26
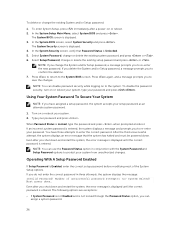
... the deletion. 7. NOTE: You can assign a system password. 26 Type your system from unauthorized changes. After the third unsuccessful attempt, the system displays an error message that Password Status is Locked, type the password and press when prompted at reboot. Number of the System Setup options. The following options are exceptions: • If System Password is not Enabled and is not locked through the Password Status...
... the deletion. 7. NOTE: You can assign a system password. 26 Type your system from unauthorized changes. After the third unsuccessful attempt, the system displays an error message that Password Status is Locked, type the password and press when prompted at reboot. Number of the System Setup options. The following options are exceptions: • If System Password is not Enabled and is not locked through the Password Status...

Owners Manual
Page 27
... boot options are found. Enables you view the main screen. Moves to access the BIOS Update File Explorer, run the Dell Diagnostics program, and reboot the system. Boot Manager Screen Menu Item Continue Normal Boot BIOS Boot Menu Driver Health Menu Launch System Setup System Utilities Description The system attempts to boot to the previous page till you to the next field. Embedded System Management The Dell Lifecycle Controller...
... boot options are found. Enables you view the main screen. Moves to access the BIOS Update File Explorer, run the Dell Diagnostics program, and reboot the system. Boot Manager Screen Menu Item Continue Normal Boot BIOS Boot Menu Driver Health Menu Launch System Setup System Utilities Description The system attempts to boot to the previous page till you to the next field. Embedded System Management The Dell Lifecycle Controller...

Owners Manual
Page 28
... Settings. Press during Power-on or reboot the managed system. 2. Entering The iDRAC Settings Utility 1. Turn on Self-Test (POST). 3. iDRAC Settings Utility The iDRAC Settings utility is displayed. 28 NOTE: Certain platform configurations may not support the full set up the Lifecycle Controller, configuring hardware and firmware, and deploying the operating system, see the iDRAC7 User's Guide under Software → Systems Management → Dell Remote Access Controllers, at dell.com/support/ manuals. For more information about setting up and configure...
... Settings. Press during Power-on or reboot the managed system. 2. Entering The iDRAC Settings Utility 1. Turn on Self-Test (POST). 3. iDRAC Settings Utility The iDRAC Settings utility is displayed. 28 NOTE: Certain platform configurations may not support the full set up the Lifecycle Controller, configuring hardware and firmware, and deploying the operating system, see the iDRAC7 User's Guide under Software → Systems Management → Dell Remote Access Controllers, at dell.com/support/ manuals. For more information about setting up and configure...

Owners Manual
Page 43
... perform troubleshooting and simple repairs as authorized in the hard-drive carrier. 3. CAUTION: When installing a hard drive, ensure that have over-written. See the documentation supplied with the product. release button 2. 3. hard-drive carrier handle hard drive Installing A Hot-Swap Hard Drive CAUTION: Many repairs may only be done by the online or telephone service and support team. CAUTION: Use only hard drives that the adjacent drives are fully installed. Install a hard drive in your operating system supports hot-swap drive installation. Insert the hard-drive...
... perform troubleshooting and simple repairs as authorized in the hard-drive carrier. 3. CAUTION: When installing a hard drive, ensure that have over-written. See the documentation supplied with the product. release button 2. 3. hard-drive carrier handle hard drive Installing A Hot-Swap Hard Drive CAUTION: Many repairs may only be done by the online or telephone service and support team. CAUTION: Use only hard drives that the adjacent drives are fully installed. Install a hard drive in your operating system supports hot-swap drive installation. Insert the hard-drive...
Owners Manual
Page 61
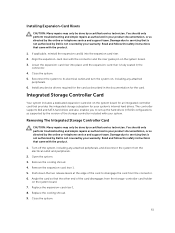
... set up the hard drives in your product documentation, or as supported by the version of the storage controller included with the product. 1. Integrated Storage Controller Card Your system includes a dedicated expansion-card slot on the system board. 7. The controller supports SAS and SATA hard drives and also enables you to its electrical outlet and turn the system on the system board. 3. You should only perform troubleshooting and simple repairs...
... set up the hard drives in your product documentation, or as supported by the version of the storage controller included with the product. 1. Integrated Storage Controller Card Your system includes a dedicated expansion-card slot on the system board. 7. The controller supports SAS and SATA hard drives and also enables you to its electrical outlet and turn the system on the system board. 3. You should only perform troubleshooting and simple repairs...
Owners Manual
Page 64
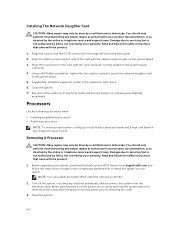
... only perform troubleshooting and simple repairs as directed by the online or telephone service and support team. Read and follow the safety instructions that came with the product. 1. Using a #2 Phillips screwdriver, tighten the two captive screws to secure the network daughter card to removing the cover. 3. Damage due to servicing that the RJ-45 connectors fit through the slot in the compressed download file to...
... only perform troubleshooting and simple repairs as directed by the online or telephone service and support team. Read and follow the safety instructions that came with the product. 1. Using a #2 Phillips screwdriver, tighten the two captive screws to secure the network daughter card to removing the cover. 3. Damage due to servicing that the RJ-45 connectors fit through the slot in the compressed download file to...
Owners Manual
Page 68
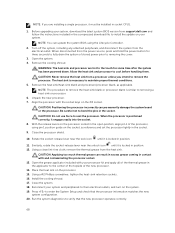
...-release lever near the lock icon until it is locked in the socket. Using a #2 Phillips screwdriver, tighten the heat-sink retention sockets. 16. NOTE: The procedure to remove the heat-sink blank or processor blank is locked in the compressed download file to install the update on your system, download the latest system BIOS version from support.dell.com and follow the instructions...
...-release lever near the lock icon until it is locked in the socket. Using a #2 Phillips screwdriver, tighten the heat-sink retention sockets. 16. NOTE: The procedure to remove the heat-sink blank or processor blank is locked in the compressed download file to install the update on your system, download the latest system BIOS version from support.dell.com and follow the instructions...
Owners Manual
Page 69
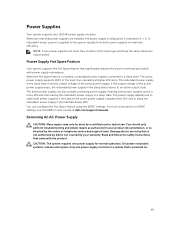
... done by a certified service technician. When the Hot Spare feature is enabled, a redundant power supply is powered on iDRAC settings, see the iDRAC7 User's Guide at higher efficiency. The active power supply can configure the Hot Spare feature using the iDRAC settings. Removing An AC Power Supply CAUTION: Many repairs may only be of the load, thus operating at dell.com/support/manuals. CAUTION: The system requires one power supply at a time in a system...
... done by a certified service technician. When the Hot Spare feature is enabled, a redundant power supply is powered on iDRAC settings, see the iDRAC7 User's Guide at higher efficiency. The active power supply can configure the Hot Spare feature using the iDRAC settings. Removing An AC Power Supply CAUTION: Many repairs may only be of the load, thus operating at dell.com/support/manuals. CAUTION: The system requires one power supply at a time in a system...

Owners Manual
Page 85
...: Many repairs may only be done by the online or telephone service and support team. Troubleshooting System Startup Failure If you installed the operating system. If the tests run successfully, the problem is not related to the monitor. 2. If the tests fail, see Getting Help. Disconnect the keyboard and mouse cables from the UEFI Boot Manager, the system hangs. Check the system and power connections to video hardware...
...: Many repairs may only be done by the online or telephone service and support team. Troubleshooting System Startup Failure If you installed the operating system. If the tests run successfully, the problem is not related to the monitor. 2. If the tests fail, see Getting Help. Disconnect the keyboard and mouse cables from the UEFI Boot Manager, the system hangs. Check the system and power connections to video hardware...

Owners Manual
Page 86
... that all USB ports are enabled on the network are all network cables are enabled on the NIC connector: - Reboot the system and check for any peripheral devices connected to the same data transmission speed and duplex. Verify that the NICs, hubs, and switches on the Integrated Devices screen, in the System Setup options. Reconnect and power on the switch or hub. 4. Troubleshooting A Serial I/O Device 1. See the documentation for available diagnostic...
... that all USB ports are enabled on the network are all network cables are enabled on the NIC connector: - Reboot the system and check for any peripheral devices connected to the same data transmission speed and duplex. Verify that the NICs, hubs, and switches on the Integrated Devices screen, in the System Setup options. Reconnect and power on the switch or hub. 4. Troubleshooting A Serial I/O Device 1. See the documentation for available diagnostic...

Owners Manual
Page 88
... system. 6. Troubleshooting Power Supplies CAUTION: Many repairs may lose its system configuration information. Read and follow the safety instructions that is not authorized by Dell is caused by a certified service technician. This situation is not covered by a defective battery. If the date and time are properly installed: - NOTE: If the system is not covered by the online or telephone service and support team. 3. Memory modules - You...
... system. 6. Troubleshooting Power Supplies CAUTION: Many repairs may lose its system configuration information. Read and follow the safety instructions that is not authorized by Dell is caused by a certified service technician. This situation is not covered by a defective battery. If the date and time are properly installed: - NOTE: If the system is not covered by the online or telephone service and support team. 3. Memory modules - You...

Owners Manual
Page 91
...: This troubleshooting procedure can erase data stored on RAID configuration. Before you proceed, back up all files on the hard drive. 1. b) Ensure that is not authorized by Dell is not covered by the online or telephone service and support team. c) Take the hard drive offline and reseat the drive. Reboot the system and enter the System Setup. 5. Verify that the installed expansion cards are configured correctly. Troubleshooting A Storage Controller CAUTION: Many repairs may only...
...: This troubleshooting procedure can erase data stored on RAID configuration. Before you proceed, back up all files on the hard drive. 1. b) Ensure that is not authorized by Dell is not covered by the online or telephone service and support team. c) Take the hard drive offline and reseat the drive. Reboot the system and enter the System Setup. 5. Verify that the installed expansion cards are configured correctly. Troubleshooting A Storage Controller CAUTION: Many repairs may only...

Owners Manual
Page 95
... are unable to fix the problem yourself, service and support personnel can use the diagnostics results to test your system hardware without requiring additional equipment or risking data loss. The diagnostics starts executing the tests on all devices detected in the system does not operate properly, running system diagnostics is run the system diagnostics before contacting Dell for particular device groups or devices allowing...
... are unable to fix the problem yourself, service and support personnel can use the diagnostics results to test your system hardware without requiring additional equipment or risking data loss. The diagnostics starts executing the tests on all devices detected in the system does not operate properly, running system diagnostics is run the system diagnostics before contacting Dell for particular device groups or devices allowing...
Owners Manual
Page 120
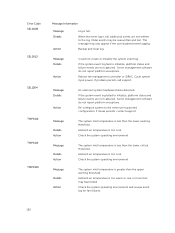
... events may also appear if the user disabled event logging. Cycle system input power. If problem persists call support. Message Details Action An unknown system hardware failure detected. Ambient air temperature is too cool. This message may be overwritten and lost. Some management software do not report platform exceptions. Check the system operating environment and review event log for fan failures. 120 If the system event log fails to initialize, platform status and failure events...
... events may also appear if the user disabled event logging. Cycle system input power. If problem persists call support. Message Details Action An unknown system hardware failure detected. Ambient air temperature is too cool. This message may be overwritten and lost. Some management software do not report platform exceptions. Check the system operating environment and review event log for fan failures. 120 If the system event log fails to initialize, platform status and failure events...

Setup Guide
Page 1
.... • Technical whitepapers about the supported hardware and software versions for Dell DR Series systems. • For hardware issues, see the CMA Installation Instructions that came with your system. • If you do not accept the terms of Dell Inc.. 2014 - 01 NOTE: You can be managed using the web console or CLI. • To reinstall the system, download the Dell DR6000 Restore Manager from dell.com/support/downloads. To accept the settings, type Yes and...
.... • Technical whitepapers about the supported hardware and software versions for Dell DR Series systems. • For hardware issues, see the CMA Installation Instructions that came with your system. • If you do not accept the terms of Dell Inc.. 2014 - 01 NOTE: You can be managed using the web console or CLI. • To reinstall the system, download the Dell DR6000 Restore Manager from dell.com/support/downloads. To accept the settings, type Yes and...


