Installation and Troubleshooting Guide (.htm)
Page 7
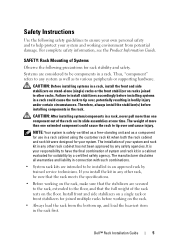
...the customer rack kit when both the rack cabinet and rack kit were designed for your responsibility to the floor, and that the full weight of system and rack kit in an approved rack by a certified safety agency. Therefore, always install the stabilizer(s) before working on ...the rack, extended to have the final combination of the rack rests on the rack. • Always load the rack from potential damage. Dell™ Rack Installation Guide 5 For complete safety information, see the Product Information Guide. Failure to install stabilizers accordingly before installing systems in a...
...the customer rack kit when both the rack cabinet and rack kit were designed for your responsibility to the floor, and that the full weight of system and rack kit in an approved rack by a certified safety agency. Therefore, always install the stabilizer(s) before working on ...the rack, extended to have the final combination of the rack rests on the rack. • Always load the rack from potential damage. Dell™ Rack Installation Guide 5 For complete safety information, see the Product Information Guide. Failure to install stabilizers accordingly before installing systems in a...
Installation and Troubleshooting Guide (.htm)
Page 9
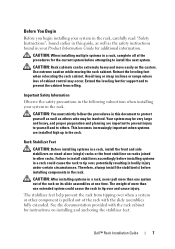
... to tip over, potentially resulting in bodily injury under certain circumstances. See the documentation provided with the slide assemblies fully extended. Dell™ Rack Installation Guide 7 Use extreme caution while moving the rack cabinet. Important Safety Information Observe the safety precautions in the... out of the procedures for additional information. Your system may occur. The stabilizer feet help prevent the rack from rolling. The weight of cabinet control may be involved. Before You Begin Before you begin installing your system in the rack, carefully read "Safety ...
... to tip over, potentially resulting in bodily injury under certain circumstances. See the documentation provided with the slide assemblies fully extended. Dell™ Rack Installation Guide 7 Use extreme caution while moving the rack cabinet. Important Safety Information Observe the safety precautions in the... out of the procedures for additional information. Your system may occur. The stabilizer feet help prevent the rack from rolling. The weight of cabinet control may be involved. Before You Begin Before you begin installing your system in the rack, carefully read "Safety ...
Installation and Troubleshooting Guide (.htm)
Page 19
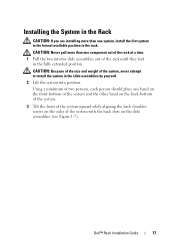
... the system in the slide assemblies by yourself. 2 Lift the system into position. CAUTION: Because of the size and weight of the system with the back slots on the slide assemblies (see Figure 1-7). Dell™ Rack Installation Guide 17 CAUTION: Never pull more than one component out of the rack at a time...
... the system in the slide assemblies by yourself. 2 Lift the system into position. CAUTION: Because of the size and weight of the system with the back slots on the slide assemblies (see Figure 1-7). Dell™ Rack Installation Guide 17 CAUTION: Never pull more than one component out of the rack at a time...
Installation and Troubleshooting Guide (.htm)
Page 21
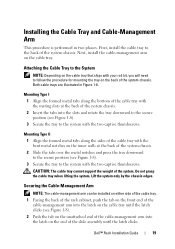
Both cable trays are illustrated in two phases. Do not grasp the cable tray when lifting the system. Dell™ Rack Installation Guide 19 Next, install the cable-management arm on the cable tray until the latch clicks. Mounting Type I 1 Align the formed metal ... the tray downward to the secure position (see Figure 1-8). 3 Secure the tray to the back of the system. CAUTION: The cable tray cannot support the weight of the system chassis. First, install the cable tray to the system with the mating slots at the back of the cable-management arm into...
Both cable trays are illustrated in two phases. Do not grasp the cable tray when lifting the system. Dell™ Rack Installation Guide 19 Next, install the cable-management arm on the cable tray until the latch clicks. Mounting Type I 1 Align the formed metal ... the tray downward to the secure position (see Figure 1-8). 3 Secure the tray to the back of the system. CAUTION: The cable tray cannot support the weight of the system chassis. First, install the cable tray to the system with the mating slots at the back of the cable-management arm into...
Getting Started Guide
Page 14
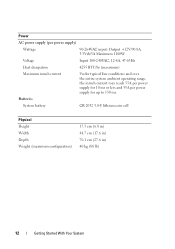
... ms or less and 35A per power supply for up to 150 ms. Batteries System battery CR 2032 3.0-V lithium coin cell Physical Height Width Depth Weight (maximum configuration) 17.3 cm (6.8 in) 44.7 cm (17.6 in) 70.1 cm (27.6 in) 40 kg (88 lb) 12 Getting Started With Your System
... ms or less and 35A per power supply for up to 150 ms. Batteries System battery CR 2032 3.0-V lithium coin cell Physical Height Width Depth Weight (maximum configuration) 17.3 cm (6.8 in) 44.7 cm (17.6 in) 70.1 cm (27.6 in) 40 kg (88 lb) 12 Getting Started With Your System


