Glossary
Page 9
... system board or may appear to your system's RAM. Video graphics array. Most VGA and SVGA video adapters include memory chips in combination with the monitor) your monitor must support the resolution. virtualization - Windows Management Instrumentation provides CIM Object... of pixels across multiple environments. VAC - Volt(s) alternating current. VDC - A video adapter may be integrated into an expansion slot. video memory - video resolution - To display a program at a specific graphics resolution, you must install the appropriate video drivers and your ...
... system board or may appear to your system's RAM. Video graphics array. Most VGA and SVGA video adapters include memory chips in combination with the monitor) your monitor must support the resolution. virtualization - Windows Management Instrumentation provides CIM Object... of pixels across multiple environments. VAC - Volt(s) alternating current. VDC - A video adapter may be integrated into an expansion slot. video memory - video resolution - To display a program at a specific graphics resolution, you must install the appropriate video drivers and your ...

Information Update
Page 3
...,C4, D3,D4, A5,A6, B5,B6, C5,C6, D5,D6, A7,A8 B7,B8 C7,C8 D7,D8 Table 2. CPU1 Memory Slot (DIMM Size Per Slot in GB) Processors CPU2 CPU3 CPU4 System Capacity (in this table apply to 2/4 processor combinations. Number of Processors System Capacity (in GB)...(2) C3 (2) C2 (2) C4 (2) C1 (4) C2 (4) C5 (1) C6 (1) C7 (1) C8 (1) C3 (2) C4 (2) D1 (2) D3 (2) D2 (2) D4 (2) D1 (4) D2 (4) D5 (1) D6 (1) D7 (1) D8 (1) D3 (2) D4 (2) Memory Configurations (Mixed DIMM Sizes) NOTE: DIMMs A1-A8 are assigned to processor 1, DIMMs B1-B8 are assigned to processor 2, and so on. For configurations with...
...,C4, D3,D4, A5,A6, B5,B6, C5,C6, D5,D6, A7,A8 B7,B8 C7,C8 D7,D8 Table 2. CPU1 Memory Slot (DIMM Size Per Slot in GB) Processors CPU2 CPU3 CPU4 System Capacity (in this table apply to 2/4 processor combinations. Number of Processors System Capacity (in GB)...(2) C3 (2) C2 (2) C4 (2) C1 (4) C2 (4) C5 (1) C6 (1) C7 (1) C8 (1) C3 (2) C4 (2) D1 (2) D3 (2) D2 (2) D4 (2) D1 (4) D2 (4) D5 (1) D6 (1) D7 (1) D8 (1) D3 (2) D4 (2) Memory Configurations (Mixed DIMM Sizes) NOTE: DIMMs A1-A8 are assigned to processor 1, DIMMs B1-B8 are assigned to processor 2, and so on. For configurations with...

Information Update
Page 4
... mode. b Figures within parentheses indicate size of DIMMs CPU1 Memory Slot (DIMM Size Per Slot in GB. System Capacity (in GB) Number of the DIMM in GB) Processors CPU2 CPU3 CPU4 96 32 A1 (4) A5 (2) B1 (4) B5 (2) C1 (4) C5 (2) D1 (4) ... (8) B1 (16) B3 (16) B2 (16) B4 (16) B5 (16) B6 (16) B7 (8) B8 (8) C1 (16) C3 (16) C2 (16) C4 (16) a Does not support Memory Sparing mode. C5 (16) C6 (16) C7 (8) C8 (8) D1 (16) D3 (16) D2 (16) D4 (16) D5 (16) D6 (16) D7 (8) D8 (8)
... mode. b Figures within parentheses indicate size of DIMMs CPU1 Memory Slot (DIMM Size Per Slot in GB. System Capacity (in GB) Number of the DIMM in GB) Processors CPU2 CPU3 CPU4 96 32 A1 (4) A5 (2) B1 (4) B5 (2) C1 (4) C5 (2) D1 (4) ... (8) B1 (16) B3 (16) B2 (16) B4 (16) B5 (16) B6 (16) B7 (8) B8 (8) C1 (16) C3 (16) C2 (16) C4 (16) a Does not support Memory Sparing mode. C5 (16) C6 (16) C7 (8) C8 (8) D1 (16) D3 (16) D2 (16) D4 (16) D5 (16) D6 (16) D7 (8) D8 (8)

Getting Started Guide
Page 11
... series processors (up to eight core processors) Expansion Bus Bus type Expansion slots PCI Express Generation 2 Riser 1 Slot 1: x8 link with x16 physical connector, 9.5-inch length, standard height Slot 2: x4 link with x8 physical connector, low-profile, with a standard ...Slot 3: x8 link with x8 physical connector, low-profile Slot 4: x8 link with x8 physical connector, low-profile Riser 2 Slot 5: x8 link with x16 physical connector, 9.5-inch length, standard height Slot 6: x8 link with x16 physical connector, 9.5-inch length, standard height Memory Architecture Memory module sockets Memory...
... series processors (up to eight core processors) Expansion Bus Bus type Expansion slots PCI Express Generation 2 Riser 1 Slot 1: x8 link with x16 physical connector, 9.5-inch length, standard height Slot 2: x4 link with x8 physical connector, low-profile, with a standard ...Slot 3: x8 link with x8 physical connector, low-profile Slot 4: x8 link with x8 physical connector, low-profile Riser 2 Slot 5: x8 link with x16 physical connector, 9.5-inch length, standard height Slot 6: x8 link with x16 physical connector, 9.5-inch length, standard height Memory Architecture Memory module sockets Memory...

Getting Started Guide
Page 12
... NICs) One optional management NIC port on iDRAC6 Enterprise card 9-pin, DTE, 16550-compatible Four 4-pin, USB 2.0-compliant 15-pin VGA One optional vFlash memory card slot on iDRAC6 Enterprise card 15-pin VGA Two 4-pin, USB 2.0-compliant One 4-pin, USB 2.0-compliant Two optional internal SD modules 10 Getting Started With Your...
... NICs) One optional management NIC port on iDRAC6 Enterprise card 9-pin, DTE, 16550-compatible Four 4-pin, USB 2.0-compliant 15-pin VGA One optional vFlash memory card slot on iDRAC6 Enterprise card 15-pin VGA Two 4-pin, USB 2.0-compliant One 4-pin, USB 2.0-compliant Two optional internal SD modules 10 Getting Started With Your...

Hardware Owner's Manual
Page 20
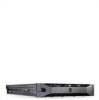
..." on page 59. Connects a monitor to the system. 14 Serial connector Connects a serial device to the system. 15 VFlash media slot (optional) 16 iDRAC6 Enterprise port (optional) Connects an external SD memory card for the optional iDRAC6 Enterprise card. The ports are USB 2.0-compliant. Guidelines for Connecting External Devices • Turn off...
..." on page 59. Connects a monitor to the system. 14 Serial connector Connects a serial device to the system. 15 VFlash media slot (optional) 16 iDRAC6 Enterprise port (optional) Connects an external SD memory card for the optional iDRAC6 Enterprise card. The ports are USB 2.0-compliant. Guidelines for Connecting External Devices • Turn off...

Hardware Owner's Manual
Page 37
.... If the problem persists, see "Troubleshooting system is rebooted. Contact support QuickPath Interconnect (QPI) failure. support Ensure that the memory modules are installed in slot "##" has had a multi-bit error (MBE). Reseat DIMM. E2025 QPI initializati on page 169. See "Getting Help" on page 195. See "Getting Help" on page ...
.... If the problem persists, see "Troubleshooting system is rebooted. Contact support QuickPath Interconnect (QPI) failure. support Ensure that the memory modules are installed in slot "##" has had a multi-bit error (MBE). Reseat DIMM. E2025 QPI initializati on page 169. See "Getting Help" on page 195. See "Getting Help" on page ...

Hardware Owner's Manual
Page 49
...ensure each lockstep pair is not optimal. Memory" on page 100. valid configuration. DIMM population violation: DIMM Lockstep Pair DIMM disabled. The system will run but with largest number of ranks in the lowest slot. Memory address line failure at address, read value... expecting value Faulty or improperly installed See "Troubleshooting System memory modules. See "General Memory Module Installation Guidelines" on page 169. Please "General Memory Module Installation Guidelines" on page 169...
...ensure each lockstep pair is not optimal. Memory" on page 100. valid configuration. DIMM population violation: DIMM Lockstep Pair DIMM disabled. The system will run but with largest number of ranks in the lowest slot. Memory address line failure at address, read value... expecting value Faulty or improperly installed See "Troubleshooting System memory modules. See "General Memory Module Installation Guidelines" on page 169. Please "General Memory Module Installation Guidelines" on page 169...

Hardware Owner's Manual
Page 98
...assembly, and the front panel display. See "Removing the Front Bezel" on page 84. See "Removing the Cooling Shroud" on the chassis walls with the slots on page 84. 3 Remove the cooling shroud. See step 2 and step 3 of obstructions. 4 If required, free the power/data cables from the...into the system and align the shroud tabs with a sliding rail system. The frontchassis assembly is mounted on page 96. CAUTION: To prevent the memory modules from the chassis: 1 If installed, remove the front bezel. See Figure 3-10. 98 Installing System Components See "Opening the System" on...
...assembly, and the front panel display. See "Removing the Front Bezel" on page 84. See "Removing the Cooling Shroud" on the chassis walls with the slots on page 84. 3 Remove the cooling shroud. See step 2 and step 3 of obstructions. 4 If required, free the power/data cables from the...into the system and align the shroud tabs with a sliding rail system. The frontchassis assembly is mounted on page 96. CAUTION: To prevent the memory modules from the chassis: 1 If installed, remove the front bezel. See Figure 3-10. 98 Installing System Components See "Opening the System" on...

Hardware Owner's Manual
Page 104
... DIMM Sizes) NOTE: DIMMs A1-A8 are assigned to processor 1, DIMMs B1-B8 are assigned to processor 2. CPU1 Memory Slot (DIMM Size Per Slot in GB) Processors CPU2 CPU3 CPU4 System Capacity (in GB) Number of the DIMM in GB 104 Installing System Components For configurations with two processors, ... (8) B3 (8) B2 (8) B4 (8) B5 (4) B6 (4) B7 (4) B8 (4) C1 (8) C3 (8) C2 (8) C4 (8) C5 (4) C6 (4) C7 (4) C8 (4) D1 (8) D3 (8) D2 (8) D4 (8) D5 (4) D6 (4) D7 (4) D8 (4) NOTE: All memory configurations listed in this table apply to processor 2, and so on. Table 3-3.
... DIMM Sizes) NOTE: DIMMs A1-A8 are assigned to processor 1, DIMMs B1-B8 are assigned to processor 2. CPU1 Memory Slot (DIMM Size Per Slot in GB) Processors CPU2 CPU3 CPU4 System Capacity (in GB) Number of the DIMM in GB 104 Installing System Components For configurations with two processors, ... (8) B3 (8) B2 (8) B4 (8) B5 (4) B6 (4) B7 (4) B8 (4) C1 (8) C3 (8) C2 (8) C4 (8) C5 (4) C6 (4) C7 (4) C8 (4) D1 (8) D3 (8) D2 (8) D4 (8) D5 (4) D6 (4) D7 (4) D8 (4) NOTE: All memory configurations listed in this table apply to processor 2, and so on. Table 3-3.

Hardware Owner's Manual
Page 156
... page 129. 8 Remove the RAID battery carrier. See Figure 3-31. 19 Slightly push the processor board toward the front of the connector from the slots on page 121. 15 If applicable, remove the NIC hardware key from the I /O board. See "Removing the Cooling Fan Assembly" on page 126.... See "Removing an Expansion Card" on page 118, and "Removing the Integrated Storage Controller Card" on page 110. See Figure 3-21. 9 Remove the memory modules. WARNING: The heat sink is separated from the I /O board. 156 Installing System Components See "Removing Expansion-Card Riser 1" on page 119 and "...
... page 129. 8 Remove the RAID battery carrier. See Figure 3-31. 19 Slightly push the processor board toward the front of the connector from the slots on page 121. 15 If applicable, remove the NIC hardware key from the I /O board. See "Removing the Cooling Fan Assembly" on page 126.... See "Removing an Expansion Card" on page 118, and "Removing the Integrated Storage Controller Card" on page 110. See Figure 3-21. 9 Remove the memory modules. WARNING: The heat sink is separated from the I /O board. 156 Installing System Components See "Removing Expansion-Card Riser 1" on page 119 and "...

Hardware Owner's Manual
Page 187
... D8 Memory module slot D8 D4 Memory module slot D4 (white release lever) D6 Memory module slot D6 D2 Memory module slot D2 (white release lever) 15 B1 Memory module slot B1 (white release lever) B5 Memory module slot B5 B3 Memory module slot B3 (white release lever) B7 Memory module slot B7 16 B2 Memory module slot B2 (white release lever) B6 Memory module slot B6 B4 Memory module slot B4...
... D8 Memory module slot D8 D4 Memory module slot D4 (white release lever) D6 Memory module slot D6 D2 Memory module slot D2 (white release lever) 15 B1 Memory module slot B1 (white release lever) B5 Memory module slot B5 B3 Memory module slot B3 (white release lever) B7 Memory module slot B7 16 B2 Memory module slot B2 (white release lever) B6 Memory module slot B6 B4 Memory module slot B4...

Hardware Owner's Manual
Page 188
... PDB_CON 28 FAN3 29 FAN4 Description Memory module slot D7 Memory module slot D3 (white release lever) Memory module slot D5 Memory module slot D1 (white release lever) Memory module slot C2 (white release lever) Memory module slot C6 Memory module slot C4 (white release lever) Memory module slot C8 Memory module slot A7 Memory module slot A3 (white release lever) Memory module slot A5 Memory module slot A1 (white release lever) Backplane power...
... PDB_CON 28 FAN3 29 FAN4 Description Memory module slot D7 Memory module slot D3 (white release lever) Memory module slot D5 Memory module slot D1 (white release lever) Memory module slot C2 (white release lever) Memory module slot C6 Memory module slot C4 (white release lever) Memory module slot C8 Memory module slot A7 Memory module slot A3 (white release lever) Memory module slot A5 Memory module slot A1 (white release lever) Backplane power...

Hardware Owner's Manual
Page 198
...installing, 116 removing, 118 SAS controller, 126 expansion slots, 114 F FlexMem Bridge, 141 front bezel installing, 83 removing, 83 front-chassis assembly, 98 front-panel features, 12 G guidelines connecting external devices, 20 expansion card installation, 114 memory installation, 100 H hard drive drive carrier, 90 installing... installing expansion card, 116 FlexMem Bridge, 141 front bezel, 83 hard drive blank, 87 hard drive carrier, 89 iDRAC card, 123 memory modules, 105 optical drive, 91 power supply blank, 96 processor, 138 SAS backplane board, 148 SAS controller, 128 system board assembly,...
...installing, 116 removing, 118 SAS controller, 126 expansion slots, 114 F FlexMem Bridge, 141 front bezel installing, 83 removing, 83 front-chassis assembly, 98 front-panel features, 12 G guidelines connecting external devices, 20 expansion card installation, 114 memory installation, 100 H hard drive drive carrier, 90 installing... installing expansion card, 116 FlexMem Bridge, 141 front bezel, 83 hard drive blank, 87 hard drive carrier, 89 iDRAC card, 123 memory modules, 105 optical drive, 91 power supply blank, 96 processor, 138 SAS backplane board, 148 SAS controller, 128 system board assembly,...

Hardware Owner's Manual
Page 200
..., 118 FlexMem Bridge, 143 front bezel, 83 hard drive blank, 86 hard drive from a drive carrier, 90 hard drives, 87 memory modules, 107 power supply, 94 power supply blank, 96 processor, 134 SAS backplane board, 146 SAS controller, 126 system board, 155 Removing ... troubleshooting, 171-172 securing your system, 70, 76 service-only procedure system board, 155 setup password, 77 slots See expansion slots. startup accessing system features, 11 support contacting Dell, 195 system board installing, 158 removing, 155 system cooling troubleshooting, 167 system features accessing, 11 system messages...
..., 118 FlexMem Bridge, 143 front bezel, 83 hard drive blank, 86 hard drive from a drive carrier, 90 hard drives, 87 memory modules, 107 power supply, 94 power supply blank, 96 processor, 134 SAS backplane board, 146 SAS controller, 126 system board, 155 Removing ... troubleshooting, 171-172 securing your system, 70, 76 service-only procedure system board, 155 setup password, 77 slots See expansion slots. startup accessing system features, 11 support contacting Dell, 195 system board installing, 158 removing, 155 system cooling troubleshooting, 167 system features accessing, 11 system messages...


