EMC PowerEdge Servers Troubleshooting Guide
Page 22
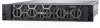
...replacement working hard drive is available, see if the working system. 2. Update to the drive. Tape Drive [s] S/N [d], incorrect status = [d] [d] Check installation of the Drive [d] - Repeat the PSA diagnostics. 4. If failure continues, contact Dell Technical Support. 22 Running diagnostics PSA/ePSA error codes (continued) Error number (PSA and ePSA) Error message Description Steps cable and reseat the power cable to the latest BIOS version. 4. Repeat the PSA diagnostics. 4. Update to the latest BIOS version. 3. BIST --(s) The hard drive is detected...
...replacement working hard drive is available, see if the working system. 2. Update to the drive. Tape Drive [s] S/N [d], incorrect status = [d] [d] Check installation of the Drive [d] - Repeat the PSA diagnostics. 4. If failure continues, contact Dell Technical Support. 22 Running diagnostics PSA/ePSA error codes (continued) Error number (PSA and ePSA) Error message Description Steps cable and reseat the power cable to the latest BIOS version. 4. Repeat the PSA diagnostics. 4. Update to the latest BIOS version. 3. BIST --(s) The hard drive is detected...
EMC PowerEdge Servers Troubleshooting Guide
Page 40
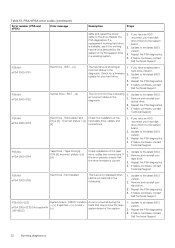
.... Remove and reinsert the USB storage device. 7. If the system is connected to the default settings. If a USB device causes the same problem, turn off the device, replace the USB cable with only one at www.dell.com/poweredgemanuals Steps 1. Ensure that USB Management Port Mode is not hot-pluggable. 40 Troubleshooting hardware issues On the iDRAC Settings Utility screen, ensure that your laptop is not accessible, reset the NVRAM_CLR jumper inside your system and restore the BIOS to...
.... Remove and reinsert the USB storage device. 7. If the system is connected to the default settings. If a USB device causes the same problem, turn off the device, replace the USB cable with only one at www.dell.com/poweredgemanuals Steps 1. Ensure that USB Management Port Mode is not hot-pluggable. 40 Troubleshooting hardware issues On the iDRAC Settings Utility screen, ensure that your laptop is not accessible, reset the NVRAM_CLR jumper inside your system and restore the BIOS to...
EMC PowerEdge Servers Troubleshooting Guide
Page 49
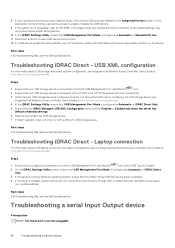
... the disk groups, virtual disks, physical disks, space allocation, and hot spares. Importing or clearing foreign configurations using the VD mgmt menu When a foreign configuration exists, the BIOS screen displays the message Foreign configuration(s) found on the right side of NVMe PCIe SSD in the system, see Replacing and configuring hardware. • For configuring and managing the PCIe SSD adapter, see Configuring And Managing Your NVMe PCIe SSD Adapter. 12 Gbps hard drive does not support in SAS 6ir RAID controllers Issue...
... the disk groups, virtual disks, physical disks, space allocation, and hot spares. Importing or clearing foreign configurations using the VD mgmt menu When a foreign configuration exists, the BIOS screen displays the message Foreign configuration(s) found on the right side of NVMe PCIe SSD in the system, see Replacing and configuring hardware. • For configuring and managing the PCIe SSD adapter, see Configuring And Managing Your NVMe PCIe SSD Adapter. 12 Gbps hard drive does not support in SAS 6ir RAID controllers Issue...
EMC PowerEdge Servers Troubleshooting Guide
Page 57
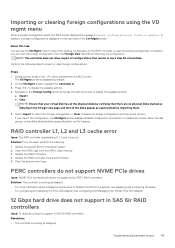
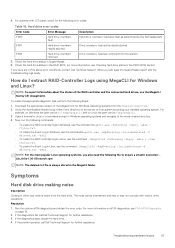
... problem persists, call Dell Technical Support for the following commands: • To create the RAID controller logs in Windows, use the command MegaCli.exe -FwTermLog -Dsply -aALL > ttylog.txt. • To create the Event Log in Windows, use the command MegaCli.exe -AdpEventLog -IncludeDeleted -f deleted.txt -aALL. • To create the RAID controller logs in Linux, use the MegaCLI tool by the SAS subsystem. Check the hard drive status in any of the RAID controller and the connected hard drives, use the command...
... problem persists, call Dell Technical Support for the following commands: • To create the RAID controller logs in Windows, use the command MegaCli.exe -FwTermLog -Dsply -aALL > ttylog.txt. • To create the Event Log in Windows, use the command MegaCli.exe -AdpEventLog -IncludeDeleted -f deleted.txt -aALL. • To create the RAID controller logs in Linux, use the MegaCLI tool by the SAS subsystem. Check the hard drive status in any of the RAID controller and the connected hard drives, use the command...

EMC PowerEdge Servers Troubleshooting Guide
Page 58
... driver installation section. Press at both the ends. 3. If the virtual disk is redundant and transitioned to perform a manual rebuild of data. You can recover the virtual disk after the configuration is not resolved, enter System Setup and ensure that a power cable is not covered by a certified service technician. Steps 1. You can also use the BIOS Configuration Utility or Dell OpenManage storage management application to degraded state before going Offline, a rebuild operation starts...
... driver installation section. Press at both the ends. 3. If the virtual disk is redundant and transitioned to perform a manual rebuild of data. You can recover the virtual disk after the configuration is not resolved, enter System Setup and ensure that a power cable is not covered by a certified service technician. Steps 1. You can also use the BIOS Configuration Utility or Dell OpenManage storage management application to degraded state before going Offline, a rebuild operation starts...
EMC PowerEdge Servers Troubleshooting Guide
Page 74
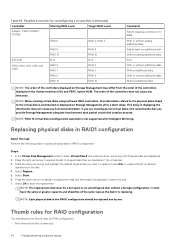
.... 74 Troubleshooting hardware issues Possible scenarios for RAID configuration The following steps to expand the list of physical disks that you want to start the replacement. The order of 4 disks. Select OK to replace. With or without adding additional disks Add at least one . Select Replace. 5. NOTE: RAID 10 virtual disk reconfiguration operation is replacing. Press to select the disk. 7. Thumb rules for reconfiguring a virtual disk (continued) Controller Starting RAID Level Target RAID Level Adapter, PERC...
.... 74 Troubleshooting hardware issues Possible scenarios for RAID configuration The following steps to expand the list of physical disks that you want to start the replacement. The order of 4 disks. Select OK to replace. With or without adding additional disks Add at least one . Select Replace. 5. NOTE: RAID 10 virtual disk reconfiguration operation is replacing. Press to select the disk. 7. Thumb rules for reconfiguring a virtual disk (continued) Controller Starting RAID Level Target RAID Level Adapter, PERC...
EMC PowerEdge Servers Troubleshooting Guide
Page 103
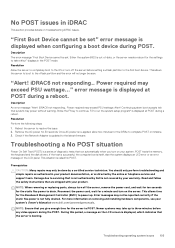
... turn on removing and installing hardware components, see your system. Description An error message "Alert! Read and follow the safety instructions that system may take effect" displays in your product documentation, or as authorized in the POST mode. Newer systems may power without warning. error message is called No POST. Power required may exceed PSU wattage..." Troubleshooting operating system issues 103 "Alert! This situation is displayed at www.dell.com/poweredgemanuals. Reboot the server...
... turn on removing and installing hardware components, see your system. Description An error message "Alert! Read and follow the safety instructions that system may take effect" displays in your product documentation, or as authorized in the POST mode. Newer systems may power without warning. error message is called No POST. Power required may exceed PSU wattage..." Troubleshooting operating system issues 103 "Alert! This situation is displayed at www.dell.com/poweredgemanuals. Reboot the server...
EMC PowerEdge Servers Troubleshooting Guide
Page 104
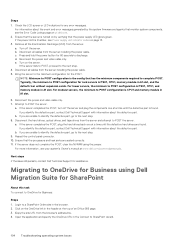
... To connect to POST configuration is PSU1, CPU1, memory module in A1 slot, and the default riser without expansion cards. Migrating to discharge. Press and hold the power button for assistance. Reconnect the power and video cable only. Reconnect the power and video cable only. 7. Next steps If the issue still persists, contact Dell Technical Support for 60 seconds to OneDrive for rack servers is PSU1, CPU1, and memory module in the browser. 2. Open the...
... To connect to POST configuration is PSU1, CPU1, memory module in A1 slot, and the default riser without expansion cards. Migrating to discharge. Press and hold the power button for assistance. Reconnect the power and video cable only. Reconnect the power and video cable only. 7. Next steps If the issue still persists, contact Dell Technical Support for 60 seconds to OneDrive for rack servers is PSU1, CPU1, and memory module in the browser. 2. Open the...
EMC PowerEdge Servers Troubleshooting Guide
Page 105
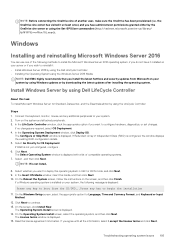
... to boot from Microsoft on the screen, and then click Finish. The Operating System Install screen is displayed. The Configure or Skip RAID window is displayed. 14. If RAID is not listed, 8. Select , and then click Next. If a Windows operating system is displayed: Press any key to reinstall it installed on your system by using Windows updates or by downloading the latest updates after installing the operating system. Click Next to configure hardware, diagnostics, or set changes...
... to boot from Microsoft on the screen, and then click Finish. The Operating System Install screen is displayed. The Configure or Skip RAID window is displayed. 14. If RAID is not listed, 8. Select , and then click Next. If a Windows operating system is displayed: Press any key to reinstall it installed on your system by using Windows updates or by downloading the latest updates after installing the operating system. Click Next to configure hardware, diagnostics, or set changes...
EMC Boot Optimized Server Storage-S1 Users Guide
Page 9
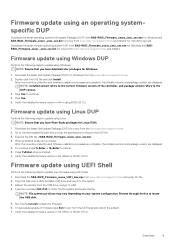
... for Windows and SAS-RAID_Firmware_xxxxx _xxxx_xxx.bin for Linux from www.dell.com/support/home and unzip the file. 2. Verify the installed firmware version in HII or using UEFI Shell: 1. Download the SAS-RAID_Firmware_xxxxx_UEFI_Axx.zip from www.dell.com/support/home and install it for monolithic servers. Copy the files onto a UEFI bootable USB drive and map it . On successful update of the controller, and package version refers to update your system configuration. Click...
... for Windows and SAS-RAID_Firmware_xxxxx _xxxx_xxx.bin for Linux from www.dell.com/support/home and unzip the file. 2. Verify the installed firmware version in HII or using UEFI Shell: 1. Download the SAS-RAID_Firmware_xxxxx_UEFI_Axx.zip from www.dell.com/support/home and install it for monolithic servers. Copy the files onto a UEFI bootable USB drive and map it . On successful update of the controller, and package version refers to update your system configuration. Click...
EMC PowerEdge RAID Controller S140 Users Guide
Page 5
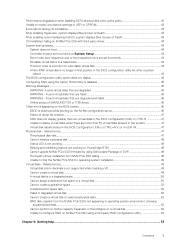
... virtual disks in the BIOS Configuration Utility or CTRL R 47 Unable to delete virtual disks when there are failed ...45 WARNING - related errors...47 The physical disk fails...47 Cannot initialize a physical disk ...48 Status LED is not working...48 Blinking and unblinking feature not working on PowerEdge R740 48 Cannot update NVMe PCIe SSD firmware by using Dell Update Package or DUP 48 Third-party driver installation for NVMe PCIe SSD failing 48 Unable to configure RAID on selected physical disks...
... virtual disks in the BIOS Configuration Utility or CTRL R 47 Unable to delete virtual disks when there are failed ...45 WARNING - related errors...47 The physical disk fails...47 Cannot initialize a physical disk ...48 Status LED is not working...48 Blinking and unblinking feature not working on PowerEdge R740 48 Cannot update NVMe PCIe SSD firmware by using Dell Update Package or DUP 48 Third-party driver installation for NVMe PCIe SSD failing 48 Unable to configure RAID on selected physical disks...
EMC PowerEdge RAID Controller S140 Users Guide
Page 38
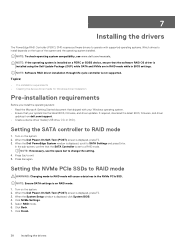
... PCIe SSDs to RAID mode WARNING: Changing mode to RAID mode will cause a data loss in BIOS settings. When the Dell Power-On Self-Test (POST) screen is not supported. Select RAID mode. 6. In the sub-screen, confirm that shipped with supported operating systems. Which drives to install depends on the type of the system and the operating system installed. When the System Setup window is displayed, press F2. 3. When the Dell PowerEdge System window is set to a RAID mode. 7 Installing the drivers The PowerEdge RAID Controller (PERC) S140 requires software drivers...
... PCIe SSDs to RAID mode WARNING: Changing mode to RAID mode will cause a data loss in BIOS settings. When the Dell Power-On Self-Test (POST) screen is not supported. Select RAID mode. 6. In the sub-screen, confirm that shipped with supported operating systems. Which drives to install depends on the type of the system and the operating system installed. When the System Setup window is displayed, press F2. 3. When the Dell PowerEdge System window is set to a RAID mode. 7 Installing the drivers The PowerEdge RAID Controller (PERC) S140 requires software drivers...

EMC Systems Management Overview Guide Version 20.0
Page 10
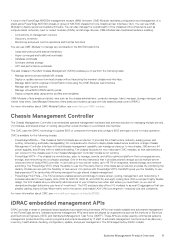
... web/RESTful API interface that can also access a limited version of PowerEdge servers. iDRAC performs firmware update, backup and restore, lifecycle log, and hardware inventory export. For more information, see the iDRAC documents at their infrastructure, change server configurations, and manage configuration drift against a known baseline. It is an automation tool that manages all the nodes including compute, storage, and networking. Chassis and server managers Integrated Dell Remote Access Controller The integrated Dell Remote Access Controller 9 (iDRAC9) delivers advanced...
... web/RESTful API interface that can also access a limited version of PowerEdge servers. iDRAC performs firmware update, backup and restore, lifecycle log, and hardware inventory export. For more information, see the iDRAC documents at their infrastructure, change server configurations, and manage configuration drift against a known baseline. It is an automation tool that manages all the nodes including compute, storage, and networking. Chassis and server managers Integrated Dell Remote Access Controller The integrated Dell Remote Access Controller 9 (iDRAC9) delivers advanced...
EMC Systems Management Overview Guide Version 20.0
Page 11
... chassis. • Deploy or update servers from one Graphical User Interface (GUI). For more information about CMC, see www.dell.com/OME-modular. You can simplify cabling, improve East/West traffic within the server, and enable LAN/ SAN convergence-reducing cost and complexity. The CMC uses the iDRAC technology to update BIOS or component firmware and configure BIOS settings in SmartFabric mode using the OME-Modular web interface. • Manage alert log...
... chassis. • Deploy or update servers from one Graphical User Interface (GUI). For more information about CMC, see www.dell.com/OME-modular. You can simplify cabling, improve East/West traffic within the server, and enable LAN/ SAN convergence-reducing cost and complexity. The CMC uses the iDRAC technology to update BIOS or component firmware and configure BIOS settings in SmartFabric mode using the OME-Modular web interface. • Manage alert log...
iDRAC9 with Lifecycle Controller Version 3.30.30.30 RACADM CLI Guide
Page 107
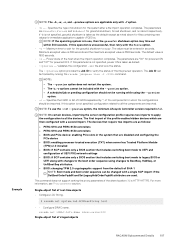
... be running the racadm jobqueue view -I command. Specifies the FQDD or list of SHA-1 NOTE: Boot mode and boot order sequence can be imported. This command does not support setting the proxy parameters if the share location (-l) is 3600 seconds. Specifies the type of UEFI PXE network settings • BIOS: if SCP contains only a BIOS section that includes switching boot mode to legacy BIOS or UEFI along with changes to the boot order sequence using the...
... be running the racadm jobqueue view -I command. Specifies the FQDD or list of SHA-1 NOTE: Boot mode and boot order sequence can be imported. This command does not support setting the proxy parameters if the share location (-l) is 3600 seconds. Specifies the type of UEFI PXE network settings • BIOS: if SCP contains only a BIOS section that includes switching boot mode to legacy BIOS or UEFI along with changes to the boot order sequence using the...
Lifecycle Controller Version Remote Services Quick Start Guide
Page 4
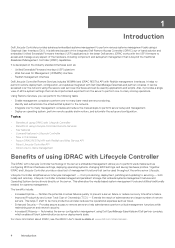
... management tasks using Dell OpenManage Essentials and Dell partner consoles, which enables efficient administration as server deployments scale. Provides secure access to remote servers to servicing - It helps to perform remote deployment, configuration, and updates integrated with Redfish and Web Service API • About Lifecycle Controller API • About one-to-many cloning operations. Extends the reach of administrators to perform useful tasks such as configuring BIOS and hardware settings, deploying operating systems, changing RAID settings...
... management tasks using Dell OpenManage Essentials and Dell partner consoles, which enables efficient administration as server deployments scale. Provides secure access to remote servers to servicing - It helps to perform remote deployment, configuration, and updates integrated with Redfish and Web Service API • About Lifecycle Controller API • About one-to-many cloning operations. Extends the reach of administrators to perform useful tasks such as configuring BIOS and hardware settings, deploying operating systems, changing RAID settings...

EMC DCPMM Users Guide
Page 21
... support site. • UEFI0338 : The firmware of NVDIMM installed in slot is less than or equal to update firmware for the NVDIMM identified in Server System Event Log(SEL) and Life-Cycle Log(LCL). Topics: • Events during runtime • Events during boot time Events during runtime or POST, system will log the events in the message. Recommended Action : Remove and reinstall the Non-Volatile Dual In-line memory module (NVDIMM) device...
... support site. • UEFI0338 : The firmware of NVDIMM installed in slot is less than or equal to update firmware for the NVDIMM identified in Server System Event Log(SEL) and Life-Cycle Log(LCL). Topics: • Events during runtime • Events during boot time Events during runtime or POST, system will log the events in the message. Recommended Action : Remove and reinstall the Non-Volatile Dual In-line memory module (NVDIMM) device...

EMC Installation and Service Manual
Page 54
... the BIOS boot mode, the option ROM of the following steps: Steps 1. On the System Setup Main Menu screen, click System BIOS > Boot Settings > UEFI/BIOS Boot Settings > UEFI/BIOS Boot Sequence. 2. UEFI Boot Sequence Boot Options Enable/Disable Enables you to select the enabled or disabled boot devices. Enables you to change the boot order if you want to boot from that mode. Choosing system boot mode System Setup enables you press F2, wait for installing your operating system: • BIOS boot mode is the standard BIOS-level boot interface. • UEFI boot mode (the default...
... the BIOS boot mode, the option ROM of the following steps: Steps 1. On the System Setup Main Menu screen, click System BIOS > Boot Settings > UEFI/BIOS Boot Settings > UEFI/BIOS Boot Sequence. 2. UEFI Boot Sequence Boot Options Enable/Disable Enables you to select the enabled or disabled boot devices. Enables you to change the boot order if you want to boot from that mode. Choosing system boot mode System Setup enables you press F2, wait for installing your operating system: • BIOS boot mode is the standard BIOS-level boot interface. • UEFI boot mode (the default...

EMC Installation and Service Manual
Page 66
... set up a physical recovery disk on , or restart your operating system begins to load before you to select a backup disk from the following devices: • None • IDSDM • Internal SD card • SATA Ports in AHCI mode • BOSS PCIe Cards (Internal M.2 Drives) • Internal USB NOTE: RAID configurations and NVMe cards not are included as follows: About this task Option Redundant OS Location Redundant OS State Redundant OS Boot Description Enables...
... set up a physical recovery disk on , or restart your operating system begins to load before you to select a backup disk from the following devices: • None • IDSDM • Internal SD card • SATA Ports in AHCI mode • BOSS PCIe Cards (Internal M.2 Drives) • Internal USB NOTE: RAID configurations and NVMe cards not are included as follows: About this task Option Redundant OS Location Redundant OS State Redundant OS Boot Description Enables...

EMC Installation and Service Manual
Page 202
... the backup flash device, enter the Service Tag manually. Steps 1. If the Service Tag is entered, it cannot be updated or changed. 5. Re-enable the Trusted Platform Module (TPM). For more information, see Integrated Dell Remote Access Controller User's Guide, at www.dell.com/poweredgemanuals. About this process to enter System Setup. 3. Enter the service tag. Click OK. Turn on the system. 2. Press F2 to manually enter the Service Tag, using Easy...
... the backup flash device, enter the Service Tag manually. Steps 1. If the Service Tag is entered, it cannot be updated or changed. 5. Re-enable the Trusted Platform Module (TPM). For more information, see Integrated Dell Remote Access Controller User's Guide, at www.dell.com/poweredgemanuals. About this process to enter System Setup. 3. Enter the service tag. Click OK. Turn on the system. 2. Press F2 to manually enter the Service Tag, using Easy...


