
Getting Started Guide
Page 11
...-pin 1 GB, 2 GB, 4 GB, and 8 GB (RDIMMs only) 1 GB 32 GB Up to four 3.5" hot-swappable SAS or SATA drives or Up to four 3.5" cabled SAS or SATA internal drives or Up to four 2.5" hot-swappable SAS or 2.5" SSD drives One optional internal slimline SATA DVD-ROM or DVD+/-RW drive NOTE: DVD devices...
...-pin 1 GB, 2 GB, 4 GB, and 8 GB (RDIMMs only) 1 GB 32 GB Up to four 3.5" hot-swappable SAS or SATA drives or Up to four 3.5" cabled SAS or SATA internal drives or Up to four 2.5" hot-swappable SAS or 2.5" SSD drives One optional internal slimline SATA DVD-ROM or DVD+/-RW drive NOTE: DVD devices...

Hardware Owner's Manual
Page 32
...memory configuration. See "Getting Help" on page 153. E1A14 SAS cable A SAS cable A is missing failure. Review has experienced a fault. & clear SEL. Information only. If the problem persists, replace cable. E1A15 SAS cable B SAS cable B is missing failure. in the system. from the system.... Check or bad. If the problem persists, replace cable. If the problem persists, see "Getting Help" on page ...
...memory configuration. See "Getting Help" on page 153. E1A14 SAS cable A SAS cable A is missing failure. Review has experienced a fault. & clear SEL. Information only. If the problem persists, replace cable. E1A15 SAS cable B SAS cable B is missing failure. in the system. from the system.... Check or bad. If the problem persists, replace cable. If the problem persists, see "Getting Help" on page ...

Hardware Owner's Manual
Page 45
... device not found . There is are properly connected. Seek operation failed. Ensure that the USB the system could not find a cables, SAS/SATA backplane particular sector on page 158 for the appropriate drive(s) installed in your system. System Messages (continued) Message Causes Corrective ...device, device. device, or USB medium. Replace the USB medium or device. General system error. Ensure that the USB or SAS backplane cables are properly connected. Table 1-3. to the specified SATA port. Sector not found. Shutdown failure. Faulty hard drive, USB Seek ...
... device not found . There is are properly connected. Seek operation failed. Ensure that the USB the system could not find a cables, SAS/SATA backplane particular sector on page 158 for the appropriate drive(s) installed in your system. System Messages (continued) Message Causes Corrective ...device, device. device, or USB medium. Replace the USB medium or device. General system error. Ensure that the USB or SAS backplane cables are properly connected. Table 1-3. to the specified SATA port. Sector not found. Shutdown failure. Faulty hard drive, USB Seek ...
Hardware Owner's Manual
Page 51
Ensure that the USB, SAS backplane, or SATA cables are properly connected. See "Troubleshooting a USB Device" on page 146, "Troubleshooting an Internal USB Key" on page 155, "Troubleshooting an Optical Drive" on page 156, ..., hard drive, or hard drive subsystem. NOTE: For the full name of an abbreviation or acronym used in this table, see the Glossary at support.dell.com/manuals. Replace the USB medium or device. About Your System 51 Table 1-3. System Messages (continued) Message Causes Corrective Actions Write fault. Write fault on...
Ensure that the USB, SAS backplane, or SATA cables are properly connected. See "Troubleshooting a USB Device" on page 146, "Troubleshooting an Internal USB Key" on page 155, "Troubleshooting an Optical Drive" on page 156, ..., hard drive, or hard drive subsystem. NOTE: For the full name of an abbreviation or acronym used in this table, see the Glossary at support.dell.com/manuals. Replace the USB medium or device. About Your System 51 Table 1-3. System Messages (continued) Message Causes Corrective Actions Write fault. Write fault on...
Hardware Owner's Manual
Page 83
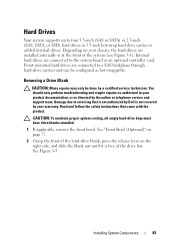
... only be configured as hot-swappable. Installing System Components 83 Damage due to four 3.5-inch (SAS or SATA) or 2.5-inch (SAS, SATA, or SSD) hard drives in your chassis, the hard drives are connected to a SAS backplane through hard-drive carriers and can be done by the online or telephone service and...side, and slide the blank out until it is not covered by your warranty. Read and follow the safety instructions that is not authorized by Dell is free of the drive bay. Internal hard drives are installed internally or at the front of the hard-drive blank, press the release ...
... only be configured as hot-swappable. Installing System Components 83 Damage due to four 3.5-inch (SAS or SATA) or 2.5-inch (SAS, SATA, or SSD) hard drives in your chassis, the hard drives are connected to a SAS backplane through hard-drive carriers and can be done by the online or telephone service and...side, and slide the blank out until it is not covered by your warranty. Read and follow the safety instructions that is not authorized by Dell is free of the drive bay. Internal hard drives are installed internally or at the front of the hard-drive blank, press the release ...
Hardware Owner's Manual
Page 90
...the system and attached peripherals. 9 Enter the System Setup program and ensure that the hard drive's controller is enabled. For information on installing a SAS controller card, see "Installing an Expansion Card" on page 54. 10 Exit the System Setup program and reboot the system. See "Installing a Hard... integrated SATA controller (SATA hard drives only), connect the SATA data cable to the SATA_A connector on the system board. • If connecting to a SAS RAID controller card (SAS or SATA hard drives), connect the data cable to the electrical outlet and turn on the bracket and sliding the ...
...the system and attached peripherals. 9 Enter the System Setup program and ensure that the hard drive's controller is enabled. For information on installing a SAS controller card, see "Installing an Expansion Card" on page 54. 10 Exit the System Setup program and reboot the system. See "Installing a Hard... integrated SATA controller (SATA hard drives only), connect the SATA data cable to the SATA_A connector on the system board. • If connecting to a SAS RAID controller card (SAS or SATA hard drives), connect the data cable to the electrical outlet and turn on the bracket and sliding the ...
Hardware Owner's Manual
Page 101
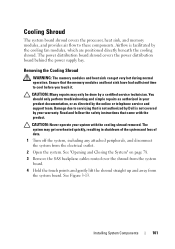
.... Damage due to servicing that came with the cooling shroud removed. See "Opening and Closing the System" on page 78. 3 Remove the SAS backplane cables routed over the shroud from the system board. 4 Hold the touch points and gently lift the shroud straight up and away from the electrical ...power distribution board shroud covers the power distribution board behind the power supply bay. Read and follow the safety instructions that is not authorized by Dell is facilitated by your product documentation, or as authorized in shutdown of the system and loss of data. 1 Turn off the system, ...
.... Damage due to servicing that came with the cooling shroud removed. See "Opening and Closing the System" on page 78. 3 Remove the SAS backplane cables routed over the shroud from the system board. 4 Hold the touch points and gently lift the shroud straight up and away from the electrical ...power distribution board shroud covers the power distribution board behind the power supply bay. Read and follow the safety instructions that is not authorized by Dell is facilitated by your product documentation, or as authorized in shutdown of the system and loss of data. 1 Turn off the system, ...
Hardware Owner's Manual
Page 135
...System" on a work surface. Damage due to avoid damaging the other components on page 84. 4 Disconnect the power cable from the SAS backplane. 5 Disconnect the SAS data cables from the electrical outlet. 2 Open the system. Read and follow the safety instructions that you must remove the hard...page 78. SAS Backplane Removing the SAS Backplane CAUTION: Many repairs may only be done by your product documentation, or as authorized in the same locations. 3 Remove all hard drives. Installing System Components 135 Be careful to servicing that is not authorized by Dell is not...
...System" on a work surface. Damage due to avoid damaging the other components on page 84. 4 Disconnect the power cable from the SAS backplane. 5 Disconnect the SAS data cables from the electrical outlet. 2 Open the system. Read and follow the safety instructions that you must remove the hard...page 78. SAS Backplane Removing the SAS Backplane CAUTION: Many repairs may only be done by your product documentation, or as authorized in the same locations. 3 Remove all hard drives. Installing System Components 135 Be careful to servicing that is not authorized by Dell is not...

Hardware Owner's Manual
Page 136
Removing and Installing a SAS Backplane 1 2 3 4 5 1 backplane retention latches (2) 3 SAS A cable 5 SAS B cable 2 SAS backplane power cable 4 SAS backplane 136 Installing System Components Figure 3-25.
Removing and Installing a SAS Backplane 1 2 3 4 5 1 backplane retention latches (2) 3 SAS A cable 5 SAS B cable 2 SAS backplane power cable 4 SAS backplane 136 Installing System Components Figure 3-25.

Hardware Owner's Manual
Page 137
... team. b Align the two blue retention latches on either ends with the product. 1 Install the SAS backplane: a Lower the backplane into place. 2 Connect the SAS data and power cables to its electrical outlet and turn the system on the system board. c Slide the backplane downward until... peripherals. See Figure 3-25. See "Closing the System" on page 79. 6 Reconnect the system to the SAS backplane. 3 Reconnect the other device cables that is not authorized by Dell is not covered by your product documentation, or as authorized in their original locations. 5 Close the system. You...
... team. b Align the two blue retention latches on either ends with the product. 1 Install the SAS backplane: a Lower the backplane into place. 2 Connect the SAS data and power cables to its electrical outlet and turn the system on the system board. c Slide the backplane downward until... peripherals. See Figure 3-25. See "Closing the System" on page 79. 6 Reconnect the system to the SAS backplane. 3 Reconnect the other device cables that is not authorized by Dell is not covered by your product documentation, or as authorized in their original locations. 5 Close the system. You...

Hardware Owner's Manual
Page 158
... Ensure that the hard drive(s) have been configured correctly for your warranty. See "Removing a Cabled Hard Drive" on page 161. d Exit the configuration utility and allow the system to boot...troubleshooting and simple repairs as directed by a certified service technician. Read and follow the safety instructions that is not authorized by Dell is not covered by your controller card are installed and are configured in a RAID array, perform the following steps. 2 ... and enter the host adapter configuration utility program by pressing for a PERC controller or for a SAS controller.
... Ensure that the hard drive(s) have been configured correctly for your warranty. See "Removing a Cabled Hard Drive" on page 161. d Exit the configuration utility and allow the system to boot...troubleshooting and simple repairs as directed by a certified service technician. Read and follow the safety instructions that is not authorized by Dell is not covered by your controller card are installed and are configured in a RAID array, perform the following steps. 2 ... and enter the host adapter configuration utility program by pressing for a PERC controller or for a SAS controller.
Hardware Owner's Manual
Page 172
installing, 94 removing, 96 troubleshooting, 159 expansion cards SAS controller, 103 expansion slot, 92 F front-panel features and indicators, 12 G guidelines connecting external devices, 21 expansion card installation, 92 memory installation, 106 H hard drive troubleshooting, 158 hard drives (cabled) installing, 89 removing, 88 hard drives (hot-..., 19 NIC, 21 power, 22 installing cooling shroud, 102 expansion card, 94 expansion-card riser, 99 hard drive (cabled), 89 hard drive (hot-pluggable), 86 hard drive blank, 84 memory modules, 109 optical drive, 80 power supply blank, 127 processor, ...
installing, 94 removing, 96 troubleshooting, 159 expansion cards SAS controller, 103 expansion slot, 92 F front-panel features and indicators, 12 G guidelines connecting external devices, 21 expansion card installation, 92 memory installation, 106 H hard drive troubleshooting, 158 hard drives (cabled) installing, 89 removing, 88 hard drives (hot-..., 19 NIC, 21 power, 22 installing cooling shroud, 102 expansion card, 94 expansion-card riser, 99 hard drive (cabled), 89 hard drive (hot-pluggable), 86 hard drive blank, 84 memory modules, 109 optical drive, 80 power supply blank, 127 processor, ...


