
Rack-to-Tower Conversion Guide
Page 5
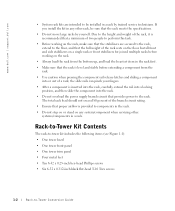
the slide rails can pinch your fingers. • After a component is level and stable before extending a component from the bottom up, and load the heaviest item in any system/component when servicing other rack, be installed in a rack. www.dell.com | support.dell.com • System rack kits are ...Do not step on or stand on the rack. • Always load the rack from the rack. • Use caution when pressing the component rail release latches and sliding a component into the rack. • Do not overload the power supply branch circuit that the rack meets the specifications. &#...
the slide rails can pinch your fingers. • After a component is level and stable before extending a component from the bottom up, and load the heaviest item in any system/component when servicing other rack, be installed in a rack. www.dell.com | support.dell.com • System rack kits are ...Do not step on or stand on the rack. • Always load the rack from the rack. • Use caution when pressing the component rail release latches and sliding a component into the rack. • Do not overload the power supply branch circuit that the rack meets the specifications. &#...
Rack-to-Tower Conversion Guide
Page 9
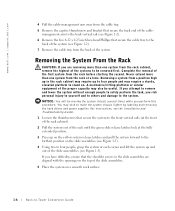
...secure the cable tray to the back of the system (see Figure 1-2). 7 Remove the cable tray from the back of the system. www.dell.com | support.dell.com 4 Pull the cable-management arm away from the cable tray. 5 Remove the captive thumbscrew and bracket that secure the back end of the... cablemanagement arm to the back vertical rail (see Figure 1-2). 6 Remove the five 6-32 x 0.25-inch hex-head Phillips that secure the system to the front vertical rails ...
...secure the cable tray to the back of the system (see Figure 1-2). 7 Remove the cable tray from the back of the system. www.dell.com | support.dell.com 4 Pull the cable-management arm away from the cable tray. 5 Remove the captive thumbscrew and bracket that secure the back end of the... cablemanagement arm to the back vertical rail (see Figure 1-2). 6 Remove the five 6-32 x 0.25-inch hex-head Phillips that secure the system to the front vertical rails ...
Rack-to-Tower Conversion Guide
Page 17
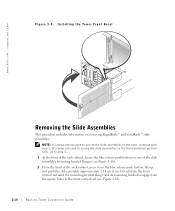
...; and VersaRails™ slide assemblies. If screws are not used to secure the slide assemblies to the front and back vertical rails, go to -Tower Conversion Guide www.dell.com | support.dell.com Figure 1-9. Installing the Tower Front Bezel Removing the Slide Assemblies This procedure includes information on the blue release push button...
...; and VersaRails™ slide assemblies. If screws are not used to secure the slide assemblies to the front and back vertical rails, go to -Tower Conversion Guide www.dell.com | support.dell.com Figure 1-9. Installing the Tower Front Bezel Removing the Slide Assemblies This procedure includes information on the blue release push button...
Rack-to-Tower Conversion Guide
Page 19
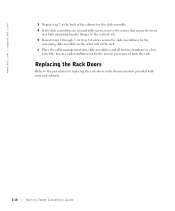
Label the box as a rack installation kit for replacing the rack doors in a box. www.dell.com | support.dell.com 3 Repeat step 2 at the back of the cabinet for this slide assembly. 4 If the slide assemblies are secured with screws, remove the screws that ...secure the front and back mounting-bracket flanges to the vertical rails. 5 Repeat steps 1 through 3 (or step 4 if screws secure the slide assemblies) for the...
Label the box as a rack installation kit for replacing the rack doors in a box. www.dell.com | support.dell.com 3 Repeat step 2 at the back of the cabinet for this slide assembly. 4 If the slide assemblies are secured with screws, remove the screws that ...secure the front and back mounting-bracket flanges to the vertical rails. 5 Repeat steps 1 through 3 (or step 4 if screws secure the slide assemblies) for the...


