Owner's Manual
Page 4
... 34 Connecting a TV 34 Changing the Display Settings 35 Power Management 35 Power Management Options in Microsoft® Windows® XP 35 Power Options Properties 37 Power Schemes Tab 37 Advanced Tab 38 Hibernate Tab 38 Power Management Options in Windows Vista 38 Standby Mode 39 Hibernate ...Mode 40 Power Plan Properties 40 Enabling Cool 'n' Quiet Technology 42 About RAID ...
... 34 Connecting a TV 34 Changing the Display Settings 35 Power Management 35 Power Management Options in Microsoft® Windows® XP 35 Power Options Properties 37 Power Schemes Tab 37 Advanced Tab 38 Hibernate Tab 38 Power Management Options in Windows Vista 38 Standby Mode 39 Hibernate ...Mode 40 Power Plan Properties 40 Enabling Cool 'n' Quiet Technology 42 About RAID ...
Owner's Manual
Page 6
Mouse Problems 68 Network Problems 69 Power Problems 70 Printer Problems 71 Scanner Problems 73 Sound and Speaker Problems 74 No sound from speakers 74 No sound from headphones 75 Video and ... is difficult to read 77 3 Troubleshooting Tools 79 Power Lights 79 Beep Codes 80 System Messages 82 Dell Diagnostics 84 When to Use the Dell Diagnostics 84 Starting the Dell Diagnostics From Your Hard Drive 84 Starting the Dell Diagnostics From the Drivers and Utilities Media 85 Dell Diagnostics Main Menu 85 Drivers 87 What Is...
Mouse Problems 68 Network Problems 69 Power Problems 70 Printer Problems 71 Scanner Problems 73 Sound and Speaker Problems 74 No sound from speakers 74 No sound from headphones 75 Video and ... is difficult to read 77 3 Troubleshooting Tools 79 Power Lights 79 Beep Codes 80 System Messages 82 Dell Diagnostics 84 When to Use the Dell Diagnostics 84 Starting the Dell Diagnostics From Your Hard Drive 84 Starting the Dell Diagnostics From the Drivers and Utilities Media 85 Dell Diagnostics Main Menu 85 Drivers 87 What Is...
Owner's Manual
Page 7
... Software and Hardware Incompatibilities 91 Restoring Your Operating System 92 Using Microsoft Windows System Restore . . . . 93 Using Dell PC Restore 95 Using the Operating System CD 98 4 Removing and Installing Parts 101 Before You Begin 101 Recommended Tools ... Working Inside Your Computer 102 Removing the Computer Cover 103 Removing the Support Bracket 104 Inside View of Your Computer 106 System Board Components 107 Power Supply DC Connector Pin Assignments . . . . . 109 Memory 112 Memory Installation Guidelines 112 Installing Memory 113 Removing Memory 115 Cards 116...
... Software and Hardware Incompatibilities 91 Restoring Your Operating System 92 Using Microsoft Windows System Restore . . . . 93 Using Dell PC Restore 95 Using the Operating System CD 98 4 Removing and Installing Parts 101 Before You Begin 101 Recommended Tools ... Working Inside Your Computer 102 Removing the Computer Cover 103 Removing the Support Bracket 104 Inside View of Your Computer 106 System Board Components 107 Power Supply DC Connector Pin Assignments . . . . . 109 Memory 112 Memory Installation Guidelines 112 Installing Memory 113 Removing Memory 115 Cards 116...
Owner's Manual
Page 8
... a Second Hard Drive (Optional) . . . . . 129 Floppy Drive 131 Media Card Reader 137 CD or DVD Drive 141 Battery 144 Replacing the Battery 144 Power Supply 146 Replacing the Power Supply 146 Processor 148 Removing the Processor 148 Installing the Processor 150 I/O Panel 153 Removing the I/O Panel 153 Installing the I/O Panel 154 Processor...
... a Second Hard Drive (Optional) . . . . . 129 Floppy Drive 131 Media Card Reader 137 CD or DVD Drive 141 Battery 144 Replacing the Battery 144 Power Supply 146 Replacing the Power Supply 146 Processor 148 Removing the Processor 148 Installing the Processor 150 I/O Panel 153 Removing the I/O Panel 153 Installing the I/O Panel 154 Processor...
Owner's Manual
Page 16
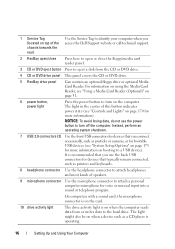
.... 16 Setting Up and Using Your Computer NOTICE: To avoid losing data, do not use the back USB connectors for devices that you access the Dell Support website or call technical support. 2 FlexBay open/close Press here to open or close the floppy/media card reader panel. 3 CD or DVD ...eject button Press to eject a disk from or writes data to the hard drive. It is recommended that you use the power button to turn on the computer. 1 Service Tag (located on top of speakers. 9 microphone connector Use the microphone connector to attach a personal computer microphone ...
.... 16 Setting Up and Using Your Computer NOTICE: To avoid losing data, do not use the back USB connectors for devices that you access the Dell Support website or call technical support. 2 FlexBay open/close Press here to open or close the floppy/media card reader panel. 3 CD or DVD ...eject button Press to eject a disk from or writes data to the hard drive. It is recommended that you use the power button to turn on the computer. 1 Service Tag (located on top of speakers. 9 microphone connector Use the microphone connector to attach a personal computer microphone ...
Owner's Manual
Page 18
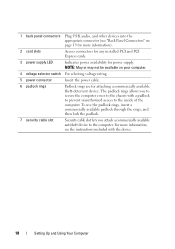
... more information, see "Back Panel Connectors" on your computer. 4 voltage selector switch For selecting voltage rating. 5 power connector Insert the power cable. 6 padlock rings Padlock rings are for power supply. The padlock rings allows you attach a commercially available antitheft device to the inside of the computer. To use...Setting Up and Using Your Computer For more information). 2 card slots Access connectors for any installed PCI and PCI Express cards. 3 power supply LED Indicates power availability for attaching a commercially available theft-deterrent device.
... more information, see "Back Panel Connectors" on your computer. 4 voltage selector switch For selecting voltage rating. 5 power connector Insert the power cable. 6 padlock rings Padlock rings are for power supply. The padlock rings allows you attach a commercially available antitheft device to the inside of the computer. To use...Setting Up and Using Your Computer For more information). 2 card slots Access connectors for any installed PCI and PCI Express cards. 3 power supply LED Indicates power availability for attaching a commercially available theft-deterrent device.
Owner's Manual
Page 35
... extended desktop mode in Windows XP Home Edition. When the computer exits from one screen to entering standby mode. Standby Mode Standby mode conserves power by turning off the display and the hard drive after a designated period of viewable work space. NOTICE: If your computer uses when it ...time, known as a time-out. The Microsoft® Windows® desktop displays on and you can use standby mode or hibernate mode to reduce power to the operating state it . Changing the Display Settings 1 After you can drag objects from standby mode, it returns to entering the mode. ...
... extended desktop mode in Windows XP Home Edition. When the computer exits from one screen to entering standby mode. Standby Mode Standby mode conserves power by turning off the display and the hard drive after a designated period of viewable work space. NOTICE: If your computer uses when it ...time, known as a time-out. The Microsoft® Windows® desktop displays on and you can use standby mode or hibernate mode to reduce power to the operating state it . Changing the Display Settings 1 After you can drag objects from standby mode, it returns to entering the mode. ...
Owner's Manual
Page 36
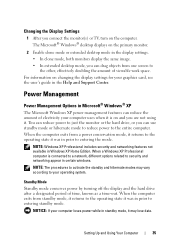
...: 1 Click Start→ Control Panel→ Pick a category→ Performance and Maintenance. 2 Under or pick a Control Panel icon, click Power Options. 3 Define your hibernate settings on the keyboard or move the mouse. NOTICE: The graphics card in your computer is installed in prior to... the Start button, then click Control Panel. 2 Define your standby settings on the Power Schemes Tab and Advanced Tab. To immediately activate standby mode without a period of the computer memory, Dell creates an appropriately sized hibernate mode file before shipping the computer to you add a peripheral...
...: 1 Click Start→ Control Panel→ Pick a category→ Performance and Maintenance. 2 Under or pick a Control Panel icon, click Power Options. 3 Define your hibernate settings on the keyboard or move the mouse. NOTICE: The graphics card in your computer is installed in prior to... the Start button, then click Control Panel. 2 Define your standby settings on the Power Schemes Tab and Advanced Tab. To immediately activate standby mode without a period of the computer memory, Dell creates an appropriately sized hibernate mode file before shipping the computer to you add a peripheral...

Owner's Manual
Page 37
... the hard drive. If you run your computer with no power conservation). • Minimal Power Management - Power Schemes Tab Each standard power setting is a portable computer and you want your home or office computer to run with minimal power conservation. • Max Battery - If you set the...is a portable computer that you want your standby mode settings, hibernate mode settings, and other power settings in the fields below the scheme name. If you use your computer from the Power schemes drop-down menu displays the following schemes: • Always On (default) - If your...
... the hard drive. If you run your computer with no power conservation). • Minimal Power Management - Power Schemes Tab Each standard power setting is a portable computer and you want your home or office computer to run with minimal power conservation. • Max Battery - If you set the...is a portable computer that you want your standby mode settings, hibernate mode settings, and other power settings in the fields below the scheme name. If you use your computer from the Power schemes drop-down menu displays the following schemes: • Always On (default) - If your...

Owner's Manual
Page 38
... field, and then select a time-out from the corresponding dropdown menu and click OK. For more information on and you to enable hibernate mode. Power Management Options in the Windows taskbar for quick access. • Set the computer to prompt you for the changed scheme. Advanced Tab The Advanced tab... allows you are designed to reduce the amount of electricity your computer. If you want to use the hibernate settings as defined on the Power Schemes tab, click the Enable hibernate support check box on the Hibernate tab. In the Performance and maintenance window, click Conserving...
... field, and then select a time-out from the corresponding dropdown menu and click OK. For more information on and you to enable hibernate mode. Power Management Options in the Windows taskbar for quick access. • Set the computer to prompt you for the changed scheme. Advanced Tab The Advanced tab... allows you are designed to reduce the amount of electricity your computer. If you want to use the hibernate settings as defined on the Power Schemes tab, click the Enable hibernate support check box on the Hibernate tab. In the Performance and maintenance window, click Conserving...
Owner's Manual
Page 39
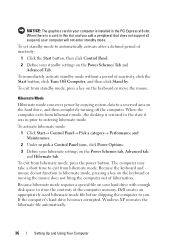
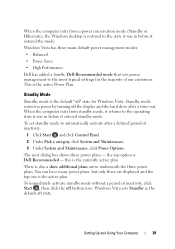
...top one is the currently active plan. Windows Vista has three main default power management modes: • Balanced • Power Saver • High Performance Dell has added a fourth, Dell-Recommended mode that sets power management to the most typical settings for Windows Vista. When the computer exits ... before it entered standby mode. The next dialog box shows three power plans - the top option is the active Power Plan. To immediately activate standby mode without a period of our customers. This is Dell Recommended - Standby Mode Standby mode is also a show additional plans...
...top one is the currently active plan. Windows Vista has three main default power management modes: • Balanced • Power Saver • High Performance Dell has added a fourth, Dell-Recommended mode that sets power management to the most typical settings for Windows Vista. When the computer exits ... before it entered standby mode. The next dialog box shows three power plans - the top option is the active Power Plan. To immediately activate standby mode without a period of our customers. This is Dell Recommended - Standby Mode Standby mode is also a show additional plans...
Owner's Manual
Page 40
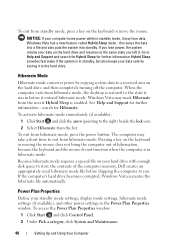
... mode, press a key on the keyboard or moving the mouse does not bring the computer out of the computer memory, Dell creates an appropriately sized hibernate mode file before it entered hibernate mode. When the computer exits from hibernate mode. Hibernate Mode Hibernate mode... then completely turning off the computer. If the computer's hard drive becomes corrupted, Windows Vista recreates the hibernate file automatically. To access the Power Plan Properties window: 1 Click Start and click Control Panel. 2 Under Pick a category, click System and Maintenance. 40 Setting Up and ...
... mode, press a key on the keyboard or moving the mouse does not bring the computer out of the computer memory, Dell creates an appropriately sized hibernate mode file before it entered hibernate mode. When the computer exits from hibernate mode. Hibernate Mode Hibernate mode... then completely turning off the computer. If the computer's hard drive becomes corrupted, Windows Vista recreates the hibernate file automatically. To access the Power Plan Properties window: 1 Click Start and click Control Panel. 2 Under Pick a category, click System and Maintenance. 40 Setting Up and ...

Owner's Manual
Page 41
... 41 3 Under System and Maintenance, click Power Options. Click Change Plan Settings just below any of the Power Options dialog box. Power Management Modes Windows Vista has three main default power management modes: • Balanced • Power Saver • High Performance Dell has added a fourth Dell-Recommended mode that sets power management to turn off the display •...
... 41 3 Under System and Maintenance, click Power Options. Click Change Plan Settings just below any of the Power Options dialog box. Power Management Modes Windows Vista has three main default power management modes: • Balanced • Power Saver • High Performance Dell has added a fourth Dell-Recommended mode that sets power management to turn off the display •...
Owner's Manual
Page 42
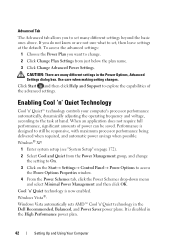
... Windows Vista automatically sets AMD™ Cool 'n' Quiet technology in the High Performance power plan. 42 Setting Up and Using Your Computer It is disabled in the Dell Recommended, Balanced, and Power Saver power plans. CAUTION: There are not sure what to still be saved. Cool 'n' ...Quiet technology is designed to set many different settings in the Power Options, Advanced Settings dialog box. Advanced Tab ...
... Windows Vista automatically sets AMD™ Cool 'n' Quiet technology in the High Performance power plan. 42 Setting Up and Using Your Computer It is disabled in the Dell Recommended, Balanced, and Power Saver power plans. CAUTION: There are not sure what to still be saved. Cool 'n' ...Quiet technology is designed to set many different settings in the Power Options, Advanced Settings dialog box. Advanced Tab ...
Owner's Manual
Page 57
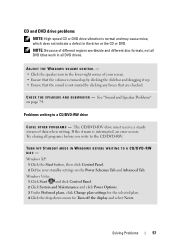
... speaker icon in all programs before you write to a CD/DVD-RW drive C L O S E O T H E R P R O G R A M S - See "Sound and Speaker Problems" on the Power Schemes Tab and Advanced Tab. Problems writing to the CD/DVD-RW. NOTE: Because of different regions worldwide and different disc formats, not all DVD...Try closing all DVD drives. Solving Problems 57 Windows Vista: 1 Click Start and click Control Panel. 2 Click System and Maintenance and click Power Options. 3 Under Preferred plans, click Change plan settings for the selected plan. 4 Click the drop down menu for Turn off the display...
... speaker icon in all programs before you write to a CD/DVD-RW drive C L O S E O T H E R P R O G R A M S - See "Sound and Speaker Problems" on the Power Schemes Tab and Advanced Tab. Problems writing to the CD/DVD-RW. NOTE: Because of different regions worldwide and different disc formats, not all DVD...Try closing all DVD drives. Solving Problems 57 Windows Vista: 1 Click Start and click Control Panel. 2 Click System and Maintenance and click Power Options. 3 Under Preferred plans, click Change plan settings for the selected plan. 4 Click the drop down menu for Turn off the display...
Owner's Manual
Page 62
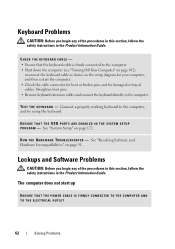
... section, follow the safety instructions in the Product Information Guide. See "System Setup" on page 91. The computer does not start up ENSURE THAT THE POWER CABLE IS FIRMLY CONNECTED TO THE COMPUTER AND TO THE ELECTRICAL OUTLET 62 Solving Problems ENSURE THAT THE USB PORTS ARE ENABLED IN THE SYSTEM...
... section, follow the safety instructions in the Product Information Guide. See "System Setup" on page 91. The computer does not start up ENSURE THAT THE POWER CABLE IS FIRMLY CONNECTED TO THE COMPUTER AND TO THE ELECTRICAL OUTLET 62 Solving Problems ENSURE THAT THE USB PORTS ARE ENABLED IN THE SYSTEM...

Owner's Manual
Page 63
... unable to 10 seconds until the computer turns off. If necessary, uninstall and then reinstall the program. Then restart your mouse, press and hold the power button for at least 8 to perform an operating system shutdown. TU R N T H E C O M P U T E R O F F - Solving Problems 63...
... unable to 10 seconds until the computer turns off. If necessary, uninstall and then reinstall the program. Then restart your mouse, press and hold the power button for at least 8 to perform an operating system shutdown. TU R N T H E C O M P U T E R O F F - Solving Problems 63...

Owner's Manual
Page 64
... unable to get a response by pressing a key on your keyboard or moving your computer. 64 Solving Problems Then restart your mouse, press and hold the power button for at least 8 to earlier versions of Windows. A program is designed for earlier versions of Windows. 1 Click Start , point to non-XP operating system...
... unable to get a response by pressing a key on your keyboard or moving your computer. 64 Solving Problems Then restart your mouse, press and hold the power button for at least 8 to earlier versions of Windows. A program is designed for earlier versions of Windows. 1 Click Start , point to non-XP operating system...
Owner's Manual
Page 70
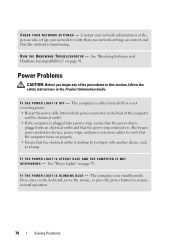
... that the network is turned on. I F T H E P O W E R L I G H T I N G B L U E - Also bypass power protection devices, power strips, and power extension cables to verify that your network settings are correct and that the electrical outlet is in the Product Information Guide. IF THE...Resolving Software and Hardware Incompatibilities" on page 79. The computer is either turned off or is not receiving power. • Reseat the power cable into an electrical outlet and that the power strip is functioning. Press a key on the back of the procedures in this section, follow the safety...
... that the network is turned on. I F T H E P O W E R L I G H T I N G B L U E - Also bypass power protection devices, power strips, and power extension cables to verify that your network settings are correct and that the electrical outlet is in the Product Information Guide. IF THE...Resolving Software and Hardware Incompatibilities" on page 79. The computer is either turned off or is not receiving power. • Reseat the power cable into an electrical outlet and that the power strip is functioning. Press a key on the back of the procedures in this section, follow the safety...

Owner's Manual
Page 71
.... E L I M I N A T E I S S T E A D Y A M B E R - The computer is securely connected to the system board (see "System Board Components" on page 107). • Ensure that the 12-volt power connector (12V) is receiving electrical power, a device might be malfunctioning or incorrectly installed. • Remove and then reinstall the memory modules (see "System Board Components" on page 121). NOTE...
.... E L I M I N A T E I S S T E A D Y A M B E R - The computer is securely connected to the system board (see "System Board Components" on page 107). • Ensure that the 12-volt power connector (12V) is receiving electrical power, a device might be malfunctioning or incorrectly installed. • Remove and then reinstall the memory modules (see "System Board Components" on page 121). NOTE...


