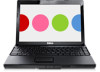
Service Manual
Page 3
... your operating system, press and hold the power button until the computer turns off . Do not touch the components or contacts on its pins. CAUTION: Only a certified service technician should perform repairs on the cable itself. CAUTION: To avoid damaging the computer, perform the following tools: l Small flat-blade screwdriver l Phillips screwdriver l Plastic scribe l BIOS executable update program at www.dell...
... your operating system, press and hold the power button until the computer turns off . Do not touch the components or contacts on its pins. CAUTION: Only a certified service technician should perform repairs on the cable itself. CAUTION: To avoid damaging the computer, perform the following tools: l Small flat-blade screwdriver l Phillips screwdriver l Plastic scribe l BIOS executable update program at www.dell...

Service Manual
Page 6
... Dell computer. Do not use only the battery designed for other Dell computers. Remove the battery (see Replacing the Battery). Replace the battery (see Removing the Battery). 3. Removing the Memory-Module Cover 1. Follow the instructions in Before You Begin. 2. Gently snap the memory-module cover into place. 4. Back to Contents Page Memory-Module Cover Dell™ Inspiron™ N3010 Service Manual Removing the Memory-Module Cover Replacing the Memory-Module Cover WARNING: Before working inside your computer, read the safety information that shipped with the slots...
... Dell computer. Do not use only the battery designed for other Dell computers. Remove the battery (see Replacing the Battery). Replace the battery (see Removing the Battery). 3. Removing the Memory-Module Cover 1. Follow the instructions in Before You Begin. 2. Gently snap the memory-module cover into place. 4. Back to Contents Page Memory-Module Cover Dell™ Inspiron™ N3010 Service Manual Removing the Memory-Module Cover Replacing the Memory-Module Cover WARNING: Before working inside your computer, read the safety information that shipped with the slots...

Service Manual
Page 7
... Internal Module With Bluetooth® Wireless Technology Dell™ Inspiron™ N3010 Service Manual Removing the Bluetooth Module Replacing the Bluetooth Module WARNING: Before working inside your computer, read the safety information that shipped with the system board connector, and press down to connect the Bluetooth module to the system board, remove the main battery (see Removing the Memory Module(s)). 5. Damage due to servicing that secures the Bluetooth module to disconnect it is not covered by your computer. Lift the Bluetooth module...
... Internal Module With Bluetooth® Wireless Technology Dell™ Inspiron™ N3010 Service Manual Removing the Bluetooth Module Replacing the Bluetooth Module WARNING: Before working inside your computer, read the safety information that shipped with the system board connector, and press down to connect the Bluetooth module to the system board, remove the main battery (see Removing the Memory Module(s)). 5. Damage due to servicing that secures the Bluetooth module to disconnect it is not covered by your computer. Lift the Bluetooth module...

Service Manual
Page 9
.... Follow the instructions in Before You Begin. 2. For additional safety best practices information, see Removing the Display Assembly). 8. Removing the Camera Module 1. Remove the display panel (see Removing the Battery) before working inside the computer. Remove the two screws that secure the camera module to Contents Page Camera Module Dell™ Inspiron™ N3010 Service Manual Removing the Camera Module Replacing the Camera Module WARNING: Before working inside your computer, read the safety information that secures the display cable to the...
.... Follow the instructions in Before You Begin. 2. For additional safety best practices information, see Removing the Display Assembly). 8. Removing the Camera Module 1. Remove the display panel (see Removing the Battery) before working inside the computer. Remove the two screws that secure the camera module to Contents Page Camera Module Dell™ Inspiron™ N3010 Service Manual Removing the Camera Module Replacing the Camera Module WARNING: Before working inside your computer, read the safety information that secures the display cable to the...

Service Manual
Page 14
... authorized by Dell™ is hot, do not touch the metal housing of the heat sink. Remove the keyboard (see Removing the Memory-Module Cover). 4. CAUTION: Only a certified service technician should perform repairs on your computer. Follow the instructions in Before You Begin. 2. Remove the palm rest assembly (see Removing the Battery) before working inside the computer. Remove the screw that secures the processor heat sink fan to...
... authorized by Dell™ is hot, do not touch the metal housing of the heat sink. Remove the keyboard (see Removing the Memory-Module Cover). 4. CAUTION: Only a certified service technician should perform repairs on your computer. Follow the instructions in Before You Begin. 2. Remove the palm rest assembly (see Removing the Battery) before working inside the computer. Remove the screw that secures the processor heat sink fan to...
Service Manual
Page 25
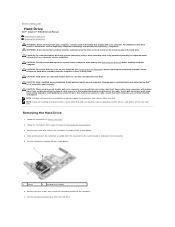
... the hard drive. Back to Contents Page Hard Drive Dell™ Inspiron™ N3010 Service Manual Removing the Hard Drive Replacing the Hard Drive WARNING: Before working inside your warranty. CAUTION: Only a certified service technician should perform repairs on your computer. As you disconnect a cable, pull on its connector or on its pull-tab, not on the new hard drive. NOTE: If you need to install an operating system, drivers, and utilities on the cable itself. Follow the instructions...
... the hard drive. Back to Contents Page Hard Drive Dell™ Inspiron™ N3010 Service Manual Removing the Hard Drive Replacing the Hard Drive WARNING: Before working inside your warranty. CAUTION: Only a certified service technician should perform repairs on your computer. As you disconnect a cable, pull on its connector or on its pull-tab, not on the new hard drive. NOTE: If you need to install an operating system, drivers, and utilities on the cable itself. Follow the instructions...
Service Manual
Page 26
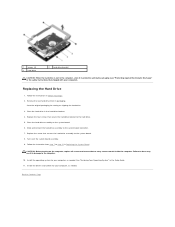
... needed . Slide and connect the hard-drive assembly to the hard drive. 5. Place the hard drive in the safety instructions that secure the hard-drive bracket to the system board connector. 7. Follow the instructions in the Setup Guide. 11. Replace the four screws that shipped with your computer, as needed . Install the drivers and utilities for your computer). Remove the new hard drive from step 7 to Contents Page Place the hard-drive assembly on the computer, replace...
... needed . Slide and connect the hard-drive assembly to the hard drive. 5. Place the hard drive in the safety instructions that secure the hard-drive bracket to the system board connector. 7. Follow the instructions in the Setup Guide. 11. Replace the four screws that shipped with your computer, as needed . Install the drivers and utilities for your computer). Remove the new hard drive from step 7 to Contents Page Place the hard-drive assembly on the computer, replace...

Service Manual
Page 27
... Page Middle Cover Dell™ Inspiron™ N3010 Service Manual Removing the Middle Cover Replacing the Middle Cover WARNING: Before working inside your computer, read the safety information that shipped with your warranty. CAUTION: To help prevent damage to the system board, remove the main battery (see Removing the Keyboard). 6. Remove the battery (see the Regulatory Compliance Homepage at www.dell.com/regulatory_compliance. Replacing the Middle Cover 1. Follow the instructions in Before...
... Page Middle Cover Dell™ Inspiron™ N3010 Service Manual Removing the Middle Cover Replacing the Middle Cover WARNING: Before working inside your computer, read the safety information that shipped with your warranty. CAUTION: To help prevent damage to the system board, remove the main battery (see Removing the Keyboard). 6. Remove the battery (see the Regulatory Compliance Homepage at www.dell.com/regulatory_compliance. Replacing the Middle Cover 1. Follow the instructions in Before...
Service Manual
Page 32
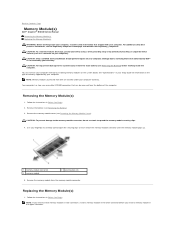
... the instructions in your Setup Guide for information on the type of memory supported by your computer. Damage due to the system board, remove the main battery (see Removing the Memory-Module Cover). See "Specifications" in Before You Begin. Use your computer warranty. Removing the Memory Module(s) 1. Remove the battery (see the Regulatory Compliance Homepage at www.dell.com/regulatory_compliance. Remove the memory module from Dell are covered under your fingertips to install memory modules in two connectors, install a memory module in...
... the instructions in your Setup Guide for information on the type of memory supported by your computer. Damage due to the system board, remove the main battery (see Removing the Memory-Module Cover). See "Specifications" in Before You Begin. Use your computer warranty. Removing the Memory Module(s) 1. Remove the battery (see the Regulatory Compliance Homepage at www.dell.com/regulatory_compliance. Remove the memory module from Dell are covered under your fingertips to install memory modules in two connectors, install a memory module in...

Service Manual
Page 33
... damage to Contents Page NOTE: If the memory module is not installed properly, the computer may result in the computer: Click Start ® Control Panel® System and Security® System. As the computer boots, it . Replace the battery (see Replacing the Memory-Module Cover). 5. Align the notch in the memory module with the tab in the memory- CAUTION: Before turning on the computer. Back to the...
... damage to Contents Page NOTE: If the memory module is not installed properly, the computer may result in the computer: Click Start ® Control Panel® System and Security® System. As the computer boots, it . Replace the battery (see Replacing the Memory-Module Cover). 5. Align the notch in the memory module with the tab in the memory- CAUTION: Before turning on the computer. Back to the...
Service Manual
Page 35
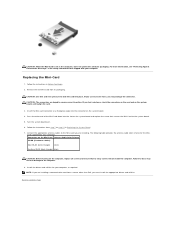
... the computer. 8. If you use excessive force, you are keyed to slide the card into the slot on the system board. 4. NOTE: If you must install the appropriate drivers and utilities. Replacing the Mini-Card 1. Follow the instructions in protective antistatic packaging. CAUTION: Use firm and even pressure to ensure correct insertion. Connect the appropriate antenna cables to the Mini-Card you may result in...
... the computer. 8. If you use excessive force, you are keyed to slide the card into the slot on the system board. 4. NOTE: If you must install the appropriate drivers and utilities. Replacing the Mini-Card 1. Follow the instructions in protective antistatic packaging. CAUTION: Use firm and even pressure to ensure correct insertion. Connect the appropriate antenna cables to the Mini-Card you may result in...

Service Manual
Page 36
... Removing the Battery) before working inside the computer. Disconnect the antenna cables from the connectors on the Mini-card. 6. Lift the connector latch and pull the pull-tab to disconnect the touch pad cable and power button board cable from the connectors on the system board. 9. Removing the Palm Rest Assembly 1. Back to Contents Page Palm Rest Assembly Dell™ Inspiron™ N3010 Service Manual Removing the Palm Rest Assembly Replacing...
... Removing the Battery) before working inside the computer. Disconnect the antenna cables from the connectors on the Mini-card. 6. Lift the connector latch and pull the pull-tab to disconnect the touch pad cable and power button board cable from the connectors on the system board. 9. Removing the Palm Rest Assembly 1. Back to Contents Page Palm Rest Assembly Dell™ Inspiron™ N3010 Service Manual Removing the Palm Rest Assembly Replacing...
Service Manual
Page 43
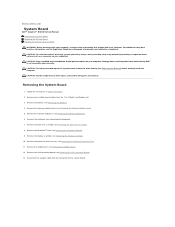
...Removing the Bluetooth Module). 9. Remove the middle cover (see Removing the Memory Module(s)). 6. Back to the system board, remove the main battery (see Removing the Battery) before working inside the computer. Follow the instructions in -1 Media Card Reader slot. 3. Remove the memory module(s) (see Removing the Middle Cover). 12. Remove the VGA connector board (see the Regulatory Compliance Homepage at www.dell.com/regulatory_compliance. For additional safety best practices information, see Removing the VGA Connector Board). 13. Remove the memory-module cover (see Removing...
...Removing the Bluetooth Module). 9. Remove the middle cover (see Removing the Memory Module(s)). 6. Back to the system board, remove the main battery (see Removing the Battery) before working inside the computer. Follow the instructions in -1 Media Card Reader slot. 3. Remove the memory module(s) (see Removing the Middle Cover). 12. Remove the VGA connector board (see the Regulatory Compliance Homepage at www.dell.com/regulatory_compliance. For additional safety best practices information, see Removing the VGA Connector Board). 13. Remove the memory-module cover (see Removing...

Setup Guide
Page 5
... Power Button 8 Set Up the Operating System 9 Create System Recovery Media (Recommended 10 Enable or Disable Wireless (Optional 12 Set Up Wireless Display (Optional 14 Connect the External Optical Drive (Optional 16 Connect to the Internet (Optional 17 Using Your Inspiron Laptop 20 Right View Features 20 Left View Features 22 Front View Features 24 Back View Features 25 Status Lights and Indicators 26 Computer Base and Keyboard Features 28 Touch Pad Gestures 30 Multimedia Control Keys 32 Display Features 34 Removing and Replacing the Battery...
... Power Button 8 Set Up the Operating System 9 Create System Recovery Media (Recommended 10 Enable or Disable Wireless (Optional 12 Set Up Wireless Display (Optional 14 Connect the External Optical Drive (Optional 16 Connect to the Internet (Optional 17 Using Your Inspiron Laptop 20 Right View Features 20 Left View Features 22 Front View Features 24 Back View Features 25 Status Lights and Indicators 26 Computer Base and Keyboard Features 28 Touch Pad Gestures 30 Multimedia Control Keys 32 Display Features 34 Removing and Replacing the Battery...
Setup Guide
Page 6
Contents Memory Problems 44 Lockups and Software Problems 45 Using Support Tools 47 Dell Support Center 47 My Dell Downloads 48 System Messages 49 Hardware Troubleshooter 50 Dell Diagnostics 51 Restoring Your Operating System 55 System Restore 56 Dell DataSafe Local Backup 57 System Recovery Media 60 Dell Factory Image Restore 61 Getting Help 63 Technical Support and Customer Service 64 DellConnect 64 Online Services 65 4 Automated Order-Status Service 66 Product Information 66 Returning Items for Repair Under...
Contents Memory Problems 44 Lockups and Software Problems 45 Using Support Tools 47 Dell Support Center 47 My Dell Downloads 48 System Messages 49 Hardware Troubleshooter 50 Dell Diagnostics 51 Restoring Your Operating System 55 System Restore 56 Dell DataSafe Local Backup 57 System Recovery Media 60 Dell Factory Image Restore 61 Getting Help 63 Technical Support and Customer Service 64 DellConnect 64 Online Services 65 4 Automated Order-Status Service 66 Product Information 66 Returning Items for Repair Under...
Setup Guide
Page 17
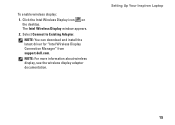
The Intel Wireless Display window appears. 2. NOTE: You can download and install the latest driver for "Intel Wireless Display Connection Manager" from support.dell.com. NOTE: For more information about wireless display, see the wireless display adapter documentation. Click the Intel Wireless Display icon on the desktop. Setting Up Your Inspiron Laptop 15 To enable wireless display: 1. Select Connect to Existing Adapter.
The Intel Wireless Display window appears. 2. NOTE: You can download and install the latest driver for "Intel Wireless Display Connection Manager" from support.dell.com. NOTE: For more information about wireless display, see the wireless display adapter documentation. Click the Intel Wireless Display icon on the desktop. Setting Up Your Inspiron Laptop 15 To enable wireless display: 1. Select Connect to Existing Adapter.
Setup Guide
Page 43
... Service Manual at support.dell.com/manuals for your problem using the following guidelines, see "Using Support Tools" on page 47 or "Contacting Dell" on page 70). Three Possible system board failure - If you installed or replaced the memory module, ensure that the memory module is seated properly. INSPIRON Solving Problems This section provides troubleshooting information for advanced service instructions. Beep Codes Your computer might emit a series of beeps during start-up if there are errors...
... Service Manual at support.dell.com/manuals for your problem using the following guidelines, see "Using Support Tools" on page 47 or "Contacting Dell" on page 70). Three Possible system board failure - If you installed or replaced the memory module, ensure that the memory module is seated properly. INSPIRON Solving Problems This section provides troubleshooting information for advanced service instructions. Beep Codes Your computer might emit a series of beeps during start-up if there are errors...
Setup Guide
Page 46
...: • Power, keyboard, and mouse extension cables. • Too many devices connected to a power strip. • Multiple power strips connected to the same electrical outlet. 44 Memory Problems If you receive an insufficient memory message - • Save and close any open files and exit any open programs you are not using to resume normal operation. • If the display is breathing white - Solving Problems If the power indicator light is not...
...: • Power, keyboard, and mouse extension cables. • Too many devices connected to a power strip. • Multiple power strips connected to the same electrical outlet. 44 Memory Problems If you receive an insufficient memory message - • Save and close any open files and exit any open programs you are not using to resume normal operation. • If the display is breathing white - Solving Problems If the power indicator light is not...
Setup Guide
Page 53
... you want to be working properly. 2. NOTE: If you wait too long and the operating system logo appears, continue to enter the System Setup (BIOS) utility. NOTE: The Drivers and Utilities disc may invoke the Pre-Boot System Assessment (PSA) on (or restart) your computer cannot display a screen image, contact Dell (see the Microsoft® Windows® desktop; NOTE: Dell Diagnostics works only on page 70...
... you want to be working properly. 2. NOTE: If you wait too long and the operating system logo appears, continue to enter the System Setup (BIOS) utility. NOTE: The Drivers and Utilities disc may invoke the Pre-Boot System Assessment (PSA) on (or restart) your computer cannot display a screen image, contact Dell (see the Microsoft® Windows® desktop; NOTE: Dell Diagnostics works only on page 70...
Setup Guide
Page 76
... 4 GB Memory type 1333 MHz SODIMM DDR3 Minimum memory 2 GB Maximum memory 8 GB 74 INSPIRON Specifications This section provides information that you may vary by region. For more information regarding the configuration of your computer, click Start → Help and Support and select the option to view information about your computer. NOTE: Offerings may need when setting up, updating drivers for, and upgrading your computer...
... 4 GB Memory type 1333 MHz SODIMM DDR3 Minimum memory 2 GB Maximum memory 8 GB 74 INSPIRON Specifications This section provides information that you may vary by region. For more information regarding the configuration of your computer, click Start → Help and Support and select the option to view information about your computer. NOTE: Offerings may need when setting up, updating drivers for, and upgrading your computer...


