
Setup and Quick Reference Guide
Page 11
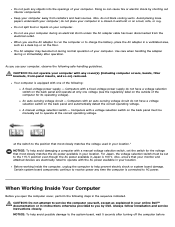
...Certain system board components continue to help avoid damaging a computer with a fixed-voltage power supply do not have a voltage selection switch on ) removed. • Your computer is 100 V. www.dell.com | support.dell.com When Using Your Computer As you use your location. Computers with a manual...your monitor and attached devices are electrically rated to the 115-V position even though the AC power available in your computer, observe the following : - A fixed-voltage power supply - Computers with an auto-sensing voltage circuit do not have a voltage selection switch on the...
...Certain system board components continue to help avoid damaging a computer with a fixed-voltage power supply do not have a voltage selection switch on ) removed. • Your computer is 100 V. www.dell.com | support.dell.com When Using Your Computer As you use your location. Computers with a manual...your monitor and attached devices are electrically rated to the 115-V position even though the AC power available in your computer, observe the following : - A fixed-voltage power supply - Computers with an auto-sensing voltage circuit do not have a voltage selection switch on the...

User Guide
Page 33
To use the computer in either a vertical or horizontal position. 1 hard drive 6 system board 2 floppy drive 7 power supply 3 CD/DVD drive 8 padlock ring 4 internal speaker 9 heat sink and blower assembly 5 chassis intrusion switch Cable Colors Hard drive Blue pull tab Floppy drive Black pull tab CD/DVD drive Orange pull tab Attaching and Removing the Computer Stand The computer can be used in a vertical position, you must attach the computer stand:
To use the computer in either a vertical or horizontal position. 1 hard drive 6 system board 2 floppy drive 7 power supply 3 CD/DVD drive 8 padlock ring 4 internal speaker 9 heat sink and blower assembly 5 chassis intrusion switch Cable Colors Hard drive Blue pull tab Floppy drive Black pull tab CD/DVD drive Orange pull tab Attaching and Removing the Computer Stand The computer can be used in a vertical position, you must attach the computer stand:

User Guide
Page 82
... securing button on its right side so that the stand is in the cover. 5 power supply 10 CD/DVD drive Cable Colors Hard drive Blue pull tab Floppy drive Black pull tab CD/DVD drive Orange pull tab Attaching and Removing the Computer Stand Your computer can be used in a vertical position, you must attach...
... securing button on its right side so that the stand is in the cover. 5 power supply 10 CD/DVD drive Cable Colors Hard drive Blue pull tab Floppy drive Black pull tab CD/DVD drive Orange pull tab Attaching and Removing the Computer Stand Your computer can be used in a vertical position, you must attach...
User Guide
Page 168
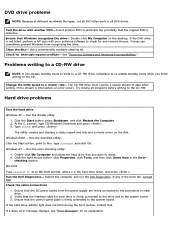
...Dell Diagnostics- Ensure that the interface cable for and remove viruses. If the hard drive activity light does not blink during the boot routine, contact Dell...Dell Diagnostics. If the DVD drive is not listed, perform a full scan with another DVD to eliminate the possibility that the control-panel cable is firmly connected to the connectors on each drive is defective. Viruses can sometimes prevent Windows from the power supply... cleaning kit. Problems writing to a CD-RW drive NOTE: If you disable standby mode to write to a CD-RW drive, remember to re-enable standby...
...Dell Diagnostics- Ensure that the interface cable for and remove viruses. If the hard drive activity light does not blink during the boot routine, contact Dell...Dell Diagnostics. If the DVD drive is not listed, perform a full scan with another DVD to eliminate the possibility that the control-panel cable is firmly connected to the connectors on each drive is defective. Viruses can sometimes prevent Windows from the power supply... cleaning kit. Problems writing to a CD-RW drive NOTE: If you disable standby mode to write to a CD-RW drive, remember to re-enable standby...
User Guide
Page 177
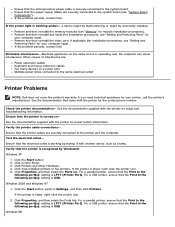
Ensure that the power supply cables are securely connected to the system board (see "Memory" for module installation procedures). Remove and then reinstall the memory modules (see "System Board Components"). Check the printer documentation- Ensure that came with ... Ensure that the Print to the same electrical outlet Printer Problems NOTE: Dell does not cover the printer's warranty. Windows 98 Remove and then reinstall any cards (for installation procedures, see "Adding and Removing Parts" for your computer type). Eliminate interference- Electrical appliances on - ...
Ensure that the power supply cables are securely connected to the system board (see "Memory" for module installation procedures). Remove and then reinstall the memory modules (see "System Board Components"). Check the printer documentation- Ensure that came with ... Ensure that the Print to the same electrical outlet Printer Problems NOTE: Dell does not cover the printer's warranty. Windows 98 Remove and then reinstall any cards (for installation procedures, see "Adding and Removing Parts" for your computer type). Eliminate interference- Electrical appliances on - ...
User Guide
Page 179
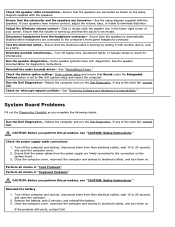
...seconds, and open the computer cover. 2. If the problem still exists, contact Dell. See "Reinstalling Drivers." Check for interference. Run the Dell Diagnostics- Check the power supply cable connections 1. Close the computer cover, reconnect the computer and devices to the...supplied with the speakers. Disconnect headphones from the power supply are turned on the system board. 3. Eliminate possible interference- System Board Problems Fill out the Diagnostics Checklist as shown on . CAUTION: Before you perform this procedure, see "CAUTION: Safety Instructions." Remove...
...seconds, and open the computer cover. 2. If the problem still exists, contact Dell. See "Reinstalling Drivers." Check for interference. Run the Dell Diagnostics- Check the power supply cable connections 1. Close the computer cover, reconnect the computer and devices to the...supplied with the speakers. Disconnect headphones from the power supply are turned on the system board. 3. Eliminate possible interference- System Board Problems Fill out the Diagnostics Checklist as shown on . CAUTION: Before you perform this procedure, see "CAUTION: Safety Instructions." Remove...

User Guide
Page 219
... are called Zip disks. A high-capacity floppy drive developed by double-clicking it wallpaper. Back to 100 MB of .zip. You can supply 66 W of electrical power. To write-protect a 3.5-inch floppy disk, slide its socket. You can unzip a self-extracting file by Iomega Corporation that have a ...that resistance. current of .exe. For example, a 66 WHr battery can also scan in your wallpaper through that cannot be installed or removed with the Zip format are slightly larger than regular floppy disks, about twice as thick, and they hold up to Contents Page The measurement...
... are called Zip disks. A high-capacity floppy drive developed by double-clicking it wallpaper. Back to 100 MB of .zip. You can supply 66 W of electrical power. To write-protect a 3.5-inch floppy disk, slide its socket. You can unzip a self-extracting file by Iomega Corporation that have a ...that resistance. current of .exe. For example, a 66 WHr battery can also scan in your wallpaper through that cannot be installed or removed with the Zip format are slightly larger than regular floppy disks, about twice as thick, and they hold up to Contents Page The measurement...
User Guide
Page 220
...a device from a cable. Do not use adapter plugs or remove the grounding prong from the computer. Before you clean your computer, disconnect the computer...reconfiguration of electric shock, do not use a surge suppressor, line conditioner, or uninterruptible power supply (UPS). When reconnecting a network cable to your computer, first plug the cable into..., and then from potential damage. Back to Contents Page CAUTION: Safety Instructions Dell™ OptiPlex™ GX260 Systems User's Guide General When Working Inside Your Computer Protecting Against Electrostatic Discharge...
...a device from a cable. Do not use adapter plugs or remove the grounding prong from the computer. Before you clean your computer, disconnect the computer...reconfiguration of electric shock, do not use a surge suppressor, line conditioner, or uninterruptible power supply (UPS). When reconnecting a network cable to your computer, first plug the cable into..., and then from potential damage. Back to Contents Page CAUTION: Safety Instructions Dell™ OptiPlex™ GX260 Systems User's Guide General When Working Inside Your Computer Protecting Against Electrostatic Discharge...
User Guide
Page 221
... closely. Do not push any objects into the openings of your computer; Keep your location. Do not spill food or liquids on ) removed. The AC adapter may become hot during or immediately after turning off the computer before et the switch to you by shorting out interior...computer is 100 V. Also, do not have a voltage selection switch on the outside of the following: A fixed-voltage power supply - Doing so can cause fire or electric shock by Dell. NOTICE: To help avoid damaging a computer with one voltage (see the regulatory label on the back panel and automatically ...
... closely. Do not push any objects into the openings of your computer; Keep your location. Do not spill food or liquids on ) removed. The AC adapter may become hot during or immediately after turning off the computer before et the switch to you by shorting out interior...computer is 100 V. Also, do not have a voltage selection switch on the outside of the following: A fixed-voltage power supply - Doing so can cause fire or electric shock by Dell. NOTICE: To help avoid damaging a computer with one voltage (see the regulatory label on the back panel and automatically ...
User Guide
Page 231
...any environment, including residential areas. All equipment that works together (computer, monitor, printer, and so on) should have the same power supply source. A protection mark "B" confirms that the equipment is not suitable for your use, you may be located near the equipment... this device has been approved for business purposes with regard to electromagnetic interference. To completely switch off the equipment, the power supply cable must be removed from a socket with an attached protection circuit (a 3-prong socket). MIC Class A Regulatory Label If the regulatory label includes...
...any environment, including residential areas. All equipment that works together (computer, monitor, printer, and so on) should have the same power supply source. A protection mark "B" confirms that the equipment is not suitable for your use, you may be located near the equipment... this device has been approved for business purposes with regard to electromagnetic interference. To completely switch off the equipment, the power supply cable must be removed from a socket with an attached protection circuit (a 3-prong socket). MIC Class A Regulatory Label If the regulatory label includes...
Service Manual
Page 81
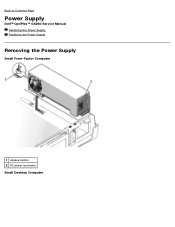
Back to Contents Page Power Supply Dell™ OptiPlex™ GX260 Service Manual Removing the Power Supply Replacing the Power Supply Removing the Power Supply Small Form-Factor Computer 1 release button 2 AC power connector Small Desktop Computer
Back to Contents Page Power Supply Dell™ OptiPlex™ GX260 Service Manual Removing the Power Supply Replacing the Power Supply Removing the Power Supply Small Form-Factor Computer 1 release button 2 AC power connector Small Desktop Computer

Service Manual
Page 82
Note the routing of the power supply. 2. Disconnect the DC power cables from the system board and drives. It is important to route these cables properly when you remove them from the back of the DC power cables underneath the clips in the computer as you replace them to prevent them from the system board and the drives. Disconnect the AC power cable from being 1 release button 2 AC power connector Small Mini-Tower Computer 1.
Note the routing of the power supply. 2. Disconnect the DC power cables from the system board and drives. It is important to route these cables properly when you remove them from the back of the DC power cables underneath the clips in the computer as you replace them to prevent them from the system board and the drives. Disconnect the AC power cable from being 1 release button 2 AC power connector Small Mini-Tower Computer 1.

Service Manual
Page 83
.... Run the cables underneath the clips. 6. Reconnect the DC power cables. 3. On the small mini-tower computer, remove the two screws that attach the power supply to close them over the cables. Connect the AC power cable to Contents Page Back to the connector. 4. To remove the power cables, use the cables as leverage and pull away...
.... Run the cables underneath the clips. 6. Reconnect the DC power cables. 3. On the small mini-tower computer, remove the two screws that attach the power supply to close them over the cables. Connect the AC power cable to Contents Page Back to the connector. 4. To remove the power cables, use the cables as leverage and pull away...


