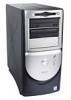
Dell Dimension 8100 Solutions Guide
Page 5
Reinstalling Windows Me 35 Reinstalling Windows 2000 37 3 Adding Parts Removing the Computer Cover 40 Looking Inside Your Computer 42 System Board 43 Rotating the Power Supply 44 Removing and Replacing the Front Panel 45 Adding Cards 46 Installing a Card 47 Removing Cards 49 Removing and Replacing the AGP Card 49 Adding Memory 51 Adding or Replacing Other Drives 52 Replacing the Computer Cover 57 4 Appendix Specifications 60 Standard Settings 64 Viewing Settings 64 System Setup Screens 65 Clearing Forgotten Passwords 65 Replacing the Battery 66 Contents 5
Reinstalling Windows Me 35 Reinstalling Windows 2000 37 3 Adding Parts Removing the Computer Cover 40 Looking Inside Your Computer 42 System Board 43 Rotating the Power Supply 44 Removing and Replacing the Front Panel 45 Adding Cards 46 Installing a Card 47 Removing Cards 49 Removing and Replacing the AGP Card 49 Adding Memory 51 Adding or Replacing Other Drives 52 Replacing the Computer Cover 57 4 Appendix Specifications 60 Standard Settings 64 Viewing Settings 64 System Setup Screens 65 Clearing Forgotten Passwords 65 Replacing the Battery 66 Contents 5
Dell Dimension 8100 Solutions Guide
Page 7
...board, wait 5 seconds after turning off the computer before disconnecting or connecting a non-USB device. • To help prevent electric shock, plug the computer and device power cables into properly grounded power... sources. Do not use a surge suppressor, line conditioner, or uninterruptible power ..., transient increases and decreases in electrical power, use adapter plugs or remove the grounding...your computer, the power voltage is automatically sensed to match the AC power available at your...power available in the Tell Me How help file. If the computer...
...board, wait 5 seconds after turning off the computer before disconnecting or connecting a non-USB device. • To help prevent electric shock, plug the computer and device power cables into properly grounded power... sources. Do not use a surge suppressor, line conditioner, or uninterruptible power ..., transient increases and decreases in electrical power, use adapter plugs or remove the grounding...your computer, the power voltage is automatically sensed to match the AC power available at your...power available in the Tell Me How help file. If the computer...

Dell Dimension 8100 Solutions Guide
Page 8
... 8 Safety Instructions Also, disconnect any telephone or telecommunication lines from the computer. 4 Disconnect the power cable to your computer away from their electrical outlets to ground the system board. Replace the battery only with care. Hold a card by its edges or by shorting out interior... incorrectly installed. While you work, periodically touch an unpainted metal surface on the computer to avoid bending any pins. www.dell.com | support.dell.com • Do not push any objects into the openings of these safety guidelines when appropriate: • When you ...
... 8 Safety Instructions Also, disconnect any telephone or telecommunication lines from the computer. 4 Disconnect the power cable to your computer away from their electrical outlets to ground the system board. Replace the battery only with care. Hold a card by its edges or by shorting out interior... incorrectly installed. While you work, periodically touch an unpainted metal surface on the computer to avoid bending any pins. www.dell.com | support.dell.com • Do not push any objects into the openings of these safety guidelines when appropriate: • When you ...

Dell Dimension 8100 Solutions Guide
Page 40
...board, disconnect the power cable from the electrical outlet and from the back of the computer, and then press the power button before you begin any of the procedures in this section, follow the safety instructions on the back panel. 3 Face the back of computer padlock ring 40 Adding Parts www.dell.com | support.dell... electrical outlet. back of the computer and slide the outer padlock ring to the left to receive a small amount of power when the computer is installed, remove it from the padlock ring on page 7. NOTICE: The system board continues to unlock the cover release mechanism.
...board, disconnect the power cable from the electrical outlet and from the back of the computer, and then press the power button before you begin any of the procedures in this section, follow the safety instructions on the back panel. 3 Face the back of computer padlock ring 40 Adding Parts www.dell.com | support.dell... electrical outlet. back of the computer and slide the outer padlock ring to the left to receive a small amount of power when the computer is installed, remove it from the padlock ring on page 7. NOTICE: The system board continues to unlock the cover release mechanism.

Dell Dimension 8100 Solutions Guide
Page 43
... the illustration, the text in parentheses indicates how items are identified on the system board. telephony connector (TAPI) parallel port connector (SER PAR) microprocessor connector (CPU_POWER) system power connector (POWER) floppy drive connector (DSKT) serial port connector (SER PAR) memory connectors (RIMM 1-4) page 51 fan connector (FAN) microprocessor mouse and keyboard connectors (KYBD_MSE...
... the illustration, the text in parentheses indicates how items are identified on the system board. telephony connector (TAPI) parallel port connector (SER PAR) microprocessor connector (CPU_POWER) system power connector (POWER) floppy drive connector (DSKT) serial port connector (SER PAR) memory connectors (RIMM 1-4) page 51 fan connector (FAN) microprocessor mouse and keyboard connectors (KYBD_MSE...

Dell Dimension 8100 Solutions Guide
Page 44
... the safety instructions on page 7. To access some of the components on the system board, you begin any of the procedures in its extended position. Press and release the power button to rotate the system power supply out of the way: 1 Turn off the computer and devices, disconnect them from... tab. www.dell.com | support.dell.com CAUTION: Before you may need to drain the power from the computer, and then remove the computer cover (see page 40). 2 Make sure that the power cable is disconnected from the power receptacle on the back of the power supply. 3 Free the power supply from their...
... the safety instructions on page 7. To access some of the components on the system board, you begin any of the procedures in its extended position. Press and release the power button to rotate the system power supply out of the way: 1 Turn off the computer and devices, disconnect them from... tab. www.dell.com | support.dell.com CAUTION: Before you may need to drain the power from the computer, and then remove the computer cover (see page 40). 2 Make sure that the power cable is disconnected from the power receptacle on the back of the power supply. 3 Free the power supply from their...

Dell Dimension 8100 Solutions Guide
Page 45
... pressing the front-panel release button, rotate the top of the procedures in this section, follow the safety instructions on the system board, rotate the power supply back to drain the power from the computer. CAUTION: Before you first must remove the computer cover (see page 40). 4 Press and release the... power button to its original position until the release tab snaps into the securing tab. Lift the panel away from the computer. When ...
... pressing the front-panel release button, rotate the top of the procedures in this section, follow the safety instructions on the system board, rotate the power supply back to drain the power from the computer. CAUTION: Before you first must remove the computer cover (see page 40). 4 Press and release the... power button to its original position until the release tab snaps into the securing tab. Lift the panel away from the computer. When ...

Dell Dimension 8100 Solutions Guide
Page 46
www.dell.com | support.dell.com To replace the front panel, fit the two retaining hooks into the recessed slots at 1.5-V. The slot supports AGP 4x or 2x modes operating ...-bit AGP card. The computer has the following slots for the following cards (see page 43): • Up to the system board, verify that the standby power LED on the system board (see the preceding illustration), and then rotate the top of the procedures in this section, follow the safety instructions on the...
www.dell.com | support.dell.com To replace the front panel, fit the two retaining hooks into the recessed slots at 1.5-V. The slot supports AGP 4x or 2x modes operating ...-bit AGP card. The computer has the following slots for the following cards (see page 43): • Up to the system board, verify that the standby power LED on the system board (see the preceding illustration), and then rotate the top of the procedures in this section, follow the safety instructions on the...

Dell Dimension 8100 Solutions Guide
Page 47
...computer when they are connected. Verify that secures the slot filler bracket to unplug your computer. 3 Remove the screw that the standby power LED on the system board. If the card is off the computer and devices, disconnect them from the computer. Insert the card firmly into the card guide... any cards. Adding Parts 47 Installing a Card 1 Turn off . 4 Insert the card's edge connector into the card connector. Press and release the power button to use when installing the card later in this procedure. To guard against electrical shock, be sure to the computer, and remove the bracket...
...computer when they are connected. Verify that secures the slot filler bracket to unplug your computer. 3 Remove the screw that the standby power LED on the system board. If the card is off the computer and devices, disconnect them from the computer. Insert the card firmly into the card guide... any cards. Adding Parts 47 Installing a Card 1 Turn off . 4 Insert the card's edge connector into the card connector. Press and release the power button to use when installing the card later in this procedure. To guard against electrical shock, be sure to the computer, and remove the bracket...

Dell Dimension 8100 Solutions Guide
Page 51
... in this section, follow the safety instructions on the system board. NOTICE: To avoid breaking the memory module, do not press near the middle of identical MB capacity in both sockets 1 and 2 or sockets 3 and 4. Then rotate the power supply upward until it locks in its extended position. 3 ...first two sockets nearest the processor before installing RIMMs in the outer two sockets. 1 Remove the computer cover (see page 40). 2 Rotate the power supply. You can increase your computer. See page 61 for information on the bottom of the module with the crossbars in the connector. CAUTION:...
... in this section, follow the safety instructions on the system board. NOTICE: To avoid breaking the memory module, do not press near the middle of identical MB capacity in both sockets 1 and 2 or sockets 3 and 4. Then rotate the power supply upward until it locks in its extended position. 3 ...first two sockets nearest the processor before installing RIMMs in the outer two sockets. 1 Remove the computer cover (see page 40). 2 Rotate the power supply. You can increase your computer. See page 61 for information on the bottom of the module with the crossbars in the connector. CAUTION:...

Dell Dimension 8100 Solutions Guide
Page 52
Press firmly on the ends until the memory module disengages from the system board (see page 44). 3 Remove the front panel (see page 45). ...and additional CD drives, using the following procedure: 1 Remove the computer cover (see page 40). 2 Rotate the power supply away from the connector. CAUTION: Before you insert the module correctly, the securing clips snap into the cutouts... at each end of the module. www.dell.com | support.dell.com 5 Insert the module straight down into the connector, making sure that it fits into the ...
Press firmly on the ends until the memory module disengages from the system board (see page 44). 3 Remove the front panel (see page 45). ...and additional CD drives, using the following procedure: 1 Remove the computer cover (see page 40). 2 Rotate the power supply away from the connector. CAUTION: Before you insert the module correctly, the securing clips snap into the cutouts... at each end of the module. www.dell.com | support.dell.com 5 Insert the module straight down into the connector, making sure that it fits into the ...

Dell Dimension 8100 Solutions Guide
Page 56
... of the drive. www.dell.com | support.dell.com 9 Connect a DC power cable to provide airflow for the fan and cooling vents. 11 If the computer drive bay was previously empty, remove the corresponding insert from the front panel. power input connector DC power cable interface connector interface cable secondary system board EIDE connector 10 Make...
... of the drive. www.dell.com | support.dell.com 9 Connect a DC power cable to provide airflow for the fan and cooling vents. 11 If the computer drive bay was previously empty, remove the corresponding insert from the front panel. power input connector DC power cable interface connector interface cable secondary system board EIDE connector 10 Make...
Dell Dimension 8100 Solutions Guide
Page 65
...electrical outlet, and turn on the screen. All other settings and values are brighter on the computer. Press for information on the system board (see page 43) and move the jumper plug so that displays your computer. When appears to the right of an option, press... system setup screens that pins 1 and 2 are jumpered. 3 Replace the computer cover (see page 57), plug your computer (including installed hardware, power conservation, and security features). A scrollable box listing options that display the system processor, L2 cache, service tag, and the version number of your ...
...electrical outlet, and turn on the screen. All other settings and values are brighter on the computer. Press for information on the system board (see page 43) and move the jumper plug so that displays your computer. When appears to the right of an option, press... system setup screens that pins 1 and 2 are jumpered. 3 Replace the computer cover (see page 57), plug your computer (including installed hardware, power conservation, and security features). A scrollable box listing options that display the system processor, L2 cache, service tag, and the version number of your ...

Dell Dimension 8100 Solutions Guide
Page 90
... volume, 22 fixing problems, 22 speaker adjusting volume, 22 fixing problems, 22 specifications, 60 SuperDisk LS-120 drives, 52 system board connectors, 43 system setup program, 64 T technical assistance telephone numbers and addresses, 68 warranty repair or credit, 82 troubleshooting, 16 turning off ..., 14 power supply, 44 printer connecting, 12 fixing problems, 23 reinstalling driver, 13 setting up , 19 Windows, 29 modem fixing problems, 24 monitor...
... volume, 22 fixing problems, 22 speaker adjusting volume, 22 fixing problems, 22 specifications, 60 SuperDisk LS-120 drives, 52 system board connectors, 43 system setup program, 64 T technical assistance telephone numbers and addresses, 68 warranty repair or credit, 82 troubleshooting, 16 turning off ..., 14 power supply, 44 printer connecting, 12 fixing problems, 23 reinstalling driver, 13 setting up , 19 Windows, 29 modem fixing problems, 24 monitor...


