
Dell OptiPlex 330 Support Question
Dell OptiPlex 330 Support Question
Find answers below for this question about Dell OptiPlex 330.Need a Dell OptiPlex 330 manual? We have 2 online manuals for this item!
Question posted by rkapadad on March 26th, 2014
Optiplex 330 How To Remove Front I/o Power Board Panel
The person who posted this question about this Dell product did not include a detailed explanation. Please use the "Request More Information" button to the right if more details would help you to answer this question.
Current Answers
Related Dell OptiPlex 330 Manual Pages
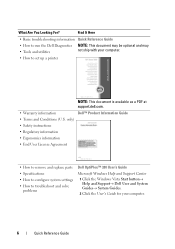
Quick Reference - Page 4

... 37 Mini Tower Computer 38
Front View 38 Back View 40 Back Panel Connectors 41 Removing the Computer Cover 43 Inside View of Your Computer 45 System Board Components 46 Replacing the Computer Cover 47 Solving Problems 47 Dell Diagnostics 48 Power Lights 51 Beep Codes 53 System Messages 54 Diagnostic Lights 56 Clearing...
Quick Reference - Page 6
...information
• Ergonomics information
• End User License Agreement
• How to remove and replace parts • Specifications • How to configure system settings • ...
not ship with your computer.
• How to troubleshoot and solve
problems
Dell OptiPlex™ 330 User's Guide
Microsoft Windows Help and Support Center 1 Click the Windows Vista Start button...
Quick Reference - Page 35

... avoid electrical shock, always unplug your computer from the system board.
2 1
3 4
6
5
1 drives bay
2 power supply
(CD/DVD, floppy, and hard drive)
3 system board
4 card slots
5 heat sink assembly
6 front I/O panel
Quick Reference Guide
35
Inside View of the procedures in this...do not accidentally disconnect cables from the electrical outlet before removing the computer cover.
Quick Reference - Page 52

... or an internal device malfunction.
- Remove and then reinstall any cards.
- Also, bypass power protection devices, power strips, and power extension cables to resume normal operation.If the power light is green and the computer is connected and powered on properly.
- Ensure that all power cables are securely connected to the system board (see "Beep Codes" on page...
User's Guide - Page 8

... Before Working Inside Your Computer 144
12 Mini Tower Computer Parts 147
Removing the Computer Cover 147
Inside View of Your Computer 149
System Board Components 150
Power Supply DC Connector Pin Assignments . . . . . 152
Memory 155 Installation Guidelines 155 Installing Memory 156 Removing Memory 157
Cards 157 PCI and PCI Express Cards 158
Bezel...
User's Guide - Page 9
... the Processor and Heat Sink 199
I/O Panel 203 Removing the I/O Panel 203 Installing the I/O Panel 204
System Board 205 Removing the System Board 205 Installing the System Board 207
Replacing the Computer Cover 207
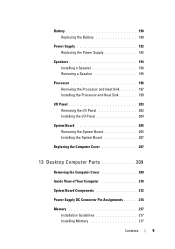
13 Desktop Computer Parts 209
Removing the Computer Cover 209
Inside View of Your Computer 210
System Board Components 212
Power Supply DC Connector Pin Assignments...
User's Guide - Page 10
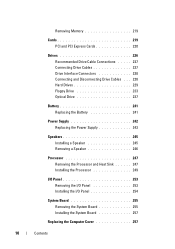
... the Battery 241
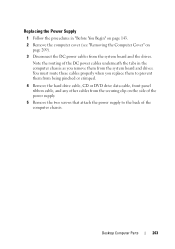
Power Supply 242 Replacing the Power Supply 243
Speakers 245 Installing a Speaker 245 Removing a Speaker 246
Processor 247 Removing the Processor and Heat Sink 247 Installing the Processor 249
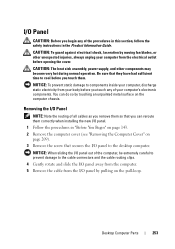
I/O Panel 253 Removing the I/O Panel 253 Installing the I/O Panel 254
System Board 255 Removing the System Board 255 Installing the System Board 257
Replacing the Computer...
User's Guide - Page 15
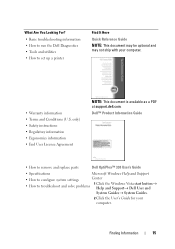
Dell™ Product Information Guide
• How to remove and replace parts
Dell OptiPlex™ 330 User's Guide
• Specifications
Microsoft Windows Help and Support
• How to configure system settings
Center
• How to set up a printer
Find It Here
...
User's Guide - Page 66
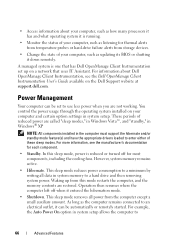
.... In this mode restarts the computer, and the memory contents are restored. This sleep mode removes all data in system memory to a hard drive and then removing system power. Power Management
Your computer can be set up from this sleep mode, power is reduced or turned off when it down remotely. These periods of reduced...
User's Guide - Page 102

... assistance.
Code 1-1-2 1-1-3
Cause Microprocessor register failure NVRAM read/write failure
102
Troubleshooting Tools Remove and then reinstall any of the following beep code errors. Ensure that the main power cable and front panel cable are securely connected to the system board (see "Contacting Dell" in the User's Guide) for instructions on page 150). Beep...
User's Guide - Page 125

...
• Remove and then reinstall any of interference are:
• Power, keyboard, and mouse extension cables
• Too many devices connected to the same power strip
• Multiple power strips connected to... as a lamp.
• Ensure that the main power cable and front panel cable are securely connected to the system board (see "System Board Components" on page 212). A device may exist.
...
User's Guide - Page 203

...: The heat sink assembly, power supply, and other unexpected injuries, always unplug your body before you touch any of your computer's electronic components.
NOTICE: When sliding the I/O panel out of all the cables that are connected to the I/O panel from the system board.
5 Remove the screw that secures the I/O panel. 6 Slide the I/O panel down to components inside...
User's Guide - Page 205
...assembly, power supply, and other unexpected injuries, always unplug your computer from each memory socket so that the memory modules can be installed in the same location after the board is removed from the... Computer Cover" on page 207). Mini Tower Computer Parts
205 System Board
Removing the System Board
CAUTION: To guard against electrical shock, laceration by running the Dell Diagnostics...
User's Guide - Page 211
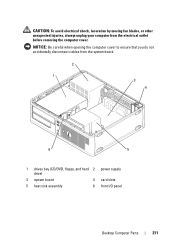
... shock, laceration by moving fan blades, or other unexpected injuries, always unplug your computer from the system board.
2 1
3 4
6
5
1 drives bay (CD/DVD, floppy, and hard 2 power supply drive)
3 system board
4 card slots
5 heat sink assembly
6 front I/O panel
Desktop Computer Parts
211 NOTICE: Be careful when opening the computer cover to ensure that you do not...
User's Guide - Page 237
... you are not replacing the drive, replace the drive panel insert. 8 Replace the computer cover (see "Removing the Computer Cover" on page 209).
3 Pull up to cables and the cable...143. Doing so may cause damage to remove the drive from the computer.
4 Disconnect the optical drive data cable from the system board connector. 5 Disconnect the power cable and the optical drive data cable from...
User's Guide - Page 243
... DC power cables underneath the tabs in the computer chassis as you replace them to prevent them from the system board and drives. Desktop Computer Parts
243
You must route these cables properly when you remove them from being pinched or crimped.
4 Remove the hard drive cable, CD or DVD drive data cable, front panel ribbon...
User's Guide - Page 245

...143. 2 Remove the cover of your computer's electronic components. You can do so by running the Dell Diagnostics (see "Removing the Computer ...power cables to the system board and drives. 13 Secure the hard drive cable, CD or DVD drive data cable, and the front
panel...all cable connections to the back of the computer chassis.
Desktop Computer Parts
245 11 Replace the screws that the computer...
User's Guide - Page 253
... cable routing clips.
4 Gently rotate and slide the I/O panel away from the computer. 5 Remove the cable from the I/O panel by touching an unpainted metal surface on the computer chassis.
CAUTION: The heat sink assembly, power supply, and other unexpected injuries, always unplug your computer's electronic components.
Desktop Computer Parts
253
NOTICE: To prevent static damage...
User's Guide - Page 255
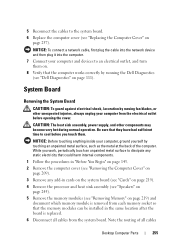
...be installed in the same location after the board is replaced. 6 Disconnect all cables
Desktop Computer Parts
255 System Board
Removing the System Board
CAUTION: To guard against electrical shock, laceration...components may become very hot during normal operation. CAUTION: The heat sink assembly, power supply, and other unexpected injuries, always unplug your computer and devices to cool ...
User's Guide - Page 270
The following information is provided on the device or devices covered in this document in compliance with the FCC regulations:
• Product name: OptiPlex 330
• Model number: DCSM and DCNE
• Company name: Dell Inc. Worldwide Regulatory Compliance & Environmental Affairs One Dell Way Round Rock, TX 78682 USA 512-...
Similar Questions

Optiplex 330 Front Panel
please anyone give me Dell optiplex 330 motherboards front panel pinout atleast power switch
please anyone give me Dell optiplex 330 motherboards front panel pinout atleast power switch
(Posted by tlmyasirs 9 years ago)


What Is The Easy Way To Solve A Dell Optiplex 330 Amber Flashing Power Light
problem?
problem?
(Posted by jtl3bjcbra 10 years ago)


How To Remove The Power Switch For An Optiplex Gx520?
(Posted by dy86LU 10 years ago)