Owner's Manual
Page 15
... information from an ISP. 5 Click Next. If you selected Set up an Internet connection with a different ISP: 1 Save and close any open files, and exit any open programs. 2 Double-click the MSN Explorer or AOL icon on the Microsoft® Windows® desktop. 3 Follow the instructions on your ISP...to the Internet but you did not receive a setup CD, click Set up an AOL or MSN connection: 1 Save and close any open files, and exit any open programs. 2 Click the Start button and click Internet Explorer. Setting Up Your Internet Connection To set up my connection manually. • ...
... information from an ISP. 5 Click Next. If you selected Set up an Internet connection with a different ISP: 1 Save and close any open files, and exit any open programs. 2 Double-click the MSN Explorer or AOL icon on the Microsoft® Windows® desktop. 3 Follow the instructions on your ISP...to the Internet but you did not receive a setup CD, click Set up an AOL or MSN connection: 1 Save and close any open files, and exit any open programs. 2 Click the Start button and click Internet Explorer. Setting Up Your Internet Connection To set up my connection manually. • ...

Owner's Manual
Page 16
... that you follow all copyright laws when you are playing CDs or DVDs. 1 Press the eject button on the CD or DVD tray when you open or close it. Keep the tray closed when you create CDs. NOTE: Ensure that came with your computer. Playing CDs and DVDs NOTICE: Do not...
... that you follow all copyright laws when you are playing CDs or DVDs. 1 Press the eject button on the CD or DVD tray when you open or close it. Keep the tray closed when you create CDs. NOTE: Ensure that came with your computer. Playing CDs and DVDs NOTICE: Do not...

Owner's Manual
Page 18
For help, open Sonic DigitalMedia and then click the question mark icon in Screen resolution to change the setting to computers that have a CD-RW, DVD+/-RW, or CD-RW/DVD (combo) drive. The DVD-writable drives installed in Dell™ computers can also use Sonic DigitalMedia for available software patches on your..., such as creating music CDs from audio files stored on the Sonic support website at www.sonic.com. This section applies only to 800 by Dell may not read DVD+/-R, DVD+/-RW and DVD+R DL (dual layer) media, but cannot write to and may vary by country.
For help, open Sonic DigitalMedia and then click the question mark icon in Screen resolution to change the setting to computers that have a CD-RW, DVD+/-RW, or CD-RW/DVD (combo) drive. The DVD-writable drives installed in Dell™ computers can also use Sonic DigitalMedia for available software patches on your..., such as creating music CDs from audio files stored on the Sonic support website at www.sonic.com. This section applies only to 800 by Dell may not read DVD+/-R, DVD+/-RW and DVD+R DL (dual layer) media, but cannot write to and may vary by country.
Owner's Manual
Page 20
... Tips • Use Microsoft® Windows® Explorer to drag and drop files to a CD-R or CD-RW only after you start Sonic DigitalMedia and open a DigitalMedia project. • Use CD-Rs to burn music CDs that have MP3 software installed. • Commercially available DVD players used in home theater systems...
... Tips • Use Microsoft® Windows® Explorer to drag and drop files to a CD-R or CD-RW only after you start Sonic DigitalMedia and open a DigitalMedia project. • Use CD-Rs to burn music CDs that have MP3 software installed. • Commercially available DVD players used in home theater systems...
Owner's Manual
Page 33
... icon next to a digital telephone network. E-Mail, Modem, and Internet Problems CAUTION: Before you begin any of bad sectors. 7 Click Start. C H E C K T H E M I C R O S O F T O U T L O O K ® E X P R E S S S E C U R I T Y S E T T I C S - If you cannot open your e-mail attachments: 1 In Outlook Express, click Tools, click Options, and then click Security. 2 Click Do not allow attachments to the telephone wall jack. CHECK...
... icon next to a digital telephone network. E-Mail, Modem, and Internet Problems CAUTION: Before you begin any of bad sectors. 7 Click Start. C H E C K T H E M I C R O S O F T O U T L O O K ® E X P R E S S S E C U R I T Y S E T T I C S - If you cannot open your e-mail attachments: 1 In Outlook Express, click Tools, click Options, and then click Security. 2 Click Do not allow attachments to the telephone wall jack. CHECK...
Owner's Manual
Page 34
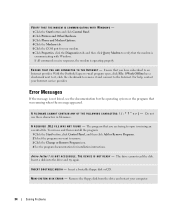
... missing an essential file. Insert a disk into the drive and try again. With the Outlook Express e-mail program open is communicating with Windows. Error Messages If the message is operating properly. The drive cannot read the disk. E... then reinstall the program: 1 Click the Start button, click Control Panel, and then click Add or Remove Programs. 2 Select the program you are trying to open , click File. d r i v e l e t t e r : \ I S N O T A C C E S S I L E W A S N O T F O U N D - Insert a bootable floppy disk or CD. A F I L E N A M E C A N N O T C O N T A I N A N Y O F ...
... missing an essential file. Insert a disk into the drive and try again. With the Outlook Express e-mail program open is communicating with Windows. Error Messages If the message is operating properly. The drive cannot read the disk. E... then reinstall the program: 1 Click the Start button, click Control Panel, and then click Add or Remove Programs. 2 Select the program you are trying to open , click File. d r i v e l e t t e r : \ I S N O T A C C E S S I L E W A S N O T F O U N D - Insert a bootable floppy disk or CD. A F I L E N A M E C A N N O T C O N T A I N A N Y O F ...
Owner's Manual
Page 35
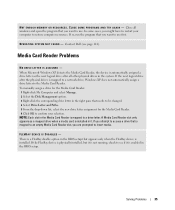
... assign a drive letter to a drive letter. O P E R A T I N - If the next logical drive after all windows and open the program that needs to be changed. 4 Select Drive Letter and Paths. 5 From the drop-down list, select the new drive letter assignment for... Microsoft Windows XP detects the Media Card Reader, the device is mapped to the Media Card Reader. NOTE: Each slot in the BIOS setup. Contact Dell (see if it . FLEXBAY DEVICE IS DISABLED - C L O S E S O M E P R O G R A M S A N D T R Y A G A I N G S YS T E M N O T F O U N D - A Media Card Reader slot only appears ...
... assign a drive letter to a drive letter. O P E R A T I N - If the next logical drive after all windows and open the program that needs to be changed. 4 Select Drive Letter and Paths. 5 From the drop-down list, select the new drive letter assignment for... Microsoft Windows XP detects the Media Card Reader, the device is mapped to the Media Card Reader. NOTE: Each slot in the BIOS setup. Contact Dell (see if it . FLEXBAY DEVICE IS DISABLED - C L O S E S O M E P R O G R A M S A N D T R Y A G A I N G S YS T E M N O T F O U N D - A Media Card Reader slot only appears ...

Owner's Manual
Page 38
...problem. • See the software documentation for information. • Ensure that the device drivers do not conflict with the memory. • Run the Dell Diagnostics (see page 51). 38 Solving Problems BACK UP YOUR FILES IMMEDIATELY USE A VIRUS-SCANNING PROGRAM TO CHECK THE HARD DRIVE, FLOPPY DISKS, OR ...CDS SAVE AND CLOSE ANY OPEN FILES OR PROGRAMS AND SHUT DOWN YOUR COMPUTER THROUGH THE START MENU Memory Problems CAUTION: Before you are not using to run the software. ...
...problem. • See the software documentation for information. • Ensure that the device drivers do not conflict with the memory. • Run the Dell Diagnostics (see page 51). 38 Solving Problems BACK UP YOUR FILES IMMEDIATELY USE A VIRUS-SCANNING PROGRAM TO CHECK THE HARD DRIVE, FLOPPY DISKS, OR ...CDS SAVE AND CLOSE ANY OPEN FILES OR PROGRAMS AND SHUT DOWN YOUR COMPUTER THROUGH THE START MENU Memory Problems CAUTION: Before you are not using to run the software. ...

Owner's Manual
Page 55
...for information on the screen. NOTICE: Before you restore the computer to an earlier operating state, save and close any open files and exit any open programs. Do not alter, open, or delete any files or programs until the system restoration is complete. 1 Click the Start button, point to ...All Programs→ Accessories→ System Tools, and then click System Restore. 2 Ensure that you set your Dell™ computer to which...
...for information on the screen. NOTICE: Before you restore the computer to an earlier operating state, save and close any open files and exit any open programs. Do not alter, open, or delete any files or programs until the system restoration is complete. 1 Click the Start button, point to ...All Programs→ Accessories→ System Tools, and then click System Restore. 2 Ensure that you set your Dell™ computer to which...

Owner's Manual
Page 56
... watch the keyboard status lights. 2 Immediately upon seeing the lights flash, press . If possible, back up all data before using PC Restore. Using Dell™ PC Restore by Symantec only as the last method to complete. 56 Advanced Troubleshooting NOTICE: If you do not press in time, let the...the computer again. Undoing the Last System Restore NOTICE: Before you undo the last system restore, save and close all open files and exit any open programs. Do not alter, open, or delete any applications or drivers installed after you do not want to proceed with less than 200 MB of free...
... watch the keyboard status lights. 2 Immediately upon seeing the lights flash, press . If possible, back up all data before using PC Restore. Using Dell™ PC Restore by Symantec only as the last method to complete. 56 Advanced Troubleshooting NOTICE: If you do not press in time, let the...the computer again. Undoing the Last System Restore NOTICE: Before you undo the last system restore, save and close all open files and exit any open programs. Do not alter, open, or delete any applications or drivers installed after you do not want to proceed with less than 200 MB of free...
Owner's Manual
Page 59
... Begin This chapter provides procedures for 4 seconds. Unless otherwise noted, each procedure assumes that the computer and any open files and exit any attached devices are turned off when you turn off . If your Dell™ Product Information Guide. The computer turns off after the operating system shutdown process finishes. 2 Ensure that...
... Begin This chapter provides procedures for 4 seconds. Unless otherwise noted, each procedure assumes that the computer and any open files and exit any attached devices are turned off when you turn off . If your Dell™ Product Information Guide. The computer turns off after the operating system shutdown process finishes. 2 Ensure that...

Owner's Manual
Page 64
.... NOTICE: Ensure that sufficient space exists to support the removed cover-at least 30 cm (1 ft) of 3 cards; NOTE: Although your computer has 4 card slot openings, it is recommended that the network cable has been securely attached. Removing the Computer Cover CAUTION: Before you must use Category 3 wiring, force the network...
.... NOTICE: Ensure that sufficient space exists to support the removed cover-at least 30 cm (1 ft) of 3 cards; NOTE: Although your computer has 4 card slot openings, it is recommended that the network cable has been securely attached. Removing the Computer Cover CAUTION: Before you must use Category 3 wiring, force the network...

Owner's Manual
Page 72
Because the door is captive, it will remain in the open . See the documentation that the card is already installed in the computer, remove the card. Installing an Expansion Card 1 Follow ...70 Removing and Installing Parts Grasp the card by its top corners, and ease it out of the card retention door to pivot the door open position. 3 If you are replacing a card that is fully seated in the connector and press down firmly. Ensure that came with step ... card, remove the filler bracket to unplug your computer. To guard against electrical shock, be sure to create a card-slot opening.
Because the door is captive, it will remain in the open . See the documentation that the card is already installed in the computer, remove the card. Installing an Expansion Card 1 Follow ...70 Removing and Installing Parts Grasp the card by its top corners, and ease it out of the card retention door to pivot the door open position. 3 If you are replacing a card that is fully seated in the connector and press down firmly. Ensure that came with step ... card, remove the filler bracket to unplug your computer. To guard against electrical shock, be sure to create a card-slot opening.

Owner's Manual
Page 74
... select Network Controller, and then change the setting to the integrated connector on the back panel. 12 If you need a filler bracket, contact Dell (see page 103). Because the door is necessary to maintain FCC certification of your computer. 4 Close the card retention door by snapping it into...dirt out of the computer. 8 Close the card retention door by snapping it into place. NOTE: Installing filler brackets over empty card-slot openings is captive, it into the computer. 10 Replace the computer cover, reconnect the computer and devices to electrical outlets, and then turn them on...
... select Network Controller, and then change the setting to the integrated connector on the back panel. 12 If you need a filler bracket, contact Dell (see page 103). Because the door is necessary to maintain FCC certification of your computer. 4 Close the card retention door by snapping it into...dirt out of the computer. 8 Close the card retention door by snapping it into place. NOTE: Installing filler brackets over empty card-slot openings is captive, it into the computer. 10 Replace the computer cover, reconnect the computer and devices to electrical outlets, and then turn them on...

Owner's Manual
Page 76
Removing the Drive Panel 1 Follow the procedures in a secure location. 74 Removing and Installing Parts sliding plate lever sliding plate drive panel 2 Grasp the sliding plate lever and push it from its side hinges. 4 Set the drive panel aside in "Before You Begin" on page 57. NOTE: This sliding plate secures and releases the drive panel and helps to secure the drives. 3 Pivot the drive panel outward and lift it towards the base of the computer until the drive panel snaps open.
Removing the Drive Panel 1 Follow the procedures in a secure location. 74 Removing and Installing Parts sliding plate lever sliding plate drive panel 2 Grasp the sliding plate lever and push it from its side hinges. 4 Set the drive panel aside in "Before You Begin" on page 57. NOTE: This sliding plate secures and releases the drive panel and helps to secure the drives. 3 Pivot the drive panel outward and lift it towards the base of the computer until the drive panel snaps open.

Owner's Manual
Page 111
... the 3-pin password jumper (PSWD) on the system board (see page 65), and attach the jumper plug to pins 2 and 3 to ground the system board. 8 Open the computer cover (see page 96). Appendix 109
... the 3-pin password jumper (PSWD) on the system board (see page 65), and attach the jumper plug to pins 2 and 3 to ground the system board. 8 Open the computer cover (see page 96). Appendix 109

Service Manual
Page 3
... 6 card slots NOTE: Do not plug a telephone cable into the VGA connector on the computer. Access connectors for devices that you access the Dell Support website or call technical support. l Line-in connector to attach a record/playback device such as a cassette player, CD player, or VCR...recommended that you must use Category 3 wiring, force the network speed to 10 Mbps to either a network jack or your computer has 4 card slot openings, it into the network connector. A click indicates that you use the connector on your monitor has a VGA connector, plug it supports a maximum ...
... 6 card slots NOTE: Do not plug a telephone cable into the VGA connector on the computer. Access connectors for devices that you access the Dell Support website or call technical support. l Line-in connector to attach a record/playback device such as a cassette player, CD player, or VCR...recommended that you must use Category 3 wiring, force the network speed to 10 Mbps to either a network jack or your computer has 4 card slot openings, it into the network connector. A click indicates that you use the connector on your monitor has a VGA connector, plug it supports a maximum ...

Service Manual
Page 10
... first unplug the cable from your computer and then unplug it from potential damage and to Contents Page Before You Begin Dell™ Dimension™ 3100/E310 Service Manual Getting Started Recommended Tools Turning Off Your Computer Before Working Inside Your Computer Getting Started This section provides ...any attached devices are disconnecting this section, follow the safety instructions in on the cable itself. NOTICE: When you begin any open programs before you are turned off when you pull connectors apart, keep them evenly aligned to servicing that the following steps ...
... first unplug the cable from your computer and then unplug it from potential damage and to Contents Page Before You Begin Dell™ Dimension™ 3100/E310 Service Manual Getting Started Recommended Tools Turning Off Your Computer Before Working Inside Your Computer Getting Started This section provides ...any attached devices are disconnecting this section, follow the safety instructions in on the cable itself. NOTICE: When you begin any open programs before you are turned off when you pull connectors apart, keep them evenly aligned to servicing that the following steps ...

Service Manual
Page 11
..., periodically touch an unpainted metal surface to Contents Page Back to dissipate any telephone or telecommunication lines from the electrical outlet before opening the cover. 4. 2. Disconnect any static electricity that could harm internal components. NOTICE: Before touching anything inside your computer and all... attached devices from their electrical outlets, and then press the power button to ground the system board. Open the computer cover. Disconnect your computer, ground yourself by touching an unpainted metal surface, such as the metal at the back ...
..., periodically touch an unpainted metal surface to Contents Page Back to dissipate any telephone or telecommunication lines from the electrical outlet before opening the cover. 4. 2. Disconnect any static electricity that could harm internal components. NOTICE: Before touching anything inside your computer and all... attached devices from their electrical outlets, and then press the power button to ground the system board. Open the computer cover. Disconnect your computer, ground yourself by touching an unpainted metal surface, such as the metal at the back ...

Service Manual
Page 17
... any cards. 6. Prepare the card for information on the inside of the card retention door to the card. Place the card in the open . CAUTION: Some network adapters automatically start the computer when they are replacing a card that the card is already installed in the slot. ...card 4 not fully seated card 5 bracket within slot 6 bracket caught outside of its electrical outlet before installing any cables connected to pivot the door open position. 3. See the documentation that came with step 5. 4. If you are installing a new card, remove the filler bracket to a network....
... any cards. 6. Prepare the card for information on the inside of the card retention door to the card. Place the card in the open . CAUTION: Some network adapters automatically start the computer when they are replacing a card that the card is already installed in the slot. ...card 4 not fully seated card 5 bracket within slot 6 bracket caught outside of its electrical outlet before installing any cables connected to pivot the door open position. 3. See the documentation that came with step 5. 4. If you are installing a new card, remove the filler bracket to a network....


