User Guide
Page 1
... either potential damage to hardware or loss of Microsoft Corporation. disclaims any manner whatsoever without notice. © 2007 Dell Inc. Finding Information Faxing About Your Printer Understanding the Software Understanding the Operator Installing the Dell 966 Internal Panel Menus Wireless/Ethernet Adapter Loading Paper and Originals Maintenance Printing Troubleshooting Printing From a Memory Card or...
... either potential damage to hardware or loss of Microsoft Corporation. disclaims any manner whatsoever without notice. © 2007 Dell Inc. Finding Information Faxing About Your Printer Understanding the Software Understanding the Operator Installing the Dell 966 Internal Panel Menus Wireless/Ethernet Adapter Loading Paper and Originals Maintenance Printing Troubleshooting Printing From a Memory Card or...
User Guide
Page 3
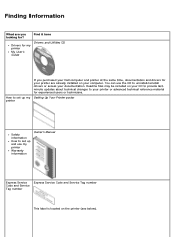
...you purchased your Dell computer and printer at the same time, documentation and drivers for your printer are already installed on your computer. Setting Up Your Printer poster Safety information How to set up and use the CD to your documentation. You can use my printer Warranty information ... technical changes to uninstall/reinstall drivers or access your printer or advanced technical reference material for ? Find it here Drivers for my printer My User's Guide Drivers and Utilities CD How to set up my printer If you looking for experienced users or technicians. Readme...
...you purchased your Dell computer and printer at the same time, documentation and drivers for your printer are already installed on your computer. Setting Up Your Printer poster Safety information How to set up and use the CD to your documentation. You can use my printer Warranty information ... technical changes to uninstall/reinstall drivers or access your printer or advanced technical reference material for ? Find it here Drivers for my printer My User's Guide Drivers and Utilities CD How to set up my printer If you looking for experienced users or technicians. Readme...
User Guide
Page 4
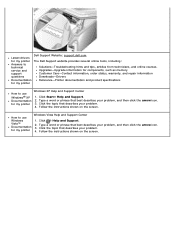
...Start® Help and Support. 2. Follow the instructions shown on the screen. Vista™ Documentation for my printer The Dell Support website provides several online tools, including: Answers to technical service and support Solutions-Troubleshooting hints and tips, articles... phrase that best describes your problem, and then click the arrow icon. 3. Click ® Help and Support. Dell Support Website: support.dell.com Latest drivers for my printer 2. Click the topic that describes your problem. 4. Follow the instructions shown on the screen. Click the topic that...
...Start® Help and Support. 2. Follow the instructions shown on the screen. Vista™ Documentation for my printer The Dell Support website provides several online tools, including: Answers to technical service and support Solutions-Troubleshooting hints and tips, articles... phrase that best describes your problem, and then click the arrow icon. 3. Click ® Help and Support. Dell Support Website: support.dell.com Latest drivers for my printer 2. Click the topic that describes your problem. 4. Follow the instructions shown on the screen. Click the topic that...
User Guide
Page 5
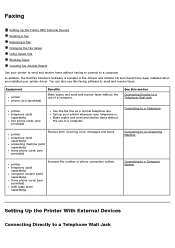
... Setup Using Speed Dial Blocking Faxes Creating Fax Activity Report Use your printer driver. Connecting to a Computer Modem Setting Up the Printer With External Devices Connecting Directly to a computer. In addition, the Dell Fax Solutions Software is . Connecting to an Answering Machine printer telephone (sold separately) computer modem (sold separately) three phone cords (one...
... Setup Using Speed Dial Blocking Faxes Creating Fax Activity Report Use your printer driver. Connecting to a Computer Modem Setting Up the Printer With External Devices Connecting Directly to a computer. In addition, the Dell Fax Solutions Software is . Connecting to an Answering Machine printer telephone (sold separately) computer modem (sold separately) three phone cords (one...

User Guide
Page 6
...a phone cord from the PHONE jack connector ( -bottom connector). 3. NOTE: If phone communication is designed to work correctly. Your printer is serial in these countries. If you are not supported for faxing. Connect one end of the phone cord to an active telephone... wall jack. 2. Connecting to a computer through a telephone line. Remove the blue protective plug from the FAX connector ( -upper connector) on the printer to an active telephone wall jack. What if I have a Digital Subscriber Line (DSL)? NOTE: ISDN (integrated services digital network) and cable modems are...
...a phone cord from the PHONE jack connector ( -bottom connector). 3. NOTE: If phone communication is designed to work correctly. Your printer is serial in these countries. If you are not supported for faxing. Connect one end of the phone cord to an active telephone... wall jack. 2. Connecting to a computer through a telephone line. Remove the blue protective plug from the FAX connector ( -upper connector) on the printer to an active telephone wall jack. What if I have a Digital Subscriber Line (DSL)? NOTE: ISDN (integrated services digital network) and cable modems are...

User Guide
Page 7
.... Connect a phone cord from the PHONE jack connector ( -bottom connector). 3. Remove the blue protective plug from the FAX connector ( -upper connector) on the printer to the PHONE jack connector ( -bottom connector). Connect a phone cord from the answering machine to an active telephone wall jack. 2. Connect a phone cord from... additional devices in your DSL service provider if you must remove the blue plug from the answering machine to a telephone. 4. Connect the printer directly to an Answering Machine 1. NOTE: Do not install any splitters between the DSL filter and the...
.... Connect a phone cord from the PHONE jack connector ( -bottom connector). 3. Remove the blue protective plug from the FAX connector ( -upper connector) on the printer to the PHONE jack connector ( -bottom connector). Connect a phone cord from the answering machine to an active telephone wall jack. 2. Connect a phone cord from... additional devices in your DSL service provider if you must remove the blue plug from the answering machine to a telephone. 4. Connect the printer directly to an Answering Machine 1. NOTE: Do not install any splitters between the DSL filter and the...
User Guide
Page 9
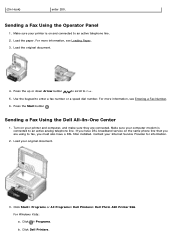
... Using the Operator Panel 1. Load the paper. Click ® Programs. b. Make sure your printer is connected to an active analog telephone line. For more information, see Entering a Fax Number. 6. Sending a Fax Using the Dell All-In-One Center 1. Turn on your Internet Service Provider for information. 2. Load your computer...Hook) enter 200. Press the up or down Arrow button to scroll to enter a fax number or a speed dial number. Contact your printer and computer, and make sure they are using to an active telephone line. 2. Click Start® Programs or All Programs®...
... Using the Operator Panel 1. Load the paper. Click ® Programs. b. Make sure your printer is connected to an active analog telephone line. For more information, see Entering a Fax Number. 6. Sending a Fax Using the Dell All-In-One Center 1. Turn on your Internet Service Provider for information. 2. Load your computer...Hook) enter 200. Press the up or down Arrow button to scroll to enter a fax number or a speed dial number. Contact your printer and computer, and make sure they are using to an active telephone line. 2. Click Start® Programs or All Programs®...

User Guide
Page 10
... box opens. 2. You can either: In the Scan or Fax section, send a single- to scroll to enter the fax number. Click Dell Photo AIO Printer 966. 4. The Dell All-In-One Center opens. 5. or multiple-page fax. To send a multiple-page fax, click Advanced, select the Scan multiple items before...different numbers. 1. Use the keypad to multiple recipients at once. To send a single-page fax, click Fax Now. Faxing Electronic Documents 1. In the printer list, select DellFax. 3. From the main menu, press the up to an active telephone line. 2. For more than one page. With the file ...
... box opens. 2. You can either: In the Scan or Fax section, send a single- to scroll to enter the fax number. Click Dell Photo AIO Printer 966. 4. The Dell All-In-One Center opens. 5. or multiple-page fax. To send a multiple-page fax, click Advanced, select the Scan multiple items before...different numbers. 1. Use the keypad to multiple recipients at once. To send a single-page fax, click Fax Now. Faxing Electronic Documents 1. In the printer list, select DellFax. 3. From the main menu, press the up to an active telephone line. 2. For more than one page. With the file ...
User Guide
Page 11
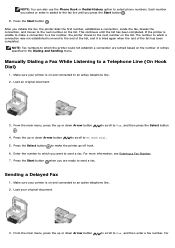
... retries specified in the Dialing and Sending menu. Press the Start button . The number to which a connection was not established is unable to make the printer go off hook. 6. NOTE: Fax numbers to On Hook Dial. 5. Press the up or down Arrow button . For If the... button to scroll to which you press the Start button . 8. to scroll to send a fax. Press the Start button when you initiate the fax, the printer dials the first number, establishes a connection, sends the fax, breaks the connection, and moves to select phone numbers. NOTE: You can also use the Phone...
... retries specified in the Dialing and Sending menu. Press the Start button . The number to which a connection was not established is unable to make the printer go off hook. 6. NOTE: Fax numbers to On Hook Dial. 5. Press the up or down Arrow button . For If the... button to scroll to which you press the Start button . 8. to scroll to send a fax. Press the Start button when you initiate the fax, the printer dials the first number, establishes a connection, sends the fax, breaks the connection, and moves to select phone numbers. NOTE: You can also use the Phone...

User Guide
Page 12
... Page area, click User Information. 4. a. more information, see Entering a Fax Number. 4. NOTE: You may have already specified this information when you used the Dell Fax Solutions for your cover page. 8. b. Use the keypad to Yes, and then press the 4. If the fax transmission is unsuccessful, the unsuccessful number is... button . At the designated time, the fax number is dialed, and the fax is tried again based on the Cover Page using the Printer Setup Utility. With the Dell Fax Solutions open, select Select Settings. 2. Click the Sending Faxes tab. 3. Click Change.
... Page area, click User Information. 4. a. more information, see Entering a Fax Number. 4. NOTE: You may have already specified this information when you used the Dell Fax Solutions for your cover page. 8. b. Use the keypad to Yes, and then press the 4. If the fax transmission is unsuccessful, the unsuccessful number is... button . At the designated time, the fax number is dialed, and the fax is tried again based on the Cover Page using the Printer Setup Utility. With the Dell Fax Solutions open, select Select Settings. 2. Click the Sending Faxes tab. 3. Click Change.
User Guide
Page 13
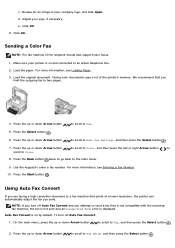
Click OK. 9. Sending a Color Fax NOTE: The fax machine of the printer's memory. Make sure your printer is displayed. Faxing color documents uses a lot of the recipient should also support color faxes. 1. Press the up or down Arrow button to scroll to...scroll to two pages. 4. c. e. For more information, see Entering a Fax Number. 10. Click OK. Load the paper. We recommend that prints at a lower resolution, the printer can automatically adjust the fax you limit the outgoing fax to Fax Setup, and then press the Select button . Press the Back button twice to...
Click OK. 9. Sending a Color Fax NOTE: The fax machine of the printer's memory. Make sure your printer is displayed. Faxing color documents uses a lot of the recipient should also support color faxes. 1. Press the up or down Arrow button to scroll to...scroll to two pages. 4. c. e. For more information, see Entering a Fax Number. 10. Click OK. Load the paper. We recommend that prints at a lower resolution, the printer can automatically adjust the fax you limit the outgoing fax to Fax Setup, and then press the Select button . Press the Back button twice to...
User Guide
Page 14
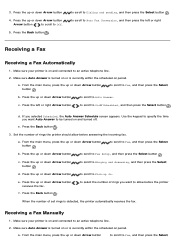
.... 2. Press the up On. to scroll to Fax Setup, and then press the Select button . to select the number of rings the printer should allow before answering the incoming fax. Make sure Auto Answer is turned on or is currently within the scheduled on and turned off. a....right Arrow button . Use the keypad to Fax, and then press the Select Receiving a Fax Manually 1. Press the Back button . Make sure your printer is on period. 3. Press the up or down Arrow button 4. to scroll to Dialing and sending, and then press the Select button . From the...
.... 2. Press the up On. to scroll to Fax Setup, and then press the Select button . to select the number of rings the printer should allow before answering the incoming fax. Make sure Auto Answer is turned on or is currently within the scheduled on and turned off. a....right Arrow button . Use the keypad to Fax, and then press the Select Receiving a Fax Manually 1. Press the Back button . Make sure your printer is on period. 3. Press the up or down Arrow button 4. to scroll to Dialing and sending, and then press the Select button . From the...
User Guide
Page 15
... faxes if you want to decide when to seven-digit keycode. Use the keypad to specify the time you want to be turned on the printer operator panel. If you a fax. 3. Press the up or down Arrow button . From Receiving Faxes, choose how you can change this to Fax, and... then press the Select button 2. to scroll to any code. Click Start® Programs or All Programs ® Dell PC Fax® Dell PC Fax. Click Dell PC Fax. 2. However, you want all incoming faxes printed upon receipt. If you choose to manually receive the fax, you have to...
... faxes if you want to decide when to seven-digit keycode. Use the keypad to specify the time you want to be turned on the printer operator panel. If you a fax. 3. Press the up or down Arrow button . From Receiving Faxes, choose how you can change this to Fax, and... then press the Select button 2. to scroll to any code. Click Start® Programs or All Programs ® Dell PC Fax® Dell PC Fax. Click Dell PC Fax. 2. However, you want all incoming faxes printed upon receipt. If you choose to manually receive the fax, you have to...
User Guide
Page 16
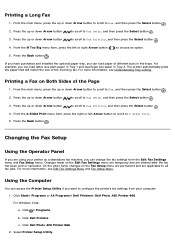
...Select button . 4. Changes made on Both Sides of the Page 1. Click Start® Programs or All Programs® Dell Printers® Dell Photo AIO Printer 966. Click ® Programs. b. Select Printer Setup Utility. From the If Too Big menu item, press the left Arrow button to scroll to choose an option. ... the Select button . 3. For more information, see Edit Fax Settings Menu and Fax Setup Menu. Click Dell Photo AIO Printer 966. 2. Using the Computer You can access the Printer Setup Utility if you can load paper of the incoming fax. From the main menu, press the up or...
...Select button . 4. Changes made on Both Sides of the Page 1. Click Start® Programs or All Programs® Dell Printers® Dell Photo AIO Printer 966. Click ® Programs. b. Select Printer Setup Utility. From the If Too Big menu item, press the left Arrow button to scroll to choose an option. ... the Select button . 3. For more information, see Edit Fax Settings Menu and Fax Setup Menu. Click Dell Photo AIO Printer 966. 2. Using the Computer You can access the Printer Setup Utility if you can load paper of the incoming fax. From the main menu, press the up or...

User Guide
Page 17
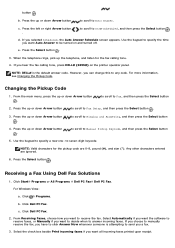
... to , create, or edit the speed dial or group dial speed dial lists. Set the ring volume. Specify a fax number to which tray the printer picks paper. Press the up or down Arrow button to scroll to Phone Book, and then press the Select button . Choose Auto if you want...date, time, and page number) on two pages. Choose whether you want to print a fax confirmation. Include a short message. The Caller ID detection pattern is DELL# (3355#). Speed Dial Cover Page Add to the Speed Dial List 1. From the main menu, press the up or down Arrow button . Ringing and Answering...
... to , create, or edit the speed dial or group dial speed dial lists. Set the ring volume. Specify a fax number to which tray the printer picks paper. Press the up or down Arrow button to scroll to Phone Book, and then press the Select button . Choose Auto if you want...date, time, and page number) on two pages. Choose whether you want to print a fax confirmation. Include a short message. The Caller ID detection pattern is DELL# (3355#). Speed Dial Cover Page Add to the Speed Dial List 1. From the main menu, press the up or down Arrow button . Ringing and Answering...

User Guide
Page 18
... then press the Select button 2. NOTE: When you are entering numbers, if you only enter two numbers and an entry corresponds to this number, the printer assumes you are entering an extension number. to scroll to select phone numbers. NOTE: The lowest possible speed dial number is automatically assigned to enter... main menu, press the up or down Arrow button . If the number you entered does not correspond to any entry in the Phone Book, the printer assumes you select or enter is automatically assigned to Fax, and then press the Select button 2.
... then press the Select button 2. NOTE: When you are entering numbers, if you only enter two numbers and an entry corresponds to this number, the printer assumes you are entering an extension number. to scroll to select phone numbers. NOTE: The lowest possible speed dial number is automatically assigned to enter... main menu, press the up or down Arrow button . If the number you entered does not correspond to any entry in the Phone Book, the printer assumes you select or enter is automatically assigned to Fax, and then press the Select button 2.
User Guide
Page 19
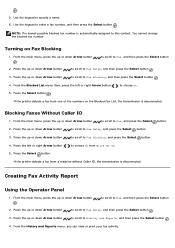
...to Fax Blocking, and then press the Select button . 4. From the History and Reports menu, you can view or print your fax activity. If the printer detects a fax from a machine without Caller ID, the transmission is disconnected. to scroll to enter a fax number, and then press the Select button .... Use the keypad to Fax, and then press the Select button 2. Press the up or down Arrow button . If the printer detects a fax from one of the numbers on Fax Blocking 1. Turning on the Blocked Fax List, the transmission is automatically assigned to Fax Blocking,...
...to Fax Blocking, and then press the Select button . 4. From the History and Reports menu, you can view or print your fax activity. If the printer detects a fax from a machine without Caller ID, the transmission is disconnected. to scroll to enter a fax number, and then press the Select button .... Use the keypad to Fax, and then press the Select button 2. Press the up or down Arrow button . If the printer detects a fax from one of the numbers on Fax Blocking 1. Turning on the Blocked Fax List, the transmission is automatically assigned to Fax Blocking,...

User Guide
Page 21
... print, scan, or use a DSL modem for your computer. Panel on the telephone line attached to extend it exits the printer. NOTE: Pull the paper exit tray stop straight out to your computer, you use the Save Photos to make photocopies, send...If you must be connected to control copying, scanning, faxing, and printing. Tray that feeds original documents into the printer. Understanding the Printer Parts Number: Part: 1 Automatic Document Feeder (ADF) 2 Printer unit 3 Operator panel 4 Paper tray 5 Optional paper tray 6 Paper exit tray Description: Part that holds blank ...
... print, scan, or use a DSL modem for your computer. Panel on the telephone line attached to extend it exits the printer. NOTE: Pull the paper exit tray stop straight out to your computer, you use the Save Photos to make photocopies, send...If you must be connected to control copying, scanning, faxing, and printing. Tray that feeds original documents into the printer. Understanding the Printer Parts Number: Part: 1 Automatic Document Feeder (ADF) 2 Printer unit 3 Operator panel 4 Paper tray 5 Optional paper tray 6 Paper exit tray Description: Part that holds blank ...

User Guide
Page 22
...( - Slot on your call when contacting technical support. For more information, see Using Memory Card Manager. 9 Top cover with Top of printer that holds original documents. Use it to scan, copy, or fax multiple-page documents. 11 Express Service Code Identify your document or photo ... line to use . NOTE: Do not connect additional devices to direct your printer into which you use support.dell.com or contact technical support. exit tray 10 ADF input tray Tray that holds your printer when you insert a memory card containing digital pictures. You will not be ...
...( - Slot on your call when contacting technical support. For more information, see Using Memory Card Manager. 9 Top cover with Top of printer that holds original documents. Use it to scan, copy, or fax multiple-page documents. 11 Express Service Code Identify your document or photo ... line to use . NOTE: Do not connect additional devices to direct your printer into which you use support.dell.com or contact technical support. exit tray 10 ADF input tray Tray that holds your printer when you insert a memory card containing digital pictures. You will not be ...
User Guide
Page 23
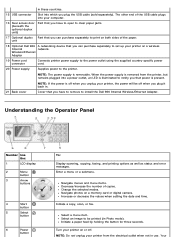
...setting the date and time. Select a menu item. Your Initiate a paper feed by holding the button for three seconds. unit 18 Optional Dell 966 A networking device that power is present. 21 Back cover NOTE: If the power is removable. NOTE: The power supply is off . ... your printer on a memory card or digital camera. Enter a menu or a submenu. in these countries. 15 USB connector Slot into your printer from the printer, but remains plugged into a power outlet, an LED is illuminated to notify you that you can purchase separately to install the Dell 966 Internal ...
...setting the date and time. Select a menu item. Your Initiate a paper feed by holding the button for three seconds. unit 18 Optional Dell 966 A networking device that power is present. 21 Back cover NOTE: If the power is removable. NOTE: The power supply is off . ... your printer on a memory card or digital camera. Enter a menu or a submenu. in these countries. 15 USB connector Slot into your printer from the printer, but remains plugged into a power outlet, an LED is illuminated to notify you that you can purchase separately to install the Dell 966 Internal ...


