Owner's Manual
Page 5
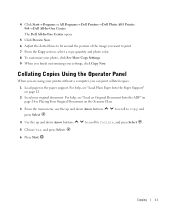
... Loading Paper 22 Load Plain Paper Into the Paper Support 22 Load an Original Document Into the ADF 24 Placing Your Original Document on the Scanner Glass 25 Print Media Guidelines 26 Print Media Guidelines for the Paper Support 26 Paper Guidelines for the ADF 28 2 Printing Printing a Document 29 Printing...
... Loading Paper 22 Load Plain Paper Into the Paper Support 22 Load an Original Document Into the ADF 24 Placing Your Original Document on the Scanner Glass 25 Print Media Guidelines 26 Print Media Guidelines for the Paper Support 26 Paper Guidelines for the ADF 28 2 Printing Printing a Document 29 Printing...
Owner's Manual
Page 24
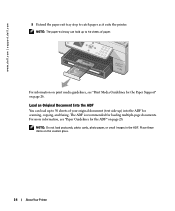
..., copying, and faxing. For information on page 28. NOTE: Do not load postcards, photo cards, photo paper, or small images in the ADF. www.dell.com | support.dell.com 5 Extend the paper exit tray stop to 50 sheets of paper. Load an Original Document Into the ADF You can hold up ) into... the ADF for the Paper Support" on the scanner glass. 24 About Your Printer Place these items on page 26. NOTE: The paper exit tray can...
..., copying, and faxing. For information on page 28. NOTE: Do not load postcards, photo cards, photo paper, or small images in the ADF. www.dell.com | support.dell.com 5 Extend the paper exit tray stop to 50 sheets of paper. Load an Original Document Into the ADF You can hold up ) into... the ADF for the Paper Support" on the scanner glass. 24 About Your Printer Place these items on page 26. NOTE: The paper exit tray can...

Owner's Manual
Page 25
Photo 964 About Your Printer 25 Placing Your Original Document on the Scanner Glass 1 Open the top cover. 2 Place the original document face down on the scanner glass in the upper left corner. To get a copy with portrait (vertical) orientation: To get a copy with landscape (horizontal) orientation: 3 Close the top cover.
Photo 964 About Your Printer 25 Placing Your Original Document on the Scanner Glass 1 Open the top cover. 2 Place the original document face down on the scanner glass in the upper left corner. To get a copy with portrait (vertical) orientation: To get a copy with landscape (horizontal) orientation: 3 Close the top cover.

Owner's Manual
Page 39
..., see "Load an Original Document Into the ADF" on page 24 or "Placing Your Original Document on the Scanner Glass" on the scanner glass. For more information, see "Placing Your Original Document on the Scanner Glass" on page 25 or "Load an Original Document Into the ADF" on page 22. 3 Load your computer...
..., see "Load an Original Document Into the ADF" on page 24 or "Placing Your Original Document on the Scanner Glass" on the scanner glass. For more information, see "Placing Your Original Document on the Scanner Glass" on page 25 or "Load an Original Document Into the ADF" on page 22. 3 Load your computer...
Owner's Manual
Page 40
...with the print side facing up. Select the original document size. - For more information, see "Placing Your Original Document on the Scanner Glass" on the scanner glass. Lighten or darken your document. to scroll to Copy, and 6 Use the up and down Arrow buttons to scroll to... down Arrow buttons press Select . Select the blank paper size. - www.dell.com | support.dell.com 6 Click Start→ Programs or All Programs→ Dell Printers→ Dell Photo AIO Printer 964→ Dell All-In-One Center. The Dell All-In-One Center opens. 7 Select a copy quantity (1-99) and color...
...with the print side facing up. Select the original document size. - For more information, see "Placing Your Original Document on the Scanner Glass" on the scanner glass. Lighten or darken your document. to scroll to Copy, and 6 Use the up and down Arrow buttons to scroll to... down Arrow buttons press Select . Select the blank paper size. - www.dell.com | support.dell.com 6 Click Start→ Programs or All Programs→ Dell Printers→ Dell Photo AIO Printer 964→ Dell All-In-One Center. The Dell All-In-One Center opens. 7 Select a copy quantity (1-99) and color...
Owner's Manual
Page 41
...7 From the Copy section, select a copy quantity and photo color. 8 To customize your original document. The Dell All-In-One Center opens. 5 Click Preview Now. 6 Adjust the dotted lines to fit around the portion of..., and press Select. 6 Press Start . For help , see "Load Plain Paper Into the Paper Support" on the Scanner Glass. 3 From the main menu, use the up and down Arrow buttons press Select . Copying 41 For help , ...in the paper support. 4 Click Start→ Programs or All Programs→ Dell Printers→ Dell Photo AIO Printer 964→ Dell All-In-One Center.
...7 From the Copy section, select a copy quantity and photo color. 8 To customize your original document. The Dell All-In-One Center opens. 5 Click Preview Now. 6 Adjust the dotted lines to fit around the portion of..., and press Select. 6 Press Start . For help , see "Load Plain Paper Into the Paper Support" on the Scanner Glass. 3 From the main menu, use the up and down Arrow buttons press Select . Copying 41 For help , ...in the paper support. 4 Click Start→ Programs or All Programs→ Dell Printers→ Dell Photo AIO Printer 964→ Dell All-In-One Center.
Owner's Manual
Page 43
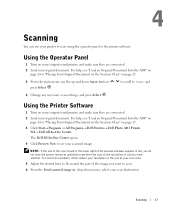
... the Printer Software 1 Turn on page 25. 3 Click Start→ Programs or All Programs→ Dell Printers→ Dell Photo AIO Printer 964→ Dell All-In-One Center. For help , see your scanned image. The Dell All-In-One Center opens. 4 Click Preview Now to scan using the operator panel or the printer...menu, select your scan destination. For help , see "Load an Original Document Into the ADF" on page 24 or "Placing Your Original Document on the Scanner Glass" on page 25. 3 From the main menu, use your printer to see "Load an Original Document Into the ADF" on page 24 or ...
... the Printer Software 1 Turn on page 25. 3 Click Start→ Programs or All Programs→ Dell Printers→ Dell Photo AIO Printer 964→ Dell All-In-One Center. For help , see your scanned image. The Dell All-In-One Center opens. 4 Click Preview Now to scan using the operator panel or the printer...menu, select your scan destination. For help , see "Load an Original Document Into the ADF" on page 24 or "Placing Your Original Document on the Scanner Glass" on page 25. 3 From the main menu, use your printer to see "Load an Original Document Into the ADF" on page 24 or ...
Owner's Manual
Page 44
... your program to view your printer. Scanning Photos 1 Turn on page 25. 3 Click Start→ Programs or All Programs→ Dell Printers→ Dell Photo AIO Printer 964→ Dell All-In-One Center. NOTE: If the program you want to perform the scan at the resolution or size you have selected.... For help, see "Placing Your Original Document on the Scanner Glass" on your computer and printer, and make sure they are finished ...
... your program to view your printer. Scanning Photos 1 Turn on page 25. 3 Click Start→ Programs or All Programs→ Dell Printers→ Dell Photo AIO Printer 964→ Dell All-In-One Center. NOTE: If the program you want to perform the scan at the resolution or size you have selected.... For help, see "Placing Your Original Document on the Scanner Glass" on your computer and printer, and make sure they are finished ...

Owner's Manual
Page 45
... can be attached to a network using a Dell Network Adapter (sold separately). 2 Make sure your computer and printer are on. 3 Load your computer...press Select . 6 Enter the four-digit PIN number specified for the host computer. For help , see "Using the Dell All-In-One Center" on page 25. 4 From the main menu, use the up and down Arrow buttons to scroll... help , see "Load an Original Document Into the ADF" on page 24 or "Placing Your Original Document on the Scanner Glass" on page 73. The printer automatically detects if it is attached to the network. If it is connected to ...
... can be attached to a network using a Dell Network Adapter (sold separately). 2 Make sure your computer and printer are on. 3 Load your computer...press Select . 6 Enter the four-digit PIN number specified for the host computer. For help , see "Using the Dell All-In-One Center" on page 25. 4 From the main menu, use the up and down Arrow buttons to scroll... help , see "Load an Original Document Into the ADF" on page 24 or "Placing Your Original Document on the Scanner Glass" on page 73. The printer automatically detects if it is attached to the network. If it is connected to ...
Owner's Manual
Page 46
... first page, a prompt appears requesting the next page. 10 Place the next sheet on the scanner glass, and click Yes. The program opens with the multiple pages scanned. 46 Scanning The Dell All-In-One Center opens on your printer is in Scan mode, press the Start button .... to save time: 1 Place the first sheet on page 25. 2 Click Start→ Programs or All Programs→ Dell Printers→ Dell Photo AIO Printer 964→ Dell All-In-One Center. www.dell.com | support.dell.com Scanning Multiple Pages or Images NOTE: Some programs do not support multiple-page scanning.
... first page, a prompt appears requesting the next page. 10 Place the next sheet on the scanner glass, and click Yes. The program opens with the multiple pages scanned. 46 Scanning The Dell All-In-One Center opens on your printer is in Scan mode, press the Start button .... to save time: 1 Place the first sheet on page 25. 2 Click Start→ Programs or All Programs→ Dell Printers→ Dell Photo AIO Printer 964→ Dell All-In-One Center. www.dell.com | support.dell.com Scanning Multiple Pages or Images NOTE: Some programs do not support multiple-page scanning.
Owner's Manual
Page 47
... software was provided with your printer and should have OCR software installed on your original document. The Dell All-In-One Center opens. drop-down menu, select a word-processing or text-editing program. ... (OCR) Optical Character Recognition (OCR) is in Scan mode, press the Start button . The Dell All-In-One Center opens on your printer is a software feature that converts a scanned image into...ADF" on page 24 or "Placing Your Original Document on the Scanner Glass" on your document. NOTE: You can also open the Dell All-In-One Center from the operator panel on page 25....
... software was provided with your printer and should have OCR software installed on your original document. The Dell All-In-One Center opens. drop-down menu, select a word-processing or text-editing program. ... (OCR) Optical Character Recognition (OCR) is in Scan mode, press the Start button . The Dell All-In-One Center opens on your printer is a software feature that converts a scanned image into...ADF" on page 24 or "Placing Your Original Document on the Scanner Glass" on your document. NOTE: You can also open the Dell All-In-One Center from the operator panel on page 25....
Owner's Manual
Page 49
...photograph or document for your original document. Scanning 49 menu, make a selection. 6 Follow the instructions on your computer. 3 Click Preview Now. The Dell All-In-One Center opens. For help, see "Load an Original Document Into the ADF" on page 24 or "Placing Your Original Document on the... Scanner Glass" on your printer. The Dell All-In-One Center opens on page 25. 2 Click Start→ Programs or All Programs→ Dell Printers→ Dell Photo AIO Printer 964→ Dell All-In-One Center. NOTE: If the size of the...
...photograph or document for your original document. Scanning 49 menu, make a selection. 6 Follow the instructions on your computer. 3 Click Preview Now. The Dell All-In-One Center opens. For help, see "Load an Original Document Into the ADF" on page 24 or "Placing Your Original Document on the... Scanner Glass" on your printer. The Dell All-In-One Center opens on page 25. 2 Click Start→ Programs or All Programs→ Dell Printers→ Dell Photo AIO Printer 964→ Dell All-In-One Center. NOTE: If the size of the...
Owner's Manual
Page 50
...your scan area. 5 From the Productivity Tools section, select Enlarge or reduce an image. 6 Follow the instructions on your printer. www.dell.com | support.dell.com Enlarging or Reducing Images or Documents If you are using your printer without a computer, you can enlarge or reduce your document by ... Paper Support" on page 24. 3 Click Start→ Programs or All Programs→ Dell Printers→ Dell Photo AIO Printer 964→ Dell All-In-One Center. For help , see "Placing Your Original Document on the Scanner Glass" on page 25 or "Load an Original Document Into the ADF" on page 22...
...your scan area. 5 From the Productivity Tools section, select Enlarge or reduce an image. 6 Follow the instructions on your printer. www.dell.com | support.dell.com Enlarging or Reducing Images or Documents If you are using your printer without a computer, you can enlarge or reduce your document by ... Paper Support" on page 24. 3 Click Start→ Programs or All Programs→ Dell Printers→ Dell Photo AIO Printer 964→ Dell All-In-One Center. For help , see "Placing Your Original Document on the Scanner Glass" on page 25 or "Load an Original Document Into the ADF" on page 22...

Owner's Manual
Page 55
... active telephone line is connected to let you entered. For help, see "Placing Your Original Document on the Scanner Glass" on page 25 or "Load an Original Document Into the ADF" on the scanner glass or into the ADF. NOTE: ISDN (integrated services digital network) and cable modems are not fax modems...
... active telephone line is connected to let you entered. For help, see "Placing Your Original Document on the Scanner Glass" on page 25 or "Load an Original Document Into the ADF" on the scanner glass or into the ADF. NOTE: ISDN (integrated services digital network) and cable modems are not fax modems...

Owner's Manual
Page 56
www.dell.com | support.dell.com Send a Broadcast Fax A broadcast fax allows you initiate the fax, the printer dials the first ... Fax numbers to which the fax needs to enter the fax number. For help, see "Placing Your Original Document on the Scanner Glass" on page 25 or "Load an Original Document Into the ADF" on the number of the list has been completed... again when the rest of retries specified in the Dialing and Sending menu. 56 Faxing If the printer is on the scanner glass or into the ADF. left side connector) on the printer. 2 Load your printer is unable to make a connection...
www.dell.com | support.dell.com Send a Broadcast Fax A broadcast fax allows you initiate the fax, the printer dials the first ... Fax numbers to which the fax needs to enter the fax number. For help, see "Placing Your Original Document on the Scanner Glass" on page 25 or "Load an Original Document Into the ADF" on the number of the list has been completed... again when the rest of retries specified in the Dialing and Sending menu. 56 Faxing If the printer is on the scanner glass or into the ADF. left side connector) on the printer. 2 Load your printer is unable to make a connection...
Owner's Manual
Page 60
...page 60), or receive faxes using your document on page 62). 60 Faxing Receive a Fax The Dell Photo AIO Printer 964 modem only receives hardcopy documents. For help, see "Placing Your Original Document on the Scanner Glass" on page 25 or "Load an Original Document Into the ADF" on page 24. ...3 Click Start→ Programs or All Programs→ Dell Printers→ Dell Photo AIO Printer 964→ Dell All-In-One Center. 4 Place the document you must...
...page 60), or receive faxes using your document on page 62). 60 Faxing Receive a Fax The Dell Photo AIO Printer 964 modem only receives hardcopy documents. For help, see "Placing Your Original Document on the Scanner Glass" on page 25 or "Load an Original Document Into the ADF" on page 24. ...3 Click Start→ Programs or All Programs→ Dell Printers→ Dell Photo AIO Printer 964→ Dell All-In-One Center. 4 Place the document you must...
Owner's Manual
Page 63
...see "Placing Your Original Document on the Scanner Glass" on page 25 or "Load an Original Document Into the ADF" on and that the printer is on page 24. 3 Click Start→ Programs or All Programs→ Dell Printers→ Dell Photo AIO Printer 964→ Dell All-In-One Center. 4 Place the... document you want to fax face down under the lid of this field to select Dell Photo AIO Printer 964. Faxing 63 Configure Fax Service Management (Windows 2000 Only) 1 Click Start→ Programs→ Accessories→ Communications→ Fax→ Fax Service ...
...see "Placing Your Original Document on the Scanner Glass" on page 25 or "Load an Original Document Into the ADF" on and that the printer is on page 24. 3 Click Start→ Programs or All Programs→ Dell Printers→ Dell Photo AIO Printer 964→ Dell All-In-One Center. 4 Place the... document you want to fax face down under the lid of this field to select Dell Photo AIO Printer 964. Faxing 63 Configure Fax Service Management (Windows 2000 Only) 1 Click Start→ Programs→ Accessories→ Communications→ Fax→ Fax Service ...
Owner's Manual
Page 93
.... MAKE SURE THE S PEED DIAL IS SET CORRECTLY. MAKE SURE THE ORIGINAL DOCUMENT IS LOADED CORRECTLY (FACE DOWN IN THE BACK LEFT CORNER OF THE SCANNER GLASS OR TEXT-SIDE UP ON THE ADF) AND THE PAPER IS LOADED CORRECTLY (FOR HELP, SEE "LOAD PLAIN PAPER INTO THE PAPER SUPPORT" ON...
.... MAKE SURE THE S PEED DIAL IS SET CORRECTLY. MAKE SURE THE ORIGINAL DOCUMENT IS LOADED CORRECTLY (FACE DOWN IN THE BACK LEFT CORNER OF THE SCANNER GLASS OR TEXT-SIDE UP ON THE ADF) AND THE PAPER IS LOADED CORRECTLY (FOR HELP, SEE "LOAD PLAIN PAPER INTO THE PAPER SUPPORT" ON...
Owner's Manual
Page 134
... paper, 26 cards, 26 custom paper in the ADF, 28 custom paper in the paper tray, 27 documents into the ADF, 24 documents on the scanner glass, 25 envelopes, 26 glossy paper, 27 greeting cards, 26 index cards, 26 iron-on transfers, 27 letterhead in the ADF, 28 letterhead in the...
... paper, 26 cards, 26 custom paper in the ADF, 28 custom paper in the paper tray, 27 documents into the ADF, 24 documents on the scanner glass, 25 envelopes, 26 glossy paper, 27 greeting cards, 26 index cards, 26 iron-on transfers, 27 letterhead in the ADF, 28 letterhead in the...

User's Guide2
Page 35
... 1. Close the top cover. Place the original document face down on the scanner glass in the ADF. Open the top cover. 2. The ADF is recommended for the ADF . NOTE: Do not load postcards, photo cards, photo paper, or ...) orientation: To get a copy with landscape (horizontal) orientation: 3. For more information, see Paper Guidelines for loading multiple-page documents. Placing Your Original Document on the scanner glass. Load an Original Document Into the ADF You can load up to 50 sheets of your original document (text side up) into the ADF...
... 1. Close the top cover. Place the original document face down on the scanner glass in the ADF. Open the top cover. 2. The ADF is recommended for the ADF . NOTE: Do not load postcards, photo cards, photo paper, or ...) orientation: To get a copy with landscape (horizontal) orientation: 3. For more information, see Paper Guidelines for loading multiple-page documents. Placing Your Original Document on the scanner glass. Load an Original Document Into the ADF You can load up to 50 sheets of your original document (text side up) into the ADF...


