
Owner's Manual
Page 14
..., you encounter problems during setup, see "Troubleshooting" on your printer, follow the steps on page 77. If you can use the Dell Photo AIO Printer 962 to pass through the printer as described in the setup steps. A few important things to note: • If your printer is... for details. NOTE: The printer (whether it is required. www.dell.com | support.dell.com Accessing Your User's Guide Click Start→ Programs or All Programs→ Dell Printers→ Dell Photo AIO Printer 962→ View Dell User's Guide. You can be connected to make photocopies or send faxes...
..., you encounter problems during setup, see "Troubleshooting" on your printer, follow the steps on page 77. If you can use the Dell Photo AIO Printer 962 to pass through the printer as described in the setup steps. A few important things to note: • If your printer is... for details. NOTE: The printer (whether it is required. www.dell.com | support.dell.com Accessing Your User's Guide Click Start→ Programs or All Programs→ Dell Printers→ Dell Photo AIO Printer 962→ View Dell User's Guide. You can be connected to make photocopies or send faxes...
Owner's Manual
Page 44
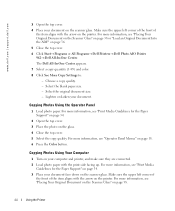
... Original Document on the Scanner Glass" on page 36. 5 Close the top cover. 6 Click Start→ Programs or All Programs→ Dell Printers→ Dell Photo AIO Printer 962→ Dell All-In-One Center. Choose a copy quality. - For more information, see "Print Media Guidelines for the Paper Support" on page 34... of the item aligns with the print side facing up. Select the original document size. - Select the blank paper size. - www.dell.com | support.dell.com 3 Open the top cover. 4 Place your document. Make sure the upper left corner of the front of the item aligns with...
... Original Document on the Scanner Glass" on page 36. 5 Close the top cover. 6 Click Start→ Programs or All Programs→ Dell Printers→ Dell Photo AIO Printer 962→ Dell All-In-One Center. Choose a copy quality. - For more information, see "Print Media Guidelines for the Paper Support" on page 34... of the item aligns with the print side facing up. Select the original document size. - Select the blank paper size. - www.dell.com | support.dell.com 3 Open the top cover. 4 Place your document. Make sure the upper left corner of the front of the item aligns with...
Owner's Manual
Page 45
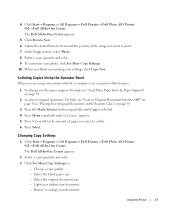
... paper support. Reduce or enlarge your document. - Changing Copy Settings 1 Click Start→ Programs or All Programs→ Dell Printers→ Dell Photo AIO Printer 962→ Dell All-In-One Center. For help , see "Load an Original Document Into the ADF" on page 36 or "Placing ...Glass" on page 34. 2 Load your settings, click Copy Now. 4 Click Start→ Programs or All Programs→ Dell Printers→ Dell Photo AIO Printer 962→ Dell All-In-One Center. Choose a copy quality. - Collating Copies Using the Operator Panel When you are using your printer without ...
... paper support. Reduce or enlarge your document. - Changing Copy Settings 1 Click Start→ Programs or All Programs→ Dell Printers→ Dell Photo AIO Printer 962→ Dell All-In-One Center. For help , see "Load an Original Document Into the ADF" on page 36 or "Placing ...Glass" on page 34. 2 Load your settings, click Copy Now. 4 Click Start→ Programs or All Programs→ Dell Printers→ Dell Photo AIO Printer 962→ Dell All-In-One Center. Choose a copy quality. - Collating Copies Using the Operator Panel When you are using your printer without ...
Owner's Manual
Page 48
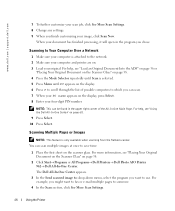
..., see "Placing Your Original Document on the Scanner Glass" on page 38. 2 Click Start→ Programs or All Programs→ Dell Printers→ Dell Photo AIO Printer 962→ Dell All-In-One Center. You can be found in the program you chose. NOTE: This can scan multiple images at once to save...selected. 5 Press Menu until PC appears on the display. 6 Press > to scroll through the list of the All-In-One Main Page. www.dell.com | support.dell.com 7 To further customize your scan job, click See More Scan Settings. 8 Change any settings. 9 When you finish customizing your document has ...
..., see "Placing Your Original Document on the Scanner Glass" on page 38. 2 Click Start→ Programs or All Programs→ Dell Printers→ Dell Photo AIO Printer 962→ Dell All-In-One Center. You can be found in the program you chose. NOTE: This can scan multiple images at once to save...selected. 5 Press Menu until PC appears on the display. 6 Press > to scroll through the list of the All-In-One Main Page. www.dell.com | support.dell.com 7 To further customize your scan job, click See More Scan Settings. 8 Change any settings. 9 When you finish customizing your document has ...
Owner's Manual
Page 49
... Using Optical Character Recognition (OCR) Optical Character Recognition (OCR) is located on page 38. 2 Click Start→ Programs or All Programs→ Dell Printers→ Dell Photo AIO Printer 962→ Dell All-In-One Center. This software is a software feature that converts a scanned image into editable text within a word processing program. After you finish...
... Using Optical Character Recognition (OCR) Optical Character Recognition (OCR) is located on page 38. 2 Click Start→ Programs or All Programs→ Dell Printers→ Dell Photo AIO Printer 962→ Dell All-In-One Center. This software is a software feature that converts a scanned image into editable text within a word processing program. After you finish...
Owner's Manual
Page 50
...Click Preview Now. 50 Using the Printer Saving an Image on page 38. 2 Click Start→ Programs or All Programs→ Dell Printers→ Dell Photo AIO Printer 962→ Dell All-In-One Center. E-mailing a Scanned Image or Document To send scanned photographs or documents through e-mail: 1 Load your .... Add text to drop-down menu, select your image. 1 Click Start→ Programs or All Programs→ Dell Printers→ Dell Photo AIO Printer 962→ Dell All-In-One Center. Adjust the brightness and contrast of your image For help see the documentation that came with your...
...Click Preview Now. 50 Using the Printer Saving an Image on page 38. 2 Click Start→ Programs or All Programs→ Dell Printers→ Dell Photo AIO Printer 962→ Dell All-In-One Center. E-mailing a Scanned Image or Document To send scanned photographs or documents through e-mail: 1 Load your .... Add text to drop-down menu, select your image. 1 Click Start→ Programs or All Programs→ Dell Printers→ Dell Photo AIO Printer 962→ Dell All-In-One Center. Adjust the brightness and contrast of your image For help see the documentation that came with your...
Owner's Manual
Page 51
.... menu, make a selection. 6 Follow the instructions on page 36. 3 Click Start→ Programs or All Programs→ Dell Printers→ Dell Photo AIO Printer 962→ Dell All-In-One Center. Enlarging or Reducing Images or Documents If you have selected. NOTE: If you finish customizing your e-mail... program. The Dell All-In-One Center appears. 4 Click Preview Now. To correct this , consult the Help for e-mail. 7 ...
.... menu, make a selection. 6 Follow the instructions on page 36. 3 Click Start→ Programs or All Programs→ Dell Printers→ Dell Photo AIO Printer 962→ Dell All-In-One Center. Enlarging or Reducing Images or Documents If you have selected. NOTE: If you finish customizing your e-mail... program. The Dell All-In-One Center appears. 4 Click Preview Now. To correct this , consult the Help for e-mail. 7 ...
Owner's Manual
Page 55
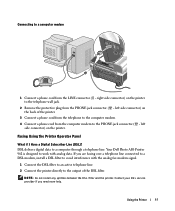
... ( - Using the Printer 55 left side connector) on the printer to the telephone wall jack. 2 Remove the protective plug from the LINE connector ( - Your Dell Photo AIO Printer 962 is designed to work with the analog fax modem signal. 1 Connect the DSL filter to an active telephone line. 2 Connect the printer directly to...
... ( - Using the Printer 55 left side connector) on the printer to the telephone wall jack. 2 Remove the protective plug from the LINE connector ( - Your Dell Photo AIO Printer 962 is designed to work with the analog fax modem signal. 1 Connect the DSL filter to an active telephone line. 2 Connect the printer directly to...
Owner's Manual
Page 57
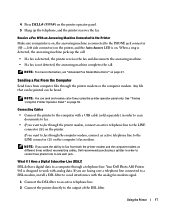
...telephone line. 2 Connect the printer directly to one wall jack. Using the Printer 57 Your Dell Photo AIO Printer 962 is detected, the answering machine picks up the telephone, and the printer receives the fax. 4 Press DELL# (3355#) on the computer's fax modem. What if I Have a Digital Subscriber Line... 55. Sending a Fax From the Computer Send faxes from both the printer modem and the computer modem at different times without reconnecting cables, Dell recommends purchasing a splitter in order to scan documents to fax. • If you want the ability to the LINE connector ( ) on...
...telephone line. 2 Connect the printer directly to one wall jack. Using the Printer 57 Your Dell Photo AIO Printer 962 is detected, the answering machine picks up the telephone, and the printer receives the fax. 4 Press DELL# (3355#) on the computer's fax modem. What if I Have a Digital Subscriber Line... 55. Sending a Fax From the Computer Send faxes from both the printer modem and the computer modem at different times without reconnecting cables, Dell recommends purchasing a splitter in order to scan documents to fax. • If you want the ability to the LINE connector ( ) on...
Owner's Manual
Page 58
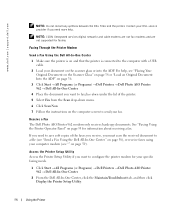
...USB cable. 2 Load your specific faxing needs. 1 Click Start → All Programs (or Programs) → Dell Printers → Dell Photo AIO Printer 962 → Dell All-In-One Center. 2 From the Dell All-In-One Center, click the Maintain/Troubleshoot tab, and then click Display the Printer Setup Utility. 58 Using... "Load an Original Document Into the ADF" on page 36. 3 Click Start → All Programs (or Programs) → Dell Printers → Dell Photo AIO Printer 962 → Dell All-In-One Center. 4 Place the document you want to fax face down under the lid of the printer. 5 Select Fax...
...USB cable. 2 Load your specific faxing needs. 1 Click Start → All Programs (or Programs) → Dell Printers → Dell Photo AIO Printer 962 → Dell All-In-One Center. 2 From the Dell All-In-One Center, click the Maintain/Troubleshoot tab, and then click Display the Printer Setup Utility. 58 Using... "Load an Original Document Into the ADF" on page 36. 3 Click Start → All Programs (or Programs) → Dell Printers → Dell Photo AIO Printer 962 → Dell All-In-One Center. 4 Place the document you want to fax face down under the lid of the printer. 5 Select Fax...
Owner's Manual
Page 60
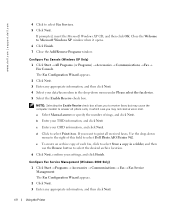
...number of each fax, click to select Store a copy in which case you to receive faxes but may cause the computer modem to select Dell Photo AIO Printer 962. If you want to print all phone calls, in a folder, and then use the Browse button to select Fax Services. 5 Click Next... field to answer all received faxes, Use the drop-down menu under Please select the fax device. 5 Select the Enable Receive check box. www.dell.com | support.dell.com 4 Click to select the desired archive location. 6 Click Next, confirm your settings, and click Finish. The Fax Configuration Wizard appears. 2 Click...
...number of each fax, click to select Store a copy in which case you to receive faxes but may cause the computer modem to select Dell Photo AIO Printer 962. If you want to print all phone calls, in a folder, and then use the Browse button to select Fax Services. 5 Click Next... field to answer all received faxes, Use the drop-down menu under Please select the fax device. 5 Select the Enable Receive check box. www.dell.com | support.dell.com 4 Click to select the desired archive location. 6 Click Next, confirm your settings, and click Finish. The Fax Configuration Wizard appears. 2 Click...
Owner's Manual
Page 61
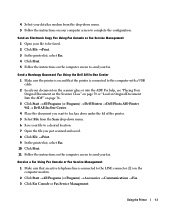
...5 Select File from the drop-down menu. 5 Follow the instructions on your computer screen to send your fax. Send a Hardcopy Document Fax Using the Dell All-In-One Center 1 Make sure the printer is on and that an active telephone line is connected to the computer with a USB cable. 2...on page 38 or "Load an Original Document Into the ADF" on page 36. 3 Click Start → All Programs (or Programs) → Dell Printers → Dell Photo AIO Printer 962 → Dell All-In-One Center. 4 Place the document you just scanned and saved. 8 Click File → Print. 9 In the printer list, select ...
...5 Select File from the drop-down menu. 5 Follow the instructions on your computer screen to send your fax. Send a Hardcopy Document Fax Using the Dell All-In-One Center 1 Make sure the printer is on and that an active telephone line is connected to the computer with a USB cable. 2...on page 38 or "Load an Original Document Into the ADF" on page 36. 3 Click Start → All Programs (or Programs) → Dell Printers → Dell Photo AIO Printer 962 → Dell All-In-One Center. 4 Place the document you just scanned and saved. 8 Click File → Print. 9 In the printer list, select ...
Owner's Manual
Page 63
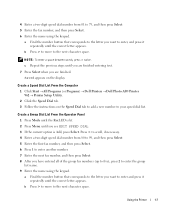
... b Press > to move to the next character space. Create a Speed Dial List From the Computer 1 Click Start → All Programs (or Programs) → Dell Printers → Dell Photo AIO Printer 962 → Printer Setup Utility. 2 Click the Speed Dial tab. 3 Follow the instructions on the display. c Repeat the previous steps until you are finished...
... b Press > to move to the next character space. Create a Speed Dial List From the Computer 1 Click Start → All Programs (or Programs) → Dell Printers → Dell Photo AIO Printer 962 → Printer Setup Utility. 2 Click the Speed Dial tab. 3 Follow the instructions on the display. c Repeat the previous steps until you are finished...
Owner's Manual
Page 65
... the fax transmission is unsuccessful to any of the list. NOTE: At the designated time, the fax numbers are tried again at a lower resolution, the Dell Photo AIO 962 can do not want to add another phone number to all of the designated fax numbers. If you send.
... the fax transmission is unsuccessful to any of the list. NOTE: At the designated time, the fax numbers are tried again at a lower resolution, the Dell Photo AIO 962 can do not want to add another phone number to all of the designated fax numbers. If you send.
Owner's Manual
Page 68
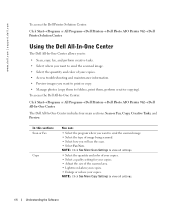
...• Select Fax Now. www.dell.com | support.dell.com To access the Dell Printer Solution Center: Click Start→ Programs or All Programs→ Dell Printers→ Dell Photo AIO Printer 962→ Dell Printer Solution Center. Using the Dell All-In-One Center The Dell All-In-One Center allows you to...images you want to folders, print them, perform creative copying). To access the Dell All-In-One Center: Click Start→ Programs or All Programs→ Dell Printers→ Dell Photo AIO Printer 962→ Dell All-In-One Center. NOTE: Click See More Copy Settings to view all ...
...• Select Fax Now. www.dell.com | support.dell.com To access the Dell Printer Solution Center: Click Start→ Programs or All Programs→ Dell Printers→ Dell Photo AIO Printer 962→ Dell Printer Solution Center. Using the Dell All-In-One Center The Dell All-In-One Center allows you to...images you want to folders, print them, perform creative copying). To access the Dell All-In-One Center: Click Start→ Programs or All Programs→ Dell Printers→ Dell Photo AIO Printer 962→ Dell All-In-One Center. NOTE: Click See More Copy Settings to view all ...
Owner's Manual
Page 75
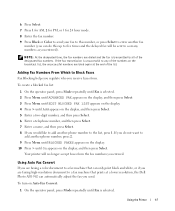
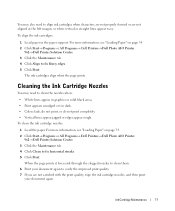
...Maintenance 75 For more information, see "Loading Paper" on page 34. 2 Click Start→ Programs or All Programs→ Dell Printers→ Dell Photo AIO Printer 962→ Dell Printer Solution Center. 3 Click the Maintenance tab. 4 Click Clean to fix blurry edges. 5 Click Print. For more ...information, see "Loading Paper" on page 34. 2 Click Start→ Programs or All Programs→ Dell Printers→ Dell Photo AIO Printer 962→ Dell Printer Solution Center. 3 Click the Maintenance tab 4 Click Align to fix horizontal streaks. 5 Click Print. Cleaning the ...
...Maintenance 75 For more information, see "Loading Paper" on page 34. 2 Click Start→ Programs or All Programs→ Dell Printers→ Dell Photo AIO Printer 962→ Dell Printer Solution Center. 3 Click the Maintenance tab. 4 Click Clean to fix blurry edges. 5 Click Print. For more ...information, see "Loading Paper" on page 34. 2 Click Start→ Programs or All Programs→ Dell Printers→ Dell Photo AIO Printer 962→ Dell Printer Solution Center. 3 Click the Maintenance tab 4 Click Align to fix horizontal streaks. 5 Click Print. Cleaning the ...
Owner's Manual
Page 77
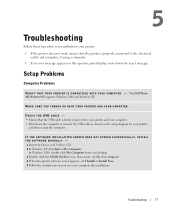
... installation. IF THE SOFTWARE INSTALLATION SCREEN DOES NOT APPEAR AUT OMATICALLY, INSTALL THE SOFTWARE MANUALLY - 1 Insert the Drivers and Utilities CD. 2 In Windows XP. The Dell Photo AIO Printer 962 supports Windows 2000 and Windows XP. click Start→ My Computer. M A K E S U R E Y O U T U R N E D O N B O T H Y O U R P R I T H Y O U R C O M P U T E R -
... installation. IF THE SOFTWARE INSTALLATION SCREEN DOES NOT APPEAR AUT OMATICALLY, INSTALL THE SOFTWARE MANUALLY - 1 Insert the Drivers and Utilities CD. 2 In Windows XP. The Dell Photo AIO Printer 962 supports Windows 2000 and Windows XP. click Start→ My Computer. M A K E S U R E Y O U T U R N E D O N B O T H Y O U R P R I T H Y O U R C O M P U T E R -

Owner's Manual
Page 78
... 1 Click Start→ Programs or All Programs→ Dell Printers→ Dell Photo AIO Printer 962→ Uninstall Dell AIO Printer 962. 2 Follow the instructions on the computer screen to install the software. If the Dell Photo AIO Printer 962 does not appear in the list of programs, the printer... Windows 2000, double-click My Computer from the electrical outlet. Click Start→ Programs or All Programs→ Dell Printers→ Dell Photo AIO Printer 962. Install the printer software. Reconnect the USB cable to remove the printer software. 3 Restart your computer. Reconnect ...
... 1 Click Start→ Programs or All Programs→ Dell Printers→ Dell Photo AIO Printer 962→ Uninstall Dell AIO Printer 962. 2 Follow the instructions on the computer screen to install the software. If the Dell Photo AIO Printer 962 does not appear in the list of programs, the printer... Windows 2000, double-click My Computer from the electrical outlet. Click Start→ Programs or All Programs→ Dell Printers→ Dell Photo AIO Printer 962. Install the printer software. Reconnect the USB cable to remove the printer software. 3 Restart your computer. Reconnect ...
Owner's Manual
Page 79
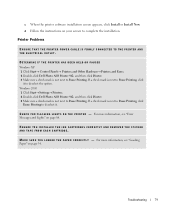
...L O A D E D T H E P A P E R C O R R E C T L Y - Windows 2000 1 Click Start→ Settings→ Printers. 2 Double-click Dell Photo AIO Printer 962, and then click Printer. 3 Make sure a check mark is not next to Pause Printing. DETERMINE IF THE PRINTER HAS BEEN HELD OR PAUSED Windows... XP 1 Click Start→ Control Panels→ Printers and Other Hardware→ Printers and Faxes. 2 Double-click Dell Photo AIO Printer 962, and then click Printer. 3 Make sure a check mark is not next to Pause Printing. C H E C K F O R F L A S H I N G L ...
...L O A D E D T H E P A P E R C O R R E C T L Y - Windows 2000 1 Click Start→ Settings→ Printers. 2 Double-click Dell Photo AIO Printer 962, and then click Printer. 3 Make sure a check mark is not next to Pause Printing. DETERMINE IF THE PRINTER HAS BEEN HELD OR PAUSED Windows... XP 1 Click Start→ Control Panels→ Printers and Other Hardware→ Printers and Faxes. 2 Double-click Dell Photo AIO Printer 962, and then click Printer. 3 Make sure a check mark is not next to Pause Printing. C H E C K F O R F L A S H I N G L ...
Owner's Manual
Page 87
Troubleshooting 87 To access the Dell Printer Solution Center: 1 Click Start→ Programs or All Programs→ Dell Printers→ Dell Photo AIO Printer 962→ Dell Printer Solution Center. 2 Click the Troubleshooting tab.
Troubleshooting 87 To access the Dell Printer Solution Center: 1 Click Start→ Programs or All Programs→ Dell Printers→ Dell Photo AIO Printer 962→ Dell Printer Solution Center. 2 Click the Troubleshooting tab.


