
Owner's Manual
Page 2
Your printer has been designed to order supplies. You can order ink online at www.dell.com/supplies or by phone. US Australia Austria Belgium Canada Chile Chile Colombia Denmark Finland France Germany Ireland Italy 877-INK-2-YOU 1300 303 290 ... black ink cartridge High Capacity color ink cartridge Photo ink cartridge Part number J5566 J5567 M4640 M4646 J4844 During a print job, a screen appears on your Dell distributor to print using the following ink cartridges. Ordering Supplies Your Dell Photo AIO Printer 942 includes software installed to warn you of low ink levels.
Your printer has been designed to order supplies. You can order ink online at www.dell.com/supplies or by phone. US Australia Austria Belgium Canada Chile Chile Colombia Denmark Finland France Germany Ireland Italy 877-INK-2-YOU 1300 303 290 ... black ink cartridge High Capacity color ink cartridge Photo ink cartridge Part number J5566 J5567 M4640 M4646 J4844 During a print job, a screen appears on your Dell distributor to print using the following ink cartridges. Ordering Supplies Your Dell Photo AIO Printer 942 includes software installed to warn you of low ink levels.
Owner's Manual
Page 12
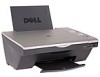
.... Carrier that keeps the printer open the Memory Card Manager. If necessary, connect the power cable to extend it rests on page 59. www.dell.com | support.dell.com Number: 4 5 6 7 8 9 10 11 12 13 Part: Paper exit tray PictBridge-enabled digital camera port Media card slot Printer ... you use of 2.0 compliant cables. The other image types found on your PictBridge-enabled digital camera. Setting Up Your Printer NOTE: The Dell Photo AIO Printer 942 supports Microsoft® Windows® 2000 and Windows XP. NOTE: Pull the paper exit tray straight out to the power adapter. Panel ...
.... Carrier that keeps the printer open the Memory Card Manager. If necessary, connect the power cable to extend it rests on page 59. www.dell.com | support.dell.com Number: 4 5 6 7 8 9 10 11 12 13 Part: Paper exit tray PictBridge-enabled digital camera port Media card slot Printer ... you use of 2.0 compliant cables. The other image types found on your PictBridge-enabled digital camera. Setting Up Your Printer NOTE: The Dell Photo AIO Printer 942 supports Microsoft® Windows® 2000 and Windows XP. NOTE: Pull the paper exit tray straight out to the power adapter. Panel ...
Owner's Manual
Page 13
You can use the Dell Photo AIO Printer 942 to use the Save to PC function. • You do not need to connect your Drivers and Utilities CD. Replacing the Operator Panel If you ... print from flash memory cards or PictBridge-enabled digital cameras. Getting Started 13 Accessing Your User's Guide Click Start→ Programs or All Programs→ Dell Printers→ Dell Photo AIO Printer 942→ View Dell User's Guide.
You can use the Dell Photo AIO Printer 942 to use the Save to PC function. • You do not need to connect your Drivers and Utilities CD. Replacing the Operator Panel If you ... print from flash memory cards or PictBridge-enabled digital cameras. Getting Started 13 Accessing Your User's Guide Click Start→ Programs or All Programs→ Dell Printers→ Dell Photo AIO Printer 942→ View Dell User's Guide.
Owner's Manual
Page 17
... your computer. For more information, see "Using Your Printer in Photo Mode" on your computer, click Start→ Programs or All Programs→ Dell Printers→ Dell Photo AIO Printer 942→ Memory Card Manager. To launch Memory Card Manager from the printer: 1 Insert a memory card into the slot on the front of the...
... your computer. For more information, see "Using Your Printer in Photo Mode" on your computer, click Start→ Programs or All Programs→ Dell Printers→ Dell Photo AIO Printer 942→ Memory Card Manager. To launch Memory Card Manager from the printer: 1 Insert a memory card into the slot on the front of the...

Owner's Manual
Page 36
... "Placing Your Document on the Scanner Glass" on page 31. 5 Close the top cover. 6 Click Start→ Programs or All Programs→ Dell Printers→ Dell Photo AIO Printer 942→ Dell All-In-One Center. For more copy settings, see "Loading Paper" on page 28. 3 Open the top cover. 4 Place your document on the...
... "Placing Your Document on the Scanner Glass" on page 31. 5 Close the top cover. 6 Click Start→ Programs or All Programs→ Dell Printers→ Dell Photo AIO Printer 942→ Dell All-In-One Center. For more copy settings, see "Loading Paper" on page 28. 3 Open the top cover. 4 Place your document on the...

Owner's Manual
Page 37
...Your Computer 1 Turn on your computer and printer, and make sure they are connected. 2 Load the photo paper with the arrow on the printer. The Dell All-In-One Center appears. 5 Click Preview Now. 6 Adjust the dotted lines to print. 7 In the Copy section, select Photo. 8 Select a... Settings. NOTE: For best results, install a photo cartridge before copying photos. 4 Click Start→ Programs or All Programs→ Dell Printers→ Dell Photo AIO Printer 942→ Dell All-In-One Center. NOTE: For more information, see "Changing Copy Settings" on page 37. 10 When you want to fit ...
...Your Computer 1 Turn on your computer and printer, and make sure they are connected. 2 Load the photo paper with the arrow on the printer. The Dell All-In-One Center appears. 5 Click Preview Now. 6 Adjust the dotted lines to print. 7 In the Copy section, select Photo. 8 Select a... Settings. NOTE: For best results, install a photo cartridge before copying photos. 4 Click Start→ Programs or All Programs→ Dell Printers→ Dell Photo AIO Printer 942→ Dell All-In-One Center. NOTE: For more information, see "Changing Copy Settings" on page 37. 10 When you want to fit ...

Owner's Manual
Page 38
... the operator panel. Copying appears on page 31. 3 Click Start→ Programs or All Programs→ Dell Printers→ Dell Photo AIO Printer 942→ Dell All-In-One Center. www.dell.com | support.dell.com Enlarging or Reducing Images or Documents If you are using your printer with the arrow on the printer...the Color button to create a color copy or press the Black button to change the blank paper size. 9 Change any copy settings. The Dell All-In-One Center appears. 38 Using the Printer If you are using your printer without a computer, you can enlarge or reduce your document ...
... the operator panel. Copying appears on page 31. 3 Click Start→ Programs or All Programs→ Dell Printers→ Dell Photo AIO Printer 942→ Dell All-In-One Center. www.dell.com | support.dell.com Enlarging or Reducing Images or Documents If you are using your printer with the arrow on the printer...the Color button to create a color copy or press the Black button to change the blank paper size. 9 Change any copy settings. The Dell All-In-One Center appears. 38 Using the Printer If you are using your printer without a computer, you can enlarge or reduce your document ...

Owner's Manual
Page 39
The Dell All-In-One Center appears. 2 Select a copy quantity and color. 3 Click See More Copy Settings to: • Choose a copy quality. • Select the blank paper ... size of your new image. 7 When you finish customizing your image, click Print Now. Changing Copy Settings 1 Click Start→ Programs or All Programs→ Dell Printers→ Dell Photo AIO Printer 942→ Dell All-In-One Center.
The Dell All-In-One Center appears. 2 Select a copy quantity and color. 3 Click See More Copy Settings to: • Choose a copy quality. • Select the blank paper ... size of your new image. 7 When you finish customizing your image, click Print Now. Changing Copy Settings 1 Click Start→ Programs or All Programs→ Dell Printers→ Dell Photo AIO Printer 942→ Dell All-In-One Center.

Owner's Manual
Page 41
... program appears with the arrow on page 31. 4 Close the top cover. 5 Click Start→ Programs or All Programs→ Dell Printers→ Dell Photo AIO Printer 942→ Dell All-In-One Center. Scanning Multiple Pages or Images 1 Turn on your computer and printer, and make sure they are connected. 2... Open the top cover. 3 Place the first sheet of your settings, click Scan Now. The Dell All-In-One Center appears. 6...
... program appears with the arrow on page 31. 4 Close the top cover. 5 Click Start→ Programs or All Programs→ Dell Printers→ Dell Photo AIO Printer 942→ Dell All-In-One Center. Scanning Multiple Pages or Images 1 Turn on your computer and printer, and make sure they are connected. 2... Open the top cover. 3 Place the first sheet of your settings, click Scan Now. The Dell All-In-One Center appears. 6...

Owner's Manual
Page 42
... Now. check with the arrow on the scanner glass and make sure they are connected. 2 Click Start→ Programs or All Programs→ Dell Printers→ Dell Photo AIO Printer 942→ Dell All-In-One Center. drop-down menu, select a word processing or text-editing program. 7 In the How will the scan be installed... the instructions on a separate CD. This software is installed. 1 Turn on page 31. 4 Close the top cover. 5 Click Start→ Programs or All Programs→ Dell Printers→ Dell Photo AIO Printer 942→ Dell All-In-One Center.
... Now. check with the arrow on the scanner glass and make sure they are connected. 2 Click Start→ Programs or All Programs→ Dell Printers→ Dell Photo AIO Printer 942→ Dell All-In-One Center. drop-down menu, select a word processing or text-editing program. 7 In the How will the scan be installed... the instructions on a separate CD. This software is installed. 1 Turn on page 31. 4 Close the top cover. 5 Click Start→ Programs or All Programs→ Dell Printers→ Dell Photo AIO Printer 942→ Dell All-In-One Center.
Owner's Manual
Page 43
The Dell All-In-One Center appears. 6 Click Preview Now. 7 In the Creative Tasks section, click E-mail an image to a friend. 8 In the What is equipped with a ... glass and make a selection. 9 Follow the instructions on page 31. 4 Close the top cover. 5 Click Start→ Programs or All Programs→ Dell Printers→ Dell Photo AIO Printer 942→ Dell All-In-One Center. Faxing To send a fax using this , consult the Help for e-mail. 10 Click Next. 11 Open your e-mail program...
The Dell All-In-One Center appears. 6 Click Preview Now. 7 In the Creative Tasks section, click E-mail an image to a friend. 8 In the What is equipped with a ... glass and make a selection. 9 Follow the instructions on page 31. 4 Close the top cover. 5 Click Start→ Programs or All Programs→ Dell Printers→ Dell Photo AIO Printer 942→ Dell All-In-One Center. Faxing To send a fax using this , consult the Help for e-mail. 10 Click Next. 11 Open your e-mail program...

Owner's Manual
Page 45
...Next. 13 On the Routing Options screen, click to select the Print it on check box if you select this check box, select the Dell Photo AIO Printer 942 to send or receive faxes. Make sure your machine to receive faxes in a folder check box if you are now ready to print .... Faxing a Paper Document To fax a single or multiple page paper document, use the Dell All-In-One Center. 1 Turn on page 31. 3 Click Start→ Programs or All Programs→ Dell Printers→ Dell Photo AIO Printer 942→ Dell All-In-One Center. When you want each fax. Using the Printer 45 You are...
...Next. 13 On the Routing Options screen, click to select the Print it on check box if you select this check box, select the Dell Photo AIO Printer 942 to send or receive faxes. Make sure your machine to receive faxes in a folder check box if you are now ready to print .... Faxing a Paper Document To fax a single or multiple page paper document, use the Dell All-In-One Center. 1 Turn on page 31. 3 Click Start→ Programs or All Programs→ Dell Printers→ Dell Photo AIO Printer 942→ Dell All-In-One Center. When you want each fax. Using the Printer 45 You are...

Owner's Manual
Page 48
... • xD-Picture Card 48 Using the Printer You can save the photos to your photos Using Memory Cards Most digital cameras use your Dell Photo AIO Printer 942 to perform many photo-printing functions, even if it is not connected to a computer: • Print thumbnails of the photos stored on your memory...
... • xD-Picture Card 48 Using the Printer You can save the photos to your photos Using Memory Cards Most digital cameras use your Dell Photo AIO Printer 942 to perform many photo-printing functions, even if it is not connected to a computer: • Print thumbnails of the photos stored on your memory...

Owner's Manual
Page 55
... screen. • Networking button - Understanding the Printer Software 55 To access the Dell Printer Solution Center: Click Start→ Programs or All Programs→ Dell Printers→ Dell Photo AIO Printer 942→ Dell Printer Solution Center. Using the Dell All-In-One Center The Dell All-In-One Center allows you to: • Scan, copy, fax, and...
... screen. • Networking button - Understanding the Printer Software 55 To access the Dell Printer Solution Center: Click Start→ Programs or All Programs→ Dell Printers→ Dell Photo AIO Printer 942→ Dell Printer Solution Center. Using the Dell All-In-One Center The Dell All-In-One Center allows you to: • Scan, copy, fax, and...

Owner's Manual
Page 56
... photos (copy them to folders, print them, perform creative copying). To access the Dell All-In-One Center: Click Start→ Programs or All Programs→ Dell Printers→ Dell Photo AIO Printer 942→ Dell All-In-One Center. NOTE: Click See More Scan Settings to view all settings.... For more information about the Dell All-In-One Center, click Help in a scanned document (...
... photos (copy them to folders, print them, perform creative copying). To access the Dell All-In-One Center: Click Start→ Programs or All Programs→ Dell Printers→ Dell Photo AIO Printer 942→ Dell All-In-One Center. NOTE: Click See More Scan Settings to view all settings.... For more information about the Dell All-In-One Center, click Help in a scanned document (...

Owner's Manual
Page 59
... Printer in Photo Mode" on the operator panel or select Save to your computer by clicking Start→ Programs or All Programs→ Dell Printers→ Dell Photo AIO Printer 942→ Memory Card Manager. menu. You can also launch MCM from the I Want To... Understanding the Printer Software 59 Using the Memory Card...
... Printer in Photo Mode" on the operator panel or select Save to your computer by clicking Start→ Programs or All Programs→ Dell Printers→ Dell Photo AIO Printer 942→ Memory Card Manager. menu. You can also launch MCM from the I Want To... Understanding the Printer Software 59 Using the Memory Card...

Owner's Manual
Page 67
...Print. For more information, see "Loading Paper" on page 28. 2 Click Start→ Programs or All Programs→ Dell Printers→ Dell Photo AIO Printer 942→ Dell Printer Solution Center. 3 Click the Maintenance tab. 4 Click Clean to verify the improved print quality. 7 If you are ... Print. For more information, see "Loading Paper" on page 28. 2 Click Start→ Programs or All Programs→ Dell Printers→ Dell Photo AIO Printer 942→ Dell Printer Solution Center. 3 Click the Maintenance tab. 4 Click Align to clean the nozzles when: • White lines appear ...
...Print. For more information, see "Loading Paper" on page 28. 2 Click Start→ Programs or All Programs→ Dell Printers→ Dell Photo AIO Printer 942→ Dell Printer Solution Center. 3 Click the Maintenance tab. 4 Click Clean to verify the improved print quality. 7 If you are ... Print. For more information, see "Loading Paper" on page 28. 2 Click Start→ Programs or All Programs→ Dell Printers→ Dell Photo AIO Printer 942→ Dell Printer Solution Center. 3 Click the Maintenance tab. 4 Click Align to clean the nozzles when: • White lines appear ...
Owner's Manual
Page 69
... installation screen appears, click Install or Install Now. 5 Follow the instructions on the setup diagram for your printer, and then restart the computer. The Dell Photo AIO Printer 942 supports Windows 2000 and Windows XP. Setup Problems Computer Problems VE R I F Y T H A T Y O U R P R I N T E R I S C O M P A T I B L E W I T H Y O U R C O M P U T E R - 5 Troubleshooting Follow these tips when you troubleshoot your printer: • If the printer...
... installation screen appears, click Install or Install Now. 5 Follow the instructions on the setup diagram for your printer, and then restart the computer. The Dell Photo AIO Printer 942 supports Windows 2000 and Windows XP. Setup Problems Computer Problems VE R I F Y T H A T Y O U R P R I N T E R I S C O M P A T I B L E W I T H Y O U R C O M P U T E R - 5 Troubleshooting Follow these tips when you troubleshoot your printer: • If the printer...
Owner's Manual
Page 70
...Start→ Printers and Faxes. For more information, see which printer is not installed. If the Dell Photo AIO Printer 942 does not appear in the list of your Dell printer in your Printers folder, make sure when disconnecting and reconnecting the printer from your printer and ...- Windows XP 1 Click Start→ Printers and Faxes. 2 Right-click Dell Photo AIO Printer 942 and select Set as Default. Windows 2000 1 Click Start→ Settings→ Printers. 2 Right-click Dell Photo AIO Printer 942 and select Set as Default. To prevent multiple instances of programs, the printer...
...Start→ Printers and Faxes. For more information, see which printer is not installed. If the Dell Photo AIO Printer 942 does not appear in the list of your Dell printer in your Printers folder, make sure when disconnecting and reconnecting the printer from your printer and ...- Windows XP 1 Click Start→ Printers and Faxes. 2 Right-click Dell Photo AIO Printer 942 and select Set as Default. Windows 2000 1 Click Start→ Settings→ Printers. 2 Right-click Dell Photo AIO Printer 942 and select Set as Default. To prevent multiple instances of programs, the printer...
Owner's Manual
Page 71
..., click Start→ My Computer. 1 Click Start→ Programs or All Programs→ Dell Printers→ Dell Photo AIO Printer 942→ Uninstall Dell Photo AIO Printer 942. 2 Follow the instructions on the screen. 3 Restart your screen to complete the installation. ... Printing, click it . If a check mark is next to deselect the option. Windows XP 1 Click Start→ Settings→ Printers and Faxes. 2 Double-click Dell Photo AIO Printer 942, and then click Printer. 3 Make sure a check mark is not next to Pause Printing. C H E C K F O R F L A S H I N G L I G HT S O N T ...
..., click Start→ My Computer. 1 Click Start→ Programs or All Programs→ Dell Printers→ Dell Photo AIO Printer 942→ Uninstall Dell Photo AIO Printer 942. 2 Follow the instructions on the screen. 3 Restart your screen to complete the installation. ... Printing, click it . If a check mark is next to deselect the option. Windows XP 1 Click Start→ Settings→ Printers and Faxes. 2 Double-click Dell Photo AIO Printer 942, and then click Printer. 3 Make sure a check mark is not next to Pause Printing. C H E C K F O R F L A S H I N G L I G HT S O N T ...


