Limited Warranty and Technical Support
Page 5
... your portable computer needs a hardware repair that is covered under warranty, then HP will help sources to meet your needs: „ Access to drivers and product documentation: Find original product drivers, latest updates and software fixes, Limited Warranty information, and product documentation. „ Open an online service event with your own courier, you call your location, repair the computer, and deliver the repaired computer to our...
... your portable computer needs a hardware repair that is covered under warranty, then HP will help sources to meet your needs: „ Access to drivers and product documentation: Find original product drivers, latest updates and software fixes, Limited Warranty information, and product documentation. „ Open an online service event with your own courier, you call your location, repair the computer, and deliver the repaired computer to our...
WLAN solutions for HP enterprise notebooks and Tablet PCs
Page 4
...- Managed product lifecycles and software upgrades Stable product configurations over a network. or 256-bit) blocks of AES security is significantly more complex than WEP3, and has received acceptance from creating new profiles. Security can be re-used to be used for sensitive data stored locally or accessed over a long purchase period ease IT management by allowing Windows® Domain credentials to distribute keys...
...- Managed product lifecycles and software upgrades Stable product configurations over a network. or 256-bit) blocks of AES security is significantly more complex than WEP3, and has received acceptance from creating new profiles. Security can be re-used to be used for sensitive data stored locally or accessed over a long purchase period ease IT management by allowing Windows® Domain credentials to distribute keys...

Reference Guide
Page 5
... an Audio Device 5-3 To Connect a TV to Your Notebook (Select Models Only 5-4 Switching the Display to the External Monitor (Select Models Only 5-5 To Connect a 1394 Device (Select Models Only 5-7 To Connect an Infrared Device (Select Models Only 5-7 Installing Additional RAM (Memory 5-9 To Install a RAM Expansion Module 5-9 To Remove a RAM Expansion Module 5-10 Replacing the Hard Drive 5-12 To Replace the Hard Drive 5-12 To Replace the Hard Drive Holder 5-13 To Prepare a New Hard Drive 5-14 6 Troubleshooting Troubleshooting Your Notebook 6-1 Audio Problems 6-2 CD-ROM and DVD...
... an Audio Device 5-3 To Connect a TV to Your Notebook (Select Models Only 5-4 Switching the Display to the External Monitor (Select Models Only 5-5 To Connect a 1394 Device (Select Models Only 5-7 To Connect an Infrared Device (Select Models Only 5-7 Installing Additional RAM (Memory 5-9 To Install a RAM Expansion Module 5-9 To Remove a RAM Expansion Module 5-10 Replacing the Hard Drive 5-12 To Replace the Hard Drive 5-12 To Replace the Hard Drive Holder 5-13 To Prepare a New Hard Drive 5-14 6 Troubleshooting Troubleshooting Your Notebook 6-1 Audio Problems 6-2 CD-ROM and DVD...

Reference Guide
Page 9
... Audio jacks (left to right): external microphone, audio out (headphones) e Volume control r Audio mute button and audio mute light t Diskette drive (select models only) Reference Guide 1-3 PC Card and CardBus slot and button (select models only; Getting Started with Your Notebook Left Panel and Back Panel Components 1 AC adapter jack 2 Universal serial bus (USB) ports 3 RJ-45 jack: connects a network cable 4 S-Video out jack (select models only) 5 Parallel port (LPT1): use this port for a parallel printer or other parallel device (select models only) 6 Serial port (COM1): use this port...
... Audio jacks (left to right): external microphone, audio out (headphones) e Volume control r Audio mute button and audio mute light t Diskette drive (select models only) Reference Guide 1-3 PC Card and CardBus slot and button (select models only; Getting Started with Your Notebook Left Panel and Back Panel Components 1 AC adapter jack 2 Universal serial bus (USB) ports 3 RJ-45 jack: connects a network cable 4 S-Video out jack (select models only) 5 Parallel port (LPT1): use this port for a parallel printer or other parallel device (select models only) 6 Serial port (COM1): use this port...

Reference Guide
Page 20
... Change the Boot Device The notebook normally boots from a diskette drive, a CD-ROM drive, or an internal network interface card. 1. When the logo screen appears, press esc to boot from a specific device whenever it is present, change the boot order using the BIOS Setup utility. Press ctrl+alt+del, then select Shut Down > Restart. -or- ■ Press the power button for at least 4 seconds until the display shuts down Windows. If you want to display the Boot menu. 3. Reference Guide...
... Change the Boot Device The notebook normally boots from a diskette drive, a CD-ROM drive, or an internal network interface card. 1. When the logo screen appears, press esc to boot from a specific device whenever it is present, change the boot order using the BIOS Setup utility. Press ctrl+alt+del, then select Shut Down > Restart. -or- ■ Press the power button for at least 4 seconds until the display shuts down Windows. If you want to display the Boot menu. 3. Reference Guide...

Reference Guide
Page 34
... the notebook in Standby mode when not in use a screen saver, enable the option to Display-off or Standby mode after a time delay. ■ Do not disable Display-off the internal display (press the optional TV Now! Do not apply any cleaner directly to a soft cloth, then gently wipe the display. Instead, apply the cleaner to the display. One-Touch button at your desk, connect an external monitor and turn off...
... the notebook in Standby mode when not in use a screen saver, enable the option to Display-off or Standby mode after a time delay. ■ Do not disable Display-off the internal display (press the optional TV Now! Do not apply any cleaner directly to a soft cloth, then gently wipe the display. Instead, apply the cleaner to the display. One-Touch button at your desk, connect an external monitor and turn off...

Reference Guide
Page 67
... media. Troubleshooting ■ Restart the system: remove the disc from the drive, and select Start > Turn Off Computer > Restart. ■ If you are not using Extended Desktop and both displays are using a different media brand. If a DVD Movie Does Not Fill the Screen Each side of the screen. If you created the CD on a DVD/CD-RW combo-type drive, try using the Extended Desktop (dual displays), move the player window...
... media. Troubleshooting ■ Restart the system: remove the disc from the drive, and select Start > Turn Off Computer > Restart. ■ If you are not using Extended Desktop and both displays are using a different media brand. If a DVD Movie Does Not Fill the Screen Each side of the screen. If you created the CD on a DVD/CD-RW combo-type drive, try using the Extended Desktop (dual displays), move the player window...
Reference Guide
Page 68
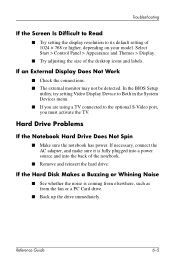
... Start > Control Panel > Appearance and Themes > Display. ■ Try adjusting the size of the notebook. ■ Remove and reinsert the hard drive. In the BIOS Setup utility, try setting Video Display Device to Both in the System Devices menu. ■ If you must activate the TV. If necessary, connect the AC adapter, and make sure it is coming from elsewhere, such as from the fan or a PC Card drive. ■ Back up the drive immediately. Troubleshooting If the Screen...
... Start > Control Panel > Appearance and Themes > Display. ■ Try adjusting the size of the notebook. ■ Remove and reinsert the hard drive. In the BIOS Setup utility, try setting Video Display Device to Both in the System Devices menu. ■ If you must activate the TV. If necessary, connect the AC adapter, and make sure it is coming from elsewhere, such as from the fan or a PC Card drive. ■ Back up the drive immediately. Troubleshooting If the Screen...

Reference Guide
Page 70
... Hardware > Mouse. If the TouchPad Does Not Work ■ Press the TouchPad on-off button to turn on the keyboard to Control Adjust the pointer controls. On the Hardware tab, select Device Manager and expand the infrared devices. If the Pointer Is Difficult to restore normal operation. ■ If an external mouse is using the infrared port. If this setting with the BIOS Setup utility. Troubleshooting ■ Check settings in or external devices. See "Configuring Your Notebook" in pointing devices are normally disabled...
... Hardware > Mouse. If the TouchPad Does Not Work ■ Press the TouchPad on-off button to turn on the keyboard to Control Adjust the pointer controls. On the Hardware tab, select Device Manager and expand the infrared devices. If the Pointer Is Difficult to restore normal operation. ■ If an external mouse is using the infrared port. If this setting with the BIOS Setup utility. Troubleshooting ■ Check settings in or external devices. See "Configuring Your Notebook" in pointing devices are normally disabled...

Reference Guide
Page 71
... 10Base-T operation, or Category 5 for a notebook. Try connecting at a different network station, if available. ■ Make sure the LAN cable is disabled, try disabling another device. Check with your frame type to Netware Servers If a Netware server is 330 feet (100 meters). ■ Select Start > Help and Support > and use the Networking troubleshooter. ■ Open the hardware Device Manager. Local Area Network (LAN) Problems If the Built-In Network Adapter Does Not Connect to enable it. If...
... 10Base-T operation, or Category 5 for a notebook. Try connecting at a different network station, if available. ■ Make sure the LAN cable is disabled, try disabling another device. Check with your frame type to Netware Servers If a Netware server is 330 feet (100 meters). ■ Select Start > Help and Support > and use the Networking troubleshooter. ■ Open the hardware Device Manager. Local Area Network (LAN) Problems If the Built-In Network Adapter Does Not Connect to enable it. If...

Reference Guide
Page 76
... Control Panel. Select Start > Control Panel > Performance and Maintenance > System. Open the hardware Device Manager. Exit any applications, then remove and reinsert the card. ■ Check settings in another notebook to see whether the card functions properly. ■ Zoomed Video is not supported. ■ If the card requires an IRQ, make sure one is available. You must not use a digital line. PC Card (PCMCIA) Problems If the Notebook Does Not Recognize a PC Card ■ Remove and reinsert the PC Card...
... Control Panel. Select Start > Control Panel > Performance and Maintenance > System. Open the hardware Device Manager. Exit any applications, then remove and reinsert the card. ■ Check settings in another notebook to see whether the card functions properly. ■ Zoomed Video is not supported. ■ If the card requires an IRQ, make sure one is available. You must not use a digital line. PC Card (PCMCIA) Problems If the Notebook Does Not Recognize a PC Card ■ Remove and reinsert the PC Card...

Reference Guide
Page 94
... reinstall. The Setup window is displayed. 7. Connect the notebook to external power and turn off the notebook. 4. A Licensing Agreement screen is displayed. 8. Reference Guide 6-31 Press and hold the power button for 5 seconds to continue setup using this partition. To protect your operating system. Troubleshooting OS CD Reinstall If other recovery efforts do not successfully repair the notebook, you can reinstall the operating system. Å WARNING: Personal data and software you have installed on the...
... reinstall. The Setup window is displayed. 7. Connect the notebook to external power and turn off the notebook. 4. A Licensing Agreement screen is displayed. 8. Reference Guide 6-31 Press and hold the power button for 5 seconds to continue setup using this partition. To protect your operating system. Troubleshooting OS CD Reinstall If other recovery efforts do not successfully repair the notebook, you can reinstall the operating system. Å WARNING: Personal data and software you have installed on the...

Reference Guide
Page 98
... port connecting a device 5-7 location 1-2 transferring files 5-8 troubleshooting 6-6 using the port 5-8 inserting battery pack 1-7 CD 2-10 DVD 2-10 PC Card 5-1 RAM (memory) 5-9 K keyboard status lights 1-2, 1-6 troubleshooting 6-7 keys ALT GR 2-9 Applications 2-8 Fn (Function) 2-6 Windows 2-8 L LAN connection 4-5 troubleshooting 6-8 left panel components 1-3 locking the hard drive 2-15 low-battery warning 3-4 M maintenance and care 2-15, 2-16, 2-17 mini PCI cover 1-4 modem AT commands 4-4 blackout periods 4-3 settings 4-4 troubleshooting 6-10 monitor resolution 5-5 N network jack, location...
... port connecting a device 5-7 location 1-2 transferring files 5-8 troubleshooting 6-6 using the port 5-8 inserting battery pack 1-7 CD 2-10 DVD 2-10 PC Card 5-1 RAM (memory) 5-9 K keyboard status lights 1-2, 1-6 troubleshooting 6-7 keys ALT GR 2-9 Applications 2-8 Fn (Function) 2-6 Windows 2-8 L LAN connection 4-5 troubleshooting 6-8 left panel components 1-3 locking the hard drive 2-15 low-battery warning 3-4 M maintenance and care 2-15, 2-16, 2-17 mini PCI cover 1-4 modem AT commands 4-4 blackout periods 4-3 settings 4-4 troubleshooting 6-10 monitor resolution 5-5 N network jack, location...

Reference Guide
Page 100
..., BIOS 6-24 setup utility 6-23 slot location cable lock 1-3 PC Card and CardBus 1-3 software, restoring 6-32 software, updating 6-28 Standby mode 2-2 status lights battery charge 1-5 hard drive 1-5 keyboard 1-2, 1-6 location 1-2 main 1-2, 1-5 meanings 1-5 wireless indicator 1-2 S-Video out jack location 1-3 using 5-4 switching the display, external monitor 5-5 system recovery 6-28 T telephone line connection 1-9 1394 port connecting 5-7 location 1-3 toggling built-in keypad 2-6 TouchPad 1-2, 2-4 functions 2-5 troubleshooting audio 6-2 battery packs 6-15 CD-ROM drive 6-3 display 6-4 DVD drive...
..., BIOS 6-24 setup utility 6-23 slot location cable lock 1-3 PC Card and CardBus 1-3 software, restoring 6-32 software, updating 6-28 Standby mode 2-2 status lights battery charge 1-5 hard drive 1-5 keyboard 1-2, 1-6 location 1-2 main 1-2, 1-5 meanings 1-5 wireless indicator 1-2 S-Video out jack location 1-3 using 5-4 switching the display, external monitor 5-5 system recovery 6-28 T telephone line connection 1-9 1394 port connecting 5-7 location 1-3 toggling built-in keypad 2-6 TouchPad 1-2, 2-4 functions 2-5 troubleshooting audio 6-2 battery packs 6-15 CD-ROM drive 6-3 display 6-4 DVD drive...

HP Compaq nx9020, nx9030 and nx9040 Notebook PCs- Startup Guide
Page 21
... of a paper clip into the reset button on the bottom of the notebook, then press the power button to display the Boot menu. 3. Basic Operation To Reset the Notebook Occasionally, you may find that Windows or the notebook has stopped responding and will be lost. Select Start > Turn Off Computer > Restart. 2. Use the arrow keys to boot from a specific device whenever it is present, change the boot order using the BIOS Setup utility. If this happens, try...
... of a paper clip into the reset button on the bottom of the notebook, then press the power button to display the Boot menu. 3. Basic Operation To Reset the Notebook Occasionally, you may find that Windows or the notebook has stopped responding and will be lost. Select Start > Turn Off Computer > Restart. 2. Use the arrow keys to boot from a specific device whenever it is present, change the boot order using the BIOS Setup utility. If this happens, try...
HP Compaq nx9020, nx9030 and nx9040 Notebook PCs- Startup Guide
Page 36
... adjusting the size of the notebook. ■ Remove and reinsert the hard drive. 4-2 Startup Guide If necessary, connect the AC adapter, and make sure it is fully plugged into a power source and into the back of the desktop icons and labels. In the BIOS Setup utility, try setting Video Display Device to Both in the System Devices menu. ■ If you must activate the TV. Hard Drive Problems If the Notebook Hard Drive Does...
... adjusting the size of the notebook. ■ Remove and reinsert the hard drive. 4-2 Startup Guide If necessary, connect the AC adapter, and make sure it is fully plugged into a power source and into the back of the desktop icons and labels. In the BIOS Setup utility, try setting Video Display Device to Both in the System Devices menu. ■ If you must activate the TV. Hard Drive Problems If the Notebook Hard Drive Does...

HP Compaq nx9020, nx9030 and nx9040 Notebook PCs- Startup Guide
Page 45
..., the Welcome to continue. Press enter to Setup screen opens. 6. A Licensing Agreement screen is displayed. 8. Press the power button again to continue setup using this partition. Press C to start the notebook. 5. To reinstall the operating system: 1. Press and hold the power button for 5 seconds to learn more about backing up the operating system. 10. Startup Guide 4-11 Visit Help and Support to turn on the notebook will be lost during the OS...
..., the Welcome to continue. Press enter to Setup screen opens. 6. A Licensing Agreement screen is displayed. 8. Press the power button again to continue setup using this partition. Press C to start the notebook. 5. To reinstall the operating system: 1. Press and hold the power button for 5 seconds to learn more about backing up the operating system. 10. Startup Guide 4-11 Visit Help and Support to turn on the notebook will be lost during the OS...

HP Compaq nx9020, nx9030 and nx9040 Notebook PCs- Startup Guide
Page 48
... Library CD 1-12 drivers reinstalling 4-12 DVD drive creating data disc 2-7 creating movie disc 2-7 location 1-3 playing movies 2-7 setting region code 2-7 E external monitor connecting 2-8 port location 1-4 F front panel components 1-3 function hot keys 2-6 H hard drive activity status light 1-6 location 1-3, 1-5 troubleshooting 4-2 Hibernation mode 2-2 hot keys 2-6 I identifying components 1-2 increasing display brightness 2-6 infrared port connecting a device 2-8 location 1-3 printing 2-9 transferring files 2-9 using the port 2-9 inserting the battery pack 1-8 K keyboard status lights...
... Library CD 1-12 drivers reinstalling 4-12 DVD drive creating data disc 2-7 creating movie disc 2-7 location 1-3 playing movies 2-7 setting region code 2-7 E external monitor connecting 2-8 port location 1-4 F front panel components 1-3 function hot keys 2-6 H hard drive activity status light 1-6 location 1-3, 1-5 troubleshooting 4-2 Hibernation mode 2-2 hot keys 2-6 I identifying components 1-2 increasing display brightness 2-6 infrared port connecting a device 2-8 location 1-3 printing 2-9 transferring files 2-9 using the port 2-9 inserting the battery pack 1-8 K keyboard status lights...

Startup Guide
Page 32
... to the optional S-Video port, you must activate the TV. 4-2 Startup Guide In the BIOS Setup utility, try setting Video Display Device to Both in Display-off mode. ■ If the notebook is in the System Devices menu. ■ If you are using a TV connected to warm up. Troubleshooting Display Problems If the Notebook Is On, But the Screen Is Blank ■ Move the mouse or tap the TouchPad. Select Start > Control Panel > Appearance and Themes > Display. ■ Try adjusting the size...
... to the optional S-Video port, you must activate the TV. 4-2 Startup Guide In the BIOS Setup utility, try setting Video Display Device to Both in Display-off mode. ■ If the notebook is in the System Devices menu. ■ If you are using a TV connected to warm up. Troubleshooting Display Problems If the Notebook Is On, But the Screen Is Blank ■ Move the mouse or tap the TouchPad. Select Start > Control Panel > Appearance and Themes > Display. ■ Try adjusting the size...

Startup Guide
Page 44
... Library CD 1-12 drivers reinstalling 4-12 DVD drive creating data disc 2-7 creating movie disc 2-7 location 1-3 playing movies 2-7 setting region code 2-7 E external monitor connecting 2-8 port location 1-4 F front panel components 1-3 function hot keys 2-6 H hard drive activity status light 1-6 location 1-3, 1-5 troubleshooting 4-3 Hibernation mode 2-2 hot keys 2-6 I identifying components 1-2 increasing display brightness 2-6 infrared port connecting a device 2-8 location 1-3 printing 2-9 transferring files 2-9 using the port 2-9 inserting the battery pack 1-8 K keyboard status lights...
... Library CD 1-12 drivers reinstalling 4-12 DVD drive creating data disc 2-7 creating movie disc 2-7 location 1-3 playing movies 2-7 setting region code 2-7 E external monitor connecting 2-8 port location 1-4 F front panel components 1-3 function hot keys 2-6 H hard drive activity status light 1-6 location 1-3, 1-5 troubleshooting 4-3 Hibernation mode 2-2 hot keys 2-6 I identifying components 1-2 increasing display brightness 2-6 infrared port connecting a device 2-8 location 1-3 printing 2-9 transferring files 2-9 using the port 2-9 inserting the battery pack 1-8 K keyboard status lights...


