Backup and Recovery - Windows Vista
Page 7
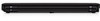
... create a set of recovery discs of system instability or failure. Select Start > All Programs > HP Backup & Recovery > HP Backup and Recovery Manager. 2. Follow the on-screen instructions. 1 Click Create factory software recovery CDs or DVDs to continue the disc creation. Click Next. 3. To create a set of the recovery discs can cancel...
... create a set of recovery discs of system instability or failure. Select Start > All Programs > HP Backup & Recovery > HP Backup and Recovery Manager. 2. Follow the on-screen instructions. 1 Click Create factory software recovery CDs or DVDs to continue the disc creation. Click Next. 3. To create a set of the recovery discs can cancel...
Backup and Recovery - Windows Vista
Page 10
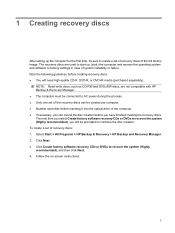
... paste it into a word-processing document: a. To copy the entire screen, press fn+prt sc. Display the screen. To copy only the active window, press alt+fn+prt sc. The screen shot can be a time saver if you can perform backup and recovery procedures, the computer must be ...can be connected to external power. NOTE: Before you have to reset your preferences. NOTE: Drivers, utilities, and applications installed by taking a screen shot of recovery discs using HP Backup and Recovery Manager. ● Create system recovery points using HP Backup and Recovery Manager, and periodically ...
... paste it into a word-processing document: a. To copy the entire screen, press fn+prt sc. Display the screen. To copy only the active window, press alt+fn+prt sc. The screen shot can be a time saver if you can perform backup and recovery procedures, the computer must be ...can be connected to external power. NOTE: Before you have to reset your preferences. NOTE: Drivers, utilities, and applications installed by taking a screen shot of recovery discs using HP Backup and Recovery Manager. ● Create system recovery points using HP Backup and Recovery Manager, and periodically ...
Backup and Recovery - Windows Vista
Page 11
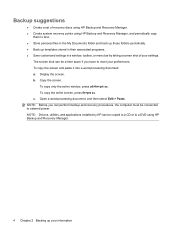
... external hard drive, or to protect system settings and important data files, and then click Next. 4. NOTE: This process will take several minutes, depending on -screen instructions. Click Next. 3. Backing up individual files and folders, and then click Next. 5. Select Start > All Programs > HP Backup & Recovery > HP Backup and Recovery Manager...
... external hard drive, or to protect system settings and important data files, and then click Next. 4. NOTE: This process will take several minutes, depending on -screen instructions. Click Next. 3. Backing up individual files and folders, and then click Next. 5. Select Start > All Programs > HP Backup & Recovery > HP Backup and Recovery Manager...
Backup and Recovery - Windows Vista
Page 12
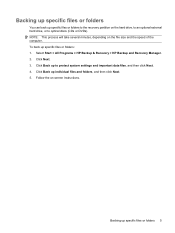
... image, including the Windows® operating system, software applications, and all personal files and folders. NOTE: This process may take over an hour, depending on -screen instructions. 6 Chapter 2 Backing up your computer speed and the amount of data being stored. Click Next. 3. Click Back up to protect system settings and important...
... image, including the Windows® operating system, software applications, and all personal files and folders. NOTE: This process may take over an hour, depending on -screen instructions. 6 Chapter 2 Backing up your computer speed and the amount of data being stored. Click Next. 3. Click Back up to protect system settings and important...
Backup and Recovery - Windows Vista
Page 13
... created the first time you want to reverse subsequent changes made after that recovery point. Click Back up modifications since that time. Follow the on-screen instructions. Select Start > All Programs > HP Backup & Recovery > HP Backup and Recovery Manager. 2. This allows you to an earlier recovery point does not affect data...
... created the first time you want to reverse subsequent changes made after that recovery point. Click Back up modifications since that time. Follow the on-screen instructions. Select Start > All Programs > HP Backup & Recovery > HP Backup and Recovery Manager. 2. This allows you to an earlier recovery point does not affect data...
Backup and Recovery - Windows Vista
Page 14
With this tool, you can schedule backups at specific intervals (daily, weekly, or monthly) or at specific events, such as at system restart or when you dock to schedule backups for the entire system, for recovery points, or for specific files and folders. To schedule backups: 1. Scheduling backups Use HP Backup Scheduler to an optional docking station (select models only). Follow the on-screen instructions. 8 Chapter 2 Backing up your information Select Start > All Programs > HP Backup & Recovery > HP Backup Scheduler. 2.
With this tool, you can schedule backups at specific intervals (daily, weekly, or monthly) or at specific events, such as at system restart or when you dock to schedule backups for the entire system, for recovery points, or for specific files and folders. To schedule backups: 1. Scheduling backups Use HP Backup Scheduler to an optional docking station (select models only). Follow the on-screen instructions. 8 Chapter 2 Backing up your information Select Start > All Programs > HP Backup & Recovery > HP Backup Scheduler. 2.

Backup and Recovery - Windows Vista
Page 16
Follow the on-screen instructions. 10 Chapter 3 Performing a recovery Performing a recovery from the recovery discs To perform a recovery from the recovery discs, follow these steps: 1. Back up all personal files. 2. Insert the first recovery disc into the optical drive and restart the computer. 3.
Follow the on-screen instructions. 10 Chapter 3 Performing a recovery Performing a recovery from the recovery discs To perform a recovery from the recovery discs, follow these steps: 1. Back up all personal files. 2. Insert the first recovery disc into the optical drive and restart the computer. 3.

Backup and Recovery - Windows Vista
Page 18
Click Recover important files or the entire system, and then click Next. 5. Initiating a recovery in Windows To initiate a recovery in Windows, follow these steps: 1. Select Start > All Programs > HP Backup & Recovery > HP Backup and Recovery Manager. 3. Click Next. 4. Back up all personal files. 2. Follow the on-screen instructions. 12 Chapter 3 Performing a recovery
Click Recover important files or the entire system, and then click Next. 5. Initiating a recovery in Windows To initiate a recovery in Windows, follow these steps: 1. Select Start > All Programs > HP Backup & Recovery > HP Backup and Recovery Manager. 3. Click Next. 4. Back up all personal files. 2. Follow the on-screen instructions. 12 Chapter 3 Performing a recovery

Backup and Recovery - Windows Vista
Page 19
Click a recovery option, and then click Next. 4. Follow the on-screen instructions. Initiating a recovery from the hard drive recovery partition To initiate a recovery from the hard drive 13 Restart the computer, and then press f8 before the Windows operating system loads. 3. Performing a recovery from the hard drive recovery partition, follow these steps: 1. Back up all personal files. 2.
Click a recovery option, and then click Next. 4. Follow the on-screen instructions. Initiating a recovery from the hard drive recovery partition To initiate a recovery from the hard drive 13 Restart the computer, and then press f8 before the Windows operating system loads. 3. Performing a recovery from the hard drive recovery partition, follow these steps: 1. Back up all personal files. 2.
Backup and Recovery - Windows XP
Page 6
... Note the following when backing up: ● Store personal files in the My Documents folder, and back it into a word-processing document: a. Copy the screen image: To copy only the active window, press alt+fn+prt sc. Open a word-processing document, click Edit > Paste. c. To create a backup ... create your initial backup immediately after a system failure is as complete as your preferences. Save the document. To copy the entire screen, press fn+prt sc. NOTE: The backup process may take over an hour, depending on file size and the speed of your information ...
... Note the following when backing up: ● Store personal files in the My Documents folder, and back it into a word-processing document: a. Copy the screen image: To copy only the active window, press alt+fn+prt sc. Open a word-processing document, click Edit > Paste. c. To create a backup ... create your initial backup immediately after a system failure is as complete as your preferences. Save the document. To copy the entire screen, press fn+prt sc. NOTE: The backup process may take over an hour, depending on file size and the speed of your information ...

Backup and Recovery - Windows XP
Page 7
... computer): You can use the discs to recover your operating system and programs installed at the factory. Recovering your information 3 NOTE: For additional information on -screen instructions. Recovering your information To recover information you have previously backed up , follow these steps: 1. The Backup or Restore Wizard opens. 3. Click Start > All Programs...
... computer): You can use the discs to recover your operating system and programs installed at the factory. Recovering your information 3 NOTE: For additional information on -screen instructions. Recovering your information To recover information you have previously backed up , follow these steps: 1. The Backup or Restore Wizard opens. 3. Click Start > All Programs...

Backup and Recovery - Windows XP
Page 8
..., and drivers. Software, drivers, and updates not installed by HP must be manually reinstalled. Shut down the computer. 4. Turn on -screen instructions to install the operating system. 6. Follow the on the computer. 5. Recovering the operating system and programs CAUTION: The recovery process ...reformats and completely erases the hard drive. All files you have created and any software installed on -screen instructions to install the drivers and programs. 4 Chapter 3 Performing a recovery If possible, back up all personal files. 2. Follow ...
..., and drivers. Software, drivers, and updates not installed by HP must be manually reinstalled. Shut down the computer. 4. Turn on -screen instructions to install the operating system. 6. Follow the on the computer. 5. Recovering the operating system and programs CAUTION: The recovery process ...reformats and completely erases the hard drive. All files you have created and any software installed on -screen instructions to install the drivers and programs. 4 Chapter 3 Performing a recovery If possible, back up all personal files. 2. Follow ...
Software Update - Windows XP
Page 5
... updates. You can also access software updates by selecting Start > Help and Support > Update Software & Drivers and following the on -screen instructions. 1 Some download packages contain a file named Readme.txt, which contains information regarding installing and troubleshooting the file. (Readme.txt files...option for updates from HP. To update the software using a Support Software disc, follow these steps: 1. Follow the on -screen instructions. Some BIOS updates may be packaged in compressed files called ROMPaqs. Insert the Support Software disc into the optical drive. 2. ...
... updates. You can also access software updates by selecting Start > Help and Support > Update Software & Drivers and following the on -screen instructions. 1 Some download packages contain a file named Readme.txt, which contains information regarding installing and troubleshooting the file. (Readme.txt files...option for updates from HP. To update the software using a Support Software disc, follow these steps: 1. Follow the on -screen instructions. Some BIOS updates may be packaged in compressed files called ROMPaqs. Insert the Support Software disc into the optical drive. 2. ...
Software Update - Windows XP
Page 6
... for software and driver downloads, and then type your Internet browser, and go to http://www.hp.com/support. 3. Identify your computer is stored on -screen instructions. 2 Updating software Follow the on the system ROM. If your computer model, product category, and series or family. Prepare for data transfer among hardware...
... for software and driver downloads, and then type your Internet browser, and go to http://www.hp.com/support. 3. Identify your computer is stored on -screen instructions. 2 Updating software Follow the on the system ROM. If your computer model, product category, and series or family. Prepare for data transfer among hardware...

Software Update - Windows XP
Page 7
... enter. Turn on or restart the computer, and then press esc while the "Press the ESC key for displaying BIOS information, follow the on-screen instructions. - Click Exit in Windows®) or by using Computer Setup. Updating the BIOS 3 Determining the BIOS version BIOS version information (also...pointing device or the arrow keys to the File menu. 5. To use Computer Setup for Startup Menu" message is displayed at the bottom of the screen, and follow these steps: 1. Press esc to return to select File > System Information. 4. Updating the BIOS To update the BIOS, first determine...
... enter. Turn on or restart the computer, and then press esc while the "Press the ESC key for displaying BIOS information, follow the on-screen instructions. - Click Exit in Windows®) or by using Computer Setup. Updating the BIOS 3 Determining the BIOS version BIOS version information (also...pointing device or the arrow keys to the File menu. 5. To use Computer Setup for Startup Menu" message is displayed at the bottom of the screen, and follow these steps: 1. Press esc to return to select File > System Information. 4. Updating the BIOS To update the BIOS, first determine...
Software Update - Windows XP
Page 8
...BIOS update you recorded earlier, open the folder on your hard drive that is newer than the BIOS version currently installed on the screen after it has been downloaded to download. The hard drive designation is typically Local Disk (C:). 3. During the download and installation, follow...update. 4. BIOS installation procedures vary. If no instructions are posted as needed. Double-click your operating system. 5. Follow the on-screen instructions to install the update. You may not be downloaded. Click the option for software and driver downloads, type your computer model ...
...BIOS update you recorded earlier, open the folder on your hard drive that is newer than the BIOS version currently installed on the screen after it has been downloaded to download. The hard drive designation is typically Local Disk (C:). 3. During the download and installation, follow...update. 4. BIOS installation procedures vary. If no instructions are posted as needed. Double-click your operating system. 5. Follow the on-screen instructions to install the update. You may not be downloaded. Click the option for software and driver downloads, type your computer model ...

Software Update - Windows XP
Page 9
NOTE: After a message on the screen. The BIOS installation begins. 5. Updating the BIOS 5 Complete the installation by following the instructions on the screen reports a successful installation, you may delete the downloaded file from your hard drive.
NOTE: After a message on the screen. The BIOS installation begins. 5. Updating the BIOS 5 Complete the installation by following the instructions on the screen reports a successful installation, you may delete the downloaded file from your hard drive.
Software Update - Windows XP
Page 10
Click Save to save the file to step 6. 3. Updating programs and drivers 1. Proceed to your computer. When the list of the screen. Click Run to do so, restart your country or region. 2. After the file is displayed, click an update to open a window containing additional information. 6. or - ...
Click Save to save the file to step 6. 3. Updating programs and drivers 1. Proceed to your computer. When the list of the screen. Click Run to do so, restart your country or region. 2. After the file is displayed, click an update to open a window containing additional information. 6. or - ...
Compaq 615 Notebook PC and Compaq 610 Notebook PC - Maintenance and Service Guide
Page 19
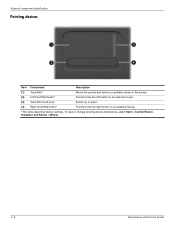
To view or change pointing device preferences, select Start > Control Panel > Hardware and Sound > Mouse. 2-6 Maintenance and Service Guide External component identification Pointing devices Item Component Description (1) TouchPad* Moves the pointer and selects or activates items on the screen. (2) Left TouchPad button* Functions like the left button on an external mouse. (3) TouchPad scroll zone Scrolls up or down. (4) Right TouchPad button* Functions like the right button on an external mouse. *This table describes factory settings.
To view or change pointing device preferences, select Start > Control Panel > Hardware and Sound > Mouse. 2-6 Maintenance and Service Guide External component identification Pointing devices Item Component Description (1) TouchPad* Moves the pointer and selects or activates items on the screen. (2) Left TouchPad button* Functions like the left button on an external mouse. (3) TouchPad scroll zone Scrolls up or down. (4) Right TouchPad button* Functions like the right button on an external mouse. *This table describes factory settings.

Compaq 615 Notebook PC and Compaq 610 Notebook PC - Maintenance and Service Guide
Page 94
...esc while the "Press the ESC key for Startup Menu" message is displayed at the bottom of the screen, or use either a pointing device (TouchPad, pointing stick, or USB mouse) or the keyboard to .... To navigate and select in this guide may not be supported by your computer. Turn on -screen instructions. ✎ You can use the up arrow key or the down arrow key. ❏...scroll up and down, click the up arrow or the down arrow in the upper-right corner of the screen. 2. Select the File, Security, Diagnostics, or System Configuration menu. To start Computer Setup, follow the...
...esc while the "Press the ESC key for Startup Menu" message is displayed at the bottom of the screen, or use either a pointing device (TouchPad, pointing stick, or USB mouse) or the keyboard to .... To navigate and select in this guide may not be supported by your computer. Turn on -screen instructions. ✎ You can use the up arrow key or the down arrow key. ❏...scroll up and down, click the up arrow or the down arrow in the upper-right corner of the screen. 2. Select the File, Security, Diagnostics, or System Configuration menu. To start Computer Setup, follow the...


