

Administration Guide
Page 29
Chapter 1 An Overview of the Cisco IP Phone Understanding the Cisco IP Phone Models 7905G/7912G Figure 1-2 Cisco IP Phone Models 7905G/7912 Features 1 2 9 8 3 4 5 6 7 10 91031 1 LCD screen Displays features such as the time, date, your phone number, caller ID, call status, and softkey tabs. 2 Cisco IP Phone Indicates the Cisco IP Phone Series to which your phone series type belongs. 3 Softkeys Enable you to feature options that are displayed...
Chapter 1 An Overview of the Cisco IP Phone Understanding the Cisco IP Phone Models 7905G/7912G Figure 1-2 Cisco IP Phone Models 7905G/7912 Features 1 2 9 8 3 4 5 6 7 10 91031 1 LCD screen Displays features such as the time, date, your phone number, caller ID, call status, and softkey tabs. 2 Cisco IP Phone Indicates the Cisco IP Phone Series to which your phone series type belongs. 3 Softkeys Enable you to feature options that are displayed...
Administration Guide
Page 92
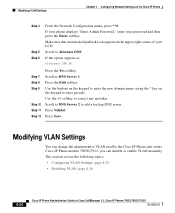
Scroll to DNS Server 1. If your phone displays "Enter Admin Password," enter your LCD. If the option appears as Alternate DNS NO Step 7 Step 8 Step 9 Step 10 Step 11 Step 12 Press ... your password and then press the Enter softkey. Use the buttons on the keypad to enter the new domain name, using the * key on the Cisco IP Phone Step 4 Step 5 Step 6 From the Network Configuration menu, press **#. Press the Edit softkey. Use the Modifying VLAN Settings Chapter 4 Configuring Network Settings on the keypad...
Scroll to DNS Server 1. If your phone displays "Enter Admin Password," enter your LCD. If the option appears as Alternate DNS NO Step 7 Step 8 Step 9 Step 10 Step 11 Step 12 Press ... your password and then press the Enter softkey. Use the buttons on the keypad to enter the new domain name, using the * key on the Cisco IP Phone Step 4 Step 5 Step 6 From the Network Configuration menu, press **#. Press the Edit softkey. Use the Modifying VLAN Settings Chapter 4 Configuring Network Settings on the keypad...

