User Manual
Page 3
... Controller and Projector Keys 8 Back Terminals 9 Operation During Projection 10 Selecting the Input Source 10 To select a different input source 10 3D Input Mode ...10 Horizontal Flipping in the 3D Input Mode 11 Image Operations During Projection 12 Adjusting Image Brightness 12 Selecting the Color Mode 13 Zooming an Image ...13 Momentarily...
... Controller and Projector Keys 8 Back Terminals 9 Operation During Projection 10 Selecting the Input Source 10 To select a different input source 10 3D Input Mode ...10 Horizontal Flipping in the 3D Input Mode 11 Image Operations During Projection 12 Adjusting Image Brightness 12 Selecting the Color Mode 13 Zooming an Image ...13 Momentarily...
User Manual
Page 6
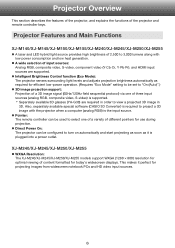
... 3,000 lumens along with the projector when a computer (analog RGB) is required to view a projected 3D image in 3D. XJ-M240/XJ-M245/XJ-M250/XJ-M255 z WXGA Resolution: The XJ-M240/XJ-M245/XJ-M250/XJ-M255 models support WXGA (1280 × 800) resolution for optimal viewing of input sources: Analog RGB,...183;Pb·Pr), and HDMI input sources are required in order to project a 3D image with low power consumption and low heat generation. Also, separately available special software (CASIO 3D Converter) is the input source. z A wide selection of content formatted for projecting ...
... 3,000 lumens along with the projector when a computer (analog RGB) is required to view a projected 3D image in 3D. XJ-M240/XJ-M245/XJ-M250/XJ-M255 z WXGA Resolution: The XJ-M240/XJ-M245/XJ-M250/XJ-M255 models support WXGA (1280 × 800) resolution for optimal viewing of input sources: Analog RGB,...183;Pb·Pr), and HDMI input sources are required in order to project a 3D image with low power consumption and low heat generation. Also, separately available special software (CASIO 3D Converter) is the input source. z A wide selection of content formatted for projecting ...
User Manual
Page 10
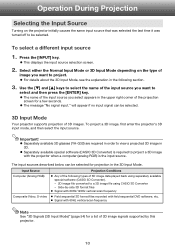
... data played back using separately available special software (CASIO 3D Converter). - 2D image file converted to a 3D image file using CASIO 3D Converter - z For details about the 3D Input Mode, see the explanation in the 3D Input Mode. To project a 3D image, first enter the projector's 3D input mode, and then select the input source. The input sources described...
... data played back using separately available special software (CASIO 3D Converter). - 2D image file converted to a 3D image file using CASIO 3D Converter - z For details about the 3D Input Mode, see the explanation in the 3D Input Mode. To project a 3D image, first enter the projector's 3D input mode, and then select the input source. The input sources described...
User Manual
Page 11
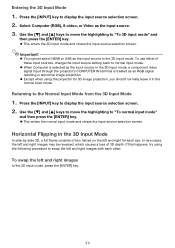
... to swap the left and right images may be reversed, which causes a loss of these input sources, change the input source setting back to "To 3D input mode" and then press the [ENTER] key. Returning to display the input source selection screen. 2. z This enters the normal input mode and closes the... mode, a component video signal input through the projector's COMPUTER IN terminal is treated as an RGB signal resulting in the 3D input mode. If this happens, try using the projector for each other. z You cannot select HDMI or USB as the input source. 3. In rare cases, ...
... to swap the left and right images may be reversed, which causes a loss of these input sources, change the input source setting back to "To 3D input mode" and then press the [ENTER] key. Returning to display the input source selection screen. 2. z This enters the normal input mode and closes the... mode, a component video signal input through the projector's COMPUTER IN terminal is treated as an RGB signal resulting in the 3D input mode. If this happens, try using the projector for each other. z You cannot select HDMI or USB as the input source. 3. In rare cases, ...
User Manual
Page 13
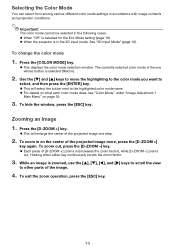
... the center of the image. 4. z This will select the button next to the highlighted color mode name. While an image is selected (filled in the 3D input mode. To zoom out, press the [D-ZOOM -] key. Important! z Each press of the projected image one whose button is zoomed, use the [S], [T],...other parts of the projected image more, press the [D-ZOOM +] key again. To zoom in (increases the zoom factor), while [D-ZOOM -] zooms out. See "3D Input Mode" (page 10). Press the [D-ZOOM +] key. z This will enlarge the center of [D-ZOOM +] zooms in on page 29. 3. To hide ...
... the center of the image. 4. z This will select the button next to the highlighted color mode name. While an image is selected (filled in the 3D input mode. To zoom out, press the [D-ZOOM -] key. Important! z Each press of the projected image one whose button is zoomed, use the [S], [T],...other parts of the projected image more, press the [D-ZOOM +] key again. To zoom in (increases the zoom factor), while [D-ZOOM -] zooms out. See "3D Input Mode" (page 10). Press the [D-ZOOM +] key. z This will enlarge the center of [D-ZOOM +] zooms in on page 29. 3. To hide ...
User Manual
Page 18
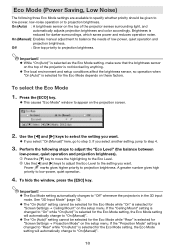
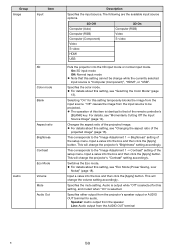
... 3. On (Manual): Enables manual adjustment to select the setting you select "On (Manual)" here, go to "Off" whenever the projector is in the 3D input mode. Use the [W] and [X] keys to balance the needs of the projector senses surrounding light, and automatically adjusts projection brightness and color accordingly. Off... "On (Auto)" is selected for darker surroundings, which saves power and reduces operation noise. A greater number gives high priority to projection brightness. See "3D Input Mode" (page 10). If the "Projection Mode" setting is not blocked by anything.
... 3. On (Manual): Enables manual adjustment to select the setting you select "On (Manual)" here, go to "Off" whenever the projector is in the 3D input mode. Use the [W] and [X] keys to balance the needs of the projector senses surrounding light, and automatically adjusts projection brightness and color accordingly. Off... "On (Auto)" is selected for darker surroundings, which saves power and reduces operation noise. A greater number gives high priority to projection brightness. See "3D Input Mode" (page 10). If the "Projection Mode" setting is not blocked by anything.
User Manual
Page 21
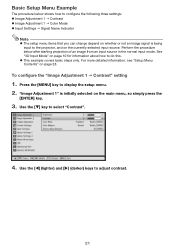
... input to the projector, and on page 10 for information about how to do this. Perform the procedure below shows how to select "Contrast". 4. See "3D Input Mode" on the currently selected input source.
... input to the projector, and on page 10 for information about how to do this. Perform the procedure below shows how to select "Contrast". 4. See "3D Input Mode" on the currently selected input source.
User Manual
Page 33
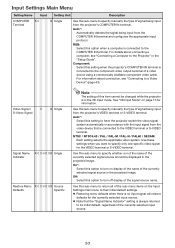
..., see "Connecting to a Video Device" (page 43). Auto*: Automatically detects the signal being input from the projector's COMPUTER IN terminal. See "3D Input Mode" on the Input Settings main menu to their initial default settings. Auto*: Select this setting to have the projector switch the video signal...type of the currently selected input source. 33 On*: Select this option to turn off display of the currently selected signal source in the 3D input mode. Off: Select this option to turn on display of the name of the signal source name. z Note that the "Signal...
..., see "Connecting to a Video Device" (page 43). Auto*: Automatically detects the signal being input from the projector's COMPUTER IN terminal. See "3D Input Mode" on the Input Settings main menu to their initial default settings. Auto*: Select this setting to have the projector switch the video signal...type of the currently selected input source. 33 On*: Select this option to turn off display of the currently selected signal source in the 3D input mode. Off: Select this option to turn on display of the name of the signal source name. z Note that the "Signal...
User Manual
Page 35
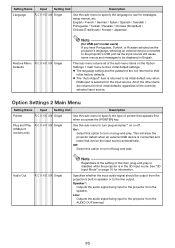
See "3D Input Mode" on page 10 for USB port model users) If you press the [POINTER] key. This sub-menu returns all of this item, plug-... 1 main menu to turn on plug-and-play. z The "Auto Adjust" item is returned to its initial default only when RGB input is in the 3D input mode. On*: Select this option to their initial default settings. Line: Outputs the audio signal being input to the line output. This will cause...
See "3D Input Mode" on page 10 for USB port model users) If you press the [POINTER] key. This sub-menu returns all of this item, plug-... 1 main menu to turn on plug-and-play. z The "Auto Adjust" item is returned to its initial default only when RGB input is in the 3D input mode. On*: Select this option to their initial default settings. Line: Outputs the audio signal being input to the line output. This will cause...
User Manual
Page 58
... input source. z For details about this setting, see "Momentarily Cutting Off the Input Source Image" (page 14). Input a value into the 3D input mode or normal input mode. Specifies either output from the input source. For details, see "Eco Mode (Power Saving, Low Noise)" (page...mode. Selecting "On" for this setting cannot be projected. This will change while the currently selected input source is selected for audio. On: 3D input mode Off: Normal input mode z Note that of the setup menu. This will change the projector's "Brightness" setting accordingly. The ...
... input source. z For details about this setting, see "Momentarily Cutting Off the Input Source Image" (page 14). Input a value into the 3D input mode or normal input mode. Specifies either output from the input source. For details, see "Eco Mode (Power Saving, Low Noise)" (page...mode. Selecting "On" for this setting cannot be projected. This will change while the currently selected input source is selected for audio. On: 3D input mode Off: Normal input mode z Note that of the setup menu. This will change the projector's "Brightness" setting accordingly. The ...