
User Guide
Page 2
... Unpacking E-9 Using the CD-ROM E-9 Using the CD-ROM that comes with the XJ-A130V, XJ-A140V, XJ-A150V, XJ-A230V, XJ-A240V, XJ-A250V E-9 Using the CD-ROM that comes with the XJ-A135V, XJ-A145V, XJ-A155V, XJ-A235V, XJ-A245V, XJ-A255V E-10 General Guide E-11 Preparing the Remote Controller E-12 Getting Ready E-14 ... trademarks of Microsoft Corporation in the United States and other reason. The sample screens shown in this manual. CASIO COMPUTER CO., LTD. For more detailed information, see the User's Guide (UsersGuide_English.pdf) on page E-7 before trying to use this...
... Unpacking E-9 Using the CD-ROM E-9 Using the CD-ROM that comes with the XJ-A130V, XJ-A140V, XJ-A150V, XJ-A230V, XJ-A240V, XJ-A250V E-9 Using the CD-ROM that comes with the XJ-A135V, XJ-A145V, XJ-A155V, XJ-A235V, XJ-A245V, XJ-A255V E-10 General Guide E-11 Preparing the Remote Controller E-12 Getting Ready E-14 ... trademarks of Microsoft Corporation in the United States and other reason. The sample screens shown in this manual. CASIO COMPUTER CO., LTD. For more detailed information, see the User's Guide (UsersGuide_English.pdf) on page E-7 before trying to use this...

User Guide
Page 10
Using the CD-ROM that comes with the XJ-A130V, XJ-A140V, XJ-A150V, XJ-A230V, XJ-A240V, XJ-A250V The CD-ROM that comes with the projector depends on your computer's CD-ROM drive. 2. Double-click "UsersGuide_English.pdf". This starts up Adobe Reader and displays the contents of the manual whose icon you clicked. On some...
Using the CD-ROM that comes with the XJ-A130V, XJ-A140V, XJ-A150V, XJ-A230V, XJ-A240V, XJ-A250V The CD-ROM that comes with the projector depends on your computer's CD-ROM drive. 2. Double-click "UsersGuide_English.pdf". This starts up Adobe Reader and displays the contents of the manual whose icon you clicked. On some...

User Guide
Page 15
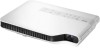
... surface you are projecting onto is angled downwards from the Side (XJ-A230V/XJ-A235V/XJ-A240V/ XJ-A245V/XJ-A250V/XJ-A255V) Screen Position the projector so the lens side is 0 to +30 degrees. E-14 Viewed from horizontal, use manual keystone correction (page E-22) to correct the image. ... for proper ventilation. The following illustrations show how the projector should be oriented for projection from the Side (XJ-A130V/XJ-A135V/XJ-A140V/ XJ-A145V/XJ-A150V/XJ-A155V) Screen Screen Make sure the projector is firm and level. Make sure to the screen. NOTE The...
... surface you are projecting onto is angled downwards from the Side (XJ-A230V/XJ-A235V/XJ-A240V/ XJ-A245V/XJ-A250V/XJ-A255V) Screen Position the projector so the lens side is 0 to +30 degrees. E-14 Viewed from horizontal, use manual keystone correction (page E-22) to correct the image. ... for proper ventilation. The following illustrations show how the projector should be oriented for projection from the Side (XJ-A130V/XJ-A135V/XJ-A140V/ XJ-A145V/XJ-A150V/XJ-A155V) Screen Screen Make sure the projector is firm and level. Make sure to the screen. NOTE The...


