iP1500 Quick Start Guide
Page 5
... Basic Printing Turning on the Printer 2 Loading Paper 3 Using Speciality Media 7 Printing with Windows 9 Printing with Macintosh 11 Canceling Printing 13 Advanced Printing Accessing Printer Driver 14 Adjusting Print Quality for Photographs 15 Using the Bundle Software 22 Printing Borderless Photographs 23 Printing Maintenance When Printing Becomes Faint or Colors are Incorrect 26 Printing the...
... Basic Printing Turning on the Printer 2 Loading Paper 3 Using Speciality Media 7 Printing with Windows 9 Printing with Macintosh 11 Canceling Printing 13 Advanced Printing Accessing Printer Driver 14 Adjusting Print Quality for Photographs 15 Using the Bundle Software 22 Printing Borderless Photographs 23 Printing Maintenance When Printing Becomes Faint or Colors are Incorrect 26 Printing the...
iP1500 Quick Start Guide
Page 6
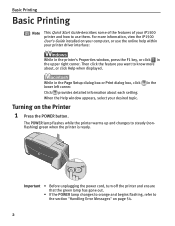
Basic Printing Basic Printing Note This Quick Start Guide describes some of the features of your printer driver interface: While in the printer's Properties window, press the F1 key, or click in the upper right corner. in the Page Setup dialog box or Print dialog box, click..., refer to use the online help within your iP1500 printer and how to the section "Handling Error Messages" on the Printer 1 Press the POWER button. The POWER lamp flashes while the printer warms up and changes to know more information, view the iP1500 User's Guide installed on your computer, or use...
Basic Printing Basic Printing Note This Quick Start Guide describes some of the features of your printer driver interface: While in the printer's Properties window, press the F1 key, or click in the upper right corner. in the Page Setup dialog box or Print dialog box, click..., refer to use the online help within your iP1500 printer and how to the section "Handling Error Messages" on the Printer 1 Press the POWER button. The POWER lamp flashes while the printer warms up and changes to know more information, view the iP1500 User's Guide installed on your computer, or use...

iP1500 Quick Start Guide
Page 9
...8226; Do not use the envelopes with embossed or treated surface, with a double flap or pressure seals, with Macintosh" on page 11. 5 For the printer driver setting, refer to the envelope size you are using. Fold the envelope flap. (1) Align the envelope against the left side. Set the envelope with its...side of 10 envelopes can be loaded at once. Basic Printing „ Loading the Envelopes Use either DL Env. Env. #10 According to "Printing with Windows" on the left side of the envelope. (3) Select Envelope in Page Size. Env. #10 or DL Env. A maximum of the Auto Sheet Feeder...
...8226; Do not use the envelopes with embossed or treated surface, with a double flap or pressure seals, with Macintosh" on page 11. 5 For the printer driver setting, refer to the envelope size you are using. Fold the envelope flap. (1) Align the envelope against the left side. Set the envelope with its...side of 10 envelopes can be loaded at once. Basic Printing „ Loading the Envelopes Use either DL Env. Env. #10 According to "Printing with Windows" on the left side of the envelope. (3) Select Envelope in Page Size. Env. #10 or DL Env. A maximum of the Auto Sheet Feeder...

iP1500 Quick Start Guide
Page 10
For the printer driver setting, refer to "Printing with Windows" on page 9, "Printing with Macintosh" on the 4" x 6" size papers. (1) Align the paper stack against the left side of the stack of paper. (3) Select 4 x 6 in in the vertical direction. You can print on page 11. 6 Basic Printing „ Loading the 4" x 6" size papers You can load a maximum of 20 papers in 4" x 6" size. (2) Pinch the Paper Guide and slide it against the right side of the photograph, load the paper in Page Size. Despite the direction of the Auto Sheet Feeder.
For the printer driver setting, refer to "Printing with Windows" on page 9, "Printing with Macintosh" on the 4" x 6" size papers. (1) Align the paper stack against the left side of the stack of paper. (3) Select 4 x 6 in in the vertical direction. You can print on page 11. 6 Basic Printing „ Loading the 4" x 6" size papers You can load a maximum of 20 papers in 4" x 6" size. (2) Pinch the Paper Guide and slide it against the right side of the photograph, load the paper in Page Size. Despite the direction of the Auto Sheet Feeder.
iP1500 Quick Start Guide
Page 18
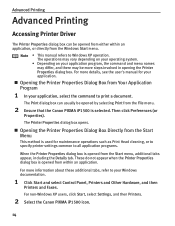
... on your operating system. • Depending on your Windows documentation. 1 Click Start and select Control Panel, Printers and Other Hardware, and then Printers and Faxes. For non-Windows XP users, click Start, select Settings, and then Printers. 2 Select the Canon PIXMA iP1500 icon. 14 These do not appear when the Printer Properties dialog box is selected. Note • This...
... on your operating system. • Depending on your Windows documentation. 1 Click Start and select Control Panel, Printers and Other Hardware, and then Printers and Faxes. For non-Windows XP users, click Start, select Settings, and then Printers. 2 Select the Canon PIXMA iP1500 icon. 14 These do not appear when the Printer Properties dialog box is selected. Note • This...
iP1500 Quick Start Guide
Page 53
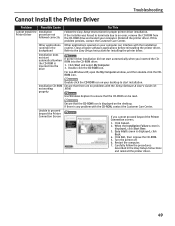
... correctly Other applications running in the Easy Setup Instructions and reinstall the printer driver. 49 Close all open the My Computer window, and then double-click the CDROM icon. If printer driver installation did not start installation. Double-click the CD-ROM icon on...is displayed, click Start Over. 3. not working ROM. For non-Windows XP, open software applications before reinstalling the printer driver. Refer to start automatically when you cannot proceed beyond the Printer Connection Screen Ensure that the CD-ROM can interfere with the installation routine...
... correctly Other applications running in the Easy Setup Instructions and reinstall the printer driver. 49 Close all open the My Computer window, and then double-click the CDROM icon. If printer driver installation did not start installation. Double-click the CD-ROM icon on...is displayed, click Start Over. 3. not working ROM. For non-Windows XP, open software applications before reinstalling the printer driver. Refer to start automatically when you cannot proceed beyond the Printer Connection Screen Ensure that the CD-ROM can interfere with the installation routine...

iP1500 Quick Start Guide
Page 54
...Problem Possible Cause Try This Ink does not eject properly/Printing is Blurred/ Colors are Wrong / White Streaks appear / Printed Ruled Lines are firmly seated in the printer driver and try printing again. When a specific color is not seated properly Print Head Nozzles clogged Check that the ink tanks ...Setting. 2. If ink supply is Use High Resolution Paper or Photo Paper Pro to High for Windows or Fine for the Print Quality setting. 1. Glossy photo paper other than the Canon speciality media is printed. On the Main tab, click High for Macintosh. pictures with Check that...
...Problem Possible Cause Try This Ink does not eject properly/Printing is Blurred/ Colors are Wrong / White Streaks appear / Printed Ruled Lines are firmly seated in the printer driver and try printing again. When a specific color is not seated properly Print Head Nozzles clogged Check that the ink tanks ...Setting. 2. If ink supply is Use High Resolution Paper or Photo Paper Pro to High for Windows or Fine for the Print Quality setting. 1. Glossy photo paper other than the Canon speciality media is printed. On the Main tab, click High for Macintosh. pictures with Check that...
iP1500 Quick Start Guide
Page 63
... Index 59 How to Use This Manual How to Windows (Windows) Appendix Printing Area Uninstalling Printer Drivers Uninstalling the User's Guide (Windows) Uncurling the Media Cleaning the Inside of the Printer BJ Status Monitor Functions (Windows) Printer Setup Utility (or Print Center) (Macintosh) Routine Maintenance When Printing Becomes Faint or Colors are Incorrect Printing the Nozzle Check Pattern Print...
... Index 59 How to Use This Manual How to Windows (Windows) Appendix Printing Area Uninstalling Printer Drivers Uninstalling the User's Guide (Windows) Uncurling the Media Cleaning the Inside of the Printer BJ Status Monitor Functions (Windows) Printer Setup Utility (or Print Center) (Macintosh) Routine Maintenance When Printing Becomes Faint or Colors are Incorrect Printing the Nozzle Check Pattern Print...
iP1500 Quick Start Guide
Page 64
....) Black printing Max Speed (Custom Setting 5): 18 ppm Standard: 13.2 ppm Color printing Max Speed (Custom Setting 5): 13 ppm Standard: 6.8 ppm 203.2 mm max. (8.0 in) (for Borderless Printing: 215.9 mm / 8.5 in) Canon extended mode 32 KB USB Approx. 43 dB (A) (in the highest print quality..., Magenta, Yellow: 128 x 2 nozzles per each color (600 dpi) Capacity (pages): Black (BCI-24 Black) approx. 300*1, approx. 520*2 Color (BCI-24 Color) approx. 170*2 *1 1500 characters per page, normal text, at standard and plain paper mode with Windows XP printer driver *2 Based on printing the ISO JIS-SCID No.5...
....) Black printing Max Speed (Custom Setting 5): 18 ppm Standard: 13.2 ppm Color printing Max Speed (Custom Setting 5): 13 ppm Standard: 6.8 ppm 203.2 mm max. (8.0 in) (for Borderless Printing: 215.9 mm / 8.5 in) Canon extended mode 32 KB USB Approx. 43 dB (A) (in the highest print quality..., Magenta, Yellow: 128 x 2 nozzles per each color (600 dpi) Capacity (pages): Black (BCI-24 Black) approx. 300*1, approx. 520*2 Color (BCI-24 Color) approx. 170*2 *1 1500 characters per page, normal text, at standard and plain paper mode with Windows XP printer driver *2 Based on printing the ISO JIS-SCID No.5...

iP1500 Quick Start Guide
Page 65
... 9.x can operate. • CD-ROM drive • USB interface • Available hard-disk space for printer driver installation • CD-ROM drive (including temporary files) • Available hard-disk space for printer driver installation Windows XP/Windows 2000: 50MB Windows Me/Windows 98: 15MB Mac OS X v.10.2.1 or later: 100 MB Mac OS 9.x: 30 MB USB operation can...
... 9.x can operate. • CD-ROM drive • USB interface • Available hard-disk space for printer driver installation • CD-ROM drive (including temporary files) • Available hard-disk space for printer driver installation Windows XP/Windows 2000: 50MB Windows Me/Windows 98: 15MB Mac OS X v.10.2.1 or later: 100 MB Mac OS 9.x: 30 MB USB operation can...
iP1500 Easy Setup Instructions
Page 2
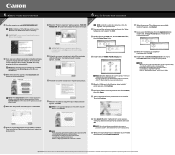
... instructions. 4 When the "Welcome to restart the computer appears, click Restart. 3 Double-click the PIXMA iP1500 270.pkg icon. NOTE: · When you do not know your CD-ROM drive. 3 When...Canon Inc. The printer will initialize for the printer driver to the "Appendix" of the driver and electronic instruction manual starts. Then insert the "Setup Software & User's Guide" CD-ROM. If you print out for your CD-ROM again. When the "Authenticate" screen appears, enter your administrator name and password. 6 Windows®Printer Driver Installation 6 Mac ®OS X Printer Driver...
... instructions. 4 When the "Welcome to restart the computer appears, click Restart. 3 Double-click the PIXMA iP1500 270.pkg icon. NOTE: · When you do not know your CD-ROM drive. 3 When...Canon Inc. The printer will initialize for the printer driver to the "Appendix" of the driver and electronic instruction manual starts. Then insert the "Setup Software & User's Guide" CD-ROM. If you print out for your CD-ROM again. When the "Authenticate" screen appears, enter your administrator name and password. 6 Windows®Printer Driver Installation 6 Mac ®OS X Printer Driver...
Service Manual
Page 7
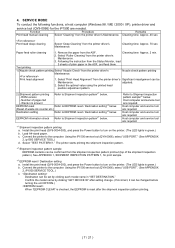
...Windows 98 / ME / 2000 / XP), printer driver and service tool (QY9-0066) for print sample. *3 EEPROM reset / Destination setting a. Number of plain paper in "SET DESTINATION." EEPROM information check Refer to EEPROM reset / Destination setting*3 below. Host computer and service tool are needed. The printer...) Function Procedure Remarks Print head manual cleaning Select "Cleaning" from the printer driver's Maintenance. Using the iP1500 service tool (QY9-0066), select "USB PORT." (See APPENDIX 2, ip1500 SERVICE TOOL.) d. Install the print head (QY6-0054-000), and ...
...Windows 98 / ME / 2000 / XP), printer driver and service tool (QY9-0066) for print sample. *3 EEPROM reset / Destination setting a. Number of plain paper in "SET DESTINATION." EEPROM information check Refer to EEPROM reset / Destination setting*3 below. Host computer and service tool are needed. The printer...) Function Procedure Remarks Print head manual cleaning Select "Cleaning" from the printer driver's Maintenance. Using the iP1500 service tool (QY9-0066), select "USB PORT." (See APPENDIX 2, ip1500 SERVICE TOOL.) d. Install the print head (QY6-0054-000), and ...


