
Instruction Manual
Page 3
... to be co-located or operated in conjunction with Battery Pack NB-4L. Many studies of radio frequency energy (RF) in the U.S.A., use with any biological effects. This model has been tested and found any other battery packs are used . One Canon Park, Melville, NY 11747, USA Tel No. ...1-800-OK-CANON (1-800-652-2666) Battery Charger CB-2LV This power unit is for the power outlet, if needed. There is no...
... to be co-located or operated in conjunction with Battery Pack NB-4L. Many studies of radio frequency energy (RF) in the U.S.A., use with any biological effects. This model has been tested and found any other battery packs are used . One Canon Park, Melville, NY 11747, USA Tel No. ...1-800-OK-CANON (1-800-652-2666) Battery Charger CB-2LV This power unit is for the power outlet, if needed. There is no...

Instruction Manual
Page 8
Table of Contents Important Usage Instructions 2 About this Manual 6 The Camcorder's Functions in Real-Life Situations 13 Unique functions for special cases 13 Getting the look you want 14 Challenging subjects and shooting conditions .......... 15 Audio, playback, editing and others 15 Wireless functions 17 Getting to Know the Camcorder 19 Supplied Accessories and CD-ROM 19 Names of Parts 21 Preparations 27 Charging and Inserting the Battery Pack 29 Using a Memory Card 34 Memory Cards Compatible for Use with the Camcorder 34 8
Table of Contents Important Usage Instructions 2 About this Manual 6 The Camcorder's Functions in Real-Life Situations 13 Unique functions for special cases 13 Getting the look you want 14 Challenging subjects and shooting conditions .......... 15 Audio, playback, editing and others 15 Wireless functions 17 Getting to Know the Camcorder 19 Supplied Accessories and CD-ROM 19 Names of Parts 21 Preparations 27 Charging and Inserting the Battery Pack 29 Using a Memory Card 34 Memory Cards Compatible for Use with the Camcorder 34 8

Instruction Manual
Page 19
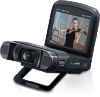
Getting to Know the Camcorder Supplied Accessories and CD-ROM The following accessories are supplied with the camcorder: XCB-2LV Battery Charger* NB-4L Battery PackW XIFC-400PCU USB Cable WS-DC11 Wrist StrapW XGetting Started Leaflet Canon VIXIA mini CD-ROMW * CB-2LVE including power cord, in Asia. 19
Getting to Know the Camcorder Supplied Accessories and CD-ROM The following accessories are supplied with the camcorder: XCB-2LV Battery Charger* NB-4L Battery PackW XIFC-400PCU USB Cable WS-DC11 Wrist StrapW XGetting Started Leaflet Canon VIXIA mini CD-ROMW * CB-2LVE including power cord, in Asia. 19

Instruction Manual
Page 27
... your camcorder is to prepare the power supply. First Time Settings Now that can turn it in the camcorder. This section explains how to charge a battery pack and how to insert one into the camcorder. This section explains the types of memory cards that your camcorder is powered up and has...
... your camcorder is to prepare the power supply. First Time Settings Now that can turn it in the camcorder. This section explains how to charge a battery pack and how to insert one into the camcorder. This section explains the types of memory cards that your camcorder is powered up and has...

Instruction Manual
Page 29
Charging and Inserting the Battery Pack Charging and Inserting the Battery Pack Charge the supplied battery pack in advance, using the supplied battery charger. 1 2 3 2 3 1 ■ Charging the Battery Pack 1 Attach the battery pack to the battery charger, aligning the triangle marks. 2 Extract the fold-in plug and plug the battery charger into a power outlet. • For Asia only: Connect the power cord to the battery charger and plug the other end into a power outlet. 29
Charging and Inserting the Battery Pack Charging and Inserting the Battery Pack Charge the supplied battery pack in advance, using the supplied battery charger. 1 2 3 2 3 1 ■ Charging the Battery Pack 1 Attach the battery pack to the battery charger, aligning the triangle marks. 2 Extract the fold-in plug and plug the battery charger into a power outlet. • For Asia only: Connect the power cord to the battery charger and plug the other end into a power outlet. 29

Instruction Manual
Page 30
tery pack from the battery charger and unplug the battery charger. 1 2 2 1 3 1 2 ■ Inserting the Battery Pack 1 Push the battery compartment cover in the direction of the arrow to open it. 2 Insert the battery pack with the Canon label facing the bottom of the camcorder. • Push the battery pack all the way in, until the battery release latch secures it in place. 30 Charging and Inserting the Battery Pack • When the CHARGE indicator on the battery charger turns green, the battery pack is fully charged. 3 When the battery pack is fully charged, remove the bat-
tery pack from the battery charger and unplug the battery charger. 1 2 2 1 3 1 2 ■ Inserting the Battery Pack 1 Push the battery compartment cover in the direction of the arrow to open it. 2 Insert the battery pack with the Canon label facing the bottom of the camcorder. • Push the battery pack all the way in, until the battery release latch secures it in place. 30 Charging and Inserting the Battery Pack • When the CHARGE indicator on the battery charger turns green, the battery pack is fully charged. 3 When the battery pack is fully charged, remove the bat-

Instruction Manual
Page 31
.... Be sure to wait until you hear a click. To remove the battery pack Open the battery compartment cover and slide the battery release latch in the direction of the arrow so the battery pack springs out. Charging and Inserting the Battery Pack 3 Close the battery compartment cover. • Push the cover until the green power indicator...
.... Be sure to wait until you hear a click. To remove the battery pack Open the battery compartment cover and slide the battery release latch in the direction of the arrow so the battery pack springs out. Charging and Inserting the Battery Pack 3 Close the battery compartment cover. • Push the cover until the green power indicator...

Instruction Manual
Page 32
...IN terminal any electrical equipment that is an issue, you can power the camcorder using the optional CA-110 Compact Power Adapter. Battery packs cannot be charged by the camcorder even when the optional compact power adapter is used. • For approximate recording/playback... breakdowns and excessive heating, do not connect the supplied battery charger to discharge naturally. Therefore, charge them on the day of use with a fully charged battery pack, refer to Approximate Usage Times (A 237). • Charged battery packs continue to voltage converters for overseas travels or special...
...IN terminal any electrical equipment that is an issue, you can power the camcorder using the optional CA-110 Compact Power Adapter. Battery packs cannot be charged by the camcorder even when the optional compact power adapter is used. • For approximate recording/playback... breakdowns and excessive heating, do not connect the supplied battery charger to discharge naturally. Therefore, charge them on the day of use with a fully charged battery pack, refer to Approximate Usage Times (A 237). • Charged battery packs continue to voltage converters for overseas travels or special...

Instruction Manual
Page 33
Charging and Inserting the Battery Pack • USA and Canada only: The Lithium ion/polymer battery that powers the product is recyclable. Please call 1-800-8-BATTERY for information on how to recycle this battery. 33
Charging and Inserting the Battery Pack • USA and Canada only: The Lithium ion/polymer battery that powers the product is recyclable. Please call 1-800-8-BATTERY for information on how to recycle this battery. 33

Instruction Manual
Page 40
... way. • Touch [24H] to use 24-hour clock or leave it unselected to use the camcorder for about 3 weeks, the built-in rechargeable lithium battery may discharge completely and the date and time setting may be lost. The next time you turn on the camcorder, you will have to complete... the basic setup and close the setup screen. • Some buttons, such as [ON]/[OFF] in some screens, will appear in lithium battery (A 231). In such case, recharge the built-in English regardless of the language selected. • You can change the language and adjust the date and...
... way. • Touch [24H] to use 24-hour clock or leave it unselected to use the camcorder for about 3 weeks, the built-in rechargeable lithium battery may discharge completely and the date and time setting may be lost. The next time you turn on the camcorder, you will have to complete... the basic setup and close the setup screen. • Some buttons, such as [ON]/[OFF] in some screens, will appear in lithium battery (A 231). In such case, recharge the built-in English regardless of the language selected. • You can change the language and adjust the date and...

Instruction Manual
Page 42
Shooting mode N IJLK Playback 'y} 1 Make sure the camcorder has sufficient power to permanently delete all the recordings it contains. plete the operation. • Insert a fully charged battery pack or use them with this camcorder for the first time. First Time Settings Initializing a Memory Card Initialize memory cards when you use the optional CA-110 Compact Power Adapter. 2 Set the power switch to ON to turn on the camcorder. • The lens cover will open. 1 1 3 Initialize the memory card. 42 You can also initialize a memory card to com-
Shooting mode N IJLK Playback 'y} 1 Make sure the camcorder has sufficient power to permanently delete all the recordings it contains. plete the operation. • Insert a fully charged battery pack or use them with this camcorder for the first time. First Time Settings Initializing a Memory Card Initialize memory cards when you use the optional CA-110 Compact Power Adapter. 2 Set the power switch to ON to turn on the camcorder. • The lens cover will open. 1 1 3 Initialize the memory card. 42 You can also initialize a memory card to com-

Instruction Manual
Page 60
Basic Recording • Observe the following precautions while the ACCESS indicator is too close to the camcorder, it is powered by a battery pack and is left without any operation for 3 minutes. Canon shall not be liable for any loss or corruption of only 20 cm (7.9 in permanent data loss or damage to the...
Basic Recording • Observe the following precautions while the ACCESS indicator is too close to the camcorder, it is powered by a battery pack and is left without any operation for 3 minutes. Canon shall not be liable for any loss or corruption of only 20 cm (7.9 in permanent data loss or damage to the...

Instruction Manual
Page 94
...-lapse scene that captures the passage of video or a photo at fixed intervals from 5 seconds to 10 minutes. plete the operation. • Insert a fully charged battery pack or use the optional CA-110 Compact Power Adapter. 2 Activate interval recording. 0 > [Special Rec Modes] > [ > [OK] Interval Recording] • The default recording interval is...
...-lapse scene that captures the passage of video or a photo at fixed intervals from 5 seconds to 10 minutes. plete the operation. • Insert a fully charged battery pack or use the optional CA-110 Compact Power Adapter. 2 Activate interval recording. 0 > [Special Rec Modes] > [ > [OK] Interval Recording] • The default recording interval is...

Instruction Manual
Page 136
Saving and Sharing Your Recordings • Regardless of the charge conditions of the battery pack in the camcorder, Battery Capacity on the camcorder's details area of CameraWindow's main screen will always appear as 'Full'. • Long scenes, whose video data exceeds 4 GB, will be ...
Saving and Sharing Your Recordings • Regardless of the charge conditions of the battery pack in the camcorder, Battery Capacity on the camcorder's details area of CameraWindow's main screen will always appear as 'Full'. • Long scenes, whose video data exceeds 4 GB, will be ...

Instruction Manual
Page 144
The Camcorder's Wi-Fi Functions • We recommend inserting a fully charged battery pack or using the optional CA-110 Compact Power Adapter when using Wi-Fi functions. • When using the camcorder's Wi-Fi functions, do not cover the front left corner of the camcorder with wireless signals. • Do not remove the memory card during the wireless connection. • While using Wi-Fi functions, the camcorder's automatic power off function will be disabled. Wi-Fi antenna 144 The Wi-Fi antenna is located there and covering it may interfere with your hand or other object.
The Camcorder's Wi-Fi Functions • We recommend inserting a fully charged battery pack or using the optional CA-110 Compact Power Adapter when using Wi-Fi functions. • When using the camcorder's Wi-Fi functions, do not cover the front left corner of the camcorder with wireless signals. • Do not remove the memory card during the wireless connection. • While using Wi-Fi functions, the camcorder's automatic power off function will be disabled. Wi-Fi antenna 144 The Wi-Fi antenna is located there and covering it may interfere with your hand or other object.

Instruction Manual
Page 147
...; Use the app's onscreen controls to end the wireless connection and turn off the camcorder. 2 iOS/Android device: Close the CameraAccess app. 147 To save battery power, the camcorder's screen will appear on the device. If necessary, enter the password that appears on the camcorder's screen. • The camcorder's network name...
...; Use the app's onscreen controls to end the wireless connection and turn off the camcorder. 2 iOS/Android device: Close the CameraAccess app. 147 To save battery power, the camcorder's screen will appear on the device. If necessary, enter the password that appears on the camcorder's screen. • The camcorder's network name...

Instruction Manual
Page 186
... of your recordings or the brightness of the playback image on a TV. • Using the [H Bright] setting will shorten the effective usage time of the battery pack. [HDMI Status] (playback mode only): Displays a screen where you leave it in record standby mode without a memory card for more than 5 minutes. • To...
... of your recordings or the brightness of the playback image on a TV. • Using the [H Bright] setting will shorten the effective usage time of the battery pack. [HDMI Status] (playback mode only): Displays a screen where you leave it in record standby mode without a memory card for more than 5 minutes. • To...

Instruction Manual
Page 190
... location of the file on 3 November will be MVI_0107.MP4; if it is a movie, its file name will be found in separate folders indicated by a battery pack, it will be IMG_0107.JPG. • All the interval scenes recorded during one interval recording sequence are a unique identifier for each file and can...
... location of the file on 3 November will be MVI_0107.MP4; if it is a movie, its file name will be found in separate folders indicated by a battery pack, it will be IMG_0107.JPG. • All the interval scenes recorded during one interval recording sequence are a unique identifier for each file and can...

Instruction Manual
Page 193
... balance (A 112) 9 Memory card operation (A 198) 10 User-selected main subject frame (A 117) 11 Self timer and countdown (A 102) 12 Frame rate (A 182) 13 Remaining battery charge (A 198) 14 Memory card 15 Remaining video recording time (A 198) 16 Video quality (A 87) 17 Remaining available number of photos (A 198) 18 Audio scene...
... balance (A 112) 9 Memory card operation (A 198) 10 User-selected main subject frame (A 117) 11 Self timer and countdown (A 102) 12 Frame rate (A 182) 13 Remaining battery charge (A 198) 14 Memory card 15 Remaining video recording time (A 198) 16 Video quality (A 87) 17 Remaining available number of photos (A 198) 18 Audio scene...

Instruction Manual
Page 198
...card, and [End] will stop. 17 Remaining available number of photos Even if the remaining number of the battery pack. • When the battery charge becomes low, replace or charge the battery pack. Appendix: Onscreen Icons and Displays 9 Memory card operation Ü Record, Ñ Record standby, ... Fast playback, Ø Fast reverse playback, Õ Slow playback, Ö Slow reverse playback, Ó Frame advance, Ô Frame reverse. 13 Remaining battery charge ` ` ` (in red) on the screen and the recording will be displayed (in red) • The icon shows a rough estimate of the ...
...card, and [End] will stop. 17 Remaining available number of photos Even if the remaining number of the battery pack. • When the battery charge becomes low, replace or charge the battery pack. Appendix: Onscreen Icons and Displays 9 Memory card operation Ü Record, Ñ Record standby, ... Fast playback, Ø Fast reverse playback, Õ Slow playback, Ö Slow reverse playback, Ó Frame advance, Ô Frame reverse. 13 Remaining battery charge ` ` ` (in red) on the screen and the recording will be displayed (in red) • The icon shows a rough estimate of the ...


