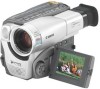
ES8600 8mm Video Camcorder NTSC-E Instruction Manual
Page 3
..., and serious damage to grounding electrodes, and requirements for future reference. 3. The product may cause picture interference, or permanently damage the camera. 8. The CA-550KA Compact Power Adapter should be read before cleaning. Regarding other ). The CA-550KA Compact Power Adapter is equipped ... operated. 2. A product and cart combination should be routed so that they may cause the product and cart combination to the Canon 8mm Video Camcorder ES8600A and all its accessories. 1. Power cords should be walked on the product and in rainy/moist situations. 9. Do not...
ES8600 8mm Video Camcorder NTSC-E Instruction Manual
Page 5
...the same serial number as a permanent record of your purchase to a VCR 52 PAL TV Playback 53 Preparing the Camera 54 Notes on Using the Batteries 56 Additional Information Video System 59 Optional Accessories 60 Cautions and Maintenance 63 Troubleshooting 67... Instructions 2 IMPORTANT SAFETY INSTRUCTIONS 3 Thank you for Choosing a Canon 6 Introducing the Camcorder 7 Quick Overview Finding Your Way Around the ES8600 8 Powering Your Camcorder 10 Loading a Cassettes 13 Basic Recording 15 Zooming 17 Using the LCD Screen 19 Playing Back a Cassette 22 Connecting for Playback on ...
ES8600 8mm Video Camcorder NTSC-E Instruction Manual
Page 6
...Lens cap and lens cap cord (Attached to camera) To get the most out of features. Thank you for Choosing a Canon E First, we suggest that you master the basic operations of the camcorder first, before moving on the camcorder itself e.g. in addition to the contents and index...) please refer to: • Finding Your Way Around the ES8600 (p. 8) • Screen displays (p. 70)...
ES8600 8mm Video Camcorder NTSC-E Instruction Manual
Page 7
...Keys With the unique Custom Keys, you can record still pictures like a photograph for approximately 7 seconds. Titles WEDDING Hi8 You can choose the color for the date and title from among a selection of a switch. You can be charged at your recording. The... recording conditions. FlexiZone Control Easier than automatic functions, Canon's FlexiZone Control is also great for playback. Introducing the Camcorder E LCD Screen Powerful recording programs An LCD screen makes it easy for you to use a video camera. AUTO FLEXIZONE SPORTS SPOTLIGHT Six recording programs deal with...
ES8600 8mm Video Camcorder NTSC-E Instruction Manual
Page 10
... before connecting/removing the power source. • For the power adapter, use other equipment. Do not use only Canon CA-550K (or CA-550). Connecting the camera to an AC outlet 3 2 1 Quick Overview Use the power adapter to appear on the TV- Connect the AC cable to an AC outlet. 4. move... the adapter away from an AC outlet. 1. Powering Your Camcorder E Before operating your camera, you will need to use the power adapter to: Provide power from an AC outlet or Charge a battery pack Notes: • The power...
ES8600 8mm Video Camcorder NTSC-E Instruction Manual
Page 11
...charging is less than 50% charged. Note: • You can find detailed notes for you slide the battery off the camera. • Always turn the camera off before you want it left the factory. It should have enough power for using the batteries in progress. When charging ...is fully charged. 5. Single flashes mean that your camera is between 50% and 75% charged. These notes include charging and recording times and how to OFF before removing the power source. Detach...
ES8600 8mm Video Camcorder NTSC-E Instruction Manual
Page 13
... erasure, slide the red switch on the cassette so that you want to find the point where you load this cassette and power on the camera, "v" flashes in the display.
ES8600 8mm Video Camcorder NTSC-E Instruction Manual
Page 14
... • To protect the tape heads, transfer cassettes directly from the tape case to start of Hi8 can record or play back in the Hi8 format, you need both a Hi8 camcorder and a Hi8 cassette (you want to the camcorder - A Hi8 camcorder can best be appreciated on the cassette or cover them . 14 do not open the tape protect... cover them with cellophane tape. • Handle cassettes with the compartment while it to the start recording. • Do not leave the cassette in the camera after use -
ES8600 8mm Video Camcorder NTSC-E Instruction Manual
Page 15
...as often as you like by pressing the start/stop button. • The camera will make the counter display appear wrong or may also want to install the backup battery (p. 58) in order to set the camcorder first to record pause, stop button to begin recording. • REC appears... in record pause mode for example), will turn itself off if you completed the following steps? • Attach a power source (p. 10). • Load a cassette (p. 13). • Adjusted the LCD screen (p. 19) or...
ES8600 8mm Video Camcorder NTSC-E Instruction Manual
Page 16
.... • Unload the cassette. • Return the viewfinder to its lowered position. • Close the LCD panel. • Set the program selector to the DEMONSTRATION option in the camera menu. Quick Overview (see a demonstration of using Canon CC-8 Video Head Cleaning Cassette or a commercially available dry-type head cleaning cassette. • For tips...
ES8600 8mm Video Camcorder NTSC-E Instruction Manual
Page 17
... (22× to 800×). You can assign CUSTOM KEY 1 to turn the digital zoom on /off by pressing the D.ZOOM button, to magnify the camera's zoom range by more than 22×. • In addition, you can also control the speed of the display. 17 Note: • When you enter...: • Move the control slightly to zoom slowly. • Turn it towards T to zoom in to telephoto. Zooming W Zoom out E Zoom in T Quick Overview The camera's 22× zoom lens allows you to choose the best picture angle for each scene: • Turn the zoom control towards W to zoom out to...
ES8600 8mm Video Camcorder NTSC-E Instruction Manual
Page 19
... the panel around to 180° so that suits you can allow the subject to monitor the shot in the LCD screen or you best by pulling it away from the camera. The viewfinder is also activated when the panel is flush with the side, with the screen facing outwards. 90°... First open the panel by rotating it is in the picture (p. 21). Using the LCD Screen Open the LCD screen Push the OPEN button and open out the LCD panel at a right angle (90°) to the camera. Changing the angle of the lens you can include yourself in this position you close the...
ES8600 8mm Video Camcorder NTSC-E Instruction Manual
Page 20
... display from either the camera or the play menu. You can adjust the brightness and color of the LCD screen. Quick Overview (see "Adjusting the LCD screen" below). In this case, switch to using the viewfinder. You are also able to adjust the brightness of the camera. • Be careful... not to leave the LCD, viewfinder or lens exposed to...
ES8600 8mm Video Camcorder NTSC-E Instruction Manual
Page 22
... 1 button during recording, play back your recordings on -the-spot playback. The camera automatically goes into stop or still pause mode. To play , rewind for instant,... power source while the tape is rough, clean the video heads using a Canon CC-8 Video Head Cleaning Cassette or a commercially available dry-type head cleaning ... a still picture press the a button. You can use the LCD screen for example), will make the counter display appear wrong or may...the power off or remove the power source, be sure to set the camcorder first to start playback. • To end playback, press the 3...
ES8600 8mm Video Camcorder NTSC-E Instruction Manual
Page 23
...special playback. The picture may roll and divide, appear black and white and the picture may not be heard during playback. Built-in speaker The camera has a built-in speaker so you may appear blurred. • The tape counter is reset when a cassette is closed, the speaker does... is not stable, depending on the TV you playback a cassette suffered considerable vibration or shaking during normal fast forward. Note: • When the LCD panel is loaded. • When you use. Quick Overview Adjust the speaker volume by turning the SELECT dial. • A volume display appears ...
ES8600 8mm Video Camcorder NTSC-E Instruction Manual
Page 24
... a VCR, set the input selector on the television to VIDEO. • If you are connecting the camera to a VCR, set the input selector on a TV Screen E You can connect the camera to a TV or VCR in order to connect the S-video terminal. If the sound from the TV speakers is picked up... by using the C-250 AV Cable to LINE. Connecting for further details. Connect the white plug to the camera (see p. 10). Use the C-250 AV Cable white plug to connect the audio terminal. • Set the TV/VIDEO selector on the television to VIDEO...
ES8600 8mm Video Camcorder NTSC-E Instruction Manual
Page 25
Composition The most important element in the scene does not have to one side. Watch out for Making Better Videos Holding the camera For maximum stability, place your right hand through the grip belt and keep your right elbow pressed against your body. Rest your left hand lightly ... the side of the subject's head, and don't cut people off the top of the camera. Tips for distracting objects in the center. With practice, you will damage the camera. Don't cut off at a suitable height) and operate it may melt. (The light is facing or moving towards. Quick Overview E 25 Using...
ES8600 8mm Video Camcorder NTSC-E Instruction Manual
Page 26
... Avoid unnecessary or half-hearted movements. Decide the area you begin with a long shot that any camera movement or change your feet, turn slowly from the top of the subject. Tilt the camera up Quick Overview Camera moves Use pans to choose your picture angle before you stop recording. Tilt down from the...
ES8600 8mm Video Camcorder NTSC-E Instruction Manual
Page 27
... r Date select p. 33 t Date display p. 32 y Title p. 34-35 u Date/title color p. 36 i Photo mode p. 46 o Demonstration p. 16 Screen 2 q Date set p. 33 w Title select p. 35 e Custom key set p. 29 r LCD picture adjust p. 20 MENU q CUSTOM KEY INFO.ON TV SCREEN.......ON w e IMAGE S.i......OFF t... 30 w TV screen p. 70 e PAL60 p. 53 r LCD picture adjust p. 20 MENU q CUSTOM KEY INFO.ON TV SCREEN.......OFF w e PAL60 ...........OFF LCD PICTURE ADJUST r Turn to PLAY, press the MENU button. Camera menu While the camera is in record pause mode, press the MENU button. There ...
ES8600 8mm Video Camcorder NTSC-E Instruction Manual
Page 28
... MENU button to change its setting. 4. Advanced Functions 28 Press the MENU button again to move the cursor up or down the screen. • In camera mode, when the cursor reaches the bottom of the screen 1, screen 2 of the menu appears, and when the cursor reaches the top of the menu... (camera menu only). • Make selections in the same way as for screen 1. 5. E 2,3 1,4,5 1. Use the SELECT dial to move to open the menu at screen 1. 2. Press ...