Startup Guide
Page 20
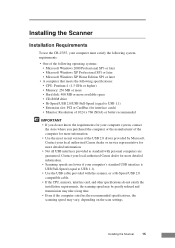
...Scanner 15 Installing the Scanner Installation Requirements To use the CR-25/55, your computer must satisfy the following system requirements: • One of the following operating systems: • Microsoft Windows 2000 Professional SP3 or later • Microsoft Windows XP Professional SP1 or later • Microsoft Windows... Monitor: Resolution of the USB 2.0 driver provided by Microsoft. Contact your local authorized Canon dealer or service representative for more detailed information. • Not all USB interfaces provided as standard with the scanner, or a Hi-Speed USB 2.0 ...
...Scanner 15 Installing the Scanner Installation Requirements To use the CR-25/55, your computer must satisfy the following system requirements: • One of the following operating systems: • Microsoft Windows 2000 Professional SP3 or later • Microsoft Windows XP Professional SP1 or later • Microsoft Windows... Monitor: Resolution of the USB 2.0 driver provided by Microsoft. Contact your local authorized Canon dealer or service representative for more detailed information. • Not all USB interfaces provided as standard with the scanner, or a Hi-Speed USB 2.0 ...
Startup Guide
Page 22
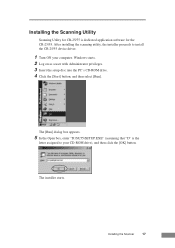
...CR-25/55 is the letter assigned to install the CR-25/55 device driver. 1 Turn ON your CD-ROM drive), and then click the [OK] button. Windows starts. 2 Log on as a user with Administrator privileges. 3 Insert the setup disc into the PC's CD-ROM drive. 4 Click the [Start] button, and then select [Run]. Installing the Scanner... 17 The installer starts. After installing the scanning utility, the installer proceeds to your computer. The [Run] dialog box appears. 5 In the Open box, enter "D:\SU55\SETUP.EXE" (assuming that "D" is dedicated application software for the CR-25/55....
...CR-25/55 is the letter assigned to install the CR-25/55 device driver. 1 Turn ON your CD-ROM drive), and then click the [OK] button. Windows starts. 2 Log on as a user with Administrator privileges. 3 Insert the setup disc into the PC's CD-ROM drive. 4 Click the [Start] button, and then select [Run]. Installing the Scanner... 17 The installer starts. After installing the scanning utility, the installer proceeds to your computer. The [Run] dialog box appears. 5 In the Open box, enter "D:\SU55\SETUP.EXE" (assuming that "D" is dedicated application software for the CR-25/55....
Startup Guide
Page 29
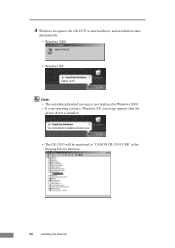
4 Windows recognizes the CR-25/55 as new hardware, and installation starts automatically. • Windows 2000 • Windows XP Note • The installation finished message is not displayed in Windows 2000. • If your operating system is Windows XP, a message appears after the device driver is installed. • The CR-25/55 will be registered as "CANON CR-25/55 USB" in the Imaging Device directory. 24 Installing the Scanner
4 Windows recognizes the CR-25/55 as new hardware, and installation starts automatically. • Windows 2000 • Windows XP Note • The installation finished message is not displayed in Windows 2000. • If your operating system is Windows XP, a message appears after the device driver is installed. • The CR-25/55 will be registered as "CANON CR-25/55 USB" in the Imaging Device directory. 24 Installing the Scanner
Startup Guide
Page 38
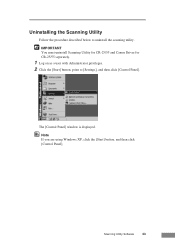
Scanning Utility Software 33 Uninstalling the Scanning Utility Follow the procedure described below to [Settings], and then click [Control Panel]. Note If you are using Windows XP, click the [Start] button, and then click [Control Panel]. The [Control Panel] window is displayed. IMPORTANT You must uninstall Scanning Utility for CR-25/55 and Canon Driver for CR-25/55 separately. 1 Log on as a user with Administrator privileges. 2 Click the [Start] button, point to uninstall the scanning utility.
Scanning Utility Software 33 Uninstalling the Scanning Utility Follow the procedure described below to [Settings], and then click [Control Panel]. Note If you are using Windows XP, click the [Start] button, and then click [Control Panel]. The [Control Panel] window is displayed. IMPORTANT You must uninstall Scanning Utility for CR-25/55 and Canon Driver for CR-25/55 separately. 1 Log on as a user with Administrator privileges. 2 Click the [Start] button, point to uninstall the scanning utility.

