Startup Guide
Page 2
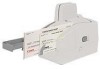
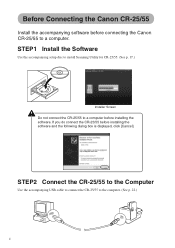
STEP2 Connect the CR-25/55 to the Computer Use the accompanying USB cable to connect the CR-25/55 to a computer before installing the software. STEP1 Install the Software Use the accompanying setup disc to install Scanning Utility for CR-25/55. (See p. 17.) Installer Screen Do not connect the CR-25/55 to the computer. (See p. 22.) i If you do connect the CR-25/55 before connecting the Canon CR-25/55 to a computer. Before Connecting the Canon CR-25/55 Install the accompanying software before installing the software and the following dialog box is displayed, click [Cancel].
STEP2 Connect the CR-25/55 to the Computer Use the accompanying USB cable to connect the CR-25/55 to a computer before installing the software. STEP1 Install the Software Use the accompanying setup disc to install Scanning Utility for CR-25/55. (See p. 17.) Installer Screen Do not connect the CR-25/55 to the computer. (See p. 22.) i If you do connect the CR-25/55 before connecting the Canon CR-25/55 to a computer. Before Connecting the Canon CR-25/55 Install the accompanying software before installing the software and the following dialog box is displayed, click [Cancel].
Startup Guide
Page 3
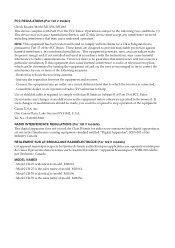
.... Model CR-25 is encouraged to try to the equipment unless otherwise specified in accordance with the instructions, may cause undesired operation. However, there is required to Part 15 of model M11056. Reorient or relocate the receiving antenna. - Use of shielded cable is no guarantee that to which can radiate radio frequency energy and, if not installed and used in the manual...
.... Model CR-25 is encouraged to try to the equipment unless otherwise specified in accordance with the instructions, may cause undesired operation. However, there is required to Part 15 of model M11056. Reorient or relocate the receiving antenna. - Use of shielded cable is no guarantee that to which can radiate radio frequency energy and, if not installed and used in the manual...
Startup Guide
Page 4
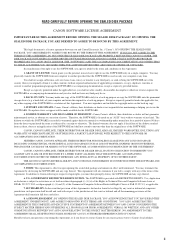
... RETURN THE CANON SCANNER, THE DISK PACKAGE CONTAINING SCANNER DRIVER SOFTWARE PROGRAMS AND/OR SCANNER UTILITY SOFTWARE PROGRAM PROPRIETARY TO CANON OR ITS LICENSOR (THE "SOFTWARE") AND THE ACCOMPANYING DOCUMENTATION AND OTHER ITEMS TO THE PLACE WHERE YOU OBTAINED THEM FOR A REFUND BEFORE THEY ARE USED OR OPENED OR UNPACKED. You may physically transfer the SOFTWARE from one computer to another programming language the SOFTWARE or accompanying documentation, except as...
... RETURN THE CANON SCANNER, THE DISK PACKAGE CONTAINING SCANNER DRIVER SOFTWARE PROGRAMS AND/OR SCANNER UTILITY SOFTWARE PROGRAM PROPRIETARY TO CANON OR ITS LICENSOR (THE "SOFTWARE") AND THE ACCOMPANYING DOCUMENTATION AND OTHER ITEMS TO THE PLACE WHERE YOU OBTAINED THEM FOR A REFUND BEFORE THEY ARE USED OR OPENED OR UNPACKED. You may physically transfer the SOFTWARE from one computer to another programming language the SOFTWARE or accompanying documentation, except as...
Startup Guide
Page 6
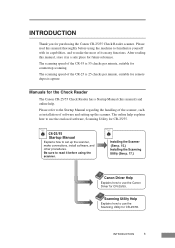
... this unit. Installing the Scanner (See p. 15.) Installing the Scanning Utility (See p. 17.) Canon Driver Help Explains how to use the Canon Driver for future reference. INTRODUCTION 1 Please refer to make the most of its capabilities, and to the Startup Manual regarding the handling of the scanner, such as installation of software and setting up the scanner, make connections, install software, and other procedures. Canon Check Reader Startup Manual Please read this manual before operating this manual thoroughly before using...
... this unit. Installing the Scanner (See p. 15.) Installing the Scanning Utility (See p. 17.) Canon Driver Help Explains how to use the Canon Driver for future reference. INTRODUCTION 1 Please refer to make the most of its capabilities, and to the Startup Manual regarding the handling of the scanner, such as installation of software and setting up the scanner, make connections, install software, and other procedures. Canon Check Reader Startup Manual Please read this manual before operating this manual thoroughly before using...
Startup Guide
Page 8
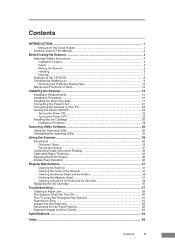
... Installing the Scanning Utility 17 Connecting the Power Cord 21 Connecting the Scanner to Your PC 22 Turning the Power ON/OFF 23 Turning the Power ON ...23 Turning the Power OFF 25 Installing the Ink Cartridge 26 Installation Procedure ...26 Scanning Utility Software 30 Using the Scanning Utility 30 Uninstalling the Scanning Utility 33 Using the Scanner ...36 Documents ...36 Document Types ...36 Placing Documents ...37 Confirming Proper Document Feeding 39 Calibrating Paper Thickness 42 Adjusting the Print Position 45 Double Feed Detection 46 Regular Maintenance 47 Cleaning...
... Installing the Scanning Utility 17 Connecting the Power Cord 21 Connecting the Scanner to Your PC 22 Turning the Power ON/OFF 23 Turning the Power ON ...23 Turning the Power OFF 25 Installing the Ink Cartridge 26 Installation Procedure ...26 Scanning Utility Software 30 Using the Scanning Utility 30 Uninstalling the Scanning Utility 33 Using the Scanner ...36 Documents ...36 Document Types ...36 Placing Documents ...37 Confirming Proper Document Feeding 39 Calibrating Paper Thickness 42 Adjusting the Print Position 45 Double Feed Detection 46 Regular Maintenance 47 Cleaning...

Startup Guide
Page 9
... can get inside of the scanner can result in inferior image quality. Make sure that generates electromagnetic fields, including speakers, televisions, and radios. 4 Before Using the Scanner Condensation inside the scanner and cause problems. • Avoid warm or humid locations, such as in the vicinity of this scanner under the following environmental requirements: • Avoid locations exposed to direct sunlight. Installation Location The performance...
... can get inside of the scanner can result in inferior image quality. Make sure that generates electromagnetic fields, including speakers, televisions, and radios. 4 Before Using the Scanner Condensation inside the scanner and cause problems. • Avoid warm or humid locations, such as in the vicinity of this scanner under the following environmental requirements: • Avoid locations exposed to direct sunlight. Installation Location The performance...
Startup Guide
Page 11
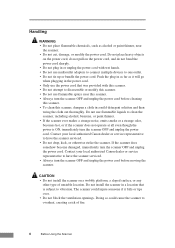
... adapters to connect multiple devices to overheat, creating a risk of unstable location. If the scanner does somehow become damaged, immediately turn the scanner OFF and unplug the power cord before cleaning this scanner. • To clean this scanner, dampen a cloth in a location that was provided with wet hands. • Do not use flammable liquids to clean the scanner, including alcohol, benzene, or paint thinner. • If the scanner ever makes...
... adapters to connect multiple devices to overheat, creating a risk of unstable location. If the scanner does somehow become damaged, immediately turn the scanner OFF and unplug the power cord before cleaning this scanner. • To clean this scanner, dampen a cloth in a location that was provided with wet hands. • Do not use flammable liquids to clean the scanner, including alcohol, benzene, or paint thinner. • If the scanner ever makes...

Startup Guide
Page 13
... OCR function. ■ Easy Maintenance Maintenance covers make handling paper jams and cleaning easy. ■ Imprinter An imprinter mechanism, which prints text on the software you are listed below. ■ Compact Size 5.5" x 8.8" x 7.4" (W x D x H), 140 mm x 223 mm x 188 mm (W x D x H) ■ Supports Large Documents Documents up to 4.2" x 9.0" (106 mm x 228 mm) can be scanned. ■ USB 2.0 Interface Connecting to a computer is done with the scanner. Features of the CR-25/55 The Canon CR-25/55 Check...
... OCR function. ■ Easy Maintenance Maintenance covers make handling paper jams and cleaning easy. ■ Imprinter An imprinter mechanism, which prints text on the software you are listed below. ■ Compact Size 5.5" x 8.8" x 7.4" (W x D x H), 140 mm x 223 mm x 188 mm (W x D x H) ■ Supports Large Documents Documents up to 4.2" x 9.0" (106 mm x 228 mm) can be scanned. ■ USB 2.0 Interface Connecting to a computer is done with the scanner. Features of the CR-25/55 The Canon CR-25/55 Check...
Startup Guide
Page 14
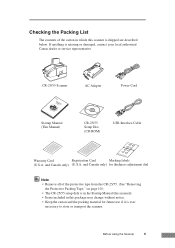
... from the CR-25/55. (See "Removing the Protective Packing Tape," on page 10.) • The CR-25/55 setup disk is in the Startup Manual (this manual). • Items included in which this scanner is shipped are described below. Before Using the Scanner 9 CR-25/55 Scanner SCtaartnuop nMaCnhuealck Reader reaPdleinagsethriseamdatnhuisaml, satnourealitbienfoaresaofpeepralatcinegfothrisfuutunriet. Areffteerreynocue.finish Startup Manual (This Manual) AC Adapter Power Cord CR-25/55 Setup Disc (CD-ROM) USB Interface Cable Warranty Card Registration Card Marking labels...
... from the CR-25/55. (See "Removing the Protective Packing Tape," on page 10.) • The CR-25/55 setup disk is in the Startup Manual (this manual). • Items included in which this scanner is shipped are described below. Before Using the Scanner 9 CR-25/55 Scanner SCtaartnuop nMaCnhuealck Reader reaPdleinagsethriseamdatnhuisaml, satnourealitbienfoaresaofpeepralatcinegfothrisfuutunriet. Areffteerreynocue.finish Startup Manual (This Manual) AC Adapter Power Cord CR-25/55 Setup Disc (CD-ROM) USB Interface Cable Warranty Card Registration Card Marking labels...
Startup Guide
Page 20
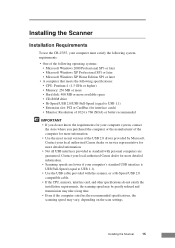
... the scanner, or a Hi-Speed USB 2.0 compatible cable. • If the CPU, memory, interface card, and other specifications do not satisfy the installation requirements, the scanning speed may be greatly reduced and transmission may take a long time. • Even if the computer satisfies the recommended specifications, the scanning speed may vary, depending on the scan settings. Contact your local authorized Canon dealer or service representative...
... the scanner, or a Hi-Speed USB 2.0 compatible cable. • If the CPU, memory, interface card, and other specifications do not satisfy the installation requirements, the scanning speed may be greatly reduced and transmission may take a long time. • Even if the computer satisfies the recommended specifications, the scanning speed may vary, depending on the scan settings. Contact your local authorized Canon dealer or service representative...
Startup Guide
Page 22
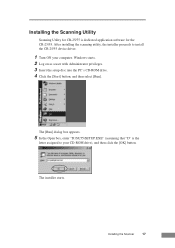
Installing the Scanning Utility Scanning Utility for the CR-25/55. Installing the Scanner 17 The [Run] dialog box appears. 5 In the Open box, enter "D:\SU55\SETUP.EXE" (assuming that "D" is dedicated application software for CR-25/55 is the letter assigned to install the CR-25/55 device driver. 1 Turn ON your CD-ROM drive), and then click the [OK] button. The installer starts. Windows starts. 2 Log on as a user with Administrator privileges. 3 Insert the setup disc into the PC...
Installing the Scanning Utility Scanning Utility for the CR-25/55. Installing the Scanner 17 The [Run] dialog box appears. 5 In the Open box, enter "D:\SU55\SETUP.EXE" (assuming that "D" is dedicated application software for CR-25/55 is the letter assigned to install the CR-25/55 device driver. 1 Turn ON your CD-ROM drive), and then click the [OK] button. The installer starts. Windows starts. 2 Log on as a user with Administrator privileges. 3 Insert the setup disc into the PC...
Startup Guide
Page 29
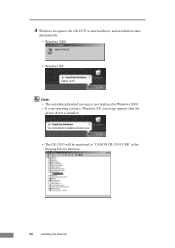
4 Windows recognizes the CR-25/55 as new hardware, and installation starts automatically. • Windows 2000 • Windows XP Note • The installation finished message is not displayed in Windows 2000. • If your operating system is Windows XP, a message appears after the device driver is installed. • The CR-25/55 will be registered as "CANON CR-25/55 USB" in the Imaging Device directory. 24 Installing the Scanner
4 Windows recognizes the CR-25/55 as new hardware, and installation starts automatically. • Windows 2000 • Windows XP Note • The installation finished message is not displayed in Windows 2000. • If your operating system is Windows XP, a message appears after the device driver is installed. • The CR-25/55 will be registered as "CANON CR-25/55 USB" in the Imaging Device directory. 24 Installing the Scanner
Startup Guide
Page 44
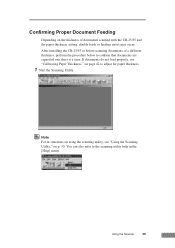
... scanning utility help in the [Help] menu. Using the Scanner 39 If documents do not feed properly, see "Using the Scanning Utility," on the thickness of a different thickness, perform the procedure below to confirm that documents are separated one sheet at a time. You can also refer to adjust for paper thickness. 1 Start the Scanning Utility. After installing the CR-25/55 or before scanning documents of documents scanned with the CR-25/55 and the paper thickness setting, double feeds or feeding errors...
... scanning utility help in the [Help] menu. Using the Scanner 39 If documents do not feed properly, see "Using the Scanning Utility," on the thickness of a different thickness, perform the procedure below to confirm that documents are separated one sheet at a time. You can also refer to adjust for paper thickness. 1 Start the Scanning Utility. After installing the CR-25/55 or before scanning documents of documents scanned with the CR-25/55 and the paper thickness setting, double feeds or feeding errors...

Startup Guide
Page 51
... view the Canon driver help. 46 Using the Scanner Double feeds cannot be misdetected as double fed: • Documents with a colored background • Documents with a glossy finish If misdetection of document may be detected for documents with an infrared double feed detection sensor that automatically detects when two or more details about how to configure scanning parameters, click the [Help] button in the settings dialog box to 0.14 mm). Double Feed Detection The scanner is valid...
... view the Canon driver help. 46 Using the Scanner Double feeds cannot be misdetected as double fed: • Documents with a colored background • Documents with a glossy finish If misdetection of document may be detected for documents with an infrared double feed detection sensor that automatically detects when two or more details about how to configure scanning parameters, click the [Help] button in the settings dialog box to 0.14 mm). Double Feed Detection The scanner is valid...
Startup Guide
Page 62
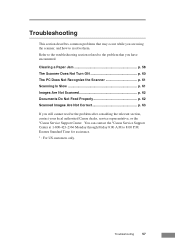
... cannot resolve the problem after consulting the relevant section, contact your local authorized Canon dealer, service representative, or the *Canon Service Support Center. Troubleshooting 57 Clearing a Paper Jam p. 58 The Scanner Does Not Turn ON p. 60 The PC Does Not Recognize the Scanner p. 61 Scanning Is Slow p. 61 Images Are Not Scanned p. 62 Documents Do Not Feed Properly p. 62 Scanned Images Are Not Correct p. 63 If you are using the scanner, and how...
... cannot resolve the problem after consulting the relevant section, contact your local authorized Canon dealer, service representative, or the *Canon Service Support Center. Troubleshooting 57 Clearing a Paper Jam p. 58 The Scanner Does Not Turn ON p. 60 The PC Does Not Recognize the Scanner p. 61 Scanning Is Slow p. 61 Images Are Not Scanned p. 62 Documents Do Not Feed Properly p. 62 Scanned Images Are Not Correct p. 63 If you are using the scanner, and how...
Startup Guide
Page 66
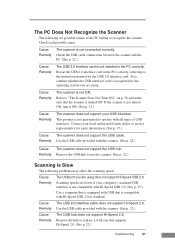
Reseat the USB 2.0 interface card in the PC correctly. If the scanner is not connected correctly. This product is not guaranteed to operate with the scanner. (See p. 22.) Cause The scanner does not support the USB hub. Remedy Use the USB cable provided with all types of the PC failing to "The Scanner Does Not Turn ON," on p. 56 and make sure that the scanner is compatible with the...
Reseat the USB 2.0 interface card in the PC correctly. If the scanner is not connected correctly. This product is not guaranteed to operate with the scanner. (See p. 22.) Cause The scanner does not support the USB hub. Remedy Use the USB cable provided with all types of the PC failing to "The Scanner Does Not Turn ON," on p. 56 and make sure that the scanner is compatible with the...
Startup Guide
Page 67
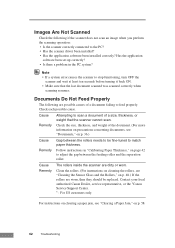
... a document failing to be replaced. Note • If a system error causes the scanner to the PC? • Has the scanner driver been installed? • Has the application software been installed correctly? For instructions on clearing a paper jam, see "Cleaning the Sensor Glass and the Rollers," on page 42 to adjust the gap between the rollers needs to feed properly. Check the size, thickness, and weight of a size, thickness, or weight that the last document scanned was scanned correctly...
... a document failing to be replaced. Note • If a system error causes the scanner to the PC? • Has the scanner driver been installed? • Has the application software been installed correctly? For instructions on clearing a paper jam, see "Cleaning the Sensor Glass and the Rollers," on page 42 to adjust the gap between the rollers needs to feed properly. Check the size, thickness, and weight of a size, thickness, or weight that the last document scanned was scanned correctly...

Startup Guide
Page 68
... scanning utility. Troubleshooting 63 If problems with scanned images, the likely causes are dirty. Try scanning without using functions such as automatically detecting the paper size or changing the scanning mode/resolution through the scan panel. Cause Remedy The sensor glass or the rollers inside the scanner are listed below. Cause Remedy The application software is not set properly for scanning and scanning is blank, the brightness setting may not support certain functions, such as automatic paper size detection or margin settings...
... scanning utility. Troubleshooting 63 If problems with scanned images, the likely causes are dirty. Try scanning without using functions such as automatically detecting the paper size or changing the scanning mode/resolution through the scan panel. Cause Remedy The sensor glass or the rollers inside the scanner are listed below. Cause Remedy The application software is not set properly for scanning and scanning is blank, the brightness setting may not support certain functions, such as automatic paper size detection or margin settings...
Startup Guide
Page 69
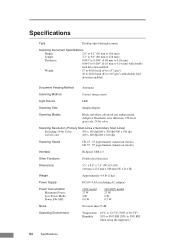
...) with double feed detection enabled Document Feeding Method Automatic Scanning Method Contact image sensor Light Source LED Scanning Side Simplex/duplex Scanning Modes Black and white, advanced text enhancement, Adoptive Threshold, error diffusion, 256-level grayscale, 24 bit color Scanning Resolution (Primary Scan Lines x Secondary Scan Lines) Excluding 24-bit Color: 100 x 100 dpi/200 x 200 dpi/300 x 300 dpi 24-bit Color: 100 x 100 dpi/200 x 100 dpi Scanning Speed CR-25 : 25 pages/minute (American checks) CR-55 : 55 pages/minute (American checks) Interface...
...) with double feed detection enabled Document Feeding Method Automatic Scanning Method Contact image sensor Light Source LED Scanning Side Simplex/duplex Scanning Modes Black and white, advanced text enhancement, Adoptive Threshold, error diffusion, 256-level grayscale, 24 bit color Scanning Resolution (Primary Scan Lines x Secondary Scan Lines) Excluding 24-bit Color: 100 x 100 dpi/200 x 200 dpi/300 x 300 dpi 24-bit Color: 100 x 100 dpi/200 x 100 dpi Scanning Speed CR-25 : 25 pages/minute (American checks) CR-55 : 55 pages/minute (American checks) Interface...
Startup Guide
Page 71
... dial 12 Print position adjustment lever 13 Protective tape 10 Power connector 14 Power cord 9, 21 Power indicator 12 Power switch 14 R Reading unit 14 Open lever 48 Regular maintenance 47 S Software Installing the scanning utility 17 Uninstalling the scanning utility .......... 33 Using the scanning utility 30 Scanning utility Scanning utility 17, 33 Canon driver 33 Scanner Installation Procedure 16 Specifications 64 AC adapter 65 External dimensions 65 Separation roller 13 T Troubleshooting 57 U USB connector 14 Using the scanner Documents 36 Paper Thickness 42...
... dial 12 Print position adjustment lever 13 Protective tape 10 Power connector 14 Power cord 9, 21 Power indicator 12 Power switch 14 R Reading unit 14 Open lever 48 Regular maintenance 47 S Software Installing the scanning utility 17 Uninstalling the scanning utility .......... 33 Using the scanning utility 30 Scanning utility Scanning utility 17, 33 Canon driver 33 Scanner Installation Procedure 16 Specifications 64 AC adapter 65 External dimensions 65 Separation roller 13 T Troubleshooting 57 U USB connector 14 Using the scanner Documents 36 Paper Thickness 42...


