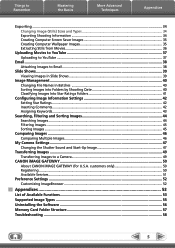
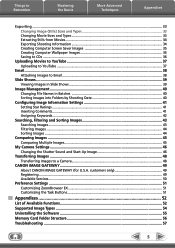
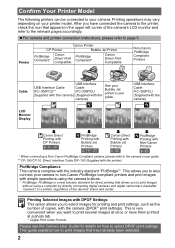
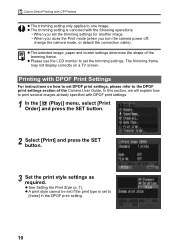
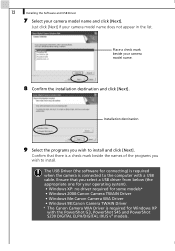
Canon 8400A006 - PowerShot A70 3.2MP Digital Camera Research

Related Manual Pages


Similar Questions

How To Turn Off Date Stamp On Digital Camera Canon Powershot A1000
(Posted by pimendy 9 years ago)

Canon S21s Manual 'how Do I Set Up My Camera To Vedio Fireworks?
(Posted by Anonymous-127831 10 years ago)

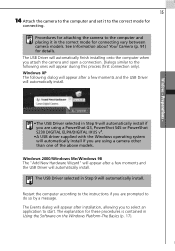
Playing The Digital Camera Solution Disk
Hi, I have Windows XP, just purchased a Canon powershot A1200, The digital camera solution disk wont...
Hi, I have Windows XP, just purchased a Canon powershot A1200, The digital camera solution disk wont...
(Posted by barbosavicki 11 years ago)