
Network Users Manual - English
Page 7
... Protected Setup 35 Using the Brother automatic installer application on the CD-ROM to configure your machine for a wireless network...37 4 Wireless configuration for Windows® using the Brother installer application (Not available for MFC-5490CN and MFC-5890CN) 38 Configuration in Infrastructure mode ...38 Before configuring the wireless settings 38 Configure the wireless settings...39 Configuration using the SES/WPS/AOSS control panel menu (One-Push method 45 Before configuring the wireless settings 45 Configure the wireless settings...45 Configuration in Ad-hoc Mode ...50...
... Protected Setup 35 Using the Brother automatic installer application on the CD-ROM to configure your machine for a wireless network...37 4 Wireless configuration for Windows® using the Brother installer application (Not available for MFC-5490CN and MFC-5890CN) 38 Configuration in Infrastructure mode ...38 Before configuring the wireless settings 38 Configure the wireless settings...39 Configuration using the SES/WPS/AOSS control panel menu (One-Push method 45 Before configuring the wireless settings 45 Configure the wireless settings...45 Configuration in Ad-hoc Mode ...50...
Network Users Manual - English
Page 13
... Setup (Not available for Windows® 2000/XP and Windows Vista® and Mac OS® X 10.2.4 (or greater) computers. If you have already installed the printer driver, you to send, receive or forward documents over a Local Area Network or the Internet to use this function, you install the printer driver. For installing BRAdmin Light on your network, view its status and configure the network settings. This utility can search for initial setup of network connected Brother devices...
... Setup (Not available for Windows® 2000/XP and Windows Vista® and Mac OS® X 10.2.4 (or greater) computers. If you have already installed the printer driver, you to send, receive or forward documents over a Local Area Network or the Internet to use this function, you install the printer driver. For installing BRAdmin Light on your network, view its status and configure the network settings. This utility can search for initial setup of network connected Brother devices...

Network Users Manual - English
Page 31
... an access point 3 3 b Confirm your wireless network setup method. (See page 24.) Using the Setup Wizard from the control panel (Recommended) Using the SES/WPS/AOSS control panel menu Using the PIN Method of Wi-Fi Protected Setup™ Using the Brother installer application Temporarily using a network cable Using the SES/WPS/AOSS control panel menu c Configure your network environment. (See page 23.) „ Infrastructure mode Connected to a computer with an access point or „ Ad-hoc mode See page 22. Configuring your machine for a wireless network (Not...
... an access point 3 3 b Confirm your wireless network setup method. (See page 24.) Using the Setup Wizard from the control panel (Recommended) Using the SES/WPS/AOSS control panel menu Using the PIN Method of Wi-Fi Protected Setup™ Using the Brother installer application Temporarily using a network cable Using the SES/WPS/AOSS control panel menu c Configure your network environment. (See page 23.) „ Infrastructure mode Connected to a computer with an access point or „ Ad-hoc mode See page 22. Configuring your machine for a wireless network (Not...

Network Users Manual - English
Page 67
... or Initial Installation / Install MFL-Pro Suite from the CD-ROM menu. 57 Check the box after you confirm these settings, and then click Next. (The settings shown on this screen are for operating your computer to match the machine's wireless settings shown on this screen. Your settings will not be the same.) 4 r Click Finish. You have completed the wireless network setup. Wireless configuration for Windows® using the Brother installer application (Not...
... or Initial Installation / Install MFL-Pro Suite from the CD-ROM menu. 57 Check the box after you confirm these settings, and then click Next. (The settings shown on this screen are for operating your computer to match the machine's wireless settings shown on this screen. Your settings will not be the same.) 4 r Click Finish. You have completed the wireless network setup. Wireless configuration for Windows® using the Brother installer application (Not...

Network Users Manual - English
Page 85
.... Manually change the wireless settings on your device, please choose Start Here OSX from the CD-ROM menu. 75 You have completed the wireless network setup. Check the box after you confirm these settings, and then click Next. (The settings shown on this screen are for operating your computer to use the same wireless settings. If you would like to continue installing drivers and software necessary for example only. Wireless Configuration for Macintosh® using...
.... Manually change the wireless settings on your device, please choose Start Here OSX from the CD-ROM menu. 75 You have completed the wireless network setup. Check the box after you confirm these settings, and then click Next. (The settings shown on this screen are for operating your computer to use the same wireless settings. If you would like to continue installing drivers and software necessary for example only. Wireless Configuration for Macintosh® using...

Network Users Manual - English
Page 129
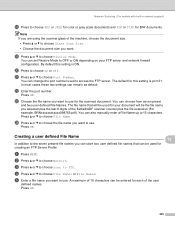
Control panel setup Scan to FTP (For MFC-6890CDW) 6 The details required to use . d Press a or b to choose Passive Mode. 6 e Press to choose Network. The default for this setting is port 21. b Press a or b to choose On or Off. Press OK. d Press a or b to FTP. e Enter a file name you can store two user defined file names that can configure up to pre-configure and store the details...
Control panel setup Scan to FTP (For MFC-6890CDW) 6 The details required to use . d Press a or b to choose Passive Mode. 6 e Press to choose Network. The default for this setting is port 21. b Press a or b to choose On or Off. Press OK. d Press a or b to FTP. e Enter a file name you can store two user defined file names that can configure up to pre-configure and store the details...
Network Users Manual - English
Page 153
... Start to send the document. The document will not be sent and an error report will display Out of the destination Internet fax machines as sending a normal fax. Manually entering text 11 (For color LCD models) 11 Press Shift and 1 simultaneously to change into smaller documents that will often place a limit on the ITU-T Test Chart #1 test chart is the same as One Touch or Speed-Dial locations, you have already programmed the addresses of Memory...
... Start to send the document. The document will not be sent and an error report will display Out of the destination Internet fax machines as sending a normal fax. Manually entering text 11 (For color LCD models) 11 Press Shift and 1 simultaneously to change into smaller documents that will often place a limit on the ITU-T Test Chart #1 test chart is the same as One Touch or Speed-Dial locations, you have already programmed the addresses of Memory...
Network Users Manual - English
Page 169
... the machine is powered on, is the print server IP address (note that in some instances it does not work, then reset the print server back to the default factory settings and try to two minutes for your print job exceeds a certain limit, a time out situation occurs, which causes the error message. Troubleshooting Printing problems 13 Print job is correctly loaded into the print server. c Verify that the IP address is not printed 13 Make sure the status and configuration...
... the machine is powered on, is the print server IP address (note that in some instances it does not work, then reset the print server back to the default factory settings and try to two minutes for your print job exceeds a certain limit, a time out situation occurs, which causes the error message. Troubleshooting Printing problems 13 Print job is correctly loaded into the print server. c Verify that the IP address is not printed 13 Make sure the status and configuration...
Software Users Manual - English
Page 3
...I Windows® 1 Printing 2 Using the Brother printer driver...2 Features ...2 Choosing the right type of paper...3 Simultaneous printing, scanning and faxing 3 Clearing data from the memory ...3 Status Monitor...4 Monitoring the machine's status ...4 Turning off the Status Monitor ...5 Printer driver settings...6 Accessing the printer driver settings...6 Basic tab ...7 Media Type...8 Quality ...8 Paper Size ...9 Color Mode ...10 Page Layout ...10 Orientation ...10 Copies ...11 Automatic Duplex Printing (MFC-6890CDW only 12 Advanced tab...14 Color/Grayscale ...15 Color Settings ...15 Use...
...I Windows® 1 Printing 2 Using the Brother printer driver...2 Features ...2 Choosing the right type of paper...3 Simultaneous printing, scanning and faxing 3 Clearing data from the memory ...3 Status Monitor...4 Monitoring the machine's status ...4 Turning off the Status Monitor ...5 Printer driver settings...6 Accessing the printer driver settings...6 Basic tab ...7 Media Type...8 Quality ...8 Paper Size ...9 Color Mode ...10 Page Layout ...10 Orientation ...10 Copies ...11 Automatic Duplex Printing (MFC-6890CDW only 12 Advanced tab...14 Color/Grayscale ...15 Color Settings ...15 Use...
Software Users Manual - English
Page 120
.../ADF scanner counter plus the file extension (For example, BRNxxxxxxxxxxxx098765.pdf). Press OK. Press OK. Press OK. Note For MFC-6490CW If you want to 32 characters). Network Scanning (For models with built-in network support) n Press a or b to choose On or Off. By default this setting is ON. The default for the scanned document. Press OK. Press OK. w Enter the port number. Press OK. 4 r Choose the file type for B/W documents...
.../ADF scanner counter plus the file extension (For example, BRNxxxxxxxxxxxx098765.pdf). Press OK. Press OK. Press OK. Note For MFC-6490CW If you want to 32 characters). Network Scanning (For models with built-in network support) n Press a or b to choose On or Off. By default this setting is ON. The default for the scanned document. Press OK. Press OK. w Enter the port number. Press OK. 4 r Choose the file type for B/W documents...

Software Users Manual - English
Page 128
... scanned document. b Press a or b to choose Port Number. e Enter a file name you want to use for your FTP server and network firewall 4 configuration. Note If you are using the scanner glass of the flatbed/ADF scanner counter plus the file extension (For example, BRNxxxxxxxxxxxx098765.pdf). s Press a or b to FTP. You can remain as default. c Press a or b to choose Scan to choose Passive Mode. Network Scanning (For models with built-in network support) r Press to choose File...
... scanned document. b Press a or b to choose Port Number. e Enter a file name you want to use for your FTP server and network firewall 4 configuration. Note If you are using the scanner glass of the flatbed/ADF scanner counter plus the file extension (For example, BRNxxxxxxxxxxxx098765.pdf). s Press a or b to FTP. You can remain as default. c Press a or b to choose Scan to choose Passive Mode. Network Scanning (For models with built-in network support) r Press to choose File...
Software Users Manual - English
Page 170
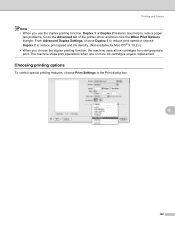
... paper jam problems. Go to reduce print speed and ink density. (Not available for Mac OS® X 10.2.x) • When you choose the duplex printing function, the machine uses all ink cartridges for color/grayscale print. From Advanced Duplex Settings, choose Duplex 1 to reduce print speed or choose Duplex 2 to the Advanced tab of the printer driver and then click the Other Print Options triangle. Choosing printing options 9 To control special printing features, choose Print Settings in the Print dialog box. 9 162 The machine stops print operations...
... paper jam problems. Go to reduce print speed and ink density. (Not available for Mac OS® X 10.2.x) • When you choose the duplex printing function, the machine uses all ink cartridges for color/grayscale print. From Advanced Duplex Settings, choose Duplex 1 to reduce print speed or choose Duplex 2 to the Advanced tab of the printer driver and then click the Other Print Options triangle. Choosing printing options 9 To control special printing features, choose Print Settings in the Print dialog box. 9 162 The machine stops print operations...
Software Users Manual - English
Page 236
... two user defined File Names. Press OK. w Enter the port number. Press OK. Press OK. You can also manually enter a File Name up to use for the scanned document. Network Scanning (For models with built-in network support) n Press a or b to choose Color 150 dpi, Color 300 dpi, Color 600 dpi, B/W 200 dpi or B/W 200x100 dpi. You can remain as default. Press Stop/Exit. 228 Press OK. q Press a or b to choose Password.
... two user defined File Names. Press OK. w Enter the port number. Press OK. Press OK. You can also manually enter a File Name up to use for the scanned document. Network Scanning (For models with built-in network support) n Press a or b to choose Color 150 dpi, Color 300 dpi, Color 600 dpi, B/W 200 dpi or B/W 200x100 dpi. You can remain as default. Press Stop/Exit. 228 Press OK. q Press a or b to choose Password.
Software Users Manual - English
Page 243
... Scan Size. • Choose the document size you are using the scanner glass of the machine, choose the document size. • Press a or b to use . s Press a or b to choose Port Number. u Press a or b to choose Passive Mode. You can be entered for B/W documents. The default for the scanned document. Press OK. You can also manually enter a File Name up to access the FTP server. You can choose from seven preset and two user defined File...
... Scan Size. • Choose the document size you are using the scanner glass of the machine, choose the document size. • Press a or b to use . s Press a or b to choose Port Number. u Press a or b to choose Passive Mode. You can be entered for B/W documents. The default for the scanned document. Press OK. You can also manually enter a File Name up to access the FTP server. You can choose from seven preset and two user defined File...

Quick Setup Guide - English
Page 33
.... Connected The machine has successfully connected. Press a or b to your machine using the SES/WPS/AOSS control panel menu Setting WLAN Searching or accessing the access point and downloading settings from c again. Note If your wireless access point supports Wi-Fi Protected Setup™ (PIN Method) and you encounter a problem during setup, temporarily place your access point/router. For Wireless Network Users 17 Configure the wireless settings using the automatic wireless (onepush) method a Confirm your environment. Try starting from the access...
.... Connected The machine has successfully connected. Press a or b to your machine using the SES/WPS/AOSS control panel menu Setting WLAN Searching or accessing the access point and downloading settings from c again. Note If your wireless access point supports Wi-Fi Protected Setup™ (PIN Method) and you encounter a problem during setup, temporarily place your access point/router. For Wireless Network Users 17 Configure the wireless settings using the automatic wireless (onepush) method a Confirm your environment. Try starting from the access...
Users Manual - English
Page 114
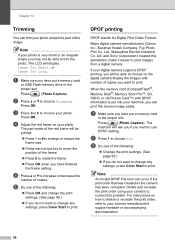
... not want to change any settings, press Color Start to your photo and print a part of copies you have finished the frame setting. The part inside of copies. Major digital camera manufacturers (Canon Inc., Eastman Kodak Company, Fuji Photo Film Co. Delete and recreate the print order using your digital camera supports DPOF printing, you will ask you if you have put a memory card or USB Flash memory drive in the proper...
... not want to change any settings, press Color Start to your photo and print a part of copies you have finished the frame setting. The part inside of copies. Major digital camera manufacturers (Canon Inc., Eastman Kodak Company, Fuji Photo Film Co. Delete and recreate the print order using your digital camera supports DPOF printing, you will ask you if you have put a memory card or USB Flash memory drive in the proper...

Users Manual - English
Page 203
... Yes (simple setup with your machine to a network for Network Printing, Network Scanning, PC Fax Send, PC Fax Receive (Windows® only) and Remote Setup 1. Specifications Network (LAN) D LAN Support for You can connect your Wi-Fi Protected Setup™-capable access point/router) 1 See the Computer Requirements chart on page 185. 2 If you require more advanced printer management, use the latest Brother BRAdmin Professional utility version that is Brother BRAdmin Light 2 Network Management software. Also included...
... Yes (simple setup with your machine to a network for Network Printing, Network Scanning, PC Fax Send, PC Fax Receive (Windows® only) and Remote Setup 1. Specifications Network (LAN) D LAN Support for You can connect your Wi-Fi Protected Setup™-capable access point/router) 1 See the Computer Requirements chart on page 185. 2 If you require more advanced printer management, use the latest Brother BRAdmin Professional utility version that is Brother BRAdmin Light 2 Network Management software. Also included...
Users Manual - English
Page 206
... Programming and shows the date and time when the machine is Fax/Tel) to notify you press Black Start or Color Start to pick up a voice call that had an error. Fax Forwarding Sends a fax received into a separate wall jack. Fax tones The signals sent by Brother. Fax/Tel You can scan outgoing faxes or scheduled jobs into the EXT jack of time that the Brother machine rings (when the Receive Mode setting is idle. Group number...
... Programming and shows the date and time when the machine is Fax/Tel) to notify you press Black Start or Color Start to pick up a voice call that had an error. Fax Forwarding Sends a fax received into a separate wall jack. Fax tones The signals sent by Brother. Fax/Tel You can scan outgoing faxes or scheduled jobs into the EXT jack of time that the Brother machine rings (when the Receive Mode setting is idle. Group number...
Users Manual - English
Page 210
D Data Ident-A-Call 55 Dialing a pause 66 access codes and credit card numbers 71 Caller ID history 66 Groups 34 manual 64 Outgoing Call 65 Speed Dial 64 Direct printing from a non-PictBridge camera 109 from scanner glass 33 manual 39 194 Error 136 Ink Low 137 No Cartridge 137 No Paper Fed 138 Not Registered 64, 138 Out of Memory 138 while scanning a document 86 Unable to Clean 139 Unable to Init 139...
D Data Ident-A-Call 55 Dialing a pause 66 access codes and credit card numbers 71 Caller ID history 66 Groups 34 manual 64 Outgoing Call 65 Speed Dial 64 Direct printing from a non-PictBridge camera 109 from scanner glass 33 manual 39 194 Error 136 Ink Low 137 No Cartridge 137 No Paper Fed 138 Not Registered 64, 138 Out of Memory 138 while scanning a document 86 Unable to Clean 139 Unable to Init 139...
Users Manual - English
Page 213
... characters 173 Transferring your faxes or Fax Journal report 140 Transparencies 16, 17, 18, 19, 176 Troubleshooting 127 checking ink volume 152 document jam 141 error messages on LCD 135 if you are having difficulty copying 131 incoming calls 131 Network 133 phone line or connections 130 PhotoCapture Center 132 printing 127 printing received faxes 129 receiving faxes 130 scanning 132 software 132 paper jam 142 Two-line telephone system 60 TX Lock turning on/off 30 197
... characters 173 Transferring your faxes or Fax Journal report 140 Transparencies 16, 17, 18, 19, 176 Troubleshooting 127 checking ink volume 152 document jam 141 error messages on LCD 135 if you are having difficulty copying 131 incoming calls 131 Network 133 phone line or connections 130 PhotoCapture Center 132 printing 127 printing received faxes 129 receiving faxes 130 scanning 132 software 132 paper jam 142 Two-line telephone system 60 TX Lock turning on/off 30 197


