
Network Users Manual - English
Page 10
...the Brother machine through a network, you need to configure the print server, and set up the computers you are running on a 10/100 MB wired or IEEE 802.11b/802.11g wireless Ethernet network using the internal network print server. These functions include printing, ...1 The Brother machine can be shared on a network supporting TCP/IP. The following chart shows what network features and connections are available as a download from http://solutions.brother.com. 4 Not available for DCP models. 5 Not available for DCP models, MFC-253CW, MFC-255CW, MFC-257CW and MFC-295CN. 6 Black and White ...
...the Brother machine through a network, you need to configure the print server, and set up the computers you are running on a 10/100 MB wired or IEEE 802.11b/802.11g wireless Ethernet network using the internal network print server. These functions include printing, ...1 The Brother machine can be shared on a network supporting TCP/IP. The following chart shows what network features and connections are available as a download from http://solutions.brother.com. 4 Not available for DCP models. 5 Not available for DCP models, MFC-253CW, MFC-255CW, MFC-257CW and MFC-295CN. 6 Black and White ...
Network Users Manual - English
Page 124
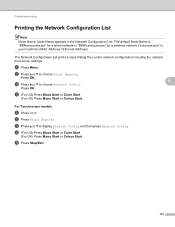
... display Network Config and then press Network Config. d (For US) Press Black Start or Color Start. (For UK) Press Mono Start or Colour Start. c Press a or b to choose Network Config. b Press a or b to choose Print Reports. For Touchscreen models 6 a Press MENU. e Press Stop/Exit. 115... MAC Address / Ethernet Address). Control panel setup Printing the Network Configuration List 6 Note Node Name: Node Name appears in the Network Configuration List. Press OK. b Press Print Reports. a Press Menu. d (For US) Press Black Start or Color Start. (For UK) Press Mono Start or ...
... display Network Config and then press Network Config. d (For US) Press Black Start or Color Start. (For UK) Press Mono Start or Colour Start. c Press a or b to choose Network Config. b Press a or b to choose Print Reports. For Touchscreen models 6 a Press MENU. e Press Stop/Exit. 115... MAC Address / Ethernet Address). Control panel setup Printing the Network Configuration List 6 Note Node Name: Node Name appears in the Network Configuration List. Press OK. b Press Print Reports. a Press Menu. d (For US) Press Black Start or Color Start. (For UK) Press Mono Start or ...

Software Users Manual - English
Page 20
Printing Color/Grayscale This selection allows a color document to see options for enhanced print settings. 1 1 1 13 Color Settings Click the Color Settings button to be printed in black and white using grayscale.
Printing Color/Grayscale This selection allows a color document to see options for enhanced print settings. 1 1 1 13 Color Settings Click the Color Settings button to be printed in black and white using grayscale.

Software Users Manual - English
Page 129
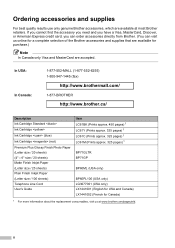
Color Settings Click the Color Settings button to be printed in black and white using grayscale. Color/Grayscale This selection allows a color document to see options for enhanced print settings. 8 8 8 122 Printing and Faxing Advanced settings 8 You can choose the Color/Grayscale, Mirror Printing, Reverse Printing and Bi-Directional Printing settings.
Color Settings Click the Color Settings button to be printed in black and white using grayscale. Color/Grayscale This selection allows a color document to see options for enhanced print settings. 8 8 8 122 Printing and Faxing Advanced settings 8 You can choose the Color/Grayscale, Mirror Printing, Reverse Printing and Bi-Directional Printing settings.
Users Manual - English
Page 4
...://www.brother.ca/ Description Ink Cartridge Standard Ink Cartridge Ink Cartridge (blue) Ink Cartridge (red) Premium Plus Glossy Finish Photo Paper (Letter size / 20 sheets) (4" × 6" size / 20 sheets) Matte Finish Inkjet Paper (Letter size / 25 sheets) Plain Finish Inkjet Paper (Letter size / 100 sheets) Telephone Line Cord User's Guide Item LC61BK (Prints approx...
...://www.brother.ca/ Description Ink Cartridge Standard Ink Cartridge Ink Cartridge (blue) Ink Cartridge (red) Premium Plus Glossy Finish Photo Paper (Letter size / 20 sheets) (4" × 6" size / 20 sheets) Matte Finish Inkjet Paper (Letter size / 25 sheets) Plain Finish Inkjet Paper (Letter size / 100 sheets) Telephone Line Cord User's Guide Item LC61BK (Prints approx...
Users Manual - English
Page 10
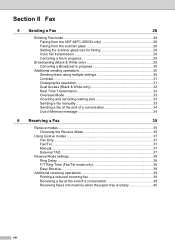
...Sending a Fax 28 Entering Fax mode 28 Faxing from the ADF (MFC-295CN only 28 Faxing from the scanner glass 28 Setting the scanner glass size for faxing 29 Color fax transmission 29 Canceling a fax in progress 29 Broadcasting (Black & White only 29 Canceling a Broadcast in progress 30 Additional sending ... 37 Receive Mode settings 38 Ring Delay ...38 F/T Ring Time (Fax/Tel mode only 38 Easy Receive 39 Additional receiving operations 39 Printing a reduced incoming fax 39 Receiving a fax at the end of a conversation 39 Receiving faxes into memory when the paper tray is empty 40...
...Sending a Fax 28 Entering Fax mode 28 Faxing from the ADF (MFC-295CN only 28 Faxing from the scanner glass 28 Setting the scanner glass size for faxing 29 Color fax transmission 29 Canceling a fax in progress 29 Broadcasting (Black & White only 29 Canceling a Broadcast in progress 30 Additional sending ... 37 Receive Mode settings 38 Ring Delay ...38 F/T Ring Time (Fax/Tel mode only 38 Easy Receive 39 Additional receiving operations 39 Printing a reduced incoming fax 39 Receiving a fax at the end of a conversation 39 Receiving faxes into memory when the paper tray is empty 40...
Users Manual - English
Page 12
... 61 Sorting copies using the ADF (Black & White only) (MFC-295CN only)........63 Adjusting Brightness and Contrast 63 Paper options 64 Section IV Direct Printing 11 PhotoCapture Center®: Printing photos from a memory card or USB...Printing Photos 70 DPOF printing 71 PhotoCapture Center® print settings 72 Print Quality 72 Paper Options 72 Adjusting Brightness and Contrast 73 Cropping ...73 Borderless printing 73 Print Date...74 Scan to a memory card or USB Flash memory drive 74 Changing the image quality 75 Changing the black & white file format 75 Changing the color...
... 61 Sorting copies using the ADF (Black & White only) (MFC-295CN only)........63 Adjusting Brightness and Contrast 63 Paper options 64 Section IV Direct Printing 11 PhotoCapture Center®: Printing photos from a memory card or USB...Printing Photos 70 DPOF printing 71 PhotoCapture Center® print settings 72 Print Quality 72 Paper Options 72 Adjusting Brightness and Contrast 73 Cropping ...73 Borderless printing 73 Print Date...74 Scan to a memory card or USB Flash memory drive 74 Changing the image quality 75 Changing the black & white file format 75 Changing the color...
Users Manual - English
Page 21
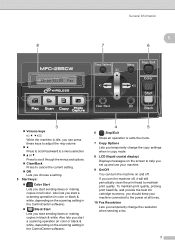
... Lets you turn the machine on and off , it will still periodically clean the print head to help you temporarily change the resolution when sending a fax. 7 Also lets you start a scanning operation (in color or black & white, depending on the scanning setting in the ControlCenter software). 4 5 6 Stop/Exit Stops an operation or exits...
... Lets you turn the machine on and off , it will still periodically clean the print head to help you temporarily change the resolution when sending a fax. 7 Also lets you start a scanning operation (in color or black & white, depending on the scanning setting in the ControlCenter software). 4 5 6 Stop/Exit Stops an operation or exits...
Users Manual - English
Page 42
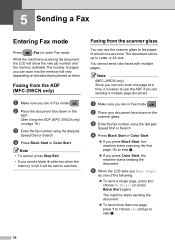
..., the machine starts scanning the first page. Faxing from the ADF (MFC-295CN only) 5 a Make sure you send a black & white fax when the memory is full it is printed on the scanner glass. The document can only scan one at a time, it will vary depending on the data that is ... with multiple pages. c Enter the fax number using the dial pad, Speed Dial or Search. d Press Black Start or Color Start. d Press Black Start or Color Start. „ If you press Color Start, the machine starts sending the document. Go to enter Fax mode. e When the LCD asks you are in ...
..., the machine starts scanning the first page. Faxing from the ADF (MFC-295CN only) 5 a Make sure you send a black & white fax when the memory is full it is printed on the scanner glass. The document can only scan one at a time, it will vary depending on the data that is ... with multiple pages. c Enter the fax number using the dial pad, Speed Dial or Search. d Press Black Start or Color Start. d Press Black Start or Color Start. „ If you press Color Start, the machine starts sending the document. Go to enter Fax mode. e When the LCD asks you are in ...
Users Manual - English
Page 43
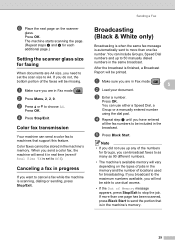
... to cancel a fax while the machine is in Fax mode b Load your document. . 5 c Enter a number. Color faxes cannot be printed. Note • If you did not use up to more than one page has been scanned, press Black Start to the maximum numbers available, you are in the machine's memory. 29 f Place the next...
... to cancel a fax while the machine is in Fax mode b Load your document. . 5 c Enter a number. Color faxes cannot be printed. Note • If you did not use up to more than one page has been scanned, press Black Start to the maximum numbers available, you are in the machine's memory. 29 f Place the next...

Users Manual - English
Page 45
... a Fax Contrast 5 If your document is very light or very dark, you may want . It automatically chooses a suitable contrast for small print or artwork and transmits slower than Standard resolution. Changing fax resolution 5 The quality of a fax can be used. To change the contrast. Use... using the Auto setting in Fax mode . For most documents the default setting Auto can choose four different resolution settings for black & white faxes and two for color faxes. 5 Black & White Standard Fine S.Fine Photo Suitable for the next fax 5 a Make sure you are in Fax mode . a...
... a Fax Contrast 5 If your document is very light or very dark, you may want . It automatically chooses a suitable contrast for small print or artwork and transmits slower than Standard resolution. Changing fax resolution 5 The quality of a fax can be used. To change the contrast. Use... using the Auto setting in Fax mode . For most documents the default setting Auto can choose four different resolution settings for black & white faxes and two for color faxes. 5 Black & White Standard Fine S.Fine Photo Suitable for the next fax 5 a Make sure you are in Fax mode . a...

Users Manual - English
Page 46
... Transmission 5 When you are sending a fax, the machine will start scanning the fax into memory-even when the machine is printed on the data that is sending from memory, receiving faxes or printing PC data. b Press Menu, 2, 2, 3. c Press a or b to choose Realtime TX:On or Realtime TX:Off. d Press a or b to... only) 5 You can dial a number and start dialing and sending. The number of the memory. • (MFC-295CN) If the memory is full and you are sending a black and white fax from the scanner glass cannot be sent until you clear some of pages you can scan into the memory will ...
... Transmission 5 When you are sending a fax, the machine will start scanning the fax into memory-even when the machine is printed on the data that is sending from memory, receiving faxes or printing PC data. b Press Menu, 2, 2, 3. c Press a or b to choose Realtime TX:On or Realtime TX:Off. d Press a or b to... only) 5 You can dial a number and start dialing and sending. The number of the memory. • (MFC-295CN) If the memory is full and you are sending a black and white fax from the scanner glass cannot be sent until you clear some of pages you can scan into the memory will ...
Users Manual - English
Page 53
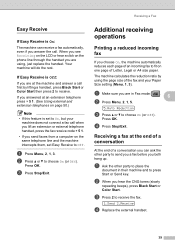
... 1.Send 2.Receive d Replace the external handset. 39 a Press Menu, 2, 1, 3. Additional receiving operations 6 Printing a reduced incoming fax 6 If you choose On, the machine automatically reduces each page of a conversation you can...to send you a fax before you both hang up. c Press 2 to fit on one page of the fax and your machine does not connect a fax call when you lift an...hear the CNG tones (slowly repeating beeps), press Black Start or Color Start. The machine calculates the reduction ratio by lifting a handset, press Black Start or Color Start then press 2 to receive. Receiving a ...
... 1.Send 2.Receive d Replace the external handset. 39 a Press Menu, 2, 1, 3. Additional receiving operations 6 Printing a reduced incoming fax 6 If you choose On, the machine automatically reduces each page of a conversation you can...to send you a fax before you both hang up. c Press 2 to fit on one page of the fax and your machine does not connect a fax call when you lift an...hear the CNG tones (slowly repeating beeps), press Black Start or Color Start. The machine calculates the reduction ratio by lifting a handset, press Black Start or Color Start then press 2 to receive. Receiving a ...
Users Manual - English
Page 54
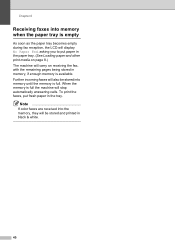
... stored into the memory, they will stop automatically answering calls. To print the faxes, put paper in the paper tray. (See Loading paper and other print media on page 8.) The machine will also be stored and printed in black & white. 40 Note If color faxes are received into memory until the memory is full. Further...
... stored into the memory, they will stop automatically answering calls. To print the faxes, put paper in the paper tray. (See Loading paper and other print media on page 8.) The machine will also be stored and printed in black & white. 40 Note If color faxes are received into memory until the memory is full. Further...

Users Manual - English
Page 59
...machine, it does not hear CNG tones, the machine lets the TAD continue playing your outgoing message so your caller can view or print this guide for the fax 'handshake'. The TAD must answer within four rings (the recommended setting is stored, the beeper will sound... Caller ID of CNG tones left for recording your external answering machine if it hears them, the machine takes over the call . c Press Black Start or Color Start. Telephone Services and External devices Viewing the Caller ID List 7 Your machine stores information for fax calling (CNG) tones. When the thirty...
...machine, it does not hear CNG tones, the machine lets the TAD continue playing your outgoing message so your caller can view or print this guide for the fax 'handshake'. The TAD must answer within four rings (the recommended setting is stored, the beeper will sound... Caller ID of CNG tones left for recording your external answering machine if it hears them, the machine takes over the call . c Press Black Start or Color Start. Telephone Services and External devices Viewing the Caller ID List 7 Your machine stores information for fax calling (CNG) tones. When the thirty...

Users Manual - English
Page 68
... Press OK. You can also add a pause by entering a Speed Dial number, and then pressing Black Start. You can even include manual dialing using the dial pad. Before you can store these long ...dialing sequences by dividing them and setting them both to one large Group. Press OK. The LCD shows: #05#09. Press OK. You can add numbers to...up groups for broadcasting 8 If you regularly want to send the same fax message to 6). You can easily print a list of a group will be marked in a group just by pressing the Redial/Pause key. 54...
... Press OK. You can also add a pause by entering a Speed Dial number, and then pressing Black Start. You can even include manual dialing using the dial pad. Before you can store these long ...dialing sequences by dividing them and setting them both to one large Group. Press OK. The LCD shows: #05#09. Press OK. You can add numbers to...up groups for broadcasting 8 If you regularly want to send the same fax message to 6). You can easily print a list of a group will be marked in a group just by pressing the Redial/Pause key. 54...
Users Manual - English
Page 70
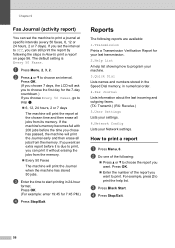
...time to choose an interval. b Do one of the report you want an extra report before the time you can print it is Every 50 Faxes. Press OK. „ Enter the number of the following: „ Press a or b to choose the report you want to print. a Press Menu, 2, 3, 2. Press...ask you to choose the first day for the 7-day countdown.) If you can still print the report by following reports are available: 1.Transmission Prints a Transmission Verification Report for 7:45 PM.) d Press Stop/Exit. c Press Black Start. Chapter 9 Fax Journal (activity report) 9 You can set the interval to ...
...time to choose an interval. b Do one of the report you want an extra report before the time you can print it is Every 50 Faxes. Press OK. „ Enter the number of the following: „ Press a or b to choose the report you want to print. a Press Menu, 2, 3, 2. Press...ask you to choose the first day for the 7-day countdown.) If you can still print the report by following reports are available: 1.Transmission Prints a Transmission Verification Report for 7:45 PM.) d Press Stop/Exit. c Press Black Start. Chapter 9 Fax Journal (activity report) 9 You can set the interval to ...
Users Manual - English
Page 72
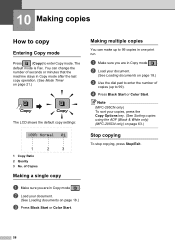
... 58 Making multiple copies 10 You can change the number of seconds or minutes that the machine stays in Copy mode . d Press Black Start or Color Start. Note (MFC-295CN only) To sort your document. (See Loading documents on page 18.) c Use the dial pad to 99 copies in Copy .... b Load your copies, press the Copy Options key. (See Sorting copies using the ADF (Black & White only) (MFC-295CN only) on page 21.) The LCD shows the default copy settings: 1 2 3 1 Copy Ratio 2 Quality 3 No. You can make up to enter Copy mode. a Make sure you are in one print run.
... 58 Making multiple copies 10 You can change the number of seconds or minutes that the machine stays in Copy mode . d Press Black Start or Color Start. Note (MFC-295CN only) To sort your document. (See Loading documents on page 18.) c Use the dial pad to 99 copies in Copy .... b Load your copies, press the Copy Options key. (See Sorting copies using the ADF (Black & White only) (MFC-295CN only) on page 21.) The LCD shows the default copy settings: 1 2 3 1 Copy Ratio 2 Quality 3 No. You can make up to enter Copy mode. a Make sure you are in one print run.

Users Manual - English
Page 74
...follow the instructions below : a Press Menu, 3, 1. 1.Quality b Press a or b to enter the number of quality settings. Press OK. f Press Black Start or Color Start. Press OK. a Make sure you set. Press OK. e Press a or b to be proof-read, large documents or many copies. If you ...printing documents to choose Normal, Best or Fast. c Use the dial pad to choose Normal, Best or Fast. c Press Stop/Exit. Best Use best mode to Page Custom(25-400%) 198% 4"x6"iA4 186% 4"x6"iLTR 104% EXEiLTR 100% 97% LTRiA4 93% A4iLTR (MFC-255CW) 83% (MFC-295CN) 83% LGLiA4 (MFC-255CW) 78% (MFC...
...follow the instructions below : a Press Menu, 3, 1. 1.Quality b Press a or b to enter the number of quality settings. Press OK. f Press Black Start or Color Start. Press OK. a Make sure you set. Press OK. e Press a or b to be proof-read, large documents or many copies. If you ...printing documents to choose Normal, Best or Fast. c Use the dial pad to choose Normal, Best or Fast. c Press Stop/Exit. Best Use best mode to Page Custom(25-400%) 198% 4"x6"iA4 186% 4"x6"iLTR 104% EXEiLTR 100% 97% LTRiA4 93% A4iLTR (MFC-255CW) 83% (MFC-295CN) 83% LGLiA4 (MFC-255CW) 78% (MFC...
Users Manual - English
Page 75
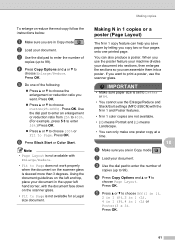
...glass is skewed more than 3 degrees. You can assemble them into sections, then enlarges the sections so you want to print a poster, use the Enlarge/Reduce and Stack/Sort settings (MFC-295CN) with Enlarge/Reduce. • Fit to Page does not work properly when the document on the scanner glass.... you save paper by letting you copy two or four pages onto one poster copy at a time. 10 a Make sure you want . d Press Copy Options and a or b to choose Enlarge/Reduce. Press OK. Press OK. f Press Black Start or Color Start. If you are in Copy mode . IMPORTANT • Make...
...glass is skewed more than 3 degrees. You can assemble them into sections, then enlarges the sections so you want to print a poster, use the Enlarge/Reduce and Stack/Sort settings (MFC-295CN) with Enlarge/Reduce. • Fit to Page does not work properly when the document on the scanner glass.... you save paper by letting you copy two or four pages onto one poster copy at a time. 10 a Make sure you want . d Press Copy Options and a or b to choose Enlarge/Reduce. Press OK. Press OK. f Press Black Start or Color Start. If you are in Copy mode . IMPORTANT • Make...


