

Users Manual - English
Page 11
... the name up to 15 characters (or leave it blank). Press Menu/Set. 5 Press Stop/Exit. Press Search/Speed Dial, press #. Note FAX-2820, FAX-2910 and FAX-2920 only: To access One-Touch numbers 11 to 20, hold down Shift as you press the One-Touch key. -OR- Dialing operations ... using One-Touch, Speed-Dial, Search or the dial pad. 4 Press Start. Press the three-digit Speed-Dial number. 4 Press Start. Note FAX-2820, FAX-2910 and FAX-2920 only: To dial One-Touch numbers 11 to 20, hold down Shift as you press the One-Touch key. 3 Enter the number...
... the name up to 15 characters (or leave it blank). Press Menu/Set. 5 Press Stop/Exit. Press Search/Speed Dial, press #. Note FAX-2820, FAX-2910 and FAX-2920 only: To access One-Touch numbers 11 to 20, hold down Shift as you press the One-Touch key. -OR- Dialing operations ... using One-Touch, Speed-Dial, Search or the dial pad. 4 Press Start. Press the three-digit Speed-Dial number. 4 Press Start. Note FAX-2820, FAX-2910 and FAX-2920 only: To dial One-Touch numbers 11 to 20, hold down Shift as you press the One-Touch key. 3 Enter the number...

Users Manual - English
Page 12
... pad to enter the number of the name you want (up to 99). 4 Press Options and ▲ or ▼ to select Stack/Sort. Press Menu/Set. 5 Press ▲ or ▼ to illuminate it in 2 Load your document. 3 Press Start. x Sorting copies using the ADF 1 Press green. (Copy) to select Sort. Press...
... pad to enter the number of the name you want (up to 99). 4 Press Options and ▲ or ▼ to select Stack/Sort. Press Menu/Set. 5 Press ▲ or ▼ to illuminate it in 2 Load your document. 3 Press Start. x Sorting copies using the ADF 1 Press green. (Copy) to select Sort. Press...
Users Manual - English
Page 13
... dialing mode (For Canada only 2-1 Setting the Station ID 2-2 General Setup ...2-3 Setting the Mode Timer (FAX-2820, FAX-2910 and FAX-2920 only 2-3 Setting the Mode Timer (MFC-7220 and MFC-7225N only 2-3 Setting the Paper Type 2-4 Setting the Paper Size 2-4 Setting the Ring Volume 2-5 Setting the Beeper Volume 2-5 Setting the Speaker Volume 2-5 Setting the Handset Volume 2-6 Choosing the Handset...
... dialing mode (For Canada only 2-1 Setting the Station ID 2-2 General Setup ...2-3 Setting the Mode Timer (FAX-2820, FAX-2910 and FAX-2920 only 2-3 Setting the Mode Timer (MFC-7220 and MFC-7225N only 2-3 Setting the Paper Type 2-4 Setting the Paper Size 2-4 Setting the Ring Volume 2-5 Setting the Beeper Volume 2-5 Setting the Speaker Volume 2-5 Setting the Handset Volume 2-6 Choosing the Handset...

Users Manual - English
Page 14
...(FAX-2820, FAX-2910 and MFC-7220 only 2-9 Setting up the password 2-9 Changing the TX Lock password 2-9 Turning TX Lock on 2-10 Turning TX Lock off 2-10 Memory Security (FAX-2920 and MFC-7225N only 2-10 Setting up the password 2-...transmission 3-3 Manual transmission 3-3 Sending a fax at the end of a conversation 3-4 Out of Memory message 3-4 Basic sending operations 3-4 Sending faxes using multiple settings 3-4 Contrast ...3-5 Fax Resolution 3-5 Dual Access 3-6 Real Time Transmission 3-6 Broadcasting 3-7 Checking job status 3-8 Canceling a fax in progress 3-8 Canceling a ...
...(FAX-2820, FAX-2910 and MFC-7220 only 2-9 Setting up the password 2-9 Changing the TX Lock password 2-9 Turning TX Lock on 2-10 Turning TX Lock off 2-10 Memory Security (FAX-2920 and MFC-7225N only 2-10 Setting up the password 2-...transmission 3-3 Manual transmission 3-3 Sending a fax at the end of a conversation 3-4 Out of Memory message 3-4 Basic sending operations 3-4 Sending faxes using multiple settings 3-4 Contrast ...3-5 Fax Resolution 3-5 Dual Access 3-6 Real Time Transmission 3-6 Broadcasting 3-7 Checking job status 3-8 Canceling a fax in progress 3-8 Canceling a ...

Users Manual - English
Page 15
...a fax at the end of a conversation 4-4 Advanced receiving operations 4-5 Printing a fax from the memory 4-5 Setting the Print Density 4-5 Polling ...4-5 Setting up Polling Receive 4-5 Setting up Sequential Polling Receive 4-6 5 Quick-Dial numbers and dialing options Storing numbers for easy dialing 5-1 Storing One...card numbers 5-4 Pause ...5-4 Tone or Pulse (For Canada only 5-4 6 Remote Fax Options Setting Remote Fax Options 6-1 Setting up Fax Forwarding 6-1 Programming your pager number 6-2 Setting Fax Storage 6-2 PC Fax Receive (MFC-7220 and MFC-7225N only 6-3 Turning off Remote...
...a fax at the end of a conversation 4-4 Advanced receiving operations 4-5 Printing a fax from the memory 4-5 Setting the Print Density 4-5 Polling ...4-5 Setting up Polling Receive 4-5 Setting up Sequential Polling Receive 4-6 5 Quick-Dial numbers and dialing options Storing numbers for easy dialing 5-1 Storing One...card numbers 5-4 Pause ...5-4 Tone or Pulse (For Canada only 5-4 6 Remote Fax Options Setting Remote Fax Options 6-1 Setting up Fax Forwarding 6-1 Programming your pager number 6-2 Setting Fax Storage 6-2 PC Fax Receive (MFC-7220 and MFC-7225N only 6-3 Turning off Remote...
Users Manual - English
Page 16
... 8-2 Using the Options key 8-3 Enlarging or reducing the copied image 8-4 Quality ...8-5 Sorting copies using the ADF 8-5 Making N in 1 copies (Page Layout 8-6 Changing the default copy settings 8-7 Quality ...8-7 Adjusting contrast 8-7 Out of Memory message 8-7 Software and Network Features (MFC-7220 and MFC-7225N only) 9-1 Important information Standard telephone and FCC Notices These...
... 8-2 Using the Options key 8-3 Enlarging or reducing the copied image 8-4 Quality ...8-5 Sorting copies using the ADF 8-5 Making N in 1 copies (Page Layout 8-6 Changing the default copy settings 8-7 Quality ...8-7 Adjusting contrast 8-7 Out of Memory message 8-7 Software and Network Features (MFC-7220 and MFC-7225N only) 9-1 Important information Standard telephone and FCC Notices These...
Users Manual - English
Page 17
... the Serial Numbers 11-29 Checking the Page Counters 11-29 Checking the Drum Life 11-29 A Appendix A Setting up telephone services A-1 Distinctive Ring A-1 What does your telephone company's 'Distinctive Ring' do A-1 What does Brother's 'Distinctive Ring' do A-1 Do you have Voice Mail A-1 Before you choose the ring pattern to register A-2 Registering...
... the Serial Numbers 11-29 Checking the Page Counters 11-29 Checking the Drum Life 11-29 A Appendix A Setting up telephone services A-1 Distinctive Ring A-1 What does your telephone company's 'Distinctive Ring' do A-1 What does Brother's 'Distinctive Ring' do A-1 Do you have Voice Mail A-1 Before you choose the ring pattern to register A-2 Registering...

Users Manual - English
Page 18
... media...S-3 Copy ...S-3 Fax...S-4 Scanner (MFC-7220 and MFC-7225N only S-5 Printer (not available for FAX-2910 S-5 Interfaces (not available for FAX-2910 S-6 Download the optional software from the Brother Web Site (FAX-2820 and FAX-2920 users only S-6 At the same time, you can download the ...manual for setting up and using the PC-Fax software S-6 Computer requirements (not available for FAX-2910 S-7 Consumable items S-8...
... media...S-3 Copy ...S-3 Fax...S-4 Scanner (MFC-7220 and MFC-7225N only S-5 Printer (not available for FAX-2910 S-5 Interfaces (not available for FAX-2910 S-6 Download the optional software from the Brother Web Site (FAX-2820 and FAX-2920 users only S-6 At the same time, you can download the ...manual for setting up and using the PC-Fax software S-6 Computer requirements (not available for FAX-2910 S-7 Consumable items S-8...
Users Manual - English
Page 24
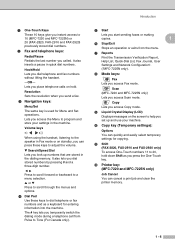
A Shift (FAX-2820, FAX-2910 and FAX-2920 only) To access One-Touch numbers 11 to help you set up numbers that are stored in quick dial...menu. 7 Reports Print the Transmission Verification Report, Help List, Quick-Dial List, Fax Journal, User Settings and Network Configuration*. (*MFC-7225N only). 8 Mode keys: Fax Lets you access Fax mode. Lets ...Set operations. It also lets you access Scan mode. Hook/Hold Lets you called. The # key lets you temporarily switch the dialing mode during a telephone call from Pulse to 10 (MFC-7220 and MFC-7225N) or 20 (FAX-2820, FAX-2910...
A Shift (FAX-2820, FAX-2910 and FAX-2920 only) To access One-Touch numbers 11 to help you set up numbers that are stored in quick dial...menu. 7 Reports Print the Transmission Verification Report, Help List, Quick-Dial List, Fax Journal, User Settings and Network Configuration*. (*MFC-7225N only). 8 Mode keys: Fax Lets you access Fax mode. Lets ...Set operations. It also lets you access Scan mode. Hook/Hold Lets you called. The # key lets you temporarily switch the dialing mode during a telephone call from Pulse to 10 (MFC-7220 and MFC-7225N) or 20 (FAX-2820, FAX-2910...
Users Manual - English
Page 30
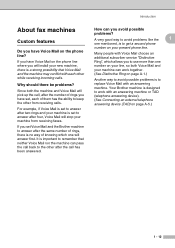
... answer after two rings and your machine is to answer after the call , after the number of rings you have set Voice Mail and the Brother machine to answer after the same number of rings, there is no way of knowing which allows you to the other from receiving faxes. A very ...good way to avoid problems like the 1 one number on page A-5.) 1 - 12 For example, if Voice Mail is set to get a second phone...
... answer after two rings and your machine is to answer after the call , after the number of rings you have set Voice Mail and the Brother machine to answer after the same number of rings, there is no way of knowing which allows you to the other from receiving faxes. A very ...good way to avoid problems like the 1 one number on page A-5.) 1 - 12 For example, if Voice Mail is set to get a second phone...
Users Manual - English
Page 31
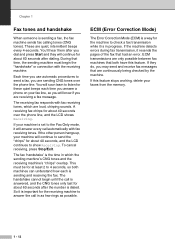
... will continue to send the "chirps" for the machine to check a fax transmission while it is dialed. Chapter 1 Fax tones and handshake When someone is set to the Fax Only mode, it will answer every call automatically with fax receiving tones. These are only possible between fax machines that time, the...
... will continue to send the "chirps" for the machine to check a fax transmission while it is dialed. Chapter 1 Fax tones and handshake When someone is set to the Fax Only mode, it will answer every call automatically with fax receiving tones. These are only possible between fax machines that time, the...

Users Manual - English
Page 32
... the Station ID the date and time displayed by your machine will display the date and time. Press Menu/Set. (For example, enter 15:25 for 6th.) 5 Enter the time in Fax mode. When the machine is in Sleep mode, the LCD shows Sleep. (See ...Sleep Time on every fax you may have to select Pulse (or Tone). 2 Getting started Initial setup Setting the Date and Time When the machine is not in use it will be affected. 1 Press Menu/Set, 0, 2. 2.Date/Time 2 Enter the last two digits of the year. If there is a power failure, you...
... the Station ID the date and time displayed by your machine will display the date and time. Press Menu/Set. (For example, enter 15:25 for 6th.) 5 Enter the time in Fax mode. When the machine is in Sleep mode, the LCD shows Sleep. (See ...Sleep Time on every fax you may have to select Pulse (or Tone). 2 Getting started Initial setup Setting the Date and Time When the machine is not in use it will be affected. 1 Press Menu/Set, 0, 2. 2.Date/Time 2 Enter the last two digits of the year. If there is a power failure, you...
Users Manual - English
Page 33
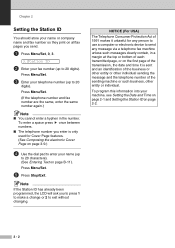
... Act of 1991 makes it is only used for any message via a telephone fax machine unless such messages clearly contain, in the number. Press Menu/Set. (If the telephone number and fax number are the same, enter the same number again.) Note ■ You cannot enter a hyphen in a margin at ... top or bottom of each transmitted page, or on the first page of the sending machine or such business, other entity or individual. Press Menu/Set. 3 Enter your telephone number (up to send any person to use a computer or electronic device to 20 digits). To enter a space press once between ...
... Act of 1991 makes it is only used for any message via a telephone fax machine unless such messages clearly contain, in the number. Press Menu/Set. (If the telephone number and fax number are the same, enter the same number again.) Note ■ You cannot enter a hyphen in a margin at ... top or bottom of each transmitted page, or on the first page of the sending machine or such business, other entity or individual. Press Menu/Set. 3 Enter your telephone number (up to send any person to use a computer or electronic device to 20 digits). To enter a space press once between ...

Users Manual - English
Page 34
If you select Off, the machine stays in the mode you used last. Press Menu/Set. 3 Press Stop/Exit. 1 Press Menu/Set, 1, 1. 1.Mode Timer 2 Press ▲ or ▼ to Fax mode. Setting the Mode Timer (MFC-7220 and MFC-7225N only) The machine has three temporary mode keys 2 on the control panel...takes after the last Copy operation before it returns to select 0 Sec, 30 Secs, 1 Min, 2 Mins, 5 Mins or Off. Getting started General Setup Setting the Mode Timer (FAX-2820, FAX-2910 and FAX-2920 only) The machine has two temporary mode keys on the control panel: Fax, Scan and Copy.
If you select Off, the machine stays in the mode you used last. Press Menu/Set. 3 Press Stop/Exit. 1 Press Menu/Set, 1, 1. 1.Mode Timer 2 Press ▲ or ▼ to Fax mode. Setting the Mode Timer (MFC-7220 and MFC-7225N only) The machine has three temporary mode keys 2 on the control panel...takes after the last Copy operation before it returns to select 0 Sec, 30 Secs, 1 Min, 2 Mins, 5 Mins or Off. Getting started General Setup Setting the Mode Timer (FAX-2820, FAX-2910 and FAX-2920 only) The machine has two temporary mode keys on the control panel: Fax, Scan and Copy.
Users Manual - English
Page 35
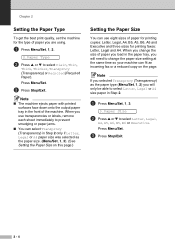
... the output paper tray in the paper tray, you will only be able to select Letter, Legal or A4 size paper in Step 2. 1 Press Menu/Set, 1, 3. 3.Paper Size 2 Press ▲ or ▼ to prevent smudging or paper jams. ■ You can select Transprncy (Transparency) in Step 2 only if Letter, Legal ...or A4 paper size was selected as the paper size. (Menu/Set, 1, 3). (See Setting the Paper Size on this page.) Setting the Paper Size You can fit an incoming fax or a reduced copy on the page. When you use eight sizes of paper...
... the output paper tray in the paper tray, you will only be able to select Letter, Legal or A4 size paper in Step 2. 1 Press Menu/Set, 1, 3. 3.Paper Size 2 Press ▲ or ▼ to prevent smudging or paper jams. ■ You can select Transprncy (Transparency) in Step 2 only if Letter, Legal ...or A4 paper size was selected as the paper size. (Menu/Set, 1, 3). (See Setting the Paper Size on this page.) Setting the Paper Size You can fit an incoming fax or a reduced copy on the page. When you use eight sizes of paper...

Users Manual - English
Page 36
... mode , you are choosing. Each key press changes the volume to adjust the volume level. The new setting will ring so you can hear the active setting as the LCD shows it again. 2 - 5 The new setting will beep when you press a key, make a mistake, or after you sent or received 2 a fax. 1... Off. In mode (Fax), press or to the next level. The volume changes with each key press. The default setting is idle (not being used). The LCD shows the setting you can adjust the speaker volume by pressing Hook/Hold, and then selecting a speaker volume level. When the beeper is...
... mode , you are choosing. Each key press changes the volume to adjust the volume level. The new setting will ring so you can hear the active setting as the LCD shows it again. 2 - 5 The new setting will beep when you press a key, make a mistake, or after you sent or received 2 a fax. 1... Off. In mode (Fax), press or to the next level. The volume changes with each key press. The default setting is idle (not being used). The LCD shows the setting you can adjust the speaker volume by pressing Hook/Hold, and then selecting a speaker volume level. When the beeper is...

Users Manual - English
Page 37
...During ▲ conversation, users can press or ▲ on the control panel to adjust the three volume levels. Vol Amplify:On-Temporary This setting is appropriate if some users. 2 - 6 WARNING It is appropriate if none of the users are hearing-impaired. There are hearing-impaired. .... During a ▲ conversation, users can press or ▲ on the control panel to adjust the volume, the LCD shows the setting you do NOT choose Permanent unless ALL the users are two handset volume levels, Low and High. Choosing the Handset Volume (For Volume ...
...During ▲ conversation, users can press or ▲ on the control panel to adjust the three volume levels. Vol Amplify:On-Temporary This setting is appropriate if some users. 2 - 6 WARNING It is appropriate if none of the users are hearing-impaired. There are hearing-impaired. .... During a ▲ conversation, users can press or ▲ on the control panel to adjust the volume, the LCD shows the setting you do NOT choose Permanent unless ALL the users are two handset volume levels, Low and High. Choosing the Handset Volume (For Volume ...

Users Manual - English
Page 38
... only some or all of the users are hearing-impaired, select Vol Amplify:On, and then press Menu/Set. 3 If all of the users are hearing-impaired, select Temporary, and then press Menu/Set. 4 Press Stop/Exit. If some or all the users are hearing-impaired, press to On, print ...appears lighter. Getting started Turning on page 2-6 before you do the following steps; 1 Press Menu/Set, 1, 4, 5. 5.Volume Amplify 2 If none of the users are hearing-impaired, press ▲ or ▼ to select Vol Amplify:Off, and then press ...
... only some or all of the users are hearing-impaired, select Vol Amplify:On, and then press Menu/Set. 3 If all of the users are hearing-impaired, select Temporary, and then press Menu/Set. 4 Press Stop/Exit. If some or all the users are hearing-impaired, press to On, print ...appears lighter. Getting started Turning on page 2-6 before you do the following steps; 1 Press Menu/Set, 1, 4, 5. 5.Volume Amplify 2 If none of the users are hearing-impaired, press ▲ or ▼ to select Vol Amplify:Off, and then press ...

Users Manual - English
Page 39
... next time the machine copies, prints or is idle (from 00 to select Light or Dark. Setting the LCD Contrast You can choose how long the machine is turned off sleep mode, press Start and...in sleep mode, there will be a short delay while the fuser warms up to its working temperature. 1 Press Menu/Set, 1, 6, 2. 2.Sleep Time 2 Use the dial pad to turn off and on the LCD. Note ■... If you change the contrast to help the LCD look lighter or darker. 1 Press Menu/Set, 1, 7. 7.LCD Contrast 2 Press ▲ or ▼ to 99 minutes) before it is in sleep mode...
... next time the machine copies, prints or is idle (from 00 to select Light or Dark. Setting the LCD Contrast You can choose how long the machine is turned off sleep mode, press Start and...in sleep mode, there will be a short delay while the fuser warms up to its working temperature. 1 Press Menu/Set, 1, 6, 2. 2.Sleep Time 2 Use the dial pad to turn off and on the LCD. Note ■... If you change the contrast to help the LCD look lighter or darker. 1 Press Menu/Set, 1, 7. 7.LCD Contrast 2 Press ▲ or ▼ to 99 minutes) before it is in sleep mode...

Users Manual - English
Page 40
... new password. TX Lock (FAX-2820, FAX-2910 and MFC-7220 only) TX Lock lets you prevent unauthorized access to set it again. ■ If you have already set up the password Note ■ If you forget the TX Lock password, 2 please call Brother Customer Service. (See Brother numbers on TX Lock, so they won...
... new password. TX Lock (FAX-2820, FAX-2910 and MFC-7220 only) TX Lock lets you prevent unauthorized access to set it again. ■ If you have already set up the password Note ■ If you forget the TX Lock password, 2 please call Brother Customer Service. (See Brother numbers on TX Lock, so they won...


