Users Manual - English
Page 103
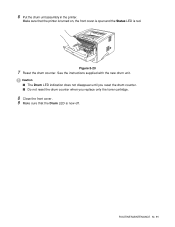
See the instructions supplied with the new drum unit. Figure 5-20 7 Reset the drum counter. ROUTINE MAINTENANCE 5 - 11 Caution ■ The Drum LED indication does not disappear until you reset the drum counter. ■ Do not reset the drum counter when you replace only the toner cartridge. 8 Close the front cover. 9 Make sure that the printer is turned on, the front cover is open and the Status LED is now off. Make sure that the Drum LED is red. 6 Put the drum unit assembly in the printer.
See the instructions supplied with the new drum unit. Figure 5-20 7 Reset the drum counter. ROUTINE MAINTENANCE 5 - 11 Caution ■ The Drum LED indication does not disappear until you reset the drum counter. ■ Do not reset the drum counter when you replace only the toner cartridge. 8 Close the front cover. 9 Make sure that the printer is turned on, the front cover is open and the Status LED is now off. Make sure that the Drum LED is red. 6 Put the drum unit assembly in the printer.

Service Manual
Page 174
... is red. (7) To reset the drum counter, press and hold down the Go button until all four LEDs are lit. (3) While pressing the blue lock lever, take the toner cartridge out of the drum unit assembly. (Fig.5-4) HL-5130/5140/5150D/5170DN SERVICE MANUAL (4) Unpack the new drum unit. (5) Put the ...toner cartridge in the new drum unit until you pick up the drum unit tightly so that toner powder does not spill out of the unit. • Do not reset the drum counter when ...
... is red. (7) To reset the drum counter, press and hold down the Go button until all four LEDs are lit. (3) While pressing the blue lock lever, take the toner cartridge out of the drum unit assembly. (Fig.5-4) HL-5130/5140/5150D/5170DN SERVICE MANUAL (4) Unpack the new drum unit. (5) Put the ...toner cartridge in the new drum unit until you pick up the drum unit tightly so that toner powder does not spill out of the unit. • Do not reset the drum counter when ...

Service Manual
Page 257
This function helps a counter reset for the main items to be set in Chapter 1. Press the "GO" switch again when keeping the front cover open . 3. It is switched to 300V when 7,000 pages are as follows; Install the drum unit into the printer. 4. With the following the...the previous one gets empty. Items Timing of Drum LED ON Development switching timing Fixing temperature Smaller size mode Descriptions 18,000 pages (Counted from the drum unit life.) The developing bias is replaced following settings, the developing bias reset function operates. 1. Press the "GO" switch...
This function helps a counter reset for the main items to be set in Chapter 1. Press the "GO" switch again when keeping the front cover open . 3. It is switched to 300V when 7,000 pages are as follows; Install the drum unit into the printer. 4. With the following the...the previous one gets empty. Items Timing of Drum LED ON Development switching timing Fixing temperature Smaller size mode Descriptions 18,000 pages (Counted from the drum unit life.) The developing bias is replaced following settings, the developing bias reset function operates. 1. Press the "GO" switch...


