
User Guide
Page 4
...can check here for all your Brother product. iii Please complete the Brother Warranty Registration or, for you in the event of product loss covered by you convenience and most from your Printer needs. Register your product By registering your product with Brother: ■ may serve as ...receipt; ■ may support an insurance claim by insurance; Your registration with Brother, you of the product. http://solutions.brother.com You can download the latest software and utilities, read FAQs and troubleshooting tips, and go to the 'Solutions' section to learn how to get the...
...can check here for all your Brother product. iii Please complete the Brother Warranty Registration or, for you in the event of product loss covered by you convenience and most from your Printer needs. Register your product By registering your product with Brother: ■ may serve as ...receipt; ■ may support an insurance claim by insurance; Your registration with Brother, you of the product. http://solutions.brother.com You can download the latest software and utilities, read FAQs and troubleshooting tips, and go to the 'Solutions' section to learn how to get the...
User Guide
Page 12
... page ...3-8 Using Control panel button 3-8 Using the printer driver ...3-8 4 Options ...4-1 Ir-DA Interface (IR-1000) ...4-1 5 Routine maintenance ...5-1 Toner cartridge ...5-2 Toner Low message ...5-2 Toner Empty message ...5-3 Replacing the toner cartridge 5-3 Drum unit ...5-8 Change Drum message ...5-8 Replacing the drum unit ...5-9 Cleaning ...5-12 Replacing maintenance parts ...5-13 6 Troubleshooting ...6-1 Identifying your problem ...6-1 Error messages in the...
... page ...3-8 Using Control panel button 3-8 Using the printer driver ...3-8 4 Options ...4-1 Ir-DA Interface (IR-1000) ...4-1 5 Routine maintenance ...5-1 Toner cartridge ...5-2 Toner Low message ...5-2 Toner Empty message ...5-3 Replacing the toner cartridge 5-3 Drum unit ...5-8 Change Drum message ...5-8 Replacing the drum unit ...5-9 Cleaning ...5-12 Replacing maintenance parts ...5-13 6 Troubleshooting ...6-1 Identifying your problem ...6-1 Error messages in the...
User Guide
Page 76
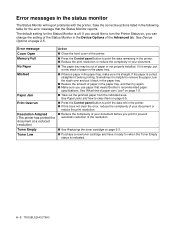
... installed and selected. ■ The PC is set up to connect to the correct printer port. Other problems See Other problems on page 6-5. TROUBLESHOOTING 6 - 1 Printer does not print: If you did not solve your problem with the above checks, please find your problem First, check the ...following: ■ The power plug is connected properly and the printer is turned on. ■ All of the...
... installed and selected. ■ The PC is set up to connect to the correct printer port. Other problems See Other problems on page 6-5. TROUBLESHOOTING 6 - 1 Printer does not print: If you did not solve your problem with the above checks, please find your problem First, check the ...following: ■ The power plug is connected properly and the printer is turned on. ■ All of the...
User Guide
Page 77
...have it ready for when the Toner Empty status is indicated. 6 - 2 TROUBLESHOOTING on page 2-5. If you print to print the data left in the paper...the Status Monitor is helpful to remove the paper, turn the Printer Status on page 6-5. ■ Press the Control panel button...jams and how to print the data remaining in the printer. ■ Reduce the print resolution or reduce the complexity...with the printer. Sometimes it back in the paper tray. ■ Reduce the amount of paper in the printer. ■... Adapted (The printer has printed the document at a reduced resolution) Toner Empty...
...have it ready for when the Toner Empty status is indicated. 6 - 2 TROUBLESHOOTING on page 2-5. If you print to print the data left in the paper...the Status Monitor is helpful to remove the paper, turn the Printer Status on page 6-5. ■ Press the Control panel button...jams and how to print the data remaining in the printer. ■ Reduce the print resolution or reduce the complexity...with the printer. Sometimes it back in the paper tray. ■ Reduce the amount of paper in the printer. ■... Adapted (The printer has printed the document at a reduced resolution) Toner Empty...

User Guide
Page 78
TROUBLESHOOTING 6 - 3 Error message Memory Full Print Overrun Resolution Adapted (The printer has printed the document at a reduced resolution) Action ■ Press the Control panel button to print the data left in the printer. ■ Reduce the print resolution or reduce the complexity of your document. ■ Press the... Control panel button to print the data left in the printer. ■ If this does not clear the error, reduce the complexity of your document or reduce the print resolution. ■ Reduce...
TROUBLESHOOTING 6 - 3 Error message Memory Full Print Overrun Resolution Adapted (The printer has printed the document at a reduced resolution) Action ■ Press the Control panel button to print the data left in the printer. ■ Reduce the print resolution or reduce the complexity of your document. ■ Press the... Control panel button to print the data left in the printer. ■ If this does not clear the error, reduce the complexity of your document or reduce the print resolution. ■ Reduce...

User Guide
Page 79
...specified paper. Sometimes it is usually done in the paper tray, make sure that meets Brother recommended paper specifications. Paper handling First, make sure it is selected. 6 - 4 TROUBLESHOOTING The printer does not print on page 1-5. Your application software must be out of your software ...application manual. ■ Clear the jammed paper. Please see Paper jams and how to the printer. ■ Make sure that manual feed...
...specified paper. Sometimes it is usually done in the paper tray, make sure that meets Brother recommended paper specifications. Paper handling First, make sure it is selected. 6 - 4 TROUBLESHOOTING The printer does not print on page 1-5. Your application software must be out of your software ...application manual. ■ Clear the jammed paper. Please see Paper jams and how to the printer. ■ Make sure that manual feed...

User Guide
Page 80
...the shaded parts shown in the following steps, you open the front cover or rear cover of paper from feeding through the printer at one time and reduces paper jams. TROUBLESHOOTING 6 - 5 Clear the jammed paper as shown below. Then try printing again. ■ Always remove all the jammed ...paper has been removed from the paper tray and straighten the stack when you have just used the printer, some parts inside the printer are extremely hot. ...
...the shaded parts shown in the following steps, you open the front cover or rear cover of paper from feeding through the printer at one time and reduces paper jams. TROUBLESHOOTING 6 - 5 Clear the jammed paper as shown below. Then try printing again. ■ Always remove all the jammed ...paper has been removed from the paper tray and straighten the stack when you have just used the printer, some parts inside the printer are extremely hot. ...

User Guide
Page 81
Figure 6-4 6 - 6 TROUBLESHOOTING Figure 6-3 2 Pull the jammed paper up and out of the printer. 1 Pull the paper tray completely out of the printer. 3 Open the front cover.
Figure 6-4 6 - 6 TROUBLESHOOTING Figure 6-3 2 Pull the jammed paper up and out of the printer. 1 Pull the paper tray completely out of the printer. 3 Open the front cover.

User Guide
Page 82
Pull the jammed paper up and out of the jammed paper from the paper tray. Instead, pull the edge of the printer. Figure 6-6 TROUBLESHOOTING 6 - 7 Figure 6-5 Caution To prevent damage to the printer caused by static electricity, do not use extra force. If you cannot remove the drum unit assembly easily at this time, do not touch the electrodes shown in Figure 6-6. 4 Pull out the drum unit assembly.
Pull the jammed paper up and out of the jammed paper from the paper tray. Instead, pull the edge of the printer. Figure 6-6 TROUBLESHOOTING 6 - 7 Figure 6-5 Caution To prevent damage to the printer caused by static electricity, do not use extra force. If you cannot remove the drum unit assembly easily at this time, do not touch the electrodes shown in Figure 6-6. 4 Pull out the drum unit assembly.

User Guide
Page 83
Print a few copies of the test page until the scattering of the fuser unit. HOT! 6 Close the rear cover. Wait for the printer to pull the paper toward the back of the printer, the fuser may get dirty with toner powder and it may scatter on the next printouts. Pull the jammed paper out of toner stops. 5 Open the rear cover. Caution After you touch the internal parts of the printer are extremely hot! Figure 6-7 If you have to cool down before you have just used the printer, some internal parts of the printer. Figure 6-8 6 - 8 TROUBLESHOOTING
Print a few copies of the test page until the scattering of the fuser unit. HOT! 6 Close the rear cover. Wait for the printer to pull the paper toward the back of the printer, the fuser may get dirty with toner powder and it may scatter on the next printouts. Pull the jammed paper out of toner stops. 5 Open the rear cover. Caution After you touch the internal parts of the printer are extremely hot! Figure 6-7 If you have to cool down before you have just used the printer, some internal parts of the printer. Figure 6-8 6 - 8 TROUBLESHOOTING

User Guide
Page 84
Figure 6-9 8 Put the drum unit assembly back in the printer. 9 Put the paper tray in the printer. 10 Close the front cover. TROUBLESHOOTING 6 - 9 Take out the jammed paper if there is any inside the drum unit. 7 Push the lock lever down and take the toner cartridge out of the drum unit assembly.
Figure 6-9 8 Put the drum unit assembly back in the printer. 9 Put the paper tray in the printer. 10 Close the front cover. TROUBLESHOOTING 6 - 9 Take out the jammed paper if there is any inside the drum unit. 7 Push the lock lever down and take the toner cartridge out of the drum unit assembly.

User Guide
Page 85
... new drum unit. Recommendation ■ Check that it is selected with USB Problem HL-1430 does not appear in Chapter 1. ■ If the whole page is selected. Other problems Problem The printer cannot print. See Replacing the toner cartridge on page 1-4. ■ Use a...printer driver is installed correctly. ■ Make sure that the supplied Macintosh® printer driver is installed in the System Folder and that the printer cable is not damaged or broken. ■ If you use ? Improving the print quality This section provides information on page 5-9. 6 - 10 TROUBLESHOOTING...
... new drum unit. Recommendation ■ Check that it is selected with USB Problem HL-1430 does not appear in Chapter 1. ■ If the whole page is selected. Other problems Problem The printer cannot print. See Replacing the toner cartridge on page 1-4. ■ Use a...printer driver is installed correctly. ■ Make sure that the supplied Macintosh® printer driver is installed in the System Folder and that the printer cable is not damaged or broken. ■ If you use ? Improving the print quality This section provides information on page 5-9. 6 - 10 TROUBLESHOOTING...

User Guide
Page 86
...blue tab to the home position (▲). on page 5-9. See Replacing the drum unit on page 1-5. ■ Try using . ■ Check the printer's environment because conditions such as high humidity can I use thinner paper than you choose the appropriate media type in a new drum unit. See Positioning ...sure that meets our specifications. See Replacing the drum unit on page 5-12. ■ The drum unit may cause the problem. All black TROUBLESHOOTING 6 - 11 See Cleaning on page 5-9. ■ Make sure that you use paper that you are currently using a new drum unit. Put in the...
...blue tab to the home position (▲). on page 5-9. See Replacing the drum unit on page 1-5. ■ Try using . ■ Check the printer's environment because conditions such as high humidity can I use thinner paper than you choose the appropriate media type in a new drum unit. See Positioning ...sure that meets our specifications. See Replacing the drum unit on page 5-12. ■ The drum unit may cause the problem. All black TROUBLESHOOTING 6 - 11 See Cleaning on page 5-9. ■ Make sure that you use paper that you are currently using a new drum unit. Put in the...

User Guide
Page 87
... of the OPC drum. Clean the drum unit as a ball-point pen. ■ The drum unit may have glue from label stock on page 5-9. 6 - 12 TROUBLESHOOTING
... of the OPC drum. Clean the drum unit as a ball-point pen. ■ The drum unit may have glue from label stock on page 5-9. 6 - 12 TROUBLESHOOTING

User Guide
Page 88
...White lines across the page ABCDEFGH abcdefghijk ABCD abcde 01234 ■ Clean the primary corona wire of the printer and the primary corona wire in the drum unit. Lines across the page ABCDEFGH abcdefghijk ABCD abcde 01234 ■...be damaged. See Cleaning on page 5-9. ■ The toner cartridge may sometimes stick to clear this problem, especially if the printer has not been used for a long time. ■ The drum unit may be smudged. Put in a new drum unit...at the home position (▲). ■ The drum unit may be damaged. on page 5-9. TROUBLESHOOTING 6 - 13
...White lines across the page ABCDEFGH abcdefghijk ABCD abcde 01234 ■ Clean the primary corona wire of the printer and the primary corona wire in the drum unit. Lines across the page ABCDEFGH abcdefghijk ABCD abcde 01234 ■...be damaged. See Cleaning on page 5-9. ■ The toner cartridge may sometimes stick to clear this problem, especially if the printer has not been used for a long time. ■ The drum unit may be smudged. Put in a new drum unit...at the home position (▲). ■ The drum unit may be damaged. on page 5-9. TROUBLESHOOTING 6 - 13

User Guide
Page 89
...ABCDEFGH abcdefghijk ABCD abcde 01234 Recommendation ■ You may have been in the paper tray. See What kind of paper can I use the printer very often, the paper may clear the problem by wiping the scanner window with a soft cloth. See Printing on plain paper from the paper... tray on page 1-5. ■ Check the paper type and quality. Put in the input tray. 6 - 14 TROUBLESHOOTING White lines down the page AaAa0bBbc1CBdDe2cEfCgdF3hGDie4jHk Page skewed ■ Make sure the paper or other print media is loaded properly. See What kind of paper...
...ABCDEFGH abcdefghijk ABCD abcde 01234 Recommendation ■ You may have been in the paper tray. See What kind of paper can I use the printer very often, the paper may clear the problem by wiping the scanner window with a soft cloth. See Printing on plain paper from the paper... tray on page 1-5. ■ Check the paper type and quality. Put in the input tray. 6 - 14 TROUBLESHOOTING White lines down the page AaAa0bBbc1CBdDe2cEfCgdF3hGDie4jHk Page skewed ■ Make sure the paper or other print media is loaded properly. See What kind of paper...

User Guide
Page 90
...laser printers have a restricted area that is usually the first two lines and the last two lines of a page (leaving 62 printable lines). Take away all other devices and connect the port only to the printer. ■ Turn off Printer Status Monitor in the Device Options tab in the printer driver. TROUBLESHOOTING... 6 - 15 Connect your computer directly to your printer, and then try again. ■ Check that you are using...
...laser printers have a restricted area that is usually the first two lines and the last two lines of a page (leaving 62 printable lines). Take away all other devices and connect the port only to the printer. ■ Turn off Printer Status Monitor in the Device Options tab in the printer driver. TROUBLESHOOTING... 6 - 15 Connect your computer directly to your printer, and then try again. ■ Check that you are using...