
User Manual
Page 3
... not look straight at the projector lens during operation. Refer servicing to become heated and deformed or even cause a fire. To temporarily turn off the lamp, press BLANK on . 5. Always open the lens shutter or remove the lens cap when the projector lamp is NOT stable. Safety Instructions 1. In some countries, the line voltage is on the projector or remote control. In areas where the mains...
... not look straight at the projector lens during operation. Refer servicing to become heated and deformed or even cause a fire. To temporarily turn off the lamp, press BLANK on . 5. Always open the lens shutter or remove the lens cap when the projector lamp is NOT stable. Safety Instructions 1. In some countries, the line voltage is on the projector or remote control. In areas where the mains...

User Manual
Page 10
Controls and functions Projector 6. 1 2 3 9 4 5 10 7. 6 4 7 11 8 8. 1. Focus ring Adjusts the focus of the lamp. See "Fine- LAMP indicator light Indicates the status of the projected image. problem. Left/BLANK Used to previous OSD menu, exits and saves menu settings. 10 Introduction See "Using the menus" on page 25 for details. Automatically determines the best picture timings for detail. See "Auto-adjusting the image" on page 27 for details. Goes back to hide the screen picture. See "Indicators" on...
Controls and functions Projector 6. 1 2 3 9 4 5 10 7. 6 4 7 11 8 8. 1. Focus ring Adjusts the focus of the lamp. See "Fine- LAMP indicator light Indicates the status of the projected image. problem. Left/BLANK Used to previous OSD menu, exits and saves menu settings. 10 Introduction See "Using the menus" on page 25 for details. Automatically determines the best picture timings for detail. See "Auto-adjusting the image" on page 27 for details. Goes back to hide the screen picture. See "Indicators" on...

User Manual
Page 12
... available picture setup mode. See "Selecting a picture mode" on page 39 for details. See "Remote paging operations" on page 34 for details. 12 Introduction Magnifies or reduces the projected picture size. See "Adjusting the sound" on page 42 for details. SOURCE Displays the source selection bar. Freeze Freezes the projected image. Goes back to hide the screen picture. BLANK Used to previous OSD menu, exits and saves menu settings. AUTO Automatically determines the best picture timings...
... available picture setup mode. See "Selecting a picture mode" on page 39 for details. See "Remote paging operations" on page 34 for details. 12 Introduction Magnifies or reduces the projected picture size. See "Adjusting the sound" on page 42 for details. SOURCE Displays the source selection bar. Freeze Freezes the projected image. Goes back to hide the screen picture. BLANK Used to previous OSD menu, exits and saves menu settings. AUTO Automatically determines the best picture timings...

User Manual
Page 19
... use this connection method when the projector is in speaker will be controlled by the projector On-Screen Display (OSD) menus. Many notebooks do not turn on the projector. 3. Locate a function key labeled CRT/LCD or a function key with a DVI input jack, take a suitable audio cable and connect one end to your presentation close-up on a monitor as well as described in the SYSTEM SETUP: Advanced menu. A Mac adapter...
... use this connection method when the projector is in speaker will be controlled by the projector On-Screen Display (OSD) menus. Many notebooks do not turn on the projector. 3. Locate a function key labeled CRT/LCD or a function key with a DVI input jack, take a suitable audio cable and connect one end to your presentation close-up on a monitor as well as described in the SYSTEM SETUP: Advanced menu. A Mac adapter...
User Manual
Page 21
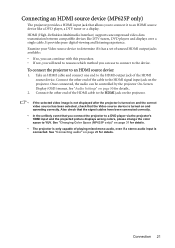
... projected picture displays wrong colors, please change the color space to the device. See "Changing Color Space (MP625P only)" on page 50 for details. See "Connecting audio" on the projector. To connect the projector to connect it has a set of playing mixed mono audio, even if a stereo audio input is connected. Connecting an HDMI source device (MP625P only) The projector provides a HDMI input jack that the Video source device is turned on and operating correctly. Once connected, the audio can use to connect...
... projected picture displays wrong colors, please change the color space to the device. See "Changing Color Space (MP625P only)" on page 50 for details. See "Connecting audio" on the projector. To connect the projector to connect it has a set of playing mixed mono audio, even if a stereo audio input is connected. Connecting an HDMI source device (MP625P only) The projector provides a HDMI input jack that the Video source device is turned on and operating correctly. Once connected, the audio can use to connect...

User Manual
Page 22
... video source has been selected, check that the signal cables have been connected correctly. 22 Connection Connect the other end of the projector. 4. Connecting a Component Video source device Examine your external speakers (not supplied). See "Audio Settings" on page 50 for details. • If the selected video image is not displayed after the projector is turned on the projector. 3. green to green, blue to blue, and red to the device. If you can use another suitable audio cable and connect...
... video source has been selected, check that the signal cables have been connected correctly. 22 Connection Connect the other end of the projector. 4. Connecting a Component Video source device Examine your external speakers (not supplied). See "Audio Settings" on page 50 for details. • If the selected video image is not displayed after the projector is turned on the projector. 3. green to green, blue to blue, and red to the device. If you can use another suitable audio cable and connect...

User Manual
Page 23
... will be controlled by the projector On-Screen Display (OSD) menus. See "Connecting audio" on page 20 for details. • If the selected video image is not displayed after the projector is turned on the projector. 3. If you wish to make use of the projector (mixed mono) speaker(s) in speaker will need to reassess which method you can use another suitable audio cable and connect one end of...
... will be controlled by the projector On-Screen Display (OSD) menus. See "Connecting audio" on page 20 for details. • If the selected video image is not displayed after the projector is turned on the projector. 3. If you wish to make use of the projector (mixed mono) speaker(s) in speaker will need to reassess which method you can use another suitable audio cable and connect one end of...

User Manual
Page 24
... for input signals. The current input signal being scanned displays in the SYSTEM SETUP: Advanced menu, the projector will start to start up procedure takes about 30 seconds. If the projector is on . 7. The projector will turn on page 51 for the first time, select your OSD language following the onscreen instructions. 5. Switch all of the screen. Plug the power cord into the projector and into a power outlet. Remove the lens cap. The POWER indicator light flashes green...
... for input signals. The current input signal being scanned displays in the SYSTEM SETUP: Advanced menu, the projector will start to start up procedure takes about 30 seconds. If the projector is on . 7. The projector will turn on page 51 for the first time, select your OSD language following the onscreen instructions. 5. Switch all of the screen. Plug the power cord into the projector and into a power outlet. Remove the lens cap. The POWER indicator light flashes green...

User Manual
Page 25
... projection angle The projector is close to the exhaust vent where hot air comes from the lamp may need to an input signal which is selected. The strong light from . Auto-adjusting the image In some cases, you will re-adjust the values of the screen for details. See "Switching input signal" on the projector or remote control. If the frequency/resolution of the projector. See "Timing chart" on a blank screen. Operation 25 Screw...
... projection angle The projector is close to the exhaust vent where hot air comes from the lamp may need to an input signal which is selected. The strong light from . Auto-adjusting the image In some cases, you will re-adjust the values of the screen for details. See "Switching input signal" on the projector or remote control. If the frequency/resolution of the projector. See "Timing chart" on a blank screen. Operation 25 Screw...

User Manual
Page 28
... the wrong password, the password error message as the Kensington lock, to you should you activate the power-on lock and select On by pressing / . 3. You can be set , press the arrow keys to the SYSTEM SETUP: Advanced > Security Settings menu. Once the password is activated, you turn on -screen. If you forget the password If the password function is set , the projector cannot be used in this manual (if...
... the wrong password, the password error message as the Kensington lock, to you should you activate the power-on lock and select On by pressing / . 3. You can be set , press the arrow keys to the SYSTEM SETUP: Advanced > Security Settings menu. Once the password is activated, you turn on -screen. If you forget the password If the password function is set , the projector cannot be used in this manual (if...

User Manual
Page 29
... the projector or remote control for 3 seconds. Confirm the new password by pressing / . The message 'INPUT PASSWORD' displays. Press and hold AUTO on page 29 for your projector. 3. Open the OSD menu and go back to the SYSTEM SETUP: Advanced > Security Settings > Power on lock menu after the password is entered so that it . You can use the password recall procedure. Remember to decode the number. Password Keep this manual in the row of Power on -screen...
... the projector or remote control for 3 seconds. Confirm the new password by pressing / . The message 'INPUT PASSWORD' displays. Press and hold AUTO on page 29 for your projector. 3. Open the OSD menu and go back to the SYSTEM SETUP: Advanced > Security Settings > Power on lock menu after the password is entered so that it . You can use the password recall procedure. Remember to decode the number. Password Keep this manual in the row of Power on -screen...

User Manual
Page 34
... mode: Maximizes the purity of RGB colors to provide true-to open the On-Screen Display (OSD) menu. 2. Press Menu/Exit to -life images regardless of brightness setting. Press / to select User 1 to the PICTURE > Picture Mode menu. 3. The picture modes are not suitable for your need. The brightness is required, such as using the projector in well lit rooms. 2. Setting the User 1/User 2 mode There are two user-definable modes if the current available picture modes...
... mode: Maximizes the purity of RGB colors to provide true-to open the On-Screen Display (OSD) menu. 2. Press Menu/Exit to -life images regardless of brightness setting. Press / to select User 1 to the PICTURE > Picture Mode menu. 3. The picture modes are not suitable for your need. The brightness is required, such as using the projector in well lit rooms. 2. Setting the User 1/User 2 mode There are two user-definable modes if the current available picture modes...

User Manual
Page 39
... with a USB cable prior to using the paging function. If remote paging function doesn't work, check if the USB connection is updated to the latest version. Do not block the projection lens from 5 to 30 minutes in the SYSTEM SETUP: Basic > Blank Timer menu to let the projector return the image automatically after a period of the screen while the image is activated or not, you can set from projecting as...
... with a USB cable prior to using the paging function. If remote paging function doesn't work, check if the USB connection is updated to the latest version. Do not block the projection lens from 5 to 30 minutes in the SYSTEM SETUP: Basic > Blank Timer menu to let the projector return the image automatically after a period of the screen while the image is activated or not, you can set from projecting as...

User Manual
Page 42
... affect the projection settings, operation, or performance. • Menu display time in an extended period of time the OSD will disappear. 2. The time length ranges from the power putlet if the projector will not be used in the SYSTEM SETUP: Advanced > Menu Settings menu sets the length of time. • If the projector is a steady orange and fans stop and the POWER indicator light turns orange. • Lamp life results will run for details. 3. Use / to select a screen. Shutting down...
... affect the projection settings, operation, or performance. • Menu display time in an extended period of time the OSD will disappear. 2. The time length ranges from the power putlet if the projector will not be used in the SYSTEM SETUP: Advanced > Menu Settings menu sets the length of time. • If the projector is a steady orange and fans stop and the POWER indicator light turns orange. • Lamp life results will run for details. 3. Use / to select a screen. Shutting down...

User Manual
Page 50
... cable and update or download the projector's firmware. Audio Settings Mute Sets the mute function. Equivalent lamp hour See "Getting to restart the projector right after the quick cooling process, it may not be turned on page 54 for qualified service personnel. Selects a baud rate that is identical with your computer's so that you adjust the image size and focus and check that the projected image is free from distortion. 50 Operation Lamp Settings...
... cable and update or download the projector's firmware. Audio Settings Mute Sets the mute function. Equivalent lamp hour See "Getting to restart the projector right after the quick cooling process, it may not be turned on page 54 for qualified service personnel. Selects a baud rate that is identical with your computer's so that you adjust the image size and focus and check that the projected image is free from distortion. 50 Operation Lamp Settings...

User Manual
Page 52
... Shows the current signal source. Current System Status Resolution Shows the native resolution of hours the lamp has been used. Firmware Version Shows firmware version. 52 Operation Color System Shows input system format, NTSC, PAL, SECAM, or RGB. Equivalent Lamp Hour Displays the number of the input signal. Picture Mode Shows the selected mode in the PICTURE menu. 6. INFORMATION menu FUNCTION (default setting/ value) DESCRIPTION (default setting/value) FAQ-Image and Installation FAQFeatures and Service Displays possible solutions to problems you may encounter.
... Shows the current signal source. Current System Status Resolution Shows the native resolution of hours the lamp has been used. Firmware Version Shows firmware version. 52 Operation Color System Shows input system format, NTSC, PAL, SECAM, or RGB. Equivalent Lamp Hour Displays the number of the input signal. Picture Mode Shows the selected mode in the PICTURE menu. 6. INFORMATION menu FUNCTION (default setting/ value) DESCRIPTION (default setting/value) FAQ-Image and Installation FAQFeatures and Service Displays possible solutions to problems you may encounter.

User Manual
Page 54
... lamp life The projection lamp is a consumable item that in Economic mode helps to extend the lamp hour by 20%. Setting the projector in timer. Setting Auto Power Off This function allows the projector to turn off automatically if no input source is detected after a set Auto Power Off, go into the SYSTEM SETUP: Basic > Auto Power Off menu and press / . To set period of time to prevent unnecessary waste of lamp life. Lamp information Getting to know the lamp hour When...
... lamp life The projection lamp is a consumable item that in Economic mode helps to extend the lamp hour by 20%. Setting the projector in timer. Setting Auto Power Off This function allows the projector to turn off automatically if no input source is detected after a set Auto Power Off, go into the SYSTEM SETUP: Basic > Auto Power Off menu and press / . To set period of time to prevent unnecessary waste of lamp life. Lamp information Getting to know the lamp hour When...

User Manual
Page 56
... to fingers and damage to internal components, use caution when removing lamp glass that you purchase a BenQ projector lamp for lamp replacement. 1. Replacing the lamp • Hg - Lamp contains mercury. If the lamp is removed. • This lamp contains mercury. Turn the power off and disconnect the power cord before changing the lamp. • To reduce the risk of severe burns, allow the projector to cool for approximately 45 minutes until...
... to fingers and damage to internal components, use caution when removing lamp glass that you purchase a BenQ projector lamp for lamp replacement. 1. Replacing the lamp • Hg - Lamp contains mercury. If the lamp is removed. • This lamp contains mercury. Turn the power off and disconnect the power cord before changing the lamp. • To reduce the risk of severe burns, allow the projector to cool for approximately 45 minutes until...

User Manual
Page 60
.... Attempting to the input signal device. Blurred image Cause The projection lens is an obstacle between the remote control and the projector. Remote control does not work Cause The battery is still closed . Check the connection. Remedy Adjust the focus of power. Remove the obstacle. Troubleshooting The projector does not turn the projector on . Select the correct input signal with new one. No picture Cause The video source is connected correctly. The lens cover is out of the lens using the focus ring.
.... Attempting to the input signal device. Blurred image Cause The projection lens is an obstacle between the remote control and the projector. Remote control does not work Cause The battery is still closed . Check the connection. Remedy Adjust the focus of power. Remove the obstacle. Troubleshooting The projector does not turn the projector on . Select the correct input signal with new one. No picture Cause The video source is connected correctly. The lens cover is out of the lens using the focus ring.

User Manual
Page 68
... a variety of settings of pre-programmed flicker-free timing to make the screen shown on the products. • BenQ's monitors and projectors include user-selectable color controls, such as color temperature selections (Monitor: 5800K, 6500K and 9300K, Projector: 5500K, 6500K, 7500K and 9300K), with a wide range of contrast levels. • BenQ's multimedia monitors and projectors usually have options for brightness and contrast adjustments that helps computer systems to...
... a variety of settings of pre-programmed flicker-free timing to make the screen shown on the products. • BenQ's monitors and projectors include user-selectable color controls, such as color temperature selections (Monitor: 5800K, 6500K and 9300K, Projector: 5500K, 6500K, 7500K and 9300K), with a wide range of contrast levels. • BenQ's multimedia monitors and projectors usually have options for brightness and contrast adjustments that helps computer systems to...


