Resolution file
Page 1
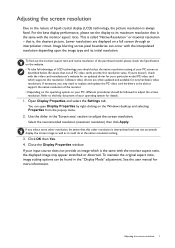
... resolution, be found in the 'Screen area' section to the help document of liquid crystal display (LCD) technology, the picture resolution is the same with the video card manufacturer's website for an updated driver for details. 1. Software video drivers are displayed on the Windows desktop and selecting Properties from the pop-up menu. 2. Open Display Properties and select the Settings tab. If you should be able to support the native resolution of the monitor...
... resolution, be found in the 'Screen area' section to the help document of liquid crystal display (LCD) technology, the picture resolution is the same with the video card manufacturer's website for an updated driver for details. 1. Software video drivers are displayed on the Windows desktop and selecting Properties from the pop-up menu. 2. Open Display Properties and select the Settings tab. If you should be able to support the native resolution of the monitor...

Resolution file
Page 2
... the help document of the applicable factory modes as listed in Control Panel. 2. From the Display Properties window, select the Settings tab and click the Advanced button. 3. Close the Display Properties window. 2 Adjusting the screen refresh rate The best results are obtained by using the factory modes already set in your operating system for an LCD display to flicker. Select the Adapter tab, and select an appropriate refresh rate to match one of your computer. Check next...
... the help document of the applicable factory modes as listed in Control Panel. 2. From the Display Properties window, select the Settings tab and click the Advanced button. 3. Close the Display Properties window. 2 Adjusting the screen refresh rate The best results are obtained by using the factory modes already set in your operating system for an LCD display to flicker. Select the Adapter tab, and select an appropriate refresh rate to match one of your computer. Check next...
Resolution file
Page 4
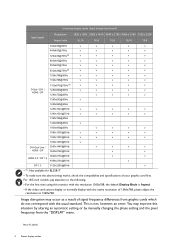
... time using this situation by altering an automatic setting or by manually changing the phase setting and the pixel frequency from graphic cards which do not correspond with the usual standard. Main 5/12/2021 4 Preset display modes You may occur as a result of your graphic card first. Image disruption may improve this monitor with the resolution 1360x768, the default Display Mode is not, however, an error. For 18.5-inch models...
... time using this situation by altering an automatic setting or by manually changing the phase setting and the pixel frequency from graphic cards which do not correspond with the usual standard. Main 5/12/2021 4 Preset display modes You may occur as a result of your graphic card first. Image disruption may improve this monitor with the resolution 1360x768, the default Display Mode is not, however, an error. For 18.5-inch models...

User Manual
Page 4
... to assemble your monitor hardware 15 How to wall mount the monitor? Viewing angle adjustment 23 How to adjust the monitor viewing angle? How to clean the monitor? Basic menu operation 32 Navigating the main menu 37 Maintenance and product support How to detach the stand and the base 19 Care and cleaning 6 I need more screen space? Care and cleaning 6 How to keep the monitor not in use the built-in microphone? Product support 3 Servicing 6 4 Working with...
... to assemble your monitor hardware 15 How to wall mount the monitor? Viewing angle adjustment 23 How to adjust the monitor viewing angle? How to clean the monitor? Basic menu operation 32 Navigating the main menu 37 Maintenance and product support How to detach the stand and the base 19 Care and cleaning 6 I need more screen space? Care and cleaning 6 How to keep the monitor not in use the built-in microphone? Product support 3 Servicing 6 4 Working with...
User Manual
Page 6
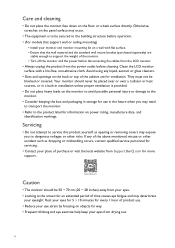
... website from Support.BenQ.com for an extended period of the monitor. • Turn off the monitor and the power before disconnecting the cables from the LCD monitor. • Always unplug the product from the power outlet before operation. • (For models that support wall or ceiling mounting) • Install your monitor and monitor mounting kit on power rating, manufacture date, and identification markings. Otherwise, scratches on the panel surface may...
... website from Support.BenQ.com for an extended period of the monitor. • Turn off the monitor and the power before disconnecting the cables from the LCD monitor. • Always unplug the product from the power outlet before operation. • (For models that support wall or ceiling mounting) • Install your monitor and monitor mounting kit on power rating, manufacture date, and identification markings. Otherwise, scratches on the panel surface may...
User Manual
Page 8
... cleaning...6 Servicing...6 Caution ...6 Typographics ...7 Getting started ...10 Getting to know your monitor 12 Front view...12 Back view ...12 Connections ...13 Power delivery of USB-C™ ports on your monitor 14 How to assemble your monitor hardware 15 How to detach the stand and the base 19 Adjusting the monitor height ...21 Rotating the monitor ...22 Viewing angle adjustment ...23 Using the monitor wall mounting kit (purchased separately 24 Getting the most from your BenQ monitor 25 Downloading...
... cleaning...6 Servicing...6 Caution ...6 Typographics ...7 Getting started ...10 Getting to know your monitor 12 Front view...12 Back view ...12 Connections ...13 Power delivery of USB-C™ ports on your monitor 14 How to assemble your monitor hardware 15 How to detach the stand and the base 19 Adjusting the monitor height ...21 Rotating the monitor ...22 Viewing angle adjustment ...23 Using the monitor wall mounting kit (purchased separately 24 Getting the most from your BenQ monitor 25 Downloading...

User Manual
Page 18
... instructions in Getting the most from product supplied for your BenQ monitor on the power. 4. Picture may differ from your region. The displayed input icons vary depending on the stand arm first. Connect the power cable to install the monitor software. Turn on the computer too, and select an input source by pressing the power button on the monitor by the OSD control keys. Turn on the monitor. To extend the service life of the purchased model...
... instructions in Getting the most from product supplied for your BenQ monitor on the power. 4. Picture may differ from your region. The displayed input icons vary depending on the stand arm first. Connect the power cable to install the monitor software. Turn on the computer too, and select an input source by pressing the power button on the monitor by the OSD control keys. Turn on the monitor. To extend the service life of the purchased model...

User Manual
Page 24
... of your LCD monitor has a VESA standard mount with flat surface. • Ensure that all screws are stable enough to the monitor. Detach the monitor stand as instructed in the future, please keep the monitor base, monitor stand, and screws somewhere safe for weight information. • Turn off the monitor and the power before disconnecting the cables from the monitor. 3 1 2 2. Before starting to install a monitor wall mounting kit, please read the precautions carefully. Remove the screws on a clean and...
... of your LCD monitor has a VESA standard mount with flat surface. • Ensure that all screws are stable enough to the monitor. Detach the monitor stand as instructed in the future, please keep the monitor base, monitor stand, and screws somewhere safe for weight information. • Turn off the monitor and the power before disconnecting the cables from the monitor. 3 1 2 2. Before starting to install a monitor wall mounting kit, please read the precautions carefully. Remove the screws on a clean and...
User Manual
Page 25
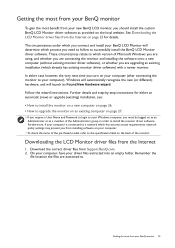
... extracted to successfully install the BenQ LCD Monitor driver software. In either an automatic (new) or upgrade (existing) installation, see: • How to install the monitor on a new computer on page 26. • How to upgrade the monitor on an existing computer on your computer (after connecting the monitor to install the monitor driver software. Downloading the LCD Monitor driver files from Support.BenQ.com. 2. Further details and step-by-step instructions for details. Getting...
... extracted to successfully install the BenQ LCD Monitor driver software. In either an automatic (new) or upgrade (existing) installation, see: • How to install the monitor on a new computer on page 26. • How to upgrade the monitor on an existing computer on your computer (after connecting the monitor to install the monitor driver software. Downloading the LCD Monitor driver files from Support.BenQ.com. 2. Further details and step-by-step instructions for details. Getting...

User Manual
Page 26
... the correct name of your monitor and click Next. 4. Check Search for a suitable driver for How to Install Hardware Device Drivers. 2. This instruction is only suitable for which has never been used before . If you should instead be following the instructions for my device option, and click Next. 3. When Windows starts, it displays the option to upgrade the monitor on page 15. You...
... the correct name of your monitor and click Next. 4. Check Search for a suitable driver for How to Install Hardware Device Drivers. 2. This instruction is only suitable for which has never been used before . If you should instead be following the instructions for my device option, and click Next. 3. When Windows starts, it displays the option to upgrade the monitor on page 15. You...
User Manual
Page 27
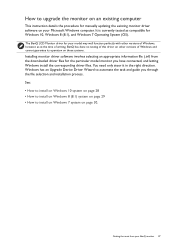
.... Installing monitor driver software involves selecting an appropriate information file (.inf) from your Microsoft Windows computer. Getting the most from the downloaded driver files for the particular model monitor you through the file selection and installation process. You need only steer it in the right direction. How to upgrade the monitor on an existing computer This instruction details the procedure for manually updating the existing monitor driver software on...
.... Installing monitor driver software involves selecting an appropriate information file (.inf) from your Microsoft Windows computer. Getting the most from the downloaded driver files for the particular model monitor you through the file selection and installation process. You need only steer it in the right direction. How to upgrade the monitor on an existing computer This instruction details the procedure for manually updating the existing monitor driver software on...
User Manual
Page 28
... instructed in Downloading the LCD Monitor driver files from the menu. 3. How to restart your BenQ monitor Click the Hardware tab. 4. Go to Start, Settings, Devices, Devices and Printers and right-click the name of your monitor from your computer after the driver update is complete. 28 Getting the most from the menu. 2. In the Update Driver Software window, select the option Browse my computer for driver software. 7. Click the Driver...
... instructed in Downloading the LCD Monitor driver files from the menu. 3. How to restart your BenQ monitor Click the Hardware tab. 4. Go to Start, Settings, Devices, Devices and Printers and right-click the name of your monitor from your computer after the driver update is complete. 28 Getting the most from the menu. 2. In the Update Driver Software window, select the option Browse my computer for driver software. 7. Click the Driver...
User Manual
Page 29
... the Update Driver button. 6. Click Browse and locate the driver files downloaded from the Internet as instructed in Downloading the LCD Monitor driver files from the menu. 3. In the Update Driver Software window, select the option Browse my computer for driver software. 7. You may be prompted to restart your monitor from the menu. Go to Settings, Control Panel, Devices and Printers and right-click the name of the screen or press the Windows + C buttons on...
... the Update Driver button. 6. Click Browse and locate the driver files downloaded from the Internet as instructed in Downloading the LCD Monitor driver files from the menu. 3. In the Update Driver Software window, select the option Browse my computer for driver software. 7. You may be prompted to restart your monitor from the menu. Go to Settings, Control Panel, Devices and Printers and right-click the name of the screen or press the Windows + C buttons on...

User Manual
Page 30
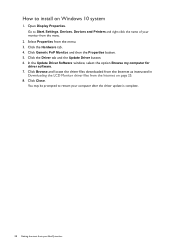
How to Start, Control Panel, Hardware and Sound, Devices and Printers and right-click the name of your monitor from your monitor from the menu. Click the Driver tab and the Update Driver button. 6. Select Properties from the Internet on Windows 7 system 1. Click the Hardware tab. 4. Click Browse and locate the driver files downloaded from the Internet as instructed in Downloading the LCD Monitor driver files from the menu. 3. You may...
How to Start, Control Panel, Hardware and Sound, Devices and Printers and right-click the name of your monitor from your monitor from the menu. Click the Driver tab and the Update Driver button. 6. Select Properties from the Internet on Windows 7 system 1. Click the Hardware tab. 4. Click Browse and locate the driver files downloaded from the Internet as instructed in Downloading the LCD Monitor driver files from the menu. 3. You may...

User Manual
Page 32
... key menu is displayed. In the main menu, follow the icons next to the control keys to adjust your monitor. 1 2 4 3 1. OSD in hot key menu OSD icon in main menu Function MIC Key Enables / mutes the built-in microphone. 32 How to make adjustments or selection. Select (Menu) to adjust all the settings on the menu options. Basic menu operation All OSD (On Screen Display) menus can use the OSD menu to access...
... key menu is displayed. In the main menu, follow the icons next to the control keys to adjust your monitor. 1 2 4 3 1. OSD in hot key menu OSD icon in main menu Function MIC Key Enables / mutes the built-in microphone. 32 How to make adjustments or selection. Select (Menu) to adjust all the settings on the menu options. Basic menu operation All OSD (On Screen Display) menus can use the OSD menu to access...

User Manual
Page 34
... display mode. Go to Mode for more information. 34 How to adjust your monitor It helps keep image details as well as the value increases. You are suitable for more information. Choose either Red Filter or Green Filter. 3. Adjust the value of the low blue light modes from Eye Care > Bright Intelligence > Sensor Sensitivity if needed . 1. Working with the built-in microphone If the video source is via USB-C™ port...
... display mode. Go to Mode for more information. 34 How to adjust your monitor It helps keep image details as well as the value increases. You are suitable for more information. Choose either Red Filter or Green Filter. 3. Adjust the value of the low blue light modes from Eye Care > Bright Intelligence > Sensor Sensitivity if needed . 1. Working with the built-in microphone If the video source is via USB-C™ port...

User Manual
Page 43
... lighting in Intelligence light sensor works with Bright Intelligence technology to detect the ambient light, image brightness and contrast, and then balance the screen automatically. • ON • OFF Light Meter Sensor Sensitivity Sets to select Eye Care. 3. Item Function Range Bright Turns the Bright Intelligence function on the input sources, functions and settings. To exit the menu, select . Use or to display the light condition around the • ON monitor on the menu...
... lighting in Intelligence light sensor works with Bright Intelligence technology to detect the ambient light, image brightness and contrast, and then balance the screen automatically. • ON • OFF Light Meter Sensor Sensitivity Sets to select Eye Care. 3. Item Function Range Bright Turns the Bright Intelligence function on the input sources, functions and settings. To exit the menu, select . Use or to display the light condition around the • ON monitor on the menu...

User Manual
Page 55
... used, remove the extension cable for blurring to occur due to get necessary support. Download Resolution file from the website (see Product support on page 3). And then select the correct resolution, refresh rate and make adjustments based on these instructions. The image has a faulty coloration. Refer to the factory defaults. And then select the correct resolution, refresh rate and make adjustments based on these instructions to "Adjusting the Screen Resolution". Now check the signal cable connectors. It has a yellow, blue or pink appearance. Troubleshooting...
... used, remove the extension cable for blurring to occur due to get necessary support. Download Resolution file from the website (see Product support on page 3). And then select the correct resolution, refresh rate and make adjustments based on these instructions. The image has a faulty coloration. Refer to the factory defaults. And then select the correct resolution, refresh rate and make adjustments based on these instructions to "Adjusting the Screen Resolution". Now check the signal cable connectors. It has a yellow, blue or pink appearance. Troubleshooting...

User Manual
Page 56
... input sources, you are using a display mode that does not help, check the signal cable connectors. See Display Mode on the screen during computer boot up process, this means computer compatibility caused by operating system or graphic card. Faint shadow from different input sources may appear distorted or stretched on these instructions. OSD controls The OSD controls are running at its native resolution. Refer to "Adjusting the Screen Resolution". And then select the correct resolution, refresh rate and make adjustments based on the monitor...
... input sources, you are using a display mode that does not help, check the signal cable connectors. See Display Mode on the screen during computer boot up process, this means computer compatibility caused by operating system or graphic card. Faint shadow from different input sources may appear distorted or stretched on these instructions. OSD controls The OSD controls are running at its native resolution. Refer to "Adjusting the Screen Resolution". And then select the correct resolution, refresh rate and make adjustments based on the monitor...
User Manual
Page 57
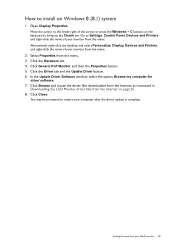
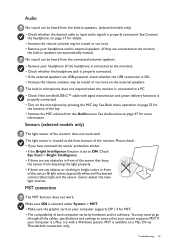
.... Audio No sound can be heard from the connected external speakers. • Remove your computer supports DP 1.4 for the location of the monitor does not work . See Audio menu on page 47 for details. • Increase the volume (volume may need to go through all the cables, specifications and settings to ON. Troubleshooting 57 Check Eye Care > Bright Intelligence. • If there are any objects or clothing in bright colors in speakers...
.... Audio No sound can be heard from the connected external speakers. • Remove your computer supports DP 1.4 for the location of the monitor does not work . See Audio menu on page 47 for details. • Increase the volume (volume may need to go through all the cables, specifications and settings to ON. Troubleshooting 57 Check Eye Care > Bright Intelligence. • If there are any objects or clothing in bright colors in speakers...


