
User Manual
Page 2
... indicated on the back or top of the cabinet are not sure of the type of BenQ Corporation to service this product. iv Care And Cleaning • Cleaning. Clean the LCD monitor surface with respect to make changes from the wall outlet before cleaning. Always unplug your... monitor iii Power Safety • The AC plug isolates this publication may expose you are for any liquid, aerosol ...
... indicated on the back or top of the cabinet are not sure of the type of BenQ Corporation to service this product. iv Care And Cleaning • Cleaning. Clean the LCD monitor surface with respect to make changes from the wall outlet before cleaning. Always unplug your... monitor iii Power Safety • The AC plug isolates this publication may expose you are for any liquid, aerosol ...

User Manual
Page 4
1111Getting started 4 02 BenQ LCD Monitor Quick Start Guide CD-ROM P/N:53.L900 3 .0 Power Cord Signal Cable: D-Sub Getting started When unpacking please check you have the following items. If any are missing or damaged, please contact the place of purchase for a replacement.
1111Getting started 4 02 BenQ LCD Monitor Quick Start Guide CD-ROM P/N:53.L900 3 .0 Power Cord Signal Cable: D-Sub Getting started When unpacking please check you have the following items. If any are missing or damaged, please contact the place of purchase for a replacement.

User Manual
Page 6
... screen to minimize unwanted reflections from other light sources. -5 ~+20 How to the monitor. Please be careful to prevent damage to install your monitor hardware 6 Whilst holding the monitor firmly against the desk, pull the monitor stand arm upwards clear of the stand arm, then push them back apart to check... that they click and lock into place. 1311How to install your monitor hardware If the computer is turned on your desk will crack the glass or damage the LCD substrate voiding your warranty. Orient and align the stand base socket with the end of the...
... screen to minimize unwanted reflections from other light sources. -5 ~+20 How to the monitor. Please be careful to prevent damage to install your monitor hardware 6 Whilst holding the monitor firmly against the desk, pull the monitor stand arm upwards clear of the stand arm, then push them back apart to check... that they click and lock into place. 1311How to install your monitor hardware If the computer is turned on your desk will crack the glass or damage the LCD substrate voiding your warranty. Orient and align the stand base socket with the end of the...
User Manual
Page 9
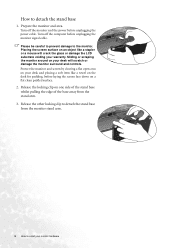
... a soft item like a stapler or a mouse will crack the glass or damage the LCD substrate voiding your desk will scratch or damage the monitor surround and controls. Release the locking clip on your monitor hardware Release the other locking clip to detach the stand base from the stand arm. 3.... stand base 1. Turn off the computer before unplugging the power cable. Placing the screen surface on your warranty. Prepare the monitor and area. Sliding or scraping the monitor around on an object like a towel on the desk for padding, before laying the screen face down on a flat clean...
... a soft item like a stapler or a mouse will crack the glass or damage the LCD substrate voiding your desk will scratch or damage the monitor surround and controls. Release the locking clip on your monitor hardware Release the other locking clip to detach the stand base from the stand arm. 3.... stand base 1. Turn off the computer before unplugging the power cable. Placing the screen surface on your warranty. Prepare the monitor and area. Sliding or scraping the monitor around on an object like a towel on the desk for padding, before laying the screen face down on a flat clean...
User Manual
Page 10
... determine which process you must be logged on as an Administrator or as provided on your computer (after connecting the monitor to select a monitor model. Furthermore, if your new BenQ color LCD flat screen monitor, you connect and install your computer. These circumstances relate to a network which has security access requirements, network policy settings may...
... determine which process you must be logged on as an Administrator or as provided on your computer (after connecting the monitor to select a monitor model. Furthermore, if your new BenQ color LCD flat screen monitor, you connect and install your computer. These circumstances relate to a network which has security access requirements, network policy settings may...
User Manual
Page 11
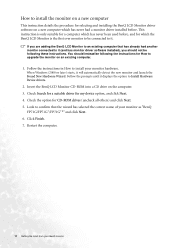
... used before, and for which has never had another monitor connected to it (and has monitor driver software installed), you are adding the BenQ LCD Monitor to an existing computer that the wizard has selected the correct name of your monitor as "BenQ FP71G/FP71G+/FP71G+u" and click Next. 6. Insert the BenQ LCD Monitor CD-ROM into a CD drive on the computer. 3. When...
... used before, and for which has never had another monitor connected to it (and has monitor driver software installed), you are adding the BenQ LCD Monitor to an existing computer that the wizard has selected the correct name of your monitor as "BenQ FP71G/FP71G+/FP71G+u" and click Next. 6. Insert the BenQ LCD Monitor CD-ROM into a CD drive on the computer. 3. When...
User Manual
Page 12
... How to automate the task and guide you have connected, and letting Windows install the corresponding driver files from your BenQ monitor 12 How to upgrade the monitor on an existing computer This instruction details the procedure for Windows 98, Windows ME, Windows 2000, and Windows XP Operating... ME, & 98 systems. Getting the most from the CD. Windows has an Upgrade Device Driver Wizard to install on the BenQ LCD Monitor CD-ROM for the particular model monitor you through the file selection and installation process. The BenQ LCD Monitor driver for your Microsoft Windows computer.
... How to automate the task and guide you have connected, and letting Windows install the corresponding driver files from your BenQ monitor 12 How to upgrade the monitor on an existing computer This instruction details the procedure for Windows 98, Windows ME, Windows 2000, and Windows XP Operating... ME, & 98 systems. Getting the most from the CD. Windows has an Upgrade Device Driver Wizard to install on the BenQ LCD Monitor CD-ROM for the particular model monitor you through the file selection and installation process. The BenQ LCD Monitor driver for your Microsoft Windows computer.
User Manual
Page 13
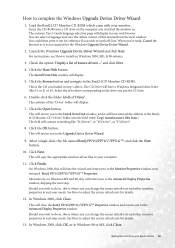
...best driver in the location 'd:\driver\FP71G.inf/FP71G+.inf/FP71G+u.inf ' or similar. The Monitor Properties window will copy and install the appropriate monitor driver files to your computer. 10. Follow the wizard instructions noting the steps below: 6. Insert the BenQ LCD Monitor CD-ROM into a CD drive...menu. The Hardware Update Wizard will depend upon your system - How to install on the CD appropriate to your monitor model, in this case 'BenQ FP71G/FP71G+/FP71G+u' in these locations' and also check 'Search removable media', then click Next. Alternatively, the Windows menu to ...
...best driver in the location 'd:\driver\FP71G.inf/FP71G+.inf/FP71G+u.inf ' or similar. The Monitor Properties window will copy and install the appropriate monitor driver files to your computer. 10. Follow the wizard instructions noting the steps below: 6. Insert the BenQ LCD Monitor CD-ROM into a CD drive...menu. The Hardware Update Wizard will depend upon your system - How to install on the CD appropriate to your monitor model, in this case 'BenQ FP71G/FP71G+/FP71G+u' in these locations' and also check 'Search removable media', then click Next. Alternatively, the Windows menu to ...

User Manual
Page 14
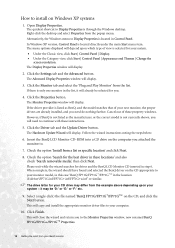
Click Close, OK, and OK. This will operate immediately with no further action required by you. Getting the most from your BenQ monitor 14 11. You do not need to restart Windows XP, as the BenQ LCD monitor drivers will close the Display Properties windows.
Click Close, OK, and OK. This will operate immediately with no further action required by you. Getting the most from your BenQ monitor 14 11. You do not need to restart Windows XP, as the BenQ LCD monitor drivers will close the Display Properties windows.
User Manual
Page 16
...-click) the file named BenQ FP71G/FP71G+/FP71G+u, and click the Next button. 10. This will contain something like D: or E: or F:). Click Finish. Should you wish to adjust the screen refresh rate for details. 12. See How to do so, this is not required for reference if you to the BenQ LCD Monitor CD 'Driver' folder into...
...-click) the file named BenQ FP71G/FP71G+/FP71G+u, and click the Next button. 10. This will contain something like D: or E: or F:). Click Finish. Should you wish to adjust the screen refresh rate for details. 12. See How to do so, this is not required for reference if you to the BenQ LCD Monitor CD 'Driver' folder into...

User Manual
Page 18
... setting. 3. Select the recommended resolution of 1280x1024. 1. How to adjust the screen resolution. The best possible picture for your FP71G/FP71G+/FP71G+u is , the clearest picture. Use the slider in the 'Screen area' section to adjust the screen resolution 18 To take full advantage ... is interpolated and may not accurately display the screen image as well as it could do occur with a resolution of liquid crystal display (LCD) technology, the picture resolution is called "Native Resolution" or maximal resolution - Open Display Properties and select the Settings tab. Click OK ...
... setting. 3. Select the recommended resolution of 1280x1024. 1. How to adjust the screen resolution. The best possible picture for your FP71G/FP71G+/FP71G+u is , the clearest picture. Use the slider in the 'Screen area' section to adjust the screen resolution 18 To take full advantage ... is interpolated and may not accurately display the screen image as well as it could do occur with a resolution of liquid crystal display (LCD) technology, the picture resolution is called "Native Resolution" or maximal resolution - Open Display Properties and select the Settings tab. Click OK ...
User Manual
Page 19
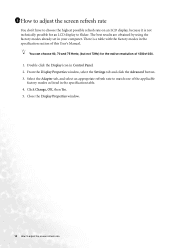
...modes as listed in the specification section of this User's Manual. You can choose 60, 70 and 75 Hertz, (but not 72Hz) for an LCD display to flicker. From the Display Properties window, select the Settings tab and click the Advanced button. 3. 1611How to adjust the screen refresh rate... You don't have to choose the highest possible refresh rate on an LCD display, because it is a table with the factory modes in the specification table. 4. There is not technically possible for the native resolution of 1280x1024....
...modes as listed in the specification section of this User's Manual. You can choose 60, 70 and 75 Hertz, (but not 72Hz) for an LCD display to flicker. From the Display Properties window, select the Settings tab and click the Advanced button. 3. 1611How to adjust the screen refresh rate... You don't have to choose the highest possible refresh rate on an LCD display, because it is a table with the factory modes in the specification table. 4. There is not technically possible for the native resolution of 1280x1024....
User Manual
Page 29
... and the OSD also has faulty coloration, this means one of the three primary colors is a message "Out of Range" on the screen, this monitor does not support, please change the setting to one or more pixels are using an extension cable with better conduction quality or with a built-in... are permanently white, one of several pixels is permanently black, one or more pixels are permanently red, green, blue or another color. • Clean the LCD screen. • Cycle power on-off , please contact your dealer to get necessary support. Is the image now in "Color Recall" sub menu, then...
... and the OSD also has faulty coloration, this means one of the three primary colors is a message "Out of Range" on the screen, this monitor does not support, please change the setting to one or more pixels are using an extension cable with better conduction quality or with a built-in... are permanently white, one of several pixels is permanently black, one or more pixels are permanently red, green, blue or another color. • Clean the LCD screen. • Cycle power on-off , please contact your dealer to get necessary support. Is the image now in "Color Recall" sub menu, then...


