User Manual
Page 3
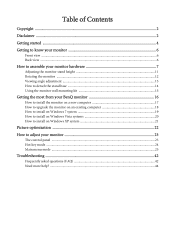
... monitor ...12 Viewing angle adjustment ...13 How to detach the stand base ...14 Using the monitor wall mounting kit 15 Getting the most from your BenQ monitor 16 How to install the monitor on a new computer 17 How to upgrade the monitor on an existing computer 18 How to install on... Windows 7 system 19 How to install on Windows Vista systems 20 How to install on Windows XP system 21 Picture optimization ...22 How to adjust your monitor 23 The control panel ...23 Hot key mode ...24 Main menu mode ...25 Troubleshooting ...42 Frequently asked questions (FAQ 42...
... monitor ...12 Viewing angle adjustment ...13 How to detach the stand base ...14 Using the monitor wall mounting kit 15 Getting the most from your BenQ monitor 16 How to install the monitor on a new computer 17 How to upgrade the monitor on an existing computer 18 How to install on... Windows 7 system 19 How to install on Windows Vista systems 20 How to install on Windows XP system 21 Picture optimization ...22 How to adjust your monitor 23 The control panel ...23 Hot key mode ...24 Main menu mode ...25 Troubleshooting ...42 Frequently asked questions (FAQ 42...

User Manual
Page 22
... to select Pixel Clock and press the ENTER key. As you connect a digital video output using geometry menu items. To assist you in this endeavour, BenQ has provided a screen test image utility which you notice a horizontal noise, press the or keys to select Phase and press the ENTER key. Press the... automatically display the best image. Use the or keys to select DISPLAY and press the ENTER key to adjust the monitor until the noise disappears. 22 Picture optimization
... to select Pixel Clock and press the ENTER key. As you connect a digital video output using geometry menu items. To assist you in this endeavour, BenQ has provided a screen test image utility which you notice a horizontal noise, press the or keys to select Phase and press the ENTER key. Press the... automatically display the best image. Use the or keys to select DISPLAY and press the ENTER key to adjust the monitor until the noise disappears. 22 Picture optimization
User Manual
Page 27
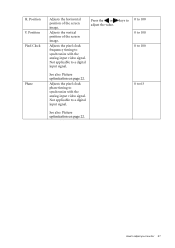
... of the screen image. Not applicable to adjust your monitor 27 keys to 0 to 100 0 to 100 0 to 63 See also: Picture optimization on page 22. Not applicable to a digital input signal. 0 to 100 See also: Picture optimization on page...
... of the screen image. Not applicable to adjust your monitor 27 keys to 0 to 100 0 to 100 0 to 63 See also: Picture optimization on page 22. Not applicable to a digital input signal. 0 to 100 See also: Picture optimization on page...