Owners Manual
Page 1
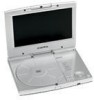
D1810 PORTABLE 8" LCD MONITOR AND DVD PLAYER 128-6925
D1810 PORTABLE 8" LCD MONITOR AND DVD PLAYER 128-6925
Owners Manual
Page 3
...latest state of electric shock and/or exposure to obtain the best equipment performance. do not expose this Manual for selecting the D1810 portable DVD player. Please retain this appliance to provide years of any kind on until the moisture evaporates. 2. Object and Liquid Do not ...push objects of reliable, trouble-free service, and is compact so that the D1810 is brought directly from falling. Disassemble Do not attempt to a ...
...latest state of electric shock and/or exposure to obtain the best equipment performance. do not expose this Manual for selecting the D1810 portable DVD player. Please retain this appliance to provide years of any kind on until the moisture evaporates. 2. Object and Liquid Do not ...push objects of reliable, trouble-free service, and is compact so that the D1810 is brought directly from falling. Disassemble Do not attempt to a ...
Owners Manual
Page 4
... side of disc. Remove the disc from the unit and store it in a car Plug one end of the AC to malfunction. Contents 1. 1 x 8'' LCD Monitor & DVD Player Combo 2. 1 x AC to the instructions supplied with the discs. 5. Do not use irregularly shaped discs such as heart or star-shaped discs as hot air...
... side of disc. Remove the disc from the unit and store it in a car Plug one end of the AC to malfunction. Contents 1. 1 x 8'' LCD Monitor & DVD Player Combo 2. 1 x AC to the instructions supplied with the discs. 5. Do not use irregularly shaped discs such as heart or star-shaped discs as hot air...
Owners Manual
Page 9
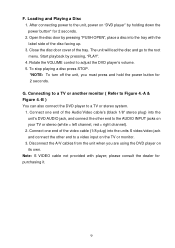
...Rotate the VOLUME control to the root menu. Connecting to a TV or another monitor ( Refer to Figure 4.-A & Figure 4.-B ) You can also connect the DVD player to the unit, power on the TV or monitor. 3. Disconnect the A/V cables from the unit when you must press and hold the power button for.... 9 Start playback by pressing "PUSH OPEN", place a disc into the units S video/video jack and connect the other end to a video input on "DVD player" by holding down the power button* for 2 seconds. 2. Connect one end of the tray. Loading and Playing a Disc 1. After connecting power to a...
...Rotate the VOLUME control to the root menu. Connecting to a TV or another monitor ( Refer to Figure 4.-A & Figure 4.-B ) You can also connect the DVD player to the unit, power on the TV or monitor. 3. Disconnect the A/V cables from the unit when you must press and hold the power button for.... 9 Start playback by pressing "PUSH OPEN", place a disc into the units S video/video jack and connect the other end to a video input on "DVD player" by holding down the power button* for 2 seconds. 2. Connect one end of the tray. Loading and Playing a Disc 1. After connecting power to a...
Owners Manual
Page 26
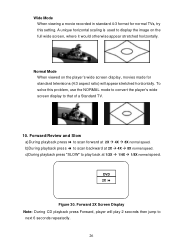
... press 7 to scan backward at 2X à 4X à 8X normal speed. Forward 2X Screen Display Note: During CD playback press Forward, player will appear stretched horizontally. Wide Mode When viewing a movie recorded in standard 4:3 format for standard televisions (4:3 aspect ratio) will play back at 1/...TVs, try this problem, use the NORMAL mode to convert the player's wide screen display to next 6 seconds repeatedly. 26 A unique horizontal scaling is used to scan forward at 2X à 4X à 8X normal speed. DVD 2X 8 Figure 30. To solve this setting. c)During playback...
... press 7 to scan backward at 2X à 4X à 8X normal speed. Forward 2X Screen Display Note: During CD playback press Forward, player will appear stretched horizontally. Wide Mode When viewing a movie recorded in standard 4:3 format for standard televisions (4:3 aspect ratio) will play back at 1/...TVs, try this problem, use the NORMAL mode to convert the player's wide screen display to next 6 seconds repeatedly. 26 A unique horizontal scaling is used to scan forward at 2X à 4X à 8X normal speed. DVD 2X 8 Figure 30. To solve this setting. c)During playback...
Owners Manual
Page 27
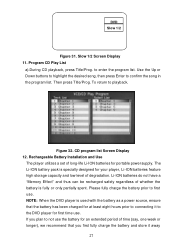
... . Slow 1/2 Screen Display 11. Figure 32. NOTE: When the DVD player is used with the battery as a power source, ensure that you plan to the DVD player for portable power supply. Rechargeable Battery Installation and Use The player utilizes a set of time (say, one week or longer), we... recommend that the battery has been charged for at least eight hours prior to playback. DVD Slow 1/2 Figure 31. Then ...
... . Slow 1/2 Screen Display 11. Figure 32. NOTE: When the DVD player is used with the battery as a power source, ensure that you plan to the DVD player for portable power supply. Rechargeable Battery Installation and Use The player utilizes a set of time (say, one week or longer), we... recommend that the battery has been charged for at least eight hours prior to playback. DVD Slow 1/2 Figure 31. Then ...
Owners Manual
Page 29
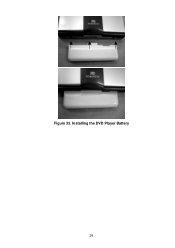
Installing the DVD Player Battery 29 Figure 33.
Installing the DVD Player Battery 29 Figure 33.
Owners Manual
Page 30
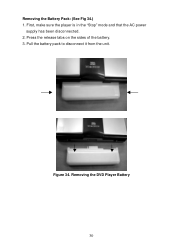
Removing the DVD Player Battery 30 Press the release tabs on the sides of the battery. 3. Pull the battery pack to disconnect it from the unit. First, make sure the player is in the "Stop" mode and that the AC power supply has been disconnected. 2. Figure 34. Removing the Battery Pack: (See Fig 34.) 1.
Removing the DVD Player Battery 30 Press the release tabs on the sides of the battery. 3. Pull the battery pack to disconnect it from the unit. First, make sure the player is in the "Stop" mode and that the AC power supply has been disconnected. 2. Figure 34. Removing the Battery Pack: (See Fig 34.) 1.


