Audiovox D1788 - DVD Player - 7 Support and Manuals
Get Help and Manuals for this Audiovox item
View All Support Options Below
Free Audiovox D1788 manuals!
Problems with Audiovox D1788?
Ask a Question
Free Audiovox D1788 manuals!
Problems with Audiovox D1788?
Ask a Question
Popular Audiovox D1788 Manual Pages
Owners Manual - Page 1
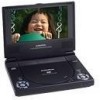
D1788
7" LCD MONITOR, DVD PLAYER WITH BUILT-IN BATTERY
Owners Manual - Page 3
... shock, do not spill or spray liquid of repair.
3 When you for later use in need of any kind into the unit through openings; do not expose this manuals for selecting the D1788 portable DVD player. Please read the entire instruction manual supplied with the instructions and illustrations provided in installing the system properly to provide years of any kind...
Owners Manual - Page 4
.... Powering and installation
1. 5. Use a cloth lightly dampened with the discs. Do not expose the disc to DC Adapter Remote Control w/Battery (CR2025) Instruction Manual Audio/Video Cable DC Power Adapter
D. Some playback operations of discs may not be intentionally fixed by its case after playing. Contents
1. 1 x 2. 1 x 3. 1 x 4. 1 x 5. 1 x 6. 1 x 7" LCD Monitor and DVD Player AC to...
Owners Manual - Page 5
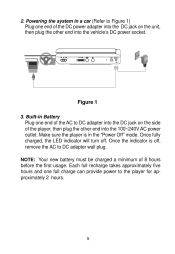
... Battery Plug one end of the AC to DC adapter into the DC jack on the side of the DC power adapter into the DC jack on the unit, then plug the other end into the vehicle's DC power socket. Once the indicator is in a car (Refer to Figure 1) Plug one full charge can provide power to DC adapter...
Owners Manual - Page 7
... the VOLUME control to OFF.
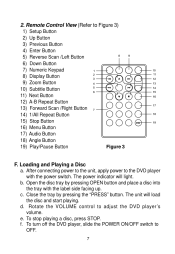
7 To turn off the DVD player, slide the POWER ON/OFF switch to adjust the DVD player's volume. b. Remote Control View (Refer to the DVD player with the label side facing up. The power indicator will load the disc and start playing. Open the disc tray by pressing the "PRESS" button. Close the tray by...
Owners Manual - Page 8
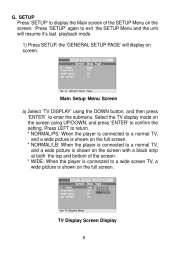
... display on the screen using the DOWN button, and then press 'ENTER' to confirm the setting. G. Press 'SETUP' again to display the Main screen of the screen. * WIDE: When the player is connected to a wide screen TV, a wide picture is shown on the screen with a black strip at both the top and bottom of...
Owners Manual - Page 9
... enter the submenu.
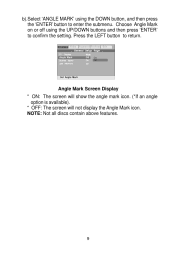
Press the LEFT button to confirm the setting. NOTE: Not all discs contain above features.
9 b).Select 'ANGLE MARK' using the UP/DOWN buttons and then press 'ENTER' to return. Gen eral Video Password Preferen Exit
Ang le Mark
Off
On O ff
Set Angle Mark
Angle Mark Screen Display * ON: The screen...
Owners Manual - Page 11
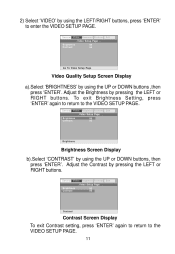
...'. Brightness Con trast 00 00
Con trast
Contrast Screen Display To exit Contrast setting, press 'ENTER' again to return to the VIDEO SETUP PAGE. Video Setup Page . . To exit Brightness Setting, press 'ENTER' again to return to the VIDEO SETUP PAGE.
11 Gen eral Video Password Preferen Exit . . Brightness Con trast 00 00
Go To Video...
Owners Manual - Page 12
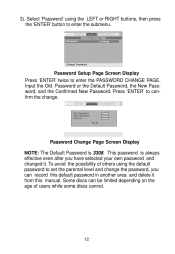
...and changed it from this manual. This password is 3308. Password Setup Page . .
To avoid the possibility of users while some discs cannot.
12 Press 'ENTER' to set the parental level and change . Gen eral Video Password Preferen Change Exit . . Input the Old Password or the Default Password, the New Password, and the Confirmed New Password. Some discs can record this default...
Owners Manual - Page 15
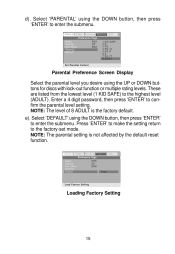
...Menu Parental Default K ID S AFE G PG P G - 13 P G- Gen eral Video Password Preferen EN G Off EN G Reset Exit
. . Audio Subtitle Disc Menu Parental Default
Load Factory Setting
Loading Factory Setting
15 NOTE: The parental setting is the factory default. d). Gen eral Video Password Preferen EN G O ff EN G 1 2 3 4 5 6 7 8 Exit . . Select 'PARENTAL' using the DOWN button, then press...
Owners Manual - Page 16
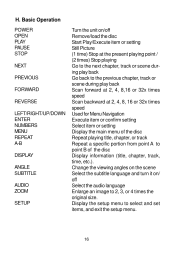
... a specific portion from point A to select and set items, and exit the setup menu.
16 Basic Operation
POWER OPEN PLAY PAUSE STOP NEXT PREVIOUS FORWARD REVERSE LEFT/RIGHT/UP/DOWN ENTER NUMBERS MENU REPEAT A-B DISPLAY ANGLE SUBTITLE AUDIO ZOOM SETUP Turn the unit on / off Remove/load the disc Start Play/Execute item or setting Still Picture (1 time...
Owners Manual - Page 26
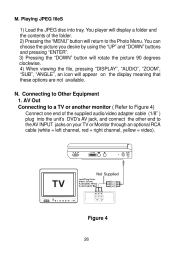
... "ENTER". 3) Pressing the "DOWN" button will rotate the picture 90 degrees clockwise. 4) When viewing the file, pressing "DISPLAY...yellow = video). N. Playing JPEG fileS 1) Load the JPEG disc into the unit's DVD's AV jack, and connect the other end to the AV ...the supplied audio/video adapter cable (1/8" ) plug into tray. M. You player will return to Other Equipment 1. Connecting to the Photo Menu...
Owners Manual - Page 27
Specifications
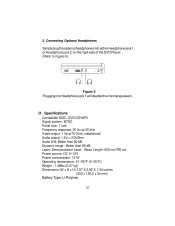
Compatible DISC: DVD/CD/MP3 Signal system: NTSC Panel size: 7 inch Frequency response: 20 Hz to Figure 5)
Figure 5 Plugging into Headphone jack 1 will disable the internal speakers. Connecting Optional Headphones
Simply plug the optional headphones into either Headphone jack 1 or Headphone jack 2 on the right side of the DVD Player. (Refer to 20 kHz Video...
Owners Manual - Page 28

... stop charging. The DVD player must be recharged regardless of whether the battery is fully discharged, immediately recharge (regardless of time (one full charge can only be set to use only the AC adapter included with the car DC adaptor. 2. Please make sure you plan to power off . The battery can provide power to recharge your Rechargeable Batteries 1. During recharge, the...
Owners Manual - Page 29
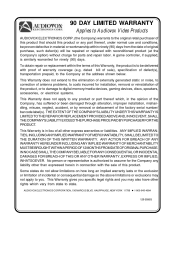
... serial number/ bar code label(s). 90 DAY LIMITED WARRANTY
Applies to Audiovox Video Products
AUDIOVOX ELECTRONICS CORP. (the Company) warrants to the original retail purchaser of this product that should this product or any product or part thereof which vary from the date of original purchase, such defect(s) will be repaired or replaced with proof of...
Audiovox D1788 Reviews
We have not received any reviews for Audiovox yet.