

User Guide
Page 3
...SABERTOOTH Z97 MARK S specifications summary ix Package contents...xiii Installation tools and components xiv Chapter 1: Product Introduction 1.1 Special features 1-1 1.1.1 Product highlights 1-1 1.1.2 "Ultimate COOL" Thermal Solutions 1-2 1.1.3 "TUF Engine" Power Design 1-3 1.1.4 "Safe & Stable!" Guardian Angel 1-3 1.1.5 ASUS EZ DIY 1-4 1.1.6 ASUS...2-7 2.1.6 SATA device connection 2-8 2.1.7 Front I/O Connector 2-9 2.1.8 Expansion Card installation 2-10 2.2 BIOS update utility 2-11 2.3 Motherboard rear and audio connections 2-12 2.3.1 Rear I/O connection 2-12 2.3.2...
...SABERTOOTH Z97 MARK S specifications summary ix Package contents...xiii Installation tools and components xiv Chapter 1: Product Introduction 1.1 Special features 1-1 1.1.1 Product highlights 1-1 1.1.2 "Ultimate COOL" Thermal Solutions 1-2 1.1.3 "TUF Engine" Power Design 1-3 1.1.4 "Safe & Stable!" Guardian Angel 1-3 1.1.5 ASUS EZ DIY 1-4 1.1.6 ASUS...2-7 2.1.6 SATA device connection 2-8 2.1.7 Front I/O Connector 2-9 2.1.8 Expansion Card installation 2-10 2.2 BIOS update utility 2-11 2.3 Motherboard rear and audio connections 2-12 2.3.1 Rear I/O connection 2-12 2.3.2...

User Guide
Page 4
Chapter 3: BIOS setup 3.1 Knowing BIOS 3-1 3.2 BIOS setup program 3-2 3.2.1 EZ Mode 3-3 3.2.2 Advanced Mode 3-4 3.2.3 Q-Fan Control 3-7 3.2.4 EZ Tuning Wizard 3-9 3.3 My Favorites 3-10 3.4 Main menu 3-12 3.5 Ai Tweaker ...10 Intel(R) Rapid Storage Technology 3-45 3.7 Monitor menu 3-46 3.8 Boot menu 3-51 3.9 Tool menu 3-57 3.9.1 ASUS EZ Flash 2 Utility 3-57 3.9.2 ASUS O.C. Profile 3-58 3.9.3 ASUS DRAM SPD Information 3-59 3.10 Exit menu 3-60 3.11 Updating BIOS 3-61 3.11.1 EZ Update 3-61 3.11.2 ASUS EZ Flash 2 3-62 3.11.3 ASUS CrashFree BIOS 3 3-63 iv
Chapter 3: BIOS setup 3.1 Knowing BIOS 3-1 3.2 BIOS setup program 3-2 3.2.1 EZ Mode 3-3 3.2.2 Advanced Mode 3-4 3.2.3 Q-Fan Control 3-7 3.2.4 EZ Tuning Wizard 3-9 3.3 My Favorites 3-10 3.4 Main menu 3-12 3.5 Ai Tweaker ...10 Intel(R) Rapid Storage Technology 3-45 3.7 Monitor menu 3-46 3.8 Boot menu 3-51 3.9 Tool menu 3-57 3.9.1 ASUS EZ Flash 2 Utility 3-57 3.9.2 ASUS O.C. Profile 3-58 3.9.3 ASUS DRAM SPD Information 3-59 3.10 Exit menu 3-60 3.11 Updating BIOS 3-61 3.11.1 EZ Update 3-61 3.11.2 ASUS EZ Flash 2 3-62 3.11.3 ASUS CrashFree BIOS 3 3-63 iv
User Guide
Page 5
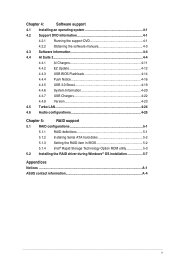
...support DVD 4-1 4.2.2 Obtaining the software manuals 4-3 4.3 Software information 4-4 4.4 AI Suite 3...4-4 4.4.1 Ai Charger 4-11 4.4.2 EZ Update 4-12 4.4.3 USB BIOS Flashback 4-14 4.4.4 Push Notice 4-16 4.4.5 USB 3.0 Boost 4-19 4.4.6 System Information 4-20 4.4.7 USB Charger 4-22 4.4.8 Version 4-23 4.5 Turbo ... definitions 5-1 5.1.2 Installing Serial ATA hard disks 5-2 5.1.3 Setting the RAID item in BIOS 5-2 5.1.4 Intel® Rapid Storage Technology Option ROM utility 5-3 5.2 Installing the RAID driver during Windows® OS installation 5-7 Appendices ...
...support DVD 4-1 4.2.2 Obtaining the software manuals 4-3 4.3 Software information 4-4 4.4 AI Suite 3...4-4 4.4.1 Ai Charger 4-11 4.4.2 EZ Update 4-12 4.4.3 USB BIOS Flashback 4-14 4.4.4 Push Notice 4-16 4.4.5 USB 3.0 Boost 4-19 4.4.6 System Information 4-20 4.4.7 USB Charger 4-22 4.4.8 Version 4-23 4.5 Turbo ... definitions 5-1 5.1.2 Installing Serial ATA hard disks 5-2 5.1.3 Setting the RAID item in BIOS 5-2 5.1.4 Intel® Rapid Storage Technology Option ROM utility 5-3 5.2 Installing the RAID driver during Windows® OS installation 5-7 Appendices ...

User Guide
Page 7
Detailed descriptions of the BIOS parameters are not part of the standard package. ASUS websites The ASUS website provides updated information on the motherboard. • Chapter 2: Basic installation This chapter lists the hardware setup procedures that ... flyers, that may have to perform when installing system components. • Chapter 3: BIOS setup This chapter tells how to change system settings through the BIOS Setup menus. Where to find more information Refer to the ASUS contact information. 2. Refer to the following parts: • Chapter 1: Product introduction This...
Detailed descriptions of the BIOS parameters are not part of the standard package. ASUS websites The ASUS website provides updated information on the motherboard. • Chapter 2: Basic installation This chapter lists the hardware setup procedures that ... flyers, that may have to perform when installing system components. • Chapter 3: BIOS setup This chapter tells how to change system settings through the BIOS Setup menus. Where to find more information Refer to the ASUS contact information. 2. Refer to the following parts: • Chapter 1: Product introduction This...

User Guide
Page 11
... less lags - Remote Desktop, Remote Keyboard and Mouse, and File Transfer - USB BIOS Flashback with Thermistors - ASUS Q-Slot - ASUS EZ Flash 2 - SABERTOOTH Z97 MARK S specifications summary Exclusive TUF Features Other Special Features "Ultimate COOL!" ASUS Remote GO! AI Suite 3 - TUF Thermal Radar 2 with USB BIOS Flashback Wizard for all smart devices - certified by military-standard) - Disk Unlocker - TUF...
... less lags - Remote Desktop, Remote Keyboard and Mouse, and File Transfer - USB BIOS Flashback with Thermistors - ASUS Q-Slot - ASUS EZ Flash 2 - SABERTOOTH Z97 MARK S specifications summary Exclusive TUF Features Other Special Features "Ultimate COOL!" ASUS Remote GO! AI Suite 3 - TUF Thermal Radar 2 with USB BIOS Flashback Wizard for all smart devices - certified by military-standard) - Disk Unlocker - TUF...

User Guide
Page 12
... 2.0, DMI 2.7, WOL by PME, PXE Drivers Anti-virus software (OEM version) ASUS/TUF CPU-Z ASUS Utilities ATX form factor: 12.0 in . (30.5 cm x 24.4 cm) Specifications are subject to change without notice. SABERTOOTH Z97 MARK S specifications summary Rear Panel I/O Ports Internal I/O connectors Internal I/O connectors BIOS features Manageability Support DVD contents Form factor 1 x DisplayPort 1 x HDMI port 1 x Optical...
... 2.0, DMI 2.7, WOL by PME, PXE Drivers Anti-virus software (OEM version) ASUS/TUF CPU-Z ASUS Utilities ATX form factor: 12.0 in . (30.5 cm x 24.4 cm) Specifications are subject to change without notice. SABERTOOTH Z97 MARK S specifications summary Rear Panel I/O Ports Internal I/O connectors Internal I/O connectors BIOS features Manageability Support DVD contents Form factor 1 x DisplayPort 1 x HDMI port 1 x Optical...

User Guide
Page 18
... plugging one cable at a time and making the connection quick and accurate. ASUS Q-connector ASUS q-Connector is a unique adapter that goes beyond the traditional keyboard-only BIOS controls, providing you with more flexibility, convenience, and easy to install on your... introduction With better electric conductivity, it ideally protects your DIY experience. 1.1.5 ASUS EZ DIY ASUS UEFI BIOS (EZ Mode) ASUS UEFI BIOS, a UEFI compliant architecture, offers the first mouse-controlled intuitive graphical BIOS interface that allows you to one module, eliminating the hassle of q-Slot ...
... plugging one cable at a time and making the connection quick and accurate. ASUS Q-connector ASUS q-Connector is a unique adapter that goes beyond the traditional keyboard-only BIOS controls, providing you with more flexibility, convenience, and easy to install on your... introduction With better electric conductivity, it ideally protects your DIY experience. 1.1.5 ASUS EZ DIY ASUS UEFI BIOS (EZ Mode) ASUS UEFI BIOS, a UEFI compliant architecture, offers the first mouse-controlled intuitive graphical BIOS interface that allows you to one module, eliminating the hassle of q-Slot ...

User Guide
Page 19
...remotely control and access your computer using your smart device and easily transfer files between your computer and smart device. Chapter 1 ASUS SABERTOOTH Z97 MARK S 1-5 ASUS Remote GO! With ASUS Remote GO!, you to supervise fan speed control, voltage and sensor readings. leads the way to 170% faster than the ... and forth between your smart device. • File Transfer: Allows you to regularly check for about three seconds, and the UEFI BIOS is powered off, in -one simple-to view your computer's desktop and remotely operate your computer in real-time from your computer ...
...remotely control and access your computer using your smart device and easily transfer files between your computer and smart device. Chapter 1 ASUS SABERTOOTH Z97 MARK S 1-5 ASUS Remote GO! With ASUS Remote GO!, you to supervise fan speed control, voltage and sensor readings. leads the way to 170% faster than the ... and forth between your smart device. • File Transfer: Allows you to regularly check for about three seconds, and the UEFI BIOS is powered off, in -one simple-to view your computer's desktop and remotely operate your computer in real-time from your computer ...

User Guide
Page 38
.... We suggest that you install the modules into slots A2 and B2 for the latest QVL. settings in the BIOS for the hyper DIMM support. • Visit the ASUS website for better compatibility. (4) Supports four (4) modules inserted into any slot as two pairs of Dual-channel memory... configuration. • ASUS exclusively provides hyper DIMM support function. • Hyper DIMM support is subject to the physical characteristics of Dual-channel memory configuration. ...
.... We suggest that you install the modules into slots A2 and B2 for the latest QVL. settings in the BIOS for the hyper DIMM support. • Visit the ASUS website for better compatibility. (4) Supports four (4) modules inserted into any slot as two pairs of Dual-channel memory... configuration. • ASUS exclusively provides hyper DIMM support function. • Hyper DIMM support is subject to the physical characteristics of Dual-channel memory configuration. ...

User Guide
Page 41
... lights continuously. function. ASUS SABERTOOTH Z97 MARK S 1-27 Chapter 1 switch lights continuously. Turn off the computer and unplug the power cord for about 30 seconds for overclockers and gamers who continually change settings to the latest BIOS version from the ASUS website at www.asus.com. • If...• The MemOK! The blinking speed of the DRAM_LED increases, indicating different test processes. • Due to boot and load the BIOS default settings. button does not function under Windows® OS environment. • During the tuning process, the system loads and tests ...
... lights continuously. function. ASUS SABERTOOTH Z97 MARK S 1-27 Chapter 1 switch lights continuously. Turn off the computer and unplug the power cord for about 30 seconds for overclockers and gamers who continually change settings to the latest BIOS version from the ASUS website at www.asus.com. • If...• The MemOK! The blinking speed of the DRAM_LED increases, indicating different test processes. • Due to boot and load the BIOS default settings. button does not function under Windows® OS environment. • During the tuning process, the system loads and tests ...

User Guide
Page 42
... cord. 2. Keep the cap on pins 2-3 for about 5-10 seconds, then move the jumper again to pins 1-2. 3. Hold down and reboot the system so the BIOS can clear the CMOS memory of date, time, and system setup parameters by erasing the CMOS RTC RAM data. You must turn ON the computer...
... cord. 2. Keep the cap on pins 2-3 for about 5-10 seconds, then move the jumper again to pins 1-2. 3. Hold down and reboot the system so the BIOS can clear the CMOS memory of date, time, and system setup parameters by erasing the CMOS RTC RAM data. You must turn ON the computer...

User Guide
Page 45
... connectors are set , refer to [RAID Mode]. ASUS SABERTOOTH Z97 MARK S 1-31 Intel® Z97 Serial ATA 6.0 Gb/s connectors (7-pin SATA6G_1-2 [black]; If you installed Serial ATA hard disk drives, you intend to create a Serial ATA RAID set using these connectors, set the SATA Mode item in the BIOS to section vvvRAID configurations or the manual...
... connectors are set , refer to [RAID Mode]. ASUS SABERTOOTH Z97 MARK S 1-31 Intel® Z97 Serial ATA 6.0 Gb/s connectors (7-pin SATA6G_1-2 [black]; If you installed Serial ATA hard disk drives, you intend to create a Serial ATA RAID set using these connectors, set the SATA Mode item in the BIOS to section vvvRAID configurations or the manual...

User Guide
Page 50
... you want to connect a high-definition or an AC'97 front panel audio module to this connector, set the Front Panel Type item in the BIOS setup to detect its temperature. Connect the thermistor cable and place the sensor on the device or the motherboard's component to [HD] or [AC97]. 8. Thermal...
... you want to connect a high-definition or an AC'97 front panel audio module to this connector, set the Front Panel Type item in the BIOS setup to detect its temperature. Connect the thermistor cable and place the sensor on the device or the motherboard's component to [HD] or [AC97]. 8. Thermal...

User Guide
Page 65
Simply insert a USB storage device to the USB port, press the USB BIOS Flashback button for three seconds until the light goes out, indicating that the BIOS updating process is enabled. 5. ASUS SABERTOOTH Z97 MARK S 2-11 Wait until a flashing light appears, which indicates that the BIOS Flashback is damaged during the process and results to the system's failure...
Simply insert a USB storage device to the USB port, press the USB BIOS Flashback button for three seconds until the light goes out, indicating that the BIOS updating process is enabled. 5. ASUS SABERTOOTH Z97 MARK S 2-11 Wait until a flashing light appears, which indicates that the BIOS Flashback is damaged during the process and results to the system's failure...

User Guide
Page 66
USB 2.0 ports 7-10 2. DisplayPort 3. HDMI port 7. Bottom port supports USB BIOS Flashback and USB Charger+ 8. USB 3.0 ports E1-E2 9. USB BIOS Flashback button 6. Audio I /O connection Chapter 2 Rear panel connectors 1. Intel LAN port* 4. Realtek LAN port* 5. 2.3 Motherboard rear and audio connections 2.3.1 Rear I /O ports** * and **: Refer to the tables on the next page for LAN port LEDs, and audio port definitions. 2-12 Chapter 2: Basic installation USB 3.0 ports 5-6, support ASUS USB 3.0 Boost.
USB 2.0 ports 7-10 2. DisplayPort 3. HDMI port 7. Bottom port supports USB BIOS Flashback and USB Charger+ 8. USB 3.0 ports E1-E2 9. USB BIOS Flashback button 6. Audio I /O connection Chapter 2 Rear panel connectors 1. Intel LAN port* 4. Realtek LAN port* 5. 2.3 Motherboard rear and audio connections 2.3.1 Rear I /O ports** * and **: Refer to the tables on the next page for LAN port LEDs, and audio port definitions. 2-12 Chapter 2: Basic installation USB 3.0 ports 5-6, support ASUS USB 3.0 Boost.

User Guide
Page 67
... performance for better compatibility. • Multi-VGA output supports up to three displays under Windows® OS environment, two displays under BIOS, and one display under DOS. * LAN ports LED indications Activity Link LED Speed LED Status Description Status Description Off No link Off...Mic In Center/Subwoofer Rear Speaker Out 8-channel Line In or Side Speaker Front Speaker Out Mic In Center/Subwoofer Rear Speaker Out Chapter 2 ASUS SABERTOOTH Z97 MARK S 2-13 Some legacy USB devices must update their firmware for your USB 3.0 devices. • Due to the design of the Intel&#...
... performance for better compatibility. • Multi-VGA output supports up to three displays under Windows® OS environment, two displays under BIOS, and one display under DOS. * LAN ports LED indications Activity Link LED Speed LED Status Description Status Description Off No link Off...Mic In Center/Subwoofer Rear Speaker Out 8-channel Line In or Side Speaker Front Speaker Out Mic In Center/Subwoofer Rear Speaker Out Chapter 2 ASUS SABERTOOTH Z97 MARK S 2-13 Some legacy USB devices must update their firmware for your USB 3.0 devices. • Due to the design of the Intel&#...

User Guide
Page 70
... may light up when you turned on the power, the system may have failed a power-on the devices in Chapter 3. 2.5 Turning off . 3. BIOS Beep One short beep One continuous beep followed by two short beeps then a pause (repeated) One continuous beep followed by three short beeps One continuous... beep followed by four short beeps Description VGA detected Quick boot set to enter the BIOS Setup. After applying power, the system power LED on the chain) c. While the tests are off the computer While the system is equipped...
... may light up when you turned on the power, the system may have failed a power-on the devices in Chapter 3. 2.5 Turning off . 3. BIOS Beep One short beep One continuous beep followed by two short beeps then a pause (repeated) One continuous beep followed by three short beeps One continuous... beep followed by four short beeps Description VGA detected Quick boot set to enter the BIOS Setup. After applying power, the system power LED on the chain) c. While the tests are off the computer While the system is equipped...

User Guide
Page 71
... your operating system. Chapter 3 ASUS SABERTOOTH Z97 MARK S 3-1 In normal circumstances, the default BIOS settings apply to most conditions to instability or boot failure. You can easily navigate the new UEFI BIOS with the same smoothness as Z97STS.CAP for system startup in this motherboard. Chapter 3: BIOS setup BIOS setup 3.1 Knowing BIOS 3 The new ASUS UEFI BIOS is a Unified Extensible Interface...
... your operating system. Chapter 3 ASUS SABERTOOTH Z97 MARK S 3-1 In normal circumstances, the default BIOS settings apply to most conditions to instability or boot failure. You can easily navigate the new UEFI BIOS with the same smoothness as Z97STS.CAP for system startup in this motherboard. Chapter 3: BIOS setup BIOS setup 3.1 Knowing BIOS 3 The new ASUS UEFI BIOS is a Unified Extensible Interface...

User Guide
Page 72
..., load the default settings to ensure system compatibility and stability. You can be used under the Exit menu or press hotkey . Entering BIOS at startup To enter BIOS Setup at startup, press during the Power-On Self Test (POST). See the 10 Exit Menu section for reference purposes only, and... screen. • Ensure that a USB mouse is connected to your motherboard if you do not press , POST continues with its parameters. BIOS menu screen The BIOS Setup program can change modes from the Exit menu or from the Exit/Advanced Mode screen. See the Onboard buttons and switches section for...
..., load the default settings to ensure system compatibility and stability. You can be used under the Exit menu or press hotkey . Entering BIOS at startup To enter BIOS Setup at startup, press during the Power-On Self Test (POST). See the 10 Exit Menu section for reference purposes only, and... screen. • Ensure that a USB mouse is connected to your motherboard if you do not press , POST continues with its parameters. BIOS menu screen The BIOS Setup program can change modes from the Exit menu or from the Exit/Advanced Mode screen. See the Onboard buttons and switches section for...

User Guide
Page 73
... temperature, CPU voltage output, CPU/chassis/power fan speed, and SATA information Displays the system properties of the BIOS setup program configures system overclocking Chapter 3 Enables or disables the SATA RAID mode for details. ASUS SABERTOOTH Z97 MARK S 3-3 Click < or > to the Setup Mode item in section Boot menu for Intel Rapid Storage Technology Displays...
... temperature, CPU voltage output, CPU/chassis/power fan speed, and SATA information Displays the system properties of the BIOS setup program configures system overclocking Chapter 3 Enables or disables the SATA RAID mode for details. ASUS SABERTOOTH Z97 MARK S 3-3 Click < or > to the Setup Mode item in section Boot menu for Intel Rapid Storage Technology Displays...


