Asus RS100-E11-PI2 Support and Manuals
Get Help and Manuals for this Asus item
View All Support Options Below
Free Asus RS100-E11-PI2 manuals!
Problems with Asus RS100-E11-PI2?
Ask a Question
Free Asus RS100-E11-PI2 manuals!
Problems with Asus RS100-E11-PI2?
Ask a Question
Popular Asus RS100-E11-PI2 Manual Pages
RS100-E10-PI2 User Manual - Page 9
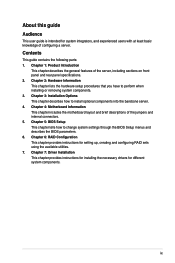
... panel and rear panel specifications. 2. Contents
This guide contains the following parts: 1.
Chapter 1: Product Introduction
This chapter describes the general features of the jumpers and internal connectors. 5. Chapter 7: Driver Installation This chapter provides instructions for installing the necessary drivers for setting up, creating and configuring RAID sets using the available...
RS100-E10-PI2 User Manual - Page 10

Typography
Bold text Italics
++
Command
Indicates a menu or an item to set up and use the proprietary ASUS server management utility. 2.
ASUS Control Center (ACC) user guide
This manual tells how to select. NOTE: Tips and additional information to the following symbols used throughout this manual.
Example: means that you must press two or more information.
DANGER...
RS100-E10-PI2 User Manual - Page 13
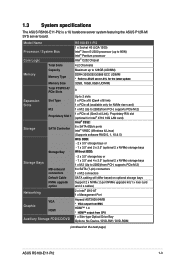
... specifications
The ASUS RS100-E11-PI2 is a 1U barebone server system featuring the ASUS P12R-M/ SYS server board. Model Name
Processor / System Bus
Core Logic Memory
Total Slots Capacity
Memory Type
Memory Size Total PCI/PCI-X/ PCIe Slots
Expansion Slots
Slot Type M.2 Proprietary Slot 1
Storage
SATA Controller
Storage Bay
Storage Bays
MB onboard connectors Default Cable NVMe upgrade...
RS100-E10-PI2 User Manual - Page 21
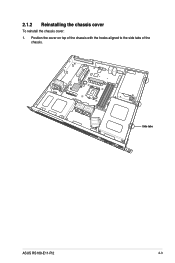
Position the cover on top of the chassis with the hooks aligned to the side tabs of the
chassis. Side tabs
ASUS RS100-E11-PI2
2-3 2.1.2 Reinstalling the chassis cover
To reinstall the chassis cover: 1.
RS100-E10-PI2 User Manual - Page 29

ASUS RS100-E11-PI2
2-11 Remove the USB cable from the chassis. Remove the CPU fan cage from the motherboard.
3. Release the four screws that secure the HDD drive tray to HDD bay 1. Please refer to 2.7.2 Optical disk drive (optional) for installing HDDs to the system. 2.4 Hard disk drives
The server chassis has two HDD bays...
RS100-E10-PI2 User Manual - Page 42
...
12*
7
PS/2 Compatible Mouse Port
13
8
Numeric Data Processor
14*
-
--
15*
-
--
* These IRQs are usually available for the expansion card. Install the software drivers for ISA or PCI devices.
2-24
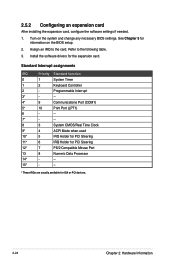
Chapter 2: Hardware Information 2.5.2 Configuring an expansion card
After installing the expansion card, configure the software settings if needed.
1. Turn on the BIOS setup.
2.
RS100-E10-PI2 User Manual - Page 43

... screw. 3. (optional) Remove the stand screw if you wish to install an 2242 or 2260 length M.2
module. 4. (optional) Install the stand screw to the length hole corresponding to install. 5 Prepare the M.2 module, then align and insert the M.2 module into the M.2 slot
(M.2_1(SOCKET3)). 6. ASUS RS100-E11-PI2
2-25
Secure the M.2 module with the screw you wish to...
RS100-E10-PI2 User Manual - Page 45
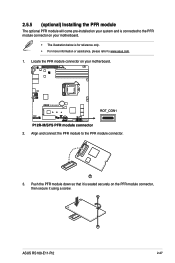
... secure it is for reference only. • For more information or assistance, please refer to the PFR module connector.
3. ASUS RS100-E11-PI2
2-27 2.5.5 (optional) Installing the PFR module
The optional PFR module will come pre-installed on your system and is connected to the PFR module connector on your motherboard.
• The illustration below is...
RS100-E10-PI2 User Manual - Page 47
Expansion card airduct (optional) 3. ASUS RS100-E11-PI2
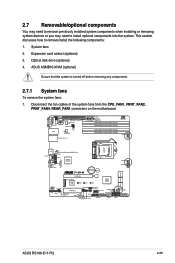
2-29 2.7 Removable/optional components
You may need to remove previously installed system components when installing or removing system devices or you may need to remove/install the following components: 1. Optical disk drive (optional) 4. Disconnect the fan cables of the system fans from the CPU_FAN1, FRNT_FAN2,
FRNT_FAN4, REAR_FAN1 ...
RS100-E10-PI2 User Manual - Page 49
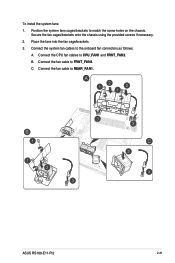
.... 3.
B.
ASUS RS100-E11-PI2
2-31 Connect the system fan cables to CPU_FAN1 and FRNT_FAN2. C. Secure the fan cages/brackets onto the chassis using the provided screws if necessary. 2. Connect the CPU fan cables to the onboard fan connectors as follows:
A. Connect the fan cable to match the screw holes on the chassis. To install the...
RS100-E10-PI2 User Manual - Page 51
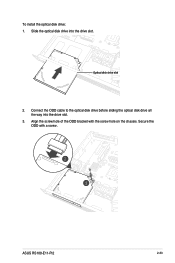
Secure the ODD with the screw hole on the chassis. Optical disk drive slot
2.
Connect the ODD cable to the optical disk drive before sliding the optical disk drive all the way into the drive slot. ASUS RS100-E11-PI2
2-33 Align the screw hole of the ODD bracket with a screw. To install the optical disk drive: 1. Slide the optical disk drive into the drive slot.
3.
RS100-E10-PI2 User Manual - Page 55
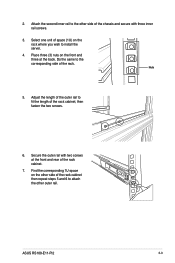
... (1U) on the front and three at the front and rear of the outer rail to install the server.
4. Secure the outer rail with three inner rail screws.
3. Adjust the length of the rack cabinet.
7.
Nuts
5. ASUS RS100-E11-PI2
3-3 2. Attach the second inner rail to the other outer rail. Place three (3) nuts on the...
RS100-E10-PI2 User Manual - Page 110
...] [1024 Bytes] [2048 Bytes] [4096 Bytes]
PCI Express Link Register Settings
ASPM Support [Disabled]
Allows you to set Maximum Payload of PCI Express Device or allow generation of Retry Attempts software will use longer timeout ranges.
[Disabled]
Disable completion timeout.
5-28
Chapter 5: BIOS Setup
Configuration options: [10] - [10000]
Unpopulated Links [Keep Link ON]
If...
RS100-E10-PI2 User Manual - Page 143

... SATA connectors supported by Intel® C242 chipset. For optimal performance, install identical drives of each drive.
6.1.3 Setting the RAID item in BIOS
You must set the RAID item in the system
user guide. 2. Install the SATA hard disks into the drive bays following the instructions in the BIOS Setup before you can create a RAID set configuration.
ASUS RS100-E11-PI2
6-3 Refer...
RS100-E10-PI2 User Manual - Page 156
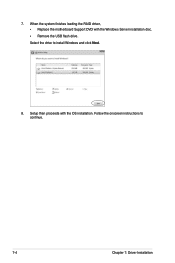
When the system finishes loading the RAID driver, • Replace the motherboard Support DVD with the OS installation. 7. Follow the onscreen instructions to install Windows and click Next.
8. Setup then proceeds with the Windows Server installation disc. • Remove the USB flash drive. Select the drive to continue.
7-4
Chapter 7: Driver Installation
Asus RS100-E11-PI2 Reviews
We have not received any reviews for Asus yet.