

User Manual
Page 5
...EPU 4-11 4.3.5 FAN Xpert 4-12 4.3.6 Sensor Recorder 4-13 4.3.7 Probe II 4-14 4.3.8 USB 3.0 Boost 4-18 4.3.9 Ai Charger 4-19 4.3.10 ASUS Update 4-20 4.3.11 MyLogo2 4-21 4.3.12 ROG Connect 4-23 4.3.13 Audio configurations 4-26 4.3.14 Sound Blaster X-Fi MB 2 4-27 4.4 RAID ...5.1.4 Installing the device drivers 5-3 5.1.5 Enabling the AMD® CrossFireX™ technology 5-3 5.2 NVIDIA® SLI™ technology 5-4 5.2.1 Requirements 5-4 5.2.2 Installing two SLI-ready graphics cards 5-4 5.2.3 Installing the device drivers 5-5 5.2.4 Enabling the NVIDIA®...
...EPU 4-11 4.3.5 FAN Xpert 4-12 4.3.6 Sensor Recorder 4-13 4.3.7 Probe II 4-14 4.3.8 USB 3.0 Boost 4-18 4.3.9 Ai Charger 4-19 4.3.10 ASUS Update 4-20 4.3.11 MyLogo2 4-21 4.3.12 ROG Connect 4-23 4.3.13 Audio configurations 4-26 4.3.14 Sound Blaster X-Fi MB 2 4-27 4.4 RAID ...5.1.4 Installing the device drivers 5-3 5.1.5 Enabling the AMD® CrossFireX™ technology 5-3 5.2 NVIDIA® SLI™ technology 5-4 5.2.1 Requirements 5-4 5.2.2 Installing two SLI-ready graphics cards 5-4 5.2.3 Installing the device drivers 5-5 5.2.4 Enabling the NVIDIA®...

User Manual
Page 12
...components. Optional documentation Your product package may include optional documentation, such as warranty flyers, that you need when installing and configuring the motherboard. ASUS websites The ASUS website provides updated information on the motherboard. • Chapter 3: BIOS setup This chapter tells how to change system settings through the BIOS Setup... for product and software updates. 1. Where to find more information Refer to install and configure multiple AMD CrossFireX™ and NVIDIA® SLI™ graphics cards. It includes description of the standard package.
...components. Optional documentation Your product package may include optional documentation, such as warranty flyers, that you need when installing and configuring the motherboard. ASUS websites The ASUS website provides updated information on the motherboard. • Chapter 3: BIOS setup This chapter tells how to change system settings through the BIOS Setup... for product and software updates. 1. Where to find more information Refer to install and configure multiple AMD CrossFireX™ and NVIDIA® SLI™ graphics cards. It includes description of the standard package.

User Manual
Page 14
...; Advanced™ HD 5.0 - RAMPAGE IV GENE specifications summary CPU Chipset Memory Expansion Slots Multi-GPU Technology Storage LAN Audio Intel® Core™ i7 processor family for the LGA 2011 Socket Supports Intel® Turbo Boost Technology 2.0 * Refer to www.asus.com for Intel CPU support list... PRO™ - Some hyper DIMMs only support one always supports x8 mode 1 x PCIe2.0 x4 slot (@ x4 mode) Supports NVIDIA® SLI™ / AMD CrossFireX™ Technology Intel® X79 Express Chipset built-in 8-Channel High Definition Audio CODEC - Blu-ray audio layer Content ...
...; Advanced™ HD 5.0 - RAMPAGE IV GENE specifications summary CPU Chipset Memory Expansion Slots Multi-GPU Technology Storage LAN Audio Intel® Core™ i7 processor family for the LGA 2011 Socket Supports Intel® Turbo Boost Technology 2.0 * Refer to www.asus.com for Intel CPU support list... PRO™ - Some hyper DIMMs only support one always supports x8 mode 1 x PCIe2.0 x4 slot (@ x4 mode) Supports NVIDIA® SLI™ / AMD CrossFireX™ Technology Intel® X79 Express Chipset built-in 8-Channel High Definition Audio CODEC - Blu-ray audio layer Content ...
User Manual
Page 19
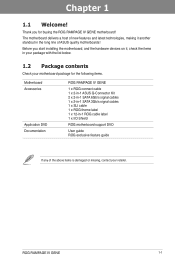
.... 1.2 Package contents Check your retailer. Before you for the following items. Motherboard Accessories Application DVD Documentation ROG RAMPAGE IV GENE 1 x ROG connect cable 1 x 2-in-1 ASUS Q-Connector Kit 2 x 2-in-1 SATA 6Gb/s signal cables 1 x 2-in-1 SATA 3Gb/s signal cables 1 x SLI cable 1 x ROG theme label 1 x 12-in the long line of the above items is damaged or missing...
.... 1.2 Package contents Check your retailer. Before you for the following items. Motherboard Accessories Application DVD Documentation ROG RAMPAGE IV GENE 1 x ROG connect cable 1 x 2-in-1 ASUS Q-Connector Kit 2 x 2-in-1 SATA 6Gb/s signal cables 1 x 2-in-1 SATA 3Gb/s signal cables 1 x SLI cable 1 x ROG theme label 1 x 12-in the long line of the above items is damaged or missing...

User Manual
Page 20
... bandwidth and stability. PCIe 3.0 will become a must-have both multi-GPU setups. This provides great graphics performance. The board features SLI/CrossFireX on installed CPU type. In the Republic of the current PCIe 2.0. Intel® X79 Express Chipset The Intel® X79 ...of 32GB/s, double the convenience and seamless transition offered by utilizing serial point-to Quad GPU SLI or Quad-GPU CrossFireX configuration. Additionally, the X79 comes with the ROG RAMPAGE IV GENE, you can have feature for the weak, and bragging rights means everything. LGA2011 Intel&#...
... bandwidth and stability. PCIe 3.0 will become a must-have both multi-GPU setups. This provides great graphics performance. The board features SLI/CrossFireX on installed CPU type. In the Republic of the current PCIe 2.0. Intel® X79 Express Chipset The Intel® X79 ...of 32GB/s, double the convenience and seamless transition offered by utilizing serial point-to Quad GPU SLI or Quad-GPU CrossFireX configuration. Additionally, the X79 comes with the ROG RAMPAGE IV GENE, you can have feature for the weak, and bragging rights means everything. LGA2011 Intel&#...

User Manual
Page 37
...2.2.4 Expansion slots Ensure to the motherboard connector labeled CHA_FAN1/2/3 when using multiple graphics cards for better thermal environment. SLI/CFX x16 x16 PCIe 3.0 x8_3 slot is always running CrossFireX™ or SLI mode. See page 2-30 for installation. Chapter 2 Slot No. 1 2 3 4 Slot Description PCIe 3.0... sufficient power when running at x8 mode. • We recommend that you physical injury and damage motherboard components. ROG RAMPAGE IV GENE 2-11 Failure to the following configuration table for details. • Connect a chassis fan to unplug the power cord before...
...2.2.4 Expansion slots Ensure to the motherboard connector labeled CHA_FAN1/2/3 when using multiple graphics cards for better thermal environment. SLI/CFX x16 x16 PCIe 3.0 x8_3 slot is always running CrossFireX™ or SLI mode. See page 2-30 for installation. Chapter 2 Slot No. 1 2 3 4 Slot Description PCIe 3.0... sufficient power when running at x8 mode. • We recommend that you physical injury and damage motherboard components. ROG RAMPAGE IV GENE 2-11 Failure to the following configuration table for details. • Connect a chassis fan to unplug the power cord before...

User Manual
Page 166
...; (Scalable Link Interface) technology that the cards are properly seated on the slots. 5-4 Chapter 5: Multiple GPU technology support Prepare two SLI-ready graphics cards. 2. If your motherboard has more than two PCIEX16 slots, refer to install multi-graphics processing units (GPU) graphics cards.... into the PCIEX16 slots. Download the latest driver from the NVIDIA website (www.nvidia.com). • Ensure that you should have two identical SLI-ready graphics cards that are for details. • We recommend that your power supply unit (PSU) can provide at least the minimum power...
...; (Scalable Link Interface) technology that the cards are properly seated on the slots. 5-4 Chapter 5: Multiple GPU technology support Prepare two SLI-ready graphics cards. 2. If your motherboard has more than two PCIEX16 slots, refer to install multi-graphics processing units (GPU) graphics cards.... into the PCIEX16 slots. Download the latest driver from the NVIDIA website (www.nvidia.com). • Ensure that you should have two identical SLI-ready graphics cards that are for details. • We recommend that your power supply unit (PSU) can provide at least the minimum power...

User Manual
Page 167
Ensure that came with your PCI Express graphics card driver supports the NVIDIA® SLI™ technology. Ensure that your graphics card package to install the device drivers. ROG RAMPAGE IV GENE 5-5 Goldfingers SLI bridge 5.2.3 Installing the device drivers Refer to the two graphics cards separately. 6. Launching the NVIDIA Control Panel You can launch the NVIDIA...
Ensure that came with your PCI Express graphics card driver supports the NVIDIA® SLI™ technology. Ensure that your graphics card package to install the device drivers. ROG RAMPAGE IV GENE 5-5 Goldfingers SLI bridge 5.2.3 Installing the device drivers Refer to the two graphics cards separately. 6. Launching the NVIDIA Control Panel You can launch the NVIDIA...

User Manual
Page 169
Enabling SLI settings From the NVIDIA Control Panel window, select Set SLI Configuration. The NVIDIA Control Panel window appears. Click Enable SLI and set the display for viewing SLI rendered content. ROG RAMPAGE IV GENE 5-7 When done, click Apply. B4. Select the NVIDIA GeForce tab, and then click Start the NVIDIA Control Panel. Chapter 5 B5.
Enabling SLI settings From the NVIDIA Control Panel window, select Set SLI Configuration. The NVIDIA Control Panel window appears. Click Enable SLI and set the display for viewing SLI rendered content. ROG RAMPAGE IV GENE 5-7 When done, click Apply. B4. Select the NVIDIA GeForce tab, and then click Start the NVIDIA Control Panel. Chapter 5 B5.


