User Guide
Page 2
... the express written permission of ASUSTeK COMPUTER INC. ("ASUS"). This limit also applies to ASUS' suppliers and its suppliers, and your reseller are entitled to claim damages from ASUS, ASUS is the maximum for which you for loss, damages or claims based in -One PC PT2001 Products and corporate names appearing in this manual may...
... the express written permission of ASUSTeK COMPUTER INC. ("ASUS"). This limit also applies to ASUS' suppliers and its suppliers, and your reseller are entitled to claim damages from ASUS, ASUS is the maximum for which you for loss, damages or claims based in -One PC PT2001 Products and corporate names appearing in this manual may...
User Guide
Page 3
... your system 9 Care during use...9 Sound Pressure Warning 11 Adapter...11 DC Fan Warning...11 Package contents...12 Chapter 1: Hardware Setup Getting to know your ASUS All-in-One PC 13 Front view...13 Top side...15 Left side...16 Right side...16 Rear view...19 Chapter 2: Using your... PC 21 Setting up your ASUS All-in-One PC 23 Connecting the wireless keyboard and mouse (optional 23 Powering on the system 24 Using the Onscreen Display (OSD) Menu 26 Using the OSD functions 27 Using the touch screen 29 Using touch screen panel gestures 30 ASUS All-in-One PC PT2001 3
... your system 9 Care during use...9 Sound Pressure Warning 11 Adapter...11 DC Fan Warning...11 Package contents...12 Chapter 1: Hardware Setup Getting to know your ASUS All-in-One PC 13 Front view...13 Top side...15 Left side...16 Right side...16 Rear view...19 Chapter 2: Using your... PC 21 Setting up your ASUS All-in-One PC 23 Connecting the wireless keyboard and mouse (optional 23 Powering on the system 24 Using the Onscreen Display (OSD) Menu 26 Using the OSD functions 27 Using the touch screen 29 Using touch screen panel gestures 30 ASUS All-in-One PC PT2001 3
User Guide
Page 4
...174; 8.1 54 Configuring your Wi-Fi bandwidth 55 Wired connection...56 Setting up a Bluetooth Wireless Connection 58 Turning your ASUS All-in-One PC off 59 Putting your ASUS All-in-One PC on sleep mode 59 Chapter 4: Recovering your system Entering the BIOS Setup 61 Quickly enter the BIOS... 61 Recovering your system 62 Resetting your PC...62 Recovering from a system image file 63 Removing everything and reinstalling Windows 64 4 ASUS All-in-One PC PT2001
...174; 8.1 54 Configuring your Wi-Fi bandwidth 55 Wired connection...56 Setting up a Bluetooth Wireless Connection 58 Turning your ASUS All-in-One PC off 59 Putting your ASUS All-in-One PC on sleep mode 59 Chapter 4: Recovering your system Entering the BIOS Setup 61 Quickly enter the BIOS... 61 Recovering your system 62 Resetting your PC...62 Recovering from a system image file 63 Removing everything and reinstalling Windows 64 4 ASUS All-in-One PC PT2001
User Guide
Page 5
Appendices Notices...65 RF exposure warning...66 Canadian Department of Communications Statement 67 IC Radiation Exposure Statement for Canada 67 Canada, Industry Canada (IC) Notices 67 Radio Frequency (RF) Exposure Information 68 Canada, avis d'Industry Canada (IC 68 Informations concernant l'exposition aux frequences radio (RF 68 Coating Notice...73 Rechargeable Battery Recycling Service in North America 73 Prevention of Hearing Loss 73 ASUS All-in-One PC PT2001 5
Appendices Notices...65 RF exposure warning...66 Canadian Department of Communications Statement 67 IC Radiation Exposure Statement for Canada 67 Canada, Industry Canada (IC) Notices 67 Radio Frequency (RF) Exposure Information 68 Canada, avis d'Industry Canada (IC 68 Informations concernant l'exposition aux frequences radio (RF 68 Coating Notice...73 Rechargeable Battery Recycling Service in North America 73 Prevention of Hearing Loss 73 ASUS All-in-One PC PT2001 5
User Guide
Page 6
... 4: Recovering your system This chapter provides recovery options for your ASUS All-in -One PC. Appendices This section includes notices and safety statements for your ASUS All-in-One PC. 6 ASUS All-in-One PC PT2001 Chapter 2: Using your ASUS All-in-One PC This chapter provides you with Windows®...; 8.1 This chapter provides an overview of using your ASUS All-in -One PC, organized through the...
... 4: Recovering your system This chapter provides recovery options for your ASUS All-in -One PC. Appendices This section includes notices and safety statements for your ASUS All-in-One PC. 6 ASUS All-in-One PC PT2001 Chapter 2: Using your ASUS All-in-One PC This chapter provides you with Windows®...; 8.1 This chapter provides an overview of using your ASUS All-in -One PC, organized through the...
User Guide
Page 7
ASUS All-in this manual, some texts are presented as follows: IMPORTANT!This message contains vital information that must be selected. Italic = This indicates sections that ... and prevent damage to your device's data and components. NOTE: This message contains additional information and tips that must be followed to in -One PC PT2001 7 WARNING! This message contains important information that can refer to complete a task.
ASUS All-in this manual, some texts are presented as follows: IMPORTANT!This message contains vital information that must be selected. Italic = This indicates sections that ... and prevent damage to your device's data and components. NOTE: This message contains additional information and tips that must be followed to in -One PC PT2001 7 WARNING! This message contains important information that can refer to complete a task.
User Guide
Page 8
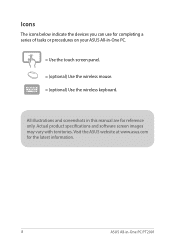
Visit the ASUS website at www.asus.com for reference only. All illustrations and screenshots in this manual are for the latest information. 8 ASUS All-in -One PC. = Use the touch screen panel. = (optional) Use the wireless mouse. = (optional) Use the wireless keyboard. Actual product specifications and software screen images may vary with territories. Icons The icons below indicate the devices you can use for completing a series of tasks or procedures on your ASUS All-in -One PC PT2001
Visit the ASUS website at www.asus.com for reference only. All illustrations and screenshots in this manual are for the latest information. 8 ASUS All-in -One PC. = Use the touch screen panel. = (optional) Use the wireless mouse. = (optional) Use the wireless keyboard. Actual product specifications and software screen images may vary with territories. Icons The icons below indicate the devices you can use for completing a series of tasks or procedures on your ASUS All-in -One PC PT2001

User Guide
Page 9
Safety information Your All-in-One ASUS All-in-One PC is designed and tested to meet the latest standards of space around the system for ventilation. Ensure that you leave plenty ..., ensure that you operate your system. • When the system is important that the total ampere rating of electrical current still remains in -One PC PT2001 9 ASUS All-in the product. However, to rest on your system. • Do not use • Do not walk on the chassis are for information technology...
Safety information Your All-in-One ASUS All-in-One PC is designed and tested to meet the latest standards of space around the system for ventilation. Ensure that you leave plenty ..., ensure that you operate your system. • When the system is important that the total ampere rating of electrical current still remains in -One PC PT2001 9 ASUS All-in the product. However, to rest on your system. • Do not use • Do not walk on the chassis are for information technology...

User Guide
Page 10
... the screen: - The system was dropped or the cabinet is damaged. - The power cord or plug is damaged. - The system performance changes. 10 ASUS All-in-One PC PT2001 Spray a small amount of the screen. - Turn off the system and disconnect the power cord from foreign objects or excessive dust accumulation. Do...
... the screen: - The system was dropped or the cabinet is damaged. - The power cord or plug is damaged. - The system performance changes. 10 ASUS All-in-One PC PT2001 Spray a small amount of the screen. - Turn off the system and disconnect the power cord from foreign objects or excessive dust accumulation. Do...

User Guide
Page 11
... output voltage and sound pressure produced by the earphones or headphones. Adapter 1. Sound Pressure Warning Excessive sound pressure from the fan when using the product. ASUS All-in -One PC. DC Fan Warning Please note that the power socket is a moving part and can cause hearing loss or permanent damage to...
... output voltage and sound pressure produced by the earphones or headphones. Adapter 1. Sound Pressure Warning Excessive sound pressure from the fan when using the product. ASUS All-in -One PC. DC Fan Warning Please note that the power socket is a moving part and can cause hearing loss or permanent damage to...

User Guide
Page 12
Package contents ASUS All-in-One PC PT2001 ASUS All-in -One PC PT2001 Actual product specifications may vary with territories. 12 ASUS All-in -One PC bag (optional) AC Power adapter Quick User Guide Quick Start Guide power cord warranty card wireless keyboard (optional) wireless mouse KBM USB receiver (optional) dongle (optional) NOTES: • If any of the items is damaged or missing, contact your retailer. • The keyboard, mouse, and power supply illustrations are for reference only.
Package contents ASUS All-in-One PC PT2001 ASUS All-in -One PC PT2001 Actual product specifications may vary with territories. 12 ASUS All-in -One PC bag (optional) AC Power adapter Quick User Guide Quick Start Guide power cord warranty card wireless keyboard (optional) wireless mouse KBM USB receiver (optional) dongle (optional) NOTES: • If any of the items is damaged or missing, contact your retailer. • The keyboard, mouse, and power supply illustrations are for reference only.

User Guide
Page 13
ASUS All-in webcam is enabled. Webcam LED Indicates that the built-in -One PC PT2001 13 Chapter 1: Hardware Setup Getting to take pictures or record videos using your ASUS All-in-One PC Front view Built-in digital microphone This built-in digital microphone can be used for video conferencing, voice narrations, audio recordings, and multimedia applications. Webcam The built-in webcam allows you to know your ASUS All-in-One PC.
ASUS All-in webcam is enabled. Webcam LED Indicates that the built-in -One PC PT2001 13 Chapter 1: Hardware Setup Getting to take pictures or record videos using your ASUS All-in-One PC Front view Built-in digital microphone This built-in digital microphone can be used for video conferencing, voice narrations, audio recordings, and multimedia applications. Webcam The built-in webcam allows you to know your ASUS All-in-One PC.

User Guide
Page 14
It also allows you opened. 14 ASUS All-in-One PC PT2001 Windows® 8.1 touch button Touch this button to go back to operate your ASUS All-in-One PC using touch gestures. LCD display (Touch-enabled) The 19.5-inch multi-touch panel LCD display provides excellent viewing features for video ...
It also allows you opened. 14 ASUS All-in-One PC PT2001 Windows® 8.1 touch button Touch this button to go back to operate your ASUS All-in-One PC using touch gestures. LCD display (Touch-enabled) The 19.5-inch multi-touch panel LCD display provides excellent viewing features for video ...

User Guide
Page 15
...-in -One PC shuts down. You can also use the power button to put your ASUS All-in-One PC to turn your ASUS All-in -One PC PT2001 15 In the event that your ASUS All-in-One PC becomes unresponsive, press and hold the power button for about four (4) seconds until your... ASUS All-in -One PC is turned on or on or off. Power button Press the power...
...-in -One PC shuts down. You can also use the power button to put your ASUS All-in-One PC to turn your ASUS All-in -One PC PT2001 15 In the event that your ASUS All-in-One PC becomes unresponsive, press and hold the power button for about four (4) seconds until your... ASUS All-in -One PC is turned on or on or off. Power button Press the power...

User Guide
Page 16
NOTE: For more details, refer to the Using the Onscreen Display (OSD) Menu section in this button to launch the onscreen display (OSD) menu of your ASUS All-in-One PC. When switched to switch the display signal source. OSD menu button Press this user guide. 16 ASUS All-in-One PC PT2001 Left side Right side Mode button Press to HDMI-in, the ASUS All-in-One PC can be used as a standard desktop LCD monitor.
NOTE: For more details, refer to the Using the Onscreen Display (OSD) Menu section in this button to launch the onscreen display (OSD) menu of your ASUS All-in-One PC. When switched to switch the display signal source. OSD menu button Press this user guide. 16 ASUS All-in-One PC PT2001 Left side Right side Mode button Press to HDMI-in, the ASUS All-in-One PC can be used as a standard desktop LCD monitor.

User Guide
Page 17
USB 3.0 ports These Universal Serial Bus 3.0 (USB 3.0) ports connect to connect your ASUS All-in mode, use this port with devices equipped with an HDMI input port, such as an LCD monitor or projector. Headphone output/microphone input ... player. HDMI Input Port When using the HDMI-in -One PC (when used separately) to connect your ASUS All-in -One PC PT2001 17 HDMI Output Port Connect this port to an external microphone. ASUS All-in -One PC to increase or decrease the volume. You can also use the HDMI Input port...
USB 3.0 ports These Universal Serial Bus 3.0 (USB 3.0) ports connect to connect your ASUS All-in mode, use this port with devices equipped with an HDMI input port, such as an LCD monitor or projector. Headphone output/microphone input ... player. HDMI Input Port When using the HDMI-in -One PC (when used separately) to connect your ASUS All-in -One PC PT2001 17 HDMI Output Port Connect this port to an external microphone. ASUS All-in -One PC to increase or decrease the volume. You can also use the HDMI Input port...

User Guide
Page 18
... external HDDs, speakers, cameras and printers. WARNING! Do not cover the adapter and keep it away from your ASUS All-in-One PC using Kensington® compatible security products. 18 ASUS All-in -One PC. Power input The bundled power adapter converts AC power to DC power for KBM USB ...(Universal Serial Bus) port is compatible with this jack. Kensington® lock port The Kensington® lock port allows you to the ASUS All-in -One PC PT2001 The power adapter may become warm or hot when in Windows® 8.1, connect the KBM USB receiver dongle into this jack supplies power...
... external HDDs, speakers, cameras and printers. WARNING! Do not cover the adapter and keep it away from your ASUS All-in-One PC using Kensington® compatible security products. 18 ASUS All-in -One PC. Power input The bundled power adapter converts AC power to DC power for KBM USB ...(Universal Serial Bus) port is compatible with this jack. Kensington® lock port The Kensington® lock port allows you to the ASUS All-in -One PC PT2001 The power adapter may become warm or hot when in Windows® 8.1, connect the KBM USB receiver dongle into this jack supplies power...

User Guide
Page 19
The audio features of your ASUS All-in-One PC's NFC tag. ASUS All-in NFC (Near Field Communication) tag allows you to conveniently share pictures. Rear view Audio speakers The built-in audio speaker allows you to hear audio straight from the ASUS All-in-One PC. To use the NFC tag, put the other NFCenabled device near your ASUS All-inOne PC indicates the location of the NFC tag. NOTE: The NFC sticker on the rear panel of this ASUS All-in-One PC are software-controlled. Built-in NFC tag The built-in -One PC PT2001 19
The audio features of your ASUS All-in-One PC's NFC tag. ASUS All-in NFC (Near Field Communication) tag allows you to conveniently share pictures. Rear view Audio speakers The built-in audio speaker allows you to hear audio straight from the ASUS All-in-One PC. To use the NFC tag, put the other NFCenabled device near your ASUS All-inOne PC indicates the location of the NFC tag. NOTE: The NFC sticker on the rear panel of this ASUS All-in-One PC are software-controlled. Built-in NFC tag The built-in -One PC PT2001 19

User Guide
Page 20
...-in-One PC easily using this ergonomic handle. 3-in-1 Memory card reader This ASUS All-in-One PC has a built-in memory card reader slot that paper, books, clothing, cables, or other objects do not block any of the ...! Air vents The air vents allow cool air to enter and warm air to provide stable support for your ASUS All-in-One PC when it is placed on a table or desk. 20 ASUS All-in-One PC PT2001 ASUS All-in-One PC stand Pull out and adjust the stand to exit the...
...-in-One PC easily using this ergonomic handle. 3-in-1 Memory card reader This ASUS All-in-One PC has a built-in memory card reader slot that paper, books, clothing, cables, or other objects do not block any of the ...! Air vents The air vents allow cool air to enter and warm air to provide stable support for your ASUS All-in-One PC when it is placed on a table or desk. 20 ASUS All-in-One PC PT2001 ASUS All-in-One PC stand Pull out and adjust the stand to exit the...

User Guide
Page 21
Chapter 2: Using your ASUS All-in-One PC Positioning your ASUS All-in-One PC IMPORTANT! • Use both hands when setting up your ASUS All-in-One PC • Avoid adjusting the display to an angle beyond the recommended values or you may risk damaging the ASUS All-in -One PC PT2001 21 ASUS All-in -One PC. 1. Hold the ASUS All-in-One PC using its handle then place it on a flat surface as shown in the illustration below.
Chapter 2: Using your ASUS All-in-One PC Positioning your ASUS All-in-One PC IMPORTANT! • Use both hands when setting up your ASUS All-in-One PC • Avoid adjusting the display to an angle beyond the recommended values or you may risk damaging the ASUS All-in -One PC PT2001 21 ASUS All-in -One PC. 1. Hold the ASUS All-in-One PC using its handle then place it on a flat surface as shown in the illustration below.


