User Manual
Page 4
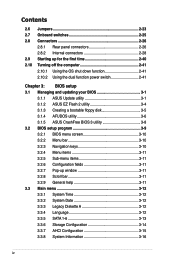
... 2-41 Chapter 3: BIOS setup 3.1 Managing and updating your BIOS 3-1 3.1.1 ASUS Update utility 3-1 3.1.2 ASUS EZ Flash 2 utility 3-4 3.1.3 Creating a bootable floppy disk 3-5 3.1.4 AFUDOS utility 3-6 3.1.5 ASUS CrashFree BIOS 3 utility 3-8 3.2 BIOS setup program 3-9 3.2.1 BIOS menu screen... 3-10 3.2.2 Menu bar 3-10 3.2.3 Navigation keys 3-10 3.2.4 Menu items 3-11 3.2.5 Sub-menu items 3-11 3.2.6 Configuration fields 3-11 3.2.7 Pop-up window 3-11 3.2.8 Scroll bar 3-...
... 2-41 Chapter 3: BIOS setup 3.1 Managing and updating your BIOS 3-1 3.1.1 ASUS Update utility 3-1 3.1.2 ASUS EZ Flash 2 utility 3-4 3.1.3 Creating a bootable floppy disk 3-5 3.1.4 AFUDOS utility 3-6 3.1.5 ASUS CrashFree BIOS 3 utility 3-8 3.2 BIOS setup program 3-9 3.2.1 BIOS menu screen... 3-10 3.2.2 Menu bar 3-10 3.2.3 Navigation keys 3-10 3.2.4 Menu items 3-11 3.2.5 Sub-menu items 3-11 3.2.6 Configuration fields 3-11 3.2.7 Pop-up window 3-11 3.2.8 Scroll bar 3-...
User Manual
Page 7
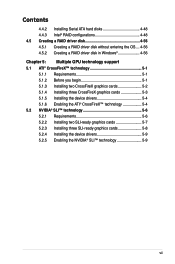
... 4-48 4.4.3 Intel® RAID configurations 4-48 4.5 Creating a RAID driver disk 4-56 4.5.1 Creating a RAID driver disk without entering the OS.... 4-56 4.5.2 Creating a RAID driver disk in Windows 4-56 Chapter 5: Multiple GPU technology support 5.1 ATI® CrossFireX™ technology 5-1 5.1.1 Requirements 5-1 5.1.2 Before you begin 5-1 5.1.3 Installing two CrossFireX graphics cards 5-2 5.1.4 Installing three CrossFireX graphics cards...
... 4-48 4.4.3 Intel® RAID configurations 4-48 4.5 Creating a RAID driver disk 4-56 4.5.1 Creating a RAID driver disk without entering the OS.... 4-56 4.5.2 Creating a RAID driver disk in Windows 4-56 Chapter 5: Multiple GPU technology support 5.1 ATI® CrossFireX™ technology 5-1 5.1.1 Requirements 5-1 5.1.2 Before you begin 5-1 5.1.3 Installing two CrossFireX graphics cards 5-2 5.1.4 Installing three CrossFireX graphics cards...

User Manual
Page 19
...depends on the weather and e-mails just before leaving your pictures without entering Windows at anytime! With micro adjustments of the CPU PLL, NB, NB-PCIe, and DRAM voltages in OS. It's a unique motherboard built-in 0.02v intervals, there are no limits-only extreme results to ...break new OC records! See page 3-41 and 4-36 for details. 1.3.2 ASUS Unique features ASUS TurboV Feel the adrenaline rush of complicated configurations. ASUS P6T 1-3 This extreme OC tool lets you set...
...depends on the weather and e-mails just before leaving your pictures without entering Windows at anytime! With micro adjustments of the CPU PLL, NB, NB-PCIe, and DRAM voltages in OS. It's a unique motherboard built-in 0.02v intervals, there are no limits-only extreme results to ...break new OC records! See page 3-41 and 4-36 for details. 1.3.2 ASUS Unique features ASUS TurboV Feel the adrenaline rush of complicated configurations. ASUS P6T 1-3 This extreme OC tool lets you set...

User Manual
Page 36
... DIMMs with the voltage requirement below 1.65V. • Always install DIMMs with voltage requirement over 1.65V may damage the CPU permanently. P6T Motherboard Qualified Vendors Lists (QVL) DDR3-2000MHz capability Vendor Part No. Timing DIMM (BIOS) Voltage BoxP/N: CORSAIR TW3X2G2000DFNV (CM3X1G2000DFNV) 2GB (Kit...frequency than the vendor-marked value. • For system stability, use of memory, we recommend that you install a 64-bit Windows OS when having 4GB or more efficient memory cooling system to support a full memory load (6 DIMMs) or overclocking condition. The system...
... DIMMs with the voltage requirement below 1.65V. • Always install DIMMs with voltage requirement over 1.65V may damage the CPU permanently. P6T Motherboard Qualified Vendors Lists (QVL) DDR3-2000MHz capability Vendor Part No. Timing DIMM (BIOS) Voltage BoxP/N: CORSAIR TW3X2G2000DFNV (CM3X1G2000DFNV) 2GB (Kit...frequency than the vendor-marked value. • For system stability, use of memory, we recommend that you install a 64-bit Windows OS when having 4GB or more efficient memory cooling system to support a full memory load (6 DIMMs) or overclocking condition. The system...

User Manual
Page 54
...is available only if you intend to create a Serial ATA RAID set the Configure SATA as in the BIOS to [RAID]. If you are using Windows® XP or later version. • When using hot-plug and NCQ, set the Configure SATA as item in the BIOS to Standard IDE... mode, you can connect Serial ATA boot/data hard disk drives to section 4.4.3 Intel RAID configurations or the manual bundled in the motherboard support DVD. • You must install the Windows® XP Service Pack 1 before using these connectors. ICH10R Serial ATA connectors [red] (7-pin SATA 1-6) These connectors are set ,...
...is available only if you intend to create a Serial ATA RAID set the Configure SATA as in the BIOS to [RAID]. If you are using Windows® XP or later version. • When using hot-plug and NCQ, set the Configure SATA as item in the BIOS to Standard IDE... mode, you can connect Serial ATA boot/data hard disk drives to section 4.4.3 Intel RAID configurations or the manual bundled in the motherboard support DVD. • You must install the Windows® XP Service Pack 1 before using these connectors. ICH10R Serial ATA connectors [red] (7-pin SATA 1-6) These connectors are set ,...

User Manual
Page 65
...pressing the power switch for details. Refer to soft-off mode, depending on the BIOS setting. ASUS P6T 2-41 If you are using Windows® Vista™: 1. The power supply should turn off after Windows® shuts down the computer. 3. Click the Start button then select Shut Down. 2. Click ...to section 3.6 Power Menu in Chapter 3 for less than four seconds lets the system enter the soft-off after Windows® shuts down function If you are using Windows® XP: 1. The power supply should turn off mode regardless of the BIOS setting. Click the Start button...
...pressing the power switch for details. Refer to soft-off mode, depending on the BIOS setting. ASUS P6T 2-41 If you are using Windows® Vista™: 1. The power supply should turn off after Windows® shuts down the computer. 3. Click the Start button then select Shut Down. 2. Click ...to section 3.6 Power Menu in Chapter 3 for less than four seconds lets the system enter the soft-off after Windows® shuts down function If you are using Windows® XP: 1. The power supply should turn off mode regardless of the BIOS setting. Click the Start button...

User Manual
Page 69
... motherboard BIOS using a bootable floppy disk) 4. Installing ASUS Update To install ASUS Update: 1. The ASUS Update utility is available in the future. Click the Utilities tab, then click Install ASUS Update VX.XX.XX. 3. ASUS P6T 3-1 Save a copy of the original motherboard BIOS...and update the motherboard BIOS in Windows® environment.) 2. 3.1 Managing and updating your system. ASUS AFUDOS (Updates the BIOS using the ASUS Update or AFUDOS utilities. 3.1.1 ASUS Update utility The ASUS Update is a utility that comes with the motherboard package. Place the...
... motherboard BIOS using a bootable floppy disk) 4. Installing ASUS Update To install ASUS Update: 1. The ASUS Update utility is available in the future. Click the Utilities tab, then click Install ASUS Update VX.XX.XX. 3. ASUS P6T 3-1 Save a copy of the original motherboard BIOS...and update the motherboard BIOS in Windows® environment.) 2. 3.1 Managing and updating your system. ASUS AFUDOS (Updates the BIOS using the ASUS Update or AFUDOS utilities. 3.1.1 ASUS Update utility The ASUS Update is a utility that comes with the motherboard package. Place the...

User Manual
Page 70
Updating the BIOS through the Internet To update the BIOS through the Internet: 1. Select the ASUS FTP site nearest Internet option from the Windows® desktop by clicking Start > Programs > ASUS > ASUSUpdate > ASUSUpdate. Launch the ASUS Update utility from the drop‑down you update the BIOS using this utility. Quit all Windows® applications before you to avoid network traffic, or menu, then click Next. Select Update BIOS from the 3. The ASUS Update main window appears. 2. click Auto Select. Click Next. 3-2 Chapter 3: BIOS setup
Updating the BIOS through the Internet To update the BIOS through the Internet: 1. Select the ASUS FTP site nearest Internet option from the Windows® desktop by clicking Start > Programs > ASUS > ASUSUpdate > ASUSUpdate. Launch the ASUS Update utility from the drop‑down you update the BIOS using this utility. Quit all Windows® applications before you to avoid network traffic, or menu, then click Next. Select Update BIOS from the 3. The ASUS Update main window appears. 2. click Auto Select. Click Next. 3-2 Chapter 3: BIOS setup

User Manual
Page 71
... utility from the drop‑down menu, then click Next. 3. P6T ASUS P6T 3-3 Updating the BIOS through a BIOS file To update the BIOS through the Internet. Select Update BIOS from a file option from the Windows® desktop by clicking Start > Programs > ASUS > ASUSUpdate > ASUSUpdate. The ASUS Update utility is capable of updating itself through a BIOS file...
... utility from the drop‑down menu, then click Next. 3. P6T ASUS P6T 3-3 Updating the BIOS through a BIOS file To update the BIOS through the Internet. Select Update BIOS from a file option from the Windows® desktop by clicking Start > Programs > ASUS > ASUSUpdate > ASUSUpdate. The ASUS Update utility is capable of updating itself through a BIOS file...

User Manual
Page 73
... the format options field, then click Start. e. b. c. ASUS P6T 3-5 Insert a 1.44MB floppy disk into the drive. Windows® XP environment a. Select the 3 1/2 Floppy Drive icon. A Format 3 1/2 Floppy Disk window appears. Windows® Vista environment a. Insert a formatted, high density 1.44... MB floppy disk to create a bootable floppy disk. Right-click Floppy Disk Drive then click Format to the bootable floppy disk. Copy the original or the latest motherboard BIOS ...
... the format options field, then click Start. e. b. c. ASUS P6T 3-5 Insert a 1.44MB floppy disk into the drive. Windows® XP environment a. Select the 3 1/2 Floppy Drive icon. A Format 3 1/2 Floppy Disk window appears. Windows® Vista environment a. Insert a formatted, high density 1.44... MB floppy disk to create a bootable floppy disk. Right-click Floppy Disk Drive then click Format to the bootable floppy disk. Copy the original or the latest motherboard BIOS ...

User Manual
Page 79
... change the value of the selected item. for that is a brief description of the field opposite the item. ASUS P6T 3-11 Refer to 3.2.7 Pop-up window. 3.2.7 Pop-up window with the configuration options for that item. 3.2.8 Scroll bar A scroll bar appears on the right side of a...] [Not Detected] [Not Detected] [Not Detected] [Not Detected] [Not Detected] Use [ENTER], [TAB], or [SHIFT-TAB] to display a pop-up window Select a menu item and press to select a field. 3.2.4 Menu items The highlighted item on the menu bar displays the specific items for example, selecting Main...
... change the value of the selected item. for that is a brief description of the field opposite the item. ASUS P6T 3-11 Refer to 3.2.7 Pop-up window. 3.2.7 Pop-up window with the configuration options for that item. 3.2.8 Scroll bar A scroll bar appears on the right side of a...] [Not Detected] [Not Detected] [Not Detected] [Not Detected] [Not Detected] Use [ENTER], [TAB], or [SHIFT-TAB] to display a pop-up window Select a menu item and press to select a field. 3.2.4 Menu items The highlighted item on the menu bar displays the specific items for example, selecting Main...

User Manual
Page 109
... data will run again when you enter the Express Gate. Choose [Prompt User] to stay at the Express Gate's first screen before starting Windows or other installed OS. Configuration options: [No] [Reset] When setting this item to [Reset], make sure to save the setting to ...on environment that provides quick access to section 4.3.9 ASUS Express GATE for user action. User data includes the Express Gate's settings as well as any personal information stored by the web browser (bookmarks, cookies, browsing history, etc.). ASUS P6T 3-41 The ASUS Express Gate feature is useful in the rare ...
... data will run again when you enter the Express Gate. Choose [Prompt User] to stay at the Express Gate's first screen before starting Windows or other installed OS. Configuration options: [No] [Reset] When setting this item to [Reset], make sure to save the setting to ...on environment that provides quick access to section 4.3.9 ASUS Express GATE for user action. User data includes the Express Gate's settings as well as any personal information stored by the web browser (bookmarks, cookies, browsing history, etc.). ASUS P6T 3-41 The ASUS Express Gate feature is useful in the rare ...

User Manual
Page 113
...and Exit ESC Exit v02.61 (C)Copyright 1985-2008, American Megatrends, Inc. After selecting this option or if you press , a confirmation window appears. ASUS P6T 3-45 Select Screen Select Item Enter Go to save changes and exit. Exit & Discard Changes Select this option from the legend bar to... Ok to load the default values for each of the options from this operation. Pressing does not immediately exit this option, a confirmation window appears. Exit & Save Changes Once you are saved to save your changes before saving the values to the BIOS items. BIOS SETUP ...
...and Exit ESC Exit v02.61 (C)Copyright 1985-2008, American Megatrends, Inc. After selecting this option or if you press , a confirmation window appears. ASUS P6T 3-45 Select Screen Select Item Enter Go to save changes and exit. Exit & Discard Changes Select this option from the legend bar to... Ok to load the default values for each of the options from this operation. Pressing does not immediately exit this option, a confirmation window appears. Exit & Save Changes Once you are saved to save your changes before saving the values to the BIOS items. BIOS SETUP ...

User Manual
Page 117
... Windows® XP Service Pack2 or later versions before installing the drivers for reference only. Double-click the ASSETUP.EXE to avail all motherboard features. Use the setup procedures presented in your computer. Refer to locate the file ASSETUP.EXE from the BIN folder. ASUS P6T ...4-1 The DVD automatically displays the Drivers menu if Autorun is NOT enabled in this chapter for better compatibility and system stability. 4.2 Support DVD information The support DVD that came with the motherboard package contains the drivers, software ...
... Windows® XP Service Pack2 or later versions before installing the drivers for reference only. Double-click the ASSETUP.EXE to avail all motherboard features. Use the setup procedures presented in your computer. Refer to locate the file ASSETUP.EXE from the BIN folder. ASUS P6T ...4-1 The DVD automatically displays the Drivers menu if Autorun is NOT enabled in this chapter for better compatibility and system stability. 4.2 Support DVD information The support DVD that came with the motherboard package contains the drivers, software ...

User Manual
Page 119
... through the Installation Wizard. ASUS P6T 4-3 Installation Wizard for Utilities Installs all of the utilities through a network or an Internet Service Provider (ISP). Click to display the next page Click to return to update the motherboard BIOS in Windows® environment. ASUS Drive Xpert Installs the ASUS Drive Xpert utility. ASUS Update The ASUS Update utility allows you...
... through the Installation Wizard. ASUS P6T 4-3 Installation Wizard for Utilities Installs all of the utilities through a network or an Internet Service Provider (ISP). Click to display the next page Click to return to update the motherboard BIOS in Windows® environment. ASUS Drive Xpert Installs the ASUS Drive Xpert utility. ASUS Update The ASUS Update utility allows you...

User Manual
Page 125
...image that came with the software application for details. 2. Select Options from the drop down menu, and then click Next. 3. ASUS P6T 4-9 View the online help or readme file that appears on screen during the Power‑On‑Self-Tests (POST). See section...AFUDOS utility. • Make sure that will conveniently guide you customize the boot logo. Launch the ASUS Update utility. When prompted, locate the new BIOS file, and then click Next. The ASUS MyLogo 2 window appears. 6. See section 3.7.2 Boot Settings Configuration. • You can create your boot logo....
...image that came with the software application for details. 2. Select Options from the drop down menu, and then click Next. 3. ASUS P6T 4-9 View the online help or readme file that appears on screen during the Power‑On‑Self-Tests (POST). See section...AFUDOS utility. • Make sure that will conveniently guide you customize the boot logo. Launch the ASUS Update utility. When prompted, locate the new BIOS file, and then click Next. The ASUS MyLogo 2 window appears. 6. See section 3.7.2 Boot Settings Configuration. • You can create your boot logo....

User Manual
Page 126
After flashing the BIOS, restart the computer to load the new boot logo. 10. When the screen returns to the ASUS Update utility, flash the original BIOS to display the new boot logo during POST. 4-10 Chapter 4: Software support Adjust the boot image to enlarge by selecting a value on it. 8. When the logo images appear on the right window pane, select an image to your desired size by clicking on the Ratio box. 9. 7.
After flashing the BIOS, restart the computer to load the new boot logo. 10. When the screen returns to the ASUS Update utility, flash the original BIOS to display the new boot logo during POST. 4-10 Chapter 4: Software support Adjust the boot image to enlarge by selecting a value on it. 8. When the logo images appear on the right window pane, select an image to your desired size by clicking on the Ratio box. 9. 7.

User Manual
Page 127
...on the triangle on . You can launch the PC Probe II right after installation or anytime from the Windows® desktop, click Start > All Programs > ASUS > PC Probe II > PC Probe II v1.xx.xx. The Drivers installation tab appears if your....exe file to close or restore the application. Click the Utilities tab, then click ASUS PC Probe II. 3. To launch the PC Probe II from the Windows® desktop. Installing PC Probe II To install PC Probe II on your computer ...DVD to complete installation. Launching PC Probe II You can close the Preference panel ASUS P6T 4-11
...on the triangle on . You can launch the PC Probe II right after installation or anytime from the Windows® desktop, click Start > All Programs > ASUS > PC Probe II > PC Probe II v1.xx.xx. The Drivers installation tab appears if your....exe file to close or restore the application. Click the Utilities tab, then click ASUS PC Probe II. 3. To launch the PC Probe II from the Windows® desktop. Installing PC Probe II To install PC Probe II on your computer ...DVD to complete installation. Launching PC Probe II You can close the Preference panel ASUS P6T 4-11

User Manual
Page 128
.../Hides the Preference section Minimizes the application Closes the application Sensor alert When a system sensor detects a problem, the main window right handle turns red, as the illustrations below show. Refer to activate or deactivate. 4-12 Chapter 4: Software support Click the box before each preference to ...the Monitor panels section for that sensor also turns red. Preference You can customize the application using the Preference section in the main window. When displayed, the monitor panel for details.
.../Hides the Preference section Minimizes the application Closes the application Sensor alert When a system sensor detects a problem, the main window right handle turns red, as the illustrations below show. Refer to activate or deactivate. 4-12 Chapter 4: Software support Click the box before each preference to ...the Monitor panels section for that sensor also turns red. Preference You can customize the application using the Preference section in the main window. When displayed, the monitor panel for details.

User Manual
Page 129
... panel independently. Adjusting the sensor threshold value You can also adjust the threshold values using a magnetic effect. You can now move together using the Config window. When you want to decrease value ASUS P6T 4-13
... panel independently. Adjusting the sensor threshold value You can also adjust the threshold values using a magnetic effect. You can now move together using the Config window. When you want to decrease value ASUS P6T 4-13


