User Manual
Page 11
... Intel® LGA775 Core™ 2 Extreme / Core™ 2 Quad/ Core™ 2 Duo processors, which are excellent for buying an ASUS® P5G41TD-M PRO motherboard! Chapter 1 Product introduction 1.1 Welcome! Thank you start installing the motherboard, and hardware devices on it another standout in the 45nm manufacturing process... list below. 1.2 Package contents Check your motherboard package for the following items. Motherboard Cables Accessories Application DVD Documentation ASUS P5G41TD-M PRO motherboard 2 x Serial ATA cables 1 x Ultra DMA 100/66/33 cable 1 x I/O shield...
... Intel® LGA775 Core™ 2 Extreme / Core™ 2 Quad/ Core™ 2 Duo processors, which are excellent for buying an ASUS® P5G41TD-M PRO motherboard! Chapter 1 Product introduction 1.1 Welcome! Thank you start installing the motherboard, and hardware devices on it another standout in the 45nm manufacturing process... list below. 1.2 Package contents Check your motherboard package for the following items. Motherboard Cables Accessories Application DVD Documentation ASUS P5G41TD-M PRO motherboard 2 x Serial ATA cables 1 x Ultra DMA 100/66/33 cable 1 x I/O shield...

User Manual
Page 13
... shut down and reboot the system, and the BIOS automatically restores the CPU parameters to open the system chassis and clear the RTC data. ASUS P5G41TD-M PRO 1-3 ASUS AI NET2 ASUS AI NET2 remotely detects the cable connection immediately after turning on the system, and any faulty cable connections are reported back up to 100...
... shut down and reboot the system, and the BIOS automatically restores the CPU parameters to open the system chassis and clear the RTC data. ASUS P5G41TD-M PRO 1-3 ASUS AI NET2 ASUS AI NET2 remotely detects the cable connection immediately after turning on the system, and any faulty cable connections are reported back up to 100...

User Manual
Page 15
... your chassis to ensure that you place it . Do not overtighten the screws! Ensure that you install the motherboard, study the configuration of the chassis ASUS P5G41TD-M PRO 1-5
... your chassis to ensure that you place it . Do not overtighten the screws! Ensure that you install the motherboard, study the configuration of the chassis ASUS P5G41TD-M PRO 1-5

User Manual
Page 17
ASUS P5G41TD-M PRO 1-7 ASUS will process Return Merchandise Authorization (RMA) requests only if the motherboard comes with the cap on the socket and the socket contacts are not bent. ASUS will shoulder the cost of repair only if the damage is shipment/transit-related. • Keep the cap after installing the motherboard. Before installing the ...
ASUS P5G41TD-M PRO 1-7 ASUS will process Return Merchandise Authorization (RMA) requests only if the motherboard comes with the cap on the socket and the socket contacts are not bent. ASUS will shoulder the cost of repair only if the damage is shipment/transit-related. • Keep the cap after installing the motherboard. Before installing the ...

User Manual
Page 19
... directly. 7. To prevent contaminating the paste, DO NOT spread the paste with pre-applied thermal paste. If it off immediately, and seek professional medical help. B ASUS P5G41TD-M PRO 1-9 Some heatsinks come with your skin, ensure that it is spread in contact with, ensuring that you wash it gets into the A retention tab. Apply...
... directly. 7. To prevent contaminating the paste, DO NOT spread the paste with pre-applied thermal paste. If it off immediately, and seek professional medical help. B ASUS P5G41TD-M PRO 1-9 Some heatsinks come with your skin, ensure that it is spread in contact with, ensuring that you wash it gets into the A retention tab. Apply...

User Manual
Page 21
Do not forget to plug this connector. 1.6.3 Uninstalling the CPU heatsink and fan To uninstall the CPU heatsink and fan: 1. Disconnect the CPU fan cable from the motherboard. Hardware monitoring errors can occur if you fail to connect the CPU fan connector! Connect the CPU fan cable to disengage the heatsink and fan assembly from the connector on the motherboard labeled CPU_FAN. Rotate each fastener counterclockwise. 3. 3. A A B B B A B A ASUS P5G41TD-M PRO 1-11 Pull up two fasteners at a time in a diagonal sequence to the connector on the motherboard. 2.
Do not forget to plug this connector. 1.6.3 Uninstalling the CPU heatsink and fan To uninstall the CPU heatsink and fan: 1. Disconnect the CPU fan cable from the motherboard. Hardware monitoring errors can occur if you fail to connect the CPU fan connector! Connect the CPU fan cable to disengage the heatsink and fan assembly from the connector on the motherboard labeled CPU_FAN. Rotate each fastener counterclockwise. 3. 3. A A B B B A B A ASUS P5G41TD-M PRO 1-11 Pull up two fasteners at a time in a diagonal sequence to the connector on the motherboard. 2.

User Manual
Page 23
...• - • • 1.35V(low voltage) • • 1.5V • • 1.5V • • 7 - • • Micron 9HF22D9KPT 7 - Use a maximum of the following: - P5G41TD-M PRO Motherboard Qualified Vendors Lists (QVL) DDR3-1066 MHz capability Vendor Part No. Samsung SEC 901 HCF8 K4B1G0846E - - Under the default state, some memory modules for...a full memory load (2 DIMMs) or overclocking conditions. Hynix H5TQ1G83AFP G7C - - • • • • • • • • • • ASUS P5G41TD-M PRO 1-13
...• - • • 1.35V(low voltage) • • 1.5V • • 1.5V • • 7 - • • Micron 9HF22D9KPT 7 - Use a maximum of the following: - P5G41TD-M PRO Motherboard Qualified Vendors Lists (QVL) DDR3-1066 MHz capability Vendor Part No. Samsung SEC 901 HCF8 K4B1G0846E - - Under the default state, some memory modules for...a full memory load (2 DIMMs) or overclocking conditions. Hynix H5TQ1G83AFP G7C - - • • • • • • • • • • ASUS P5G41TD-M PRO 1-13

User Manual
Page 25
...- ELPIDA J1108BASE-DJ-E - - NANYA NT5CB128M8AN-CG - - 7-7-7-20 - - - - - 9 - - - - - 9-9-9-24 1.5V 9 - Micron 8DD22D9JNM - ASUS P5G41TD-M PRO 1-15 Samsung SEC 913 HCH9 K4B1G0846E - - Micron 8FD22D9JNM - - Single-sided / DS - elixir N2CB1680AN-C6 9 - SEC 904 HCH9 K4B1G0846D PM64M8D38U-15 - DDR3-1333 ...SP001GBLTU133S01 2048MB DS 1024MB DS 1024MB DS 2048MB DS 4096MB(Kit of Dual-channel memory configuration Visit the ASUS website at www.asus.com for the latest QVL. Samsung K4B1G0846D-HCH9 - - ASINT DDRII1208-DJ 0844 - - elixir ...
...- ELPIDA J1108BASE-DJ-E - - NANYA NT5CB128M8AN-CG - - 7-7-7-20 - - - - - 9 - - - - - 9-9-9-24 1.5V 9 - Micron 8DD22D9JNM - ASUS P5G41TD-M PRO 1-15 Samsung SEC 913 HCH9 K4B1G0846E - - Micron 8FD22D9JNM - - Single-sided / DS - elixir N2CB1680AN-C6 9 - SEC 904 HCH9 K4B1G0846D PM64M8D38U-15 - DDR3-1333 ...SP001GBLTU133S01 2048MB DS 1024MB DS 1024MB DS 2048MB DS 4096MB(Kit of Dual-channel memory configuration Visit the ASUS website at www.asus.com for the latest QVL. Samsung K4B1G0846D-HCH9 - - ASINT DDRII1208-DJ 0844 - - elixir ...
User Manual
Page 27
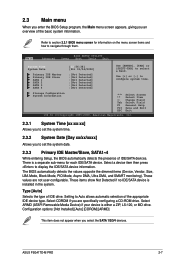
... PCI Express specifications. Remove the system unit cover (if your motherboard is completely seated on the system and change the necessary BIOS settings, if any. ASUS P5G41TD-M PRO 1-17 1.8 Expansion slots In the future, you physical injury and damage motherboard components. 1.8.1 Installing an expansion card To install an expansion card: 1. The following sub...
... PCI Express specifications. Remove the system unit cover (if your motherboard is completely seated on the system and change the necessary BIOS settings, if any. ASUS P5G41TD-M PRO 1-17 1.8 Expansion slots In the future, you physical injury and damage motherboard components. 1.8.1 Installing an expansion card To install an expansion card: 1. The following sub...

User Manual
Page 29
...-45) port. This port connects the tape, CD, DVD player, or other VGA-compatible devices. 4. Side Speaker Out port (gray). Rear Speaker Out port (black). ASUS P5G41TD-M PRO 1-19 PS/2 mouse port (green). LAN port LED indications ACT/LINK LED Status Description OFF No link ORANGE Linked BLINKING Data activity SPEED LED Status...
...-45) port. This port connects the tape, CD, DVD player, or other VGA-compatible devices. 4. Side Speaker Out port (gray). Rear Speaker Out port (black). ASUS P5G41TD-M PRO 1-19 PS/2 mouse port (green). LAN port LED indications ACT/LINK LED Status Description OFF No link ORANGE Linked BLINKING Data activity SPEED LED Status...

User Manual
Page 31
... for an additional Sony/Philips Digital Interface (S/PDIF) port. Do not forget to connect the fan cables to the fan connectors on the fan connectors! ASUS P5G41TD-M PRO 1-21 CPU and chassis fan connectors (4-pin CPU_FAN, 3-pin CHA_FAN) Connect the fan cables to the fan connectors.
... for an additional Sony/Philips Digital Interface (S/PDIF) port. Do not forget to connect the fan cables to the fan connectors on the fan connectors! ASUS P5G41TD-M PRO 1-21 CPU and chassis fan connectors (4-pin CPU_FAN, 3-pin CHA_FAN) Connect the fan cables to the fan connectors.

User Manual
Page 33
... parallel ATA with Serial ATA 1.5Gb/s specification. The Serial ATA 3Gb/s is set the Front Panel Type item in the BIOS setup to [HD Audio]. ASUS P5G41TD-M PRO 1-23 Install the Windows® XP Service Pack 2 or later version before using Serial ATA. See section 2.4.3 Chipset for details. 6.
... parallel ATA with Serial ATA 1.5Gb/s specification. The Serial ATA 3Gb/s is set the Front Panel Type item in the BIOS setup to [HD Audio]. ASUS P5G41TD-M PRO 1-23 Install the Windows® XP Service Pack 2 or later version before using Serial ATA. See section 2.4.3 Chipset for details. 6.

User Manual
Page 35
...; ATX power button/soft-off button (2-pin PWRSW) This connector is for the system power button. The speaker allows you turn on the BIOS settings. ASUS P5G41TD-M PRO 1-25 The IDE LED lights up when you to this connector. The system power LED lights up or flashes when data is read from or...
...; ATX power button/soft-off button (2-pin PWRSW) This connector is for the system power button. The speaker allows you turn on the BIOS settings. ASUS P5G41TD-M PRO 1-25 The IDE LED lights up when you to this connector. The system power LED lights up or flashes when data is read from or...

User Manual
Page 37
... for reference only. The contents of your computer. To run the Support DVD Place the Support DVD to run the DVD. ASUS P5G41TD-M PRO 1-27 Double-click the ASSETUP.EXE to the optical drive. 1.11 Software support 1.11.1 Installing an operating system This motherboard supports Windows®...information Click an item to install If Autorun is NOT enabled in your hardware. • Motherboard settings and hardware options vary. Visit the ASUS website at any time without notice. The following screen is enabled in your computer, browse the contents of the Support DVD to maximize the...
... for reference only. The contents of your computer. To run the Support DVD Place the Support DVD to run the DVD. ASUS P5G41TD-M PRO 1-27 Double-click the ASSETUP.EXE to the optical drive. 1.11 Software support 1.11.1 Installing an operating system This motherboard supports Windows®...information Click an item to install If Autorun is NOT enabled in your hardware. • Motherboard settings and hardware options vary. Visit the ASUS website at any time without notice. The following screen is enabled in your computer, browse the contents of the Support DVD to maximize the...

User Manual
Page 39
...Select Update BIOS from the Internet a. Updating the BIOS To update the BIOS: 1. Select the ASUS FTP site nearest you update the BIOS using the ASUS Update utility. 2.1.1 ASUS Update utility The ASUS Update is a utility that allows you to manage, save, and update the motherboard BIOS in ...This utility is available in the optical drive. From the FTP site, select the BIOS version that comes with the motherboard package. ASUS P5G41TD-M PRO 2-1 c. The Drivers menu appears. 2. Place the support DVD in the support DVD that you need to restore the BIOS in the future....
...Select Update BIOS from the Internet a. Updating the BIOS To update the BIOS: 1. Select the ASUS FTP site nearest you update the BIOS using the ASUS Update utility. 2.1.1 ASUS Update utility The ASUS Update is a utility that allows you to manage, save, and update the motherboard BIOS in ...This utility is available in the optical drive. From the FTP site, select the BIOS version that comes with the motherboard package. ASUS P5G41TD-M PRO 2-1 c. The Drivers menu appears. 2. Place the support DVD in the support DVD that you need to restore the BIOS in the future....

User Manual
Page 41
...Refer to restore the BIOS file when it fails or gets corrupted during the updating process. Download the latest BIOS file from the ASUS website at www.asus.com. • The removable devices that contains the updated BIOS file. • Before using this utility. The utility automatically checks...the latest version. Turn on again. When found, the utility reads the BIOS file and starts flashing the corrupted BIOS file. 4. ASUS P5G41TD-M PRO 2-3 For motherboards without the floppy connector, prepare a USB flash disk before using the motherboard support DVD or a removable device that...
...Refer to restore the BIOS file when it fails or gets corrupted during the updating process. Download the latest BIOS file from the ASUS website at www.asus.com. • The removable devices that contains the updated BIOS file. • Before using this utility. The utility automatically checks...the latest version. Turn on again. When found, the utility reads the BIOS file and starts flashing the corrupted BIOS file. 4. ASUS P5G41TD-M PRO 2-3 For motherboards without the floppy connector, prepare a USB flash disk before using the motherboard support DVD or a removable device that...

User Manual
Page 43
... of the screen has the following main items: Main For changing the basic system configuration. Exit For selecting the exit options and loading default settings. ASUS P5G41TD-M PRO 2-5 2.2.1 BIOS menu screen Menu items Menu bar Main Advanced Power Configuration fields BIOS SETUP UTILITY Boot Tools Exit General help System Time [00:31:48...
... of the screen has the following main items: Main For changing the basic system configuration. Exit For selecting the exit options and loading default settings. ASUS P5G41TD-M PRO 2-5 2.2.1 BIOS menu screen Menu items Menu bar Main Advanced Power Configuration fields BIOS SETUP UTILITY Boot Tools Exit General help System Time [00:31:48...
User Manual
Page 45
... a field. There is a separate sub-menu for information on the menu screen items and how to section 2.2.1 BIOS menu screen for each IDE/SATA device. ASUS P5G41TD-M PRO 2-7 Refer to navigate through them. Change Field Tab Select Field F1 General Help F10 Save and Exit ESC Exit v02.61 (C)Copyright 1985-2009, American...
... a field. There is a separate sub-menu for information on the menu screen items and how to section 2.2.1 BIOS menu screen for each IDE/SATA device. ASUS P5G41TD-M PRO 2-7 Refer to navigate through them. Change Field Tab Select Field F1 General Help F10 Save and Exit ESC Exit v02.61 (C)Copyright 1985-2009, American...

User Manual
Page 47
... BIOS automatically detects the items in this menu. BIOS Information Displays the auto-detected BIOS information. loads overclocking profiles with optimal parameters for the system. ASUS P5G41TD-M PRO 2-9 System Memory Displays the auto-detected system memory. 2.4 Advanced menu The Advanced menu items allow you to individually set overclocking parameters. Take caution when changing...
... BIOS automatically detects the items in this menu. BIOS Information Displays the auto-detected BIOS information. loads overclocking profiles with optimal parameters for the system. ASUS P5G41TD-M PRO 2-9 System Memory Displays the auto-detected system memory. 2.4 Advanced menu The Advanced menu items allow you to individually set overclocking parameters. Take caution when changing...

User Manual
Page 49
... and set the VTT voltage. Configuration option: [Auto] • If an invalid ratio is set in the value directly or use +/- Configuration options: [Disabled] [Enabled] ASUS P5G41TD-M PRO 2-11 The values range from 1.12500V to 2.4700V with a 0.00625V increment. The values range from 1.21000V to 1.51875V with a 0.02000V increment. Configuration options: [Auto] VTT...
... and set the VTT voltage. Configuration option: [Auto] • If an invalid ratio is set in the value directly or use +/- Configuration options: [Disabled] [Enabled] ASUS P5G41TD-M PRO 2-11 The values range from 1.12500V to 2.4700V with a 0.00625V increment. The values range from 1.21000V to 1.51875V with a 0.02000V increment. Configuration options: [Auto] VTT...

