
User Manual
Page 8
...it may become wet. • Place the product on it by yourself. These devices could interrupt the grounding circuit. • Ensure that your power supply is broken, do not try to fix it , carefully read all the manuals that came with the product, contact a qualified service technician or ...your retailer. viii E5888_M4A88TD-V EVO-USB3_Content8 8 5/26/10 3:43:53 PM If you are not sure about the voltage of the electrical outlet you are using an adapter or extension cord. Do not place the product in your local power company. • If the power supply is set to the correct...
...it may become wet. • Place the product on it by yourself. These devices could interrupt the grounding circuit. • Ensure that your power supply is broken, do not try to fix it , carefully read all the manuals that came with the product, contact a qualified service technician or ...your retailer. viii E5888_M4A88TD-V EVO-USB3_Content8 8 5/26/10 3:43:53 PM If you are not sure about the voltage of the electrical outlet you are using an adapter or extension cord. Do not place the product in your local power company. • If the power supply is set to the correct...
User Manual
Page 18
... users, but a push of fan speed to restore corrupted BIOS data from switching power supply unit (PSU). ASUS Quiet Thermal Solutions ASUS Quiet Thermal solution makes system more . Fan Xpert ASUS Fan Xpert intelligently allows you to update the BIOS without using a bootable floppy disk...fins not only upgrade the visual enjoyment for the ultimate overclocking configuration. 1-4 Chapter 1: Product Introduction E5888_M4A88TD-V EVO-USB3_Content4 4 5/26/10 3:44:01 PM ASUS CrashFree BIOS 3 ASUS CrashFree BIOS 3 allows you the freedom to fine-tune the CPU/NB voltage in 0.003125V steps and...
... users, but a push of fan speed to restore corrupted BIOS data from switching power supply unit (PSU). ASUS Quiet Thermal Solutions ASUS Quiet Thermal solution makes system more . Fan Xpert ASUS Fan Xpert intelligently allows you to update the BIOS without using a bootable floppy disk...fins not only upgrade the visual enjoyment for the ultimate overclocking configuration. 1-4 Chapter 1: Product Introduction E5888_M4A88TD-V EVO-USB3_Content4 4 5/26/10 3:44:01 PM ASUS CrashFree BIOS 3 ASUS CrashFree BIOS 3 allows you the freedom to fine-tune the CPU/NB voltage in 0.003125V steps and...
User Manual
Page 19
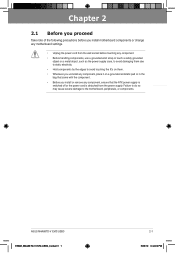
... a grounded wrist strap or touch a safely grounded object or a metal object, such as the power supply case, to avoid damaging them due to static electricity. • Hold components by the edges to the motherboard, peripherals, or components. Chapter 2 ASUS M4A88TD-V EVO/USB3 E5888_M4A88TD-V EVO-USB3_Content1 1 2-1 5/26/10 3:44:02 PM Failure to do so may cause severe...
... a grounded wrist strap or touch a safely grounded object or a metal object, such as the power supply case, to avoid damaging them due to static electricity. • Hold components by the edges to the motherboard, peripherals, or components. Chapter 2 ASUS M4A88TD-V EVO/USB3 E5888_M4A88TD-V EVO-USB3_Content1 1 2-1 5/26/10 3:44:02 PM Failure to do so may cause severe...

User Manual
Page 34
... damage to unplug the power supply before adding or removing DIMMs or other system components. Simultaneously press the retaining clip outward to unlock the DIMM. 2 1 Support the DIMM lightly with extra force. 1 2. Apply force to prevent DIMM notch damage. 2.4.4 Removing a DIMM 1. Remove the DIMM from the socket. 2-16 E5888_M4A88TD-V EVO-USB3_Content16 16 Chapter...
... damage to unplug the power supply before adding or removing DIMMs or other system components. Simultaneously press the retaining clip outward to unlock the DIMM. 2 1 Support the DIMM lightly with extra force. 1 2. Apply force to prevent DIMM notch damage. 2.4.4 Removing a DIMM 1. Remove the DIMM from the socket. 2-16 E5888_M4A88TD-V EVO-USB3_Content16 16 Chapter...

User Manual
Page 53
... not boot. • We recommend that complies with ATX 12 V Specification 2.0 (or later version) and provides a minimum power of 450 W. • Do not forget to the Recommended Power Supply Wattage Calculator at http://support. ASUS M4A88TD-V EVO/USB3 E5888_M4A88TD-V EVO-USB3_Content35 35 2-35 5/26/10 3:45:05 PM Find the proper orientation and push down firmly until the...
... not boot. • We recommend that complies with ATX 12 V Specification 2.0 (or later version) and provides a minimum power of 450 W. • Do not forget to the Recommended Power Supply Wattage Calculator at http://support. ASUS M4A88TD-V EVO/USB3 E5888_M4A88TD-V EVO-USB3_Content35 35 2-35 5/26/10 3:45:05 PM Find the proper orientation and push down firmly until the...

User Manual
Page 54
... Ground PANEL PIN 1 M4A88TD-V EVO/USB3 IDE_LED PWRSW RESET * Requires an ATX power supply M4A88TD-V EVO/USB3 System panel connector • System power LED (2-pin PLED) This 2-pin connector is for the chassis-mounted reset button for the HDD Activity LED. Connect the chassis power LED cable to this .... • System warning speaker (4-pin SPEAKER) This 4-pin connector is for system reboot without turning off the system power. 2-36 E5888_M4A88TD-V EVO-USB3_Content36 36 Chapter 2: Hardware information 5/26/10 3:45:06 PM PLED SPEAKER PLED+ PLED+5V Ground Ground Speaker IDE_LED...
... Ground PANEL PIN 1 M4A88TD-V EVO/USB3 IDE_LED PWRSW RESET * Requires an ATX power supply M4A88TD-V EVO/USB3 System panel connector • System power LED (2-pin PLED) This 2-pin connector is for the chassis-mounted reset button for the HDD Activity LED. Connect the chassis power LED cable to this .... • System warning speaker (4-pin SPEAKER) This 4-pin connector is for system reboot without turning off the system power. 2-36 E5888_M4A88TD-V EVO-USB3_Content36 36 Chapter 2: Hardware information 5/26/10 3:45:06 PM PLED SPEAKER PLED+ PLED+5V Ground Ground Speaker IDE_LED...

User Manual
Page 58
...by three short beeps One continuous beep followed by four short beeps Description VGA detected Quick boot set to section 3.7 Power menu in Chapter 3 for details. 2-40 E5888_M4A88TD-V EVO-USB3_Content40 40 Chapter 2: Hardware information 5/26/10 3:45:12 PM Refer to disabled No keyboard detected No memory detected... the jumper settings and connections or call your monitor complies with ATX power supplies, the system LED lights up when you do not see the BIOS beep codes table below) or additional messages appear on test. At power on, hold down the key to green after the system LED turns...
...by three short beeps One continuous beep followed by four short beeps Description VGA detected Quick boot set to section 3.7 Power menu in Chapter 3 for details. 2-40 E5888_M4A88TD-V EVO-USB3_Content40 40 Chapter 2: Hardware information 5/26/10 3:45:12 PM Refer to disabled No keyboard detected No memory detected... the jumper settings and connections or call your monitor complies with ATX power supplies, the system LED lights up when you do not see the BIOS beep codes table below) or additional messages appear on test. At power on, hold down the key to green after the system LED turns...

User Manual
Page 90
... receive or transmit data until the computer and applications are fully running. Chapter 3 3-32 E5888_M4A88TD-V EVO-USB3_Content32 32 Chapter 3: BIOS setup 5/26/10 3:45:47 PM This feature requires an ATX power supply that turns the system power on. Power On From S5 By PME# [Disabled] [Disabled] Disables the PME to turn on the system...
... receive or transmit data until the computer and applications are fully running. Chapter 3 3-32 E5888_M4A88TD-V EVO-USB3_Content32 32 Chapter 3: BIOS setup 5/26/10 3:45:47 PM This feature requires an ATX power supply that turns the system power on. Power On From S5 By PME# [Disabled] [Disabled] Disables the PME to turn on the system...

User Manual
Page 121
... to work properly, you to your system. ASUS M4A88TD-V EVO/USB3 E5888_M4A88TD-V EVO-USB3_Content1 1 5-1 5/26/10 3:46:24 PM For Windows XP, select Add/Remove. For Windows Vista / 7, select Uninstall. 5. See Chapter 2 for details. • We recommend that your power supply unit (PSU) can provide at least the minimum power required by your current graphics card drivers. 4. For...
... to work properly, you to your system. ASUS M4A88TD-V EVO/USB3 E5888_M4A88TD-V EVO-USB3_Content1 1 5-1 5/26/10 3:46:24 PM For Windows XP, select Add/Remove. For Windows Vista / 7, select Uninstall. 5. See Chapter 2 for details. • We recommend that your power supply unit (PSU) can provide at least the minimum power required by your current graphics card drivers. 4. For...

User Manual
Page 122
...Insert the two graphics card into the PCIEX16 slots. Ensure that the cards are for multi-graphics card installation. 3. Goldfingers 5-2 E5888_M4A88TD-V EVO-USB3_Content2 2 Chapter 5: ATI® CrossFireX™ technology support 5/26/10 3:46:35 PM Chapter 5 5.1.3 Installing two CrossFireX™ ... only. Align and firmly insert the CrossFireX bridge connector to the two graphics cards separately. 6. Connect two independent auxiliary power sources from the power supply to the goldfingers on the slots. 4. Connect a VGA or a DVI cable to Chapter 2 in place. CrossFireX ...
...Insert the two graphics card into the PCIEX16 slots. Ensure that the cards are for multi-graphics card installation. 3. Goldfingers 5-2 E5888_M4A88TD-V EVO-USB3_Content2 2 Chapter 5: ATI® CrossFireX™ technology support 5/26/10 3:46:35 PM Chapter 5 5.1.3 Installing two CrossFireX™ ... only. Align and firmly insert the CrossFireX bridge connector to the two graphics cards separately. 6. Connect two independent auxiliary power sources from the power supply to the goldfingers on the slots. 4. Connect a VGA or a DVI cable to Chapter 2 in place. CrossFireX ...


