
User Manual
Page 1
Motherboard M4A785G HTPC Series
Motherboard M4A785G HTPC Series

User Manual
Page 3
Contents Contents...iii Notices...vi Safety information vii About this guide viii M4A785G HTPC Series specifications summary ix Chapter 1 Product introduction 1.1 Welcome 1-1 1.2 Package contents 1-1 1.3 Special features 1-1 1.3.1 Product highlights 1-1 1.3.2 Innovative ASUS features 1-2 1.4 Before you proceed 1-4 1.5 Motherboard overview 1-5 1.5.1 Placement direction 1-5 1.5.2 Screw holes 1-5 1.5.3 Motherboard layout 1-6 1.5.4 Layout contents 1-6 1.6 Central Processing Unit (CPU 1-7 1.6.1 Installing the CPU 1-7 1.6.2 Installing the heatsink and fan...
Contents Contents...iii Notices...vi Safety information vii About this guide viii M4A785G HTPC Series specifications summary ix Chapter 1 Product introduction 1.1 Welcome 1-1 1.2 Package contents 1-1 1.3 Special features 1-1 1.3.1 Product highlights 1-1 1.3.2 Innovative ASUS features 1-2 1.4 Before you proceed 1-4 1.5 Motherboard overview 1-5 1.5.1 Placement direction 1-5 1.5.2 Screw holes 1-5 1.5.3 Motherboard layout 1-6 1.5.4 Layout contents 1-6 1.6 Central Processing Unit (CPU 1-7 1.6.1 Installing the CPU 1-7 1.6.2 Installing the heatsink and fan...

User Manual
Page 6
... • This device may cause harmful interference to provide reasonable protection against harmful interference in our products at ASUS REACH website at http://green.asus.com/english/REACH.htm. REACH Complying with FCC regulations. Check local regulations for connection of the monitor to the... not expressly approved by turning the equipment off and on a circuit different from that may cause undesired operation. DO NOT throw the motherboard in a particular installation. This equipment generates, uses and can be determined by the party responsible for a Class B digital device, ...
... • This device may cause harmful interference to provide reasonable protection against harmful interference in our products at ASUS REACH website at http://green.asus.com/english/REACH.htm. REACH Complying with FCC regulations. Check local regulations for connection of the monitor to the... not expressly approved by turning the equipment off and on a circuit different from that may cause undesired operation. DO NOT throw the motherboard in a particular installation. This equipment generates, uses and can be determined by the party responsible for a Class B digital device, ...

User Manual
Page 7
... adding devices on a stable surface. • If you encounter technical problems with your regular household waste. This motherboard should only be included in your motherboard) and is an optional component (may or may not be used in environments with ambient temperatures between 5°C (41°... not sure about the voltage of the electrical outlet you add a device. • Before connecting or removing signal cables from the motherboard, ensure that the power cables for the devices are unplugged before the signal cables are unplugged. • Seek professional assistance before using...
... adding devices on a stable surface. • If you encounter technical problems with your regular household waste. This motherboard should only be included in your motherboard) and is an optional component (may or may not be used in environments with ambient temperatures between 5°C (41°... not sure about the voltage of the electrical outlet you add a device. • Before connecting or removing signal cables from the motherboard, ensure that the power cables for the devices are unplugged before the signal cables are unplugged. • Seek professional assistance before using...

User Manual
Page 8
... include optional documentation, such as warranty flyers, that you perform certain tasks properly, take note of the motherboard and the new technology it supports. • Chapter 2: BIOS setup This chapter tells how to help you need when ... This chapter describes the features of the following sources for additional information and for product and software updates. 1. ASUS websites The ASUS website provides updated information on ASUS hardware and software products. Typography Bold text Italics ++ Indicates a menu or an item to complete a task....
... include optional documentation, such as warranty flyers, that you perform certain tasks properly, take note of the motherboard and the new technology it supports. • Chapter 2: BIOS setup This chapter tells how to help you need when ... This chapter describes the features of the following sources for additional information and for product and software updates. 1. ASUS websites The ASUS website provides updated information on ASUS hardware and software products. Typography Bold text Italics ++ Indicates a menu or an item to complete a task....

User Manual
Page 13
Before you for the following items. Motherboard Cables Accessories Application DVD Documentations ASUS M4A785G HTPC Series motherboard 1 x Ultra DMA 133/100/66 cable 2 x Serial ATA signal cables 1 x I/O shield 1 x 2 in your package with the list below. 1.2 Package contents Check your retailer. 1.3 1.3.1 Special features ...
Before you for the following items. Motherboard Cables Accessories Application DVD Documentations ASUS M4A785G HTPC Series motherboard 1 x Ultra DMA 133/100/66 cable 2 x Serial ATA signal cables 1 x I/O shield 1 x 2 in your package with the list below. 1.2 Package contents Check your retailer. 1.3 1.3.1 Special features ...
User Manual
Page 14
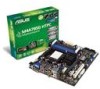
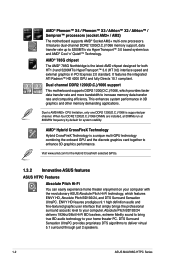
... default for the Hybrid CrossfireX selected GPUs. 1.3.2 Innovative ASUS features ASUS HTPC Features Absolute Pitch Hi-Fi You can easily experience home theater enjoyment on your computer with the revolutionary ASUS Absolute Pitch Hi-Fi technology, which provides faster data ...just 2 speakers. 1-2 ASUS M4A785G HTPC Series AMD® Hybrid CrossFireX Technology Hybrid CrossFireX Technology is supported per channel. AMD® Phenom™ X4 / Phenom™ X3 / Athlon™ X2 / Athlon™ / Sempron™ processors (socket AM2+ / AM2) The motherboard supports AMD® Socket...
... default for the Hybrid CrossfireX selected GPUs. 1.3.2 Innovative ASUS features ASUS HTPC Features Absolute Pitch Hi-Fi You can easily experience home theater enjoyment on your computer with the revolutionary ASUS Absolute Pitch Hi-Fi technology, which provides faster data ...just 2 speakers. 1-2 ASUS M4A785G HTPC Series AMD® Hybrid CrossFireX Technology Hybrid CrossFireX Technology is supported per channel. AMD® Phenom™ X4 / Phenom™ X3 / Athlon™ X2 / Athlon™ / Sempron™ processors (socket AM2+ / AM2) The motherboard supports AMD® Socket...

User Manual
Page 15
... audio quality, thus, professional AV (Audio Visual) equipment usually separate power supply for details. ASUS Home Theater Gate The ASUS Home Theater Gate, specially designed for the HTPC series, allows you with the perfect environment to enjoy your music and movies. The gold-plated... This effectively reduces electronic noise to be equipped with the revolutionary ASUS Absolute Pitch Hi-Fi technology, which lower the CPU power usage while increasing energy efficiency. The ASUS HTPC series is the first motherboard series to ensure purer sound quality. For better sound quality, connect...
... audio quality, thus, professional AV (Audio Visual) equipment usually separate power supply for details. ASUS Home Theater Gate The ASUS Home Theater Gate, specially designed for the HTPC series, allows you with the perfect environment to enjoy your music and movies. The gold-plated... This effectively reduces electronic noise to be equipped with the revolutionary ASUS Absolute Pitch Hi-Fi technology, which lower the CPU power usage while increasing energy efficiency. The ASUS HTPC series is the first motherboard series to ensure purer sound quality. For better sound quality, connect...

User Manual
Page 16
.... • Unplug the power cord from the wall socket before removing or plugging in any component, switch off mode. Onboard LED The motherboard comes with a standby power LED that the system is a reminder that came with the component. • Before you should shut down ...power cord. This is ON, in sleep mode, or in the bag that you install or remove any motherboard component. Failure to do so may cause severe damage to indicate that lights up to the motherboard, peripherals, or components. 1.4 Before you proceed Take note of the onboard LED. 1-4 ASUS M4A785G HTPC Series
.... • Unplug the power cord from the wall socket before removing or plugging in any component, switch off mode. Onboard LED The motherboard comes with a standby power LED that the system is a reminder that came with the component. • Before you should shut down ...power cord. This is ON, in sleep mode, or in the bag that you install or remove any motherboard component. Failure to do so may cause severe damage to indicate that lights up to the motherboard, peripherals, or components. 1.4 Before you proceed Take note of the onboard LED. 1-4 ASUS M4A785G HTPC Series

User Manual
Page 17
Place this side towards the rear of the chassis as indicated in the image below. 1.5.2 Screw holes Place eight screws into the chassis in the correct orientation. Chapter 1: Product introduction 1-5 Do not overtighten the screws! The edge with external ports goes to the chassis. Doing so can damage the motherboard. 1.5 Motherboard overview 1.5.1 Placement direction When installing the motherboard, ensure that you place it into the holes indicated by circles to secure the motherboard to the rear part of the chassis.
Place this side towards the rear of the chassis as indicated in the image below. 1.5.2 Screw holes Place eight screws into the chassis in the correct orientation. Chapter 1: Product introduction 1-5 Do not overtighten the screws! The edge with external ports goes to the chassis. Doing so can damage the motherboard. 1.5 Motherboard overview 1.5.1 Placement direction When installing the motherboard, ensure that you place it into the holes indicated by circles to secure the motherboard to the rear part of the chassis.

User Manual
Page 18
1.5.3 Motherboard layout 1.5.4 Layout contents Connectors/Jumpers/Slots 1. USB connectors (10-1 pin USB56, USB78, USB910) 11. Audio power connector (4-pin AUDIO_PWR) 13. ATX power connectors (24-pin ... port connector (10-1 pin IE1394_2) 12. Digital audio connector (4-1 pin SPDIF_OUT) Page 1-26 1-25 1-7 1-10 1-28 1-27 1-4 1-20 1-29 1-30 1-32 1-31 1-30 1-32 1-31 1-6 ASUS M4A785G HTPC Series
1.5.3 Motherboard layout 1.5.4 Layout contents Connectors/Jumpers/Slots 1. USB connectors (10-1 pin USB56, USB78, USB910) 11. Audio power connector (4-pin AUDIO_PWR) 13. ATX power connectors (24-pin ... port connector (10-1 pin IE1394_2) 12. Digital audio connector (4-1 pin SPDIF_OUT) Page 1-26 1-25 1-7 1-10 1-28 1-27 1-4 1-20 1-29 1-30 1-32 1-31 1-30 1-32 1-31 1-6 ASUS M4A785G HTPC Series

User Manual
Page 19
... NOT force the CPU into the socket until it up to unlock the socket, then lift it fits in place. 1.6 Central Processing Unit (CPU) The motherboard comes with a CPU socket designed for AMD® AM3/AM2+/AM2 Phenom™ II / Athlon™ II / Phenom™ / Athlon™ / ...Sempron™ processors. Do not install an Opteron™ processor on the motherboard. 2. Press the lever sideways to 90°-100° angle, otherwise the CPU will not fit in one correct orientation. Locate the CPU socket on...
... NOT force the CPU into the socket until it up to unlock the socket, then lift it fits in place. 1.6 Central Processing Unit (CPU) The motherboard comes with a CPU socket designed for AMD® AM3/AM2+/AM2 Phenom™ II / Athlon™ II / Phenom™ / Athlon™ / ...Sempron™ processors. Do not install an Opteron™ processor on the motherboard. 2. Press the lever sideways to 90°-100° angle, otherwise the CPU will not fit in one correct orientation. Locate the CPU socket on...

User Manual
Page 20
...before you use only AMD-certified heatsink and fan assembly. The lever clicks on the motherboard. Do not forget to remove the retention module base when installing the CPU or installing other motherboard components. • If you purchased a separate CPU heatsink and fan assembly, ensure.... CPU Fan CPU Heatsink Retention bracket Retention bracket lock Retention Module Base 1-8 ASUS M4A785G HTPC Series Place the heatsink on top of the installed CPU, making sure that the heatsink fits properly on the motherboard upon purchase. • You do not have to connect the CPU fan ...
...before you use only AMD-certified heatsink and fan assembly. The lever clicks on the motherboard. Do not forget to remove the retention module base when installing the CPU or installing other motherboard components. • If you purchased a separate CPU heatsink and fan assembly, ensure.... CPU Fan CPU Heatsink Retention bracket Retention bracket lock Retention Module Base 1-8 ASUS M4A785G HTPC Series Place the heatsink on top of the installed CPU, making sure that the heatsink fits properly on the motherboard upon purchase. • You do not have to connect the CPU fan ...

User Manual
Page 21
... do not match the CPU documentation, follow the latter. 2. Ensure that the retention bracket is in place. 4. Push down the retention bracket lock on the motherboard labeled CPU_FAN. Chapter 1: Product introduction 1-9 Your boxed CPU heatsink and fan assembly should come with installation instructions for the CPU, heatsink, and the retention mechanism...
... do not match the CPU documentation, follow the latter. 2. Ensure that the retention bracket is in place. 4. Push down the retention bracket lock on the motherboard labeled CPU_FAN. Chapter 1: Product introduction 1-9 Your boxed CPU heatsink and fan assembly should come with installation instructions for the CPU, heatsink, and the retention mechanism...

User Manual
Page 22
... use of memory, we recommend that you install a 64-bit Windows OS when having 4GB or more memory on the motherboard. • This motherboard does not support DIMMs made up of the lower-sized channel for the OS can be about 3GB or less. Under the.../Mb=1 Megabyte/MB.) • Due to support a full memory load (4 DIMMs) or overclocking condition. 1-10 ASUS M4A785G HTPC Series For optimum compatibility, we recommend that you install 4GB or more memory installed on the motherboard, the actual usable memory for the dual-channel configuration. 1.7 System memory 1.7.1 Overview The...
... use of memory, we recommend that you install a 64-bit Windows OS when having 4GB or more memory on the motherboard. • This motherboard does not support DIMMs made up of the lower-sized channel for the OS can be about 3GB or less. Under the.../Mb=1 Megabyte/MB.) • Due to support a full memory load (4 DIMMs) or overclocking condition. 1-10 ASUS M4A785G HTPC Series For optimum compatibility, we recommend that you install 4GB or more memory installed on the motherboard, the actual usable memory for the dual-channel configuration. 1.7 System memory 1.7.1 Overview The...

User Manual
Page 23
...; • UMAX D41002GP0-73BNJ1 4096MB(Kit of 2) DS N/A Heat-Sink Package 5(800-5-5-5-15) 2 • Chapter 1: Product introduction 1-11 Size SS/ Chip DS Brand Chip NO. M4A785G HTPC Series Motherboard Qualified Vendors Lists (QVL) DDR2-1066MHz capability (with AM3 CPU) Vendor Part No.
...; • UMAX D41002GP0-73BNJ1 4096MB(Kit of 2) DS N/A Heat-Sink Package 5(800-5-5-5-15) 2 • Chapter 1: Product introduction 1-11 Size SS/ Chip DS Brand Chip NO. M4A785G HTPC Series Motherboard Qualified Vendors Lists (QVL) DDR2-1066MHz capability (with AM3 CPU) Vendor Part No.

User Manual
Page 30
...socket. 1 Unlocked retaining clip 2 DDR2 DIMM notch 1 A DDR2 DIMM is properly seated. Simultaneously press the retaining clips outward to both the motherboard and the components. 1. The DIMM might get damaged 1 when it fits in only one direction. Failure to do so can cause severe damage... the retaining clips outward to avoid damaging the DIMM. 3. Remove the DIMM from the socket. 2 1 DDR2 DIMM notch 1-18 ASUS M4A785G HTPC Series Locked Retaining Clip 1.7.4 Removing a DIMM To remove a DIMM: 1. Firmly insert the DIMM into a socket to unlock a DDR2 DIMM socket. 2.
...socket. 1 Unlocked retaining clip 2 DDR2 DIMM notch 1 A DDR2 DIMM is properly seated. Simultaneously press the retaining clips outward to both the motherboard and the components. 1. The DIMM might get damaged 1 when it fits in only one direction. Failure to do so can cause severe damage... the retaining clips outward to avoid damaging the DIMM. 3. Remove the DIMM from the socket. 2 1 DDR2 DIMM notch 1-18 ASUS M4A785G HTPC Series Locked Retaining Clip 1.7.4 Removing a DIMM To remove a DIMM: 1. Firmly insert the DIMM into a socket to unlock a DDR2 DIMM socket. 2.

User Manual
Page 31
...After installing the expansion card, configure it and make the necessary hardware settings for later use . Remove the system unit cover (if your motherboard is completely seated on BIOS setup. 2. Secure the card to install expansion cards. See Chapter 2 for the expansion card. Install the .... Turn on shared slots, ensure that the drivers support "Share IRQ" or that came with the screw you physical injury and damage motherboard components. 1.8.1 Installing an expansion card To install an expansion card: 1. When using PCI cards on the system and change the necessary BIOS...
...After installing the expansion card, configure it and make the necessary hardware settings for later use . Remove the system unit cover (if your motherboard is completely seated on BIOS setup. 2. Secure the card to install expansion cards. See Chapter 2 for the expansion card. Install the .... Turn on shared slots, ensure that the drivers support "Share IRQ" or that came with the screw you physical injury and damage motherboard components. 1.8.1 Installing an expansion card To install an expansion card: 1. When using PCI cards on the system and change the necessary BIOS...

User Manual
Page 36
Install AMD Chipset Driver from the motherboard support DVD. 2. Move the Underscan/Overscan slider to adjust the overall size of the display. 3 4 5 6 6. To ensure that may be visible around the outside of ... while using the onboard HDMI out port and the HDMI cable, you are using an HDTV compliance resolution such as 480i, 720i, or 1080i. 1-24 ASUS M4A785G HTPC Series Right-click the desktop and select ATI CATALYST(R) Control Center. 3. To resize your DFP resolution check box. The Scaling Options function of the customized...
Install AMD Chipset Driver from the motherboard support DVD. 2. Move the Underscan/Overscan slider to adjust the overall size of the display. 3 4 5 6 6. To ensure that may be visible around the outside of ... while using the onboard HDMI out port and the HDMI cable, you are using an HDTV compliance resolution such as 480i, 720i, or 1080i. 1-24 ASUS M4A785G HTPC Series Right-click the desktop and select ATI CATALYST(R) Control Center. 3. To resize your DFP resolution check box. The Scaling Options function of the customized...

User Manual
Page 37
...support cooling fans of 350mA-740mA (8.88W max.) or a total of the connector. Only the CPU_FAN and CHA_FAN1-2 connectors support the ASUS Q FAN 2 feature and the ASUS Tranquil Mode. Refer to the fan connectors. 1.10.2 Internal connectors 1. Connect the fan cables to the fan connectors on the fan...2-18 for the fan type setting Chapter 1: Product introduction 1-25 Insufficient air flow inside the system may damage the motherboard components. DO NOT place jumper caps on the motherboard, making sure that the black wire of each cable matches the ground pin of 1A-2.22A (26.64W max.)...
...support cooling fans of 350mA-740mA (8.88W max.) or a total of the connector. Only the CPU_FAN and CHA_FAN1-2 connectors support the ASUS Q FAN 2 feature and the ASUS Tranquil Mode. Refer to the fan connectors. 1.10.2 Internal connectors 1. Connect the fan cables to the fan connectors on the fan...2-18 for the fan type setting Chapter 1: Product introduction 1-25 Insufficient air flow inside the system may damage the motherboard components. DO NOT place jumper caps on the motherboard, making sure that the black wire of each cable matches the ground pin of 1A-2.22A (26.64W max.)...


