

User Guide
Page 2
...BUSINESS, LOSS OF USE OR DATA, INTERRUPTION OF BUSINESS AND THE LIKE), EVEN IF ASUS HAS BEEN ADVISED OF THE POSSIBILITY OF SUCH DAMAGES ARISING FROM ANY DEFECT OR ERROR IN THIS MANUAL OR PRODUCT. ii No part of their respective companies, and are used only for ...or altered, unless such repair, modification of ASUSTeK COMPUTER INC. ("ASUS"). ASUS ASSUMES NO RESPONSIBILITY OR LIABILITY FOR ANY ERRORS OR INACCURACIES THAT MAY APPEAR IN THIS MANUAL, INCLUDING THE PRODUCTS AND SOFTWARE DESCRIBED IN IT. ASUS PROVIDES THIS MANUAL "AS IS" WITHOUT WARRANTY OF ANY KIND, EITHER EXPRESS OR IMPLIED...
...BUSINESS, LOSS OF USE OR DATA, INTERRUPTION OF BUSINESS AND THE LIKE), EVEN IF ASUS HAS BEEN ADVISED OF THE POSSIBILITY OF SUCH DAMAGES ARISING FROM ANY DEFECT OR ERROR IN THIS MANUAL OR PRODUCT. ii No part of their respective companies, and are used only for ...or altered, unless such repair, modification of ASUSTeK COMPUTER INC. ("ASUS"). ASUS ASSUMES NO RESPONSIBILITY OR LIABILITY FOR ANY ERRORS OR INACCURACIES THAT MAY APPEAR IN THIS MANUAL, INCLUDING THE PRODUCTS AND SOFTWARE DESCRIBED IN IT. ASUS PROVIDES THIS MANUAL "AS IS" WITHOUT WARRANTY OF ANY KIND, EITHER EXPRESS OR IMPLIED...

User Guide
Page 8
... devices could interrupt the grounding circuit. • Make sure that your power supply is broken, do not try to fix it , carefully read all the manuals that came with the product, contact a qualified service technician or your retailer. Contact a qualified service technician or your area. This symbol of the crossed out...
... devices could interrupt the grounding circuit. • Make sure that your power supply is broken, do not try to fix it , carefully read all the manuals that came with the product, contact a qualified service technician or your retailer. Contact a qualified service technician or your area. This symbol of the crossed out...

User Guide
Page 10
...-than and greaterthan sign means that you MUST follow to help you perform certain tasks properly, take note of the following symbols used throughout this manual. If you must press the enclosed key. Used to select. Example: means that you must type the command exactly as shown, then supply the required...
...-than and greaterthan sign means that you MUST follow to help you perform certain tasks properly, take note of the following symbols used throughout this manual. If you must press the enclosed key. Used to select. Example: means that you must type the command exactly as shown, then supply the required...

User Guide
Page 77
....2us] [20.5us] [41.0us] [81.9us] [163.8us] [327.7us] [655.4us] [1.31ms] [2.62ms] [5.24ms] [10.49ms] [20.97ms] [42.00ms] [84.00ms] ASUS KGN(M)H-D16 4-19 Configuration options: [Disabled] [40ns] [80ns] [160ns] [320ns] [640ns] [1.28us] [2.56us] [5.12us] [10.2us] [20.5us] [41.0us] [81.9us] [163.8us] ...] [Enabled] Enables the DRAM ECC that allows the hardware to be corrected when idle. Set to [User] to adjust the DRAM BG Scrub sub-item manually. Configuration options: [Disabled] [40ns] [80ns] [160ns] [320ns] [640ns] [1.28us] [2.56us] [5.12us] [10.2us] [20.5us] [41.0us] [81.9us] [163.8us] [...
....2us] [20.5us] [41.0us] [81.9us] [163.8us] [327.7us] [655.4us] [1.31ms] [2.62ms] [5.24ms] [10.49ms] [20.97ms] [42.00ms] [84.00ms] ASUS KGN(M)H-D16 4-19 Configuration options: [Disabled] [40ns] [80ns] [160ns] [320ns] [640ns] [1.28us] [2.56us] [5.12us] [10.2us] [20.5us] [41.0us] [81.9us] [163.8us] ...] [Enabled] Enables the DRAM ECC that allows the hardware to be corrected when idle. Set to [User] to adjust the DRAM BG Scrub sub-item manually. Configuration options: [Disabled] [40ns] [80ns] [160ns] [320ns] [640ns] [1.28us] [2.56us] [5.12us] [10.2us] [20.5us] [41.0us] [81.9us] [163.8us] [...

User Guide
Page 78
DRAM Timing Configuration Advanced BIOS SETUP UTILITY DRAM Timing Configuration DRAM Timing Config [Auto] Options Auto Manual DRAM Timing Config [Auto] Configuration options: [Auto] [Manual] Memory Clock Speed [400 MHz] Allows you to select which node's timing parameters to [Manual]. Configuration options: [400 MHz] [533 MHz] [667 MHz] Memory Timing Parameters [CPU Node 0] Allows...
DRAM Timing Configuration Advanced BIOS SETUP UTILITY DRAM Timing Configuration DRAM Timing Config [Auto] Options Auto Manual DRAM Timing Config [Auto] Configuration options: [Auto] [Manual] Memory Clock Speed [400 MHz] Allows you to select which node's timing parameters to [Manual]. Configuration options: [400 MHz] [533 MHz] [667 MHz] Memory Timing Parameters [CPU Node 0] Allows...
User Guide
Page 117
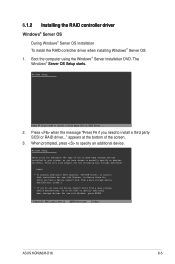
...device manufacturer, press S. * If you need to install a third party SCSI or RAID driver... 2. S=Specify Additional Device ENTER=Continue F3=Exit ASUS KGN(M)H-D16 6-5 Windows Setup Press F6 if you have any device support disks from a mass storage device manufacturer, or do not want to specify an additional... device. appears at the bottom of one or more mass storage devices installed in your system, or you need to manually ...
...device manufacturer, press S. * If you need to install a third party SCSI or RAID driver... 2. S=Specify Additional Device ENTER=Continue F3=Exit ASUS KGN(M)H-D16 6-5 Windows Setup Press F6 if you have any device support disks from a mass storage device manufacturer, or do not want to specify an additional... device. appears at the bottom of one or more mass storage devices installed in your system, or you need to manually ...

User Guide
Page 127
...: 1. You need to install the ATI SM Bus driver on the system. 6.2 ATI SM Bus controller driver installation This section provides instructions on how to manually install the ATI SMBus driver on a Windows® XP / Server 2003 operating system...
...: 1. You need to install the ATI SM Bus driver on the system. 6.2 ATI SM Bus controller driver installation This section provides instructions on how to manually install the ATI SMBus driver on a Windows® XP / Server 2003 operating system...

User Guide
Page 132
To install the ASPEED display driver 1. You need to manually install the ASPEED display driver on how to install the ASPEED display driver. When the ASPEED InstallShield Wizard window appears, click Next to the optical ...
To install the ASPEED display driver 1. You need to manually install the ASPEED display driver on how to install the ASPEED display driver. When the ASPEED InstallShield Wizard window appears, click Next to the optical ...
User Guide
Page 135
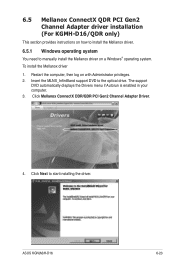
6.5 Mellanox ConnectX QDR PCI Gen2 Channel Adapter driver installation (For KGMH-D16/QDR only) This section provides instructions on how to install the Mellanox driver. 6.5.1 Windows operating system You need to the optical drive. Insert the MLNX_InfiniBand support DVD to manually install the Mellanox driver on with Administrator privileges. 2. Click Mellanox ConnectX...if Autorun is enabled in your computer. 3. Click Next to start installing the driver. Restart the computer, then log on a Windows® operating system. ASUS KGN(M)H-D16 6-23 To install the Mellanox driver 1.
6.5 Mellanox ConnectX QDR PCI Gen2 Channel Adapter driver installation (For KGMH-D16/QDR only) This section provides instructions on how to install the Mellanox driver. 6.5.1 Windows operating system You need to the optical drive. Insert the MLNX_InfiniBand support DVD to manually install the Mellanox driver on with Administrator privileges. 2. Click Mellanox ConnectX...if Autorun is enabled in your computer. 3. Click Next to start installing the driver. Restart the computer, then log on a Windows® operating system. ASUS KGN(M)H-D16 6-23 To install the Mellanox driver 1.

User Guide
Page 139
...Linux Enterprise Server OS, follow the general instructions in this section to mount the Mellanox driver on a Red Hat® Enterprise Linux OS. ASUS KGN(M)H-D16 6-27 To mount the Mellanox driver 1. Login to the system. 6.5.2 Red Hat® Enterprise Linux OS You need to the folder. The...folder as root. 2. Ensure that the command line matches your system. Create a folder on the desktop and copy the latest Mellanox driver to manually mount the Mellanox driver on your driver version and operating system. Type the command line and mount the driver to the system as you like...
...Linux Enterprise Server OS, follow the general instructions in this section to mount the Mellanox driver on a Red Hat® Enterprise Linux OS. ASUS KGN(M)H-D16 6-27 To mount the Mellanox driver 1. Login to the system. 6.5.2 Red Hat® Enterprise Linux OS You need to the folder. The...folder as root. 2. Ensure that the command line matches your system. Create a folder on the desktop and copy the latest Mellanox driver to manually mount the Mellanox driver on your driver version and operating system. Type the command line and mount the driver to the system as you like...
