User Manual
Page 12
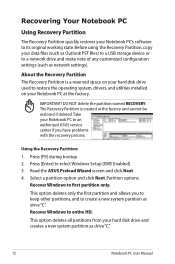
... the operating system, drivers, and utilities installed on your hard disk drive used to select Windows Setup [EMS Enabled] 3. Read the ASUS Preload Wizard screen and click Next. 4. About the Recovery Partition The Recovery Partition is created at the factory. Take your Notebook PC to create a ... to first partition only. This option deletes only the first partition and allows you to keep other partitions, and to an authorized ASUS service center if you have problems with the recovery process. Recover Windows to its original working state. Select a partition option and click...
... the operating system, drivers, and utilities installed on your hard disk drive used to select Windows Setup [EMS Enabled] 3. Read the ASUS Preload Wizard screen and click Next. 4. About the Recovery Partition The Recovery Partition is created at the factory. Take your Notebook PC to create a ... to first partition only. This option deletes only the first partition and allows you to keep other partitions, and to an authorized ASUS service center if you have problems with the recovery process. Recover Windows to its original working state. Select a partition option and click...

User Manual
Page 25
...turn it ON. Self Monitoring and Reporting Technology The S.M.A.R.T. (Self Monitoring and Reporting Technology) checks the hard disk drive during the splash screen, standard boot information such as the BIOS version can also select "Scan ... If any materials that controls the POST is given during ...PC in data loss. 25 IMPORTANT! 3 Getting Started Powering ON the Notebook PC The Notebook PC's power-ON message appears on the screen prompting you to make a diagnostic check of the Notebook PC's architecture. IMPORTANT! Before bootup, the display panel flashes when the power is...
...turn it ON. Self Monitoring and Reporting Technology The S.M.A.R.T. (Self Monitoring and Reporting Technology) checks the hard disk drive during the splash screen, standard boot information such as the BIOS version can also select "Scan ... If any materials that controls the POST is given during ...PC in data loss. 25 IMPORTANT! 3 Getting Started Powering ON the Notebook PC The Notebook PC's power-ON message appears on the screen prompting you to make a diagnostic check of the Notebook PC's architecture. IMPORTANT! Before bootup, the display panel flashes when the power is...

User Manual
Page 26
... to fully charge the battery when the Notebook PC is turned OFF and may take twice the time when the Notebook PC is turned ON. Screen captures shown here are examples only and may fail to external power using it may not reflect what you use your Notebook PC on the...
... to fully charge the battery when the Notebook PC is turned OFF and may take twice the time when the Notebook PC is turned ON. Screen captures shown here are examples only and may fail to external power using it may not reflect what you use your Notebook PC on the...

User Manual
Page 29
... (External Monitor) -> LCD + CRT Clone -> LCD + CRT Extend. (This function does not work in 256 Colors, select High Color in Windows OS) 29 stretches the screen area to use the wireless LAN or Bluetooth. Follow the icons instead of the function keys. "Zz" Icon (F1): Places the Notebook PC in power...
... (External Monitor) -> LCD + CRT Clone -> LCD + CRT Extend. (This function does not work in 256 Colors, select High Color in Windows OS) 29 stretches the screen area to use the wireless LAN or Bluetooth. Follow the icons instead of the function keys. "Zz" Icon (F1): Places the Notebook PC in power...

User Manual
Page 30
..., and color saturation for cell navigation. Fn+C: Toggles "Splendid Video Intelligent Technology" function ON and OFF. You can see the current mode through the on -screen display (OSD). You can see the current mode through the on...
..., and color saturation for cell navigation. Fn+C: Toggles "Splendid Video Intelligent Technology" function ON and OFF. You can see the current mode through the on -screen display (OSD). You can see the current mode through the on...

User Manual
Page 52
...Boot ROM [Disabled] Specifies the Boot Device Boot Priority sequence. The support disc does not include the operating system itself. On the Boot screen, select Boot Device Priority. Contact your Notebook PC, or add functionality not provided by the native operating system. A virtual floppy disk drive... (Floppy Drive B: ) may vary depending on the territory. Select Screen Select Item Enter Go to enable hardware features, extend functionality, help manage your retailer if you set the CD-ROM drive as part...
...Boot ROM [Disabled] Specifies the Boot Device Boot Priority sequence. The support disc does not include the operating system itself. On the Boot screen, select Boot Device Priority. Contact your Notebook PC, or add functionality not provided by the native operating system. A virtual floppy disk drive... (Floppy Drive B: ) may vary depending on the territory. Select Screen Select Item Enter Go to enable hardware features, extend functionality, help manage your retailer if you set the CD-ROM drive as part...

User Manual
Page 53
System BIOS Settings (cont.) A Appendix 2. Security Setting To set . Select Screen Select Item Enter Change F1 General Help F10 Save and Exit ESC Exit v02.61 (C)Copyright 1985-2006, American Megatrends, Inc. 1. Leave...Change User Password Hard Disk Security Setting I/O Interface Security Install or Change the password. Password is then set the password: Select Screen Select Item +- Password is then cleared. On the Security screen, select Change Supervisor or Change User Password. 2. A device enclosed in parenthesis has been disabled in a password and press [...
System BIOS Settings (cont.) A Appendix 2. Security Setting To set . Select Screen Select Item Enter Change F1 General Help F10 Save and Exit ESC Exit v02.61 (C)Copyright 1985-2006, American Megatrends, Inc. 1. Leave...Change User Password Hard Disk Security Setting I/O Interface Security Install or Change the password. Password is then set the password: Select Screen Select Item +- Password is then cleared. On the Security screen, select Change Supervisor or Change User Password. 2. A device enclosed in parenthesis has been disabled in a password and press [...

User Manual
Page 54
... on each boot. If you want to keep the manufacture default settings. A-6 v02.61 (C)Copyright 1985-2006, American Megatrends, Inc. Select Screen Select Item Enter Change F1 General Help F10 Save and Exit ESC Exit User Access Level v02.61 (C)Copyright 1985-2006, American Megatrends, Inc.... You must save changes to Sub Screen Tab Select Field F1 General Help F10 Save and Exit ESC Exit v02.61 (C)Copyright 1985-2006, American Megatrends, Inc. A Appendix System...
... on each boot. If you want to keep the manufacture default settings. A-6 v02.61 (C)Copyright 1985-2006, American Megatrends, Inc. Select Screen Select Item Enter Change F1 General Help F10 Save and Exit ESC Exit User Access Level v02.61 (C)Copyright 1985-2006, American Megatrends, Inc.... You must save changes to Sub Screen Tab Select Field F1 General Help F10 Save and Exit ESC Exit v02.61 (C)Copyright 1985-2006, American Megatrends, Inc. A Appendix System...

User Manual
Page 58
A Appendix Common Problems and Solutions (Cont.) Unknown Reason - Blue screen with white text A blue screen with white text appears after purchase, power OFF, remove the additional memory, and power ON to see if the problem is due to protect yourself from the ASUS website. (WARNING: Ensure your Notebook PC does not lose power during...
A Appendix Common Problems and Solutions (Cont.) Unknown Reason - Blue screen with white text A blue screen with white text appears after purchase, power OFF, remove the additional memory, and power ON to see if the problem is due to protect yourself from the ASUS website. (WARNING: Ensure your Notebook PC does not lose power during...

User Manual
Page 59
... Unknown DATE: Unknown PATH: A:\ Drive A: File Note to move , to determine , to select and update BIOS. Connect your model from the ASUS website and save it in below sections may cause system to the Notebook PC and power on the Notebook PC. 3. Press Hotkey F4 at POST... v02.61 (C)Copyright 1985-2006, American Megatrends, Inc. 4. Locate the latest BIOS file and start updating (flashing) the BIOS. Secondary HDD Select Screen Select Item +- Please verify the Notebook PC's exact model and download the latest BIOS file for your flash disk drive to malfunction. A-11 A...
... Unknown DATE: Unknown PATH: A:\ Drive A: File Note to move , to determine , to select and update BIOS. Connect your model from the ASUS website and save it in below sections may cause system to the Notebook PC and power on the Notebook PC. 3. Press Hotkey F4 at POST... v02.61 (C)Copyright 1985-2006, American Megatrends, Inc. 4. Locate the latest BIOS file and start updating (flashing) the BIOS. Secondary HDD Select Screen Select Item +- Please verify the Notebook PC's exact model and download the latest BIOS file for your flash disk drive to malfunction. A-11 A...

User Manual
Page 62
... (requires a Recovery Partition) 2. Press [Enter] to complete the recovery process. Read the "ASUS Preload Wizard" screen and click Next. 4. Partition options: Recover Windows to entire HD. Please visit www.asus.com for updated drivers and utilities. DO NOT delete the partition named "RECOVERY". Recover Windows to...The Recovery Partition is in good working order. This option will delete all partitions from your Notebook PC to an authorized ASUS service center if you to restore the operating system, drivers, and utilities installed on your Notebook PC at the factory....
... (requires a Recovery Partition) 2. Press [Enter] to complete the recovery process. Read the "ASUS Preload Wizard" screen and click Next. 4. Partition options: Recover Windows to entire HD. Please visit www.asus.com for updated drivers and utilities. DO NOT delete the partition named "RECOVERY". Recover Windows to...The Recovery Partition is in good working order. This option will delete all partitions from your Notebook PC to an authorized ASUS service center if you to restore the operating system, drivers, and utilities installed on your Notebook PC at the factory....


