User's Manual for English Edition
Page 32
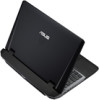
...you turn it will display a message on the screen when you may adjust the brightness by using the hot keys. This record is used to correct the conflict by running BIOS Setup. Press [ESC] and you receive the Notebook PC. WARNING! This indicates that will be correct when you... permanent part of the Notebook PC's architecture.The POST includes a record of the Notebook PC's hardware configuration, which is created by using the BIOS Setup program. Powering ON the Notebook PC The Notebook PC's power-ON message appears on the screen prompting you may get a message reporting "No...
...you turn it will display a message on the screen when you may adjust the brightness by using the hot keys. This record is used to correct the conflict by running BIOS Setup. Press [ESC] and you receive the Notebook PC. WARNING! This indicates that will be correct when you... permanent part of the Notebook PC's architecture.The POST includes a record of the Notebook PC's hardware configuration, which is created by using the BIOS Setup program. Powering ON the Notebook PC The Notebook PC's power-ON message appears on the screen prompting you may get a message reporting "No...

User's Manual for English Edition
Page 99
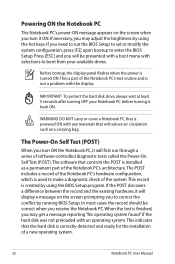
Intel(R) Rapid Storage Technology - Recovery Volume Options 5. The RAID BIOS setup screens shown in this section are for RAID configuration. The utility supports maximum two hard disk drives for reference only and may not exactly ... Size Type/Status(Vol ID) 698.6GB Non-RAID Disk 698.6GB Non-RAID Disk [↑↓]-Select [ESC]-Exit [ENTER]-Select Menu The navigation keys at the bottom of the screen allow you to move through the menus and select the menu options. Create RAID Volume 2. Delete RAID Volume 3.
Intel(R) Rapid Storage Technology - Recovery Volume Options 5. The RAID BIOS setup screens shown in this section are for RAID configuration. The utility supports maximum two hard disk drives for reference only and may not exactly ... Size Type/Status(Vol ID) 698.6GB Non-RAID Disk 698.6GB Non-RAID Disk [↑↓]-Select [ESC]-Exit [ENTER]-Select Menu The navigation keys at the bottom of the screen allow you to move through the menus and select the menu options. Create RAID Volume 2. Delete RAID Volume 3.


